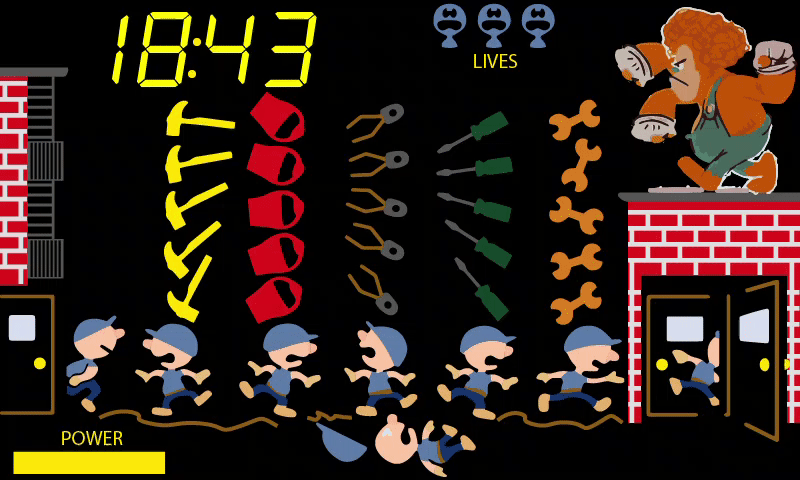
It’s time for a new project and I want to do something special. I want to make a new video game and I’m calling it Super Sonday! It’s always good to set up some perimeters whenever tackling something new, certain goals you want to meet, so let’s take a look.
8-Bit style game
Something for my young nieces to play (who don’t have much experience playing video games)
A platformer
Multiple levels and bosses
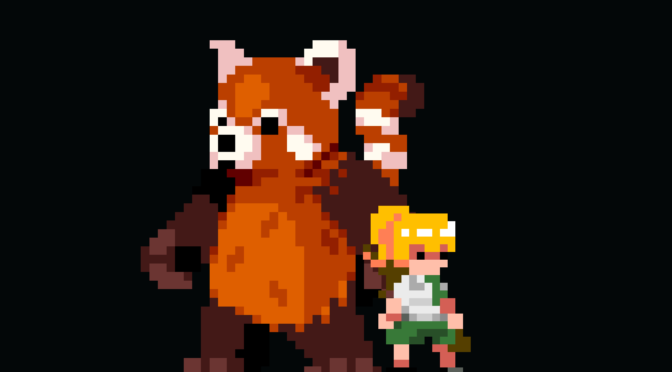
So there are my goals! Really, the inspiration for making a game was giving something to my two nieces, who this game is named after. these two wild girls have the greatest imaginations. I figured, “Why not make something starring a young girl like them?”
Sonday’s Game Style
I love old-school Nintendo platformers. Of course, Super Mario Bros. is always a classic. But don’t forget Mega Man, Ducktales, or Metroid. All of those games serve as styles. I also want the player character to get more powerful over time, or collect special abilities if the player finds hidden treasures. Thus, an inventory – similar to Zelda, will be needed.
I also watched a movie called Turning Red which I thought was amazing! I loved the idea of a character who could transform into a powerful creature to have more powers. BUT, there had to be advantages to the character’s original form too!
Some ideas I’m taking from those games include a password system, powerups, 8 worlds/bosses, and lots more.
The Story
Super Sonday stars a little girl, part of a mystical family, who holds onto an item called The Sonday Stone. This mystical gem is so powerful, it’s wanted by many monsters of the world. Unfortunately, it was recently stolen and split up amount 8 evil bosses. Super Sonday, as the youngest in the family, is tasked to rescue the stone and save her family’s legacy and heirloom.
Sonday can transform into her mystical beast form for stronger attacks, higher jumps, and the ability to climb walls. But, she can’t stay in that form forever and may need to transform back into a girl to fit in certain areas.
Graphics
Sadly, I am not pixel artist. I am using many open source graphics for this project. The sprites for Sonday (in both forms) are completely original though which I’m quite proud of!
The Sound of Super Sonday
Most sounds in this game are basic beeps, boops, and noises. I do want some original music to help set the game’s mood though. Usually, I would just convert some classical song into midi and go from there. For this project, it was time to write something new!
I am NOT a musician though. Luckily, and fantastically, my brother in law (father of the real-life Sonday girls) is and is helping me out. While I originally hoped for one or maybe two songs, this wonderful human has written several fully-looped songs to go with the game.
Take a listen at just a couple below!
This is the Super Sonday Main Title ThemeSuper Sonday Main Level
Really, this music makes the game POP and I can’t believe how good it matches the gameplay. It’s worth checking the game out just to hear the rest of the music – I’m personally a big fan of the boss level music.
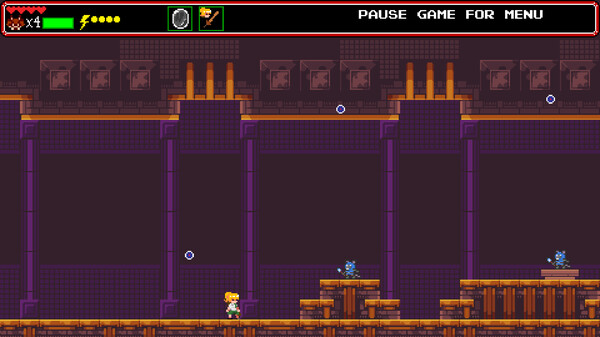
Gameplay
Ready to see how the game plays? Check out the first level or two in the video below.
The game works equally well with a keyboard or Xbox style controller.
You can learn more closely how to play with this fun instruction manual I’ve created!
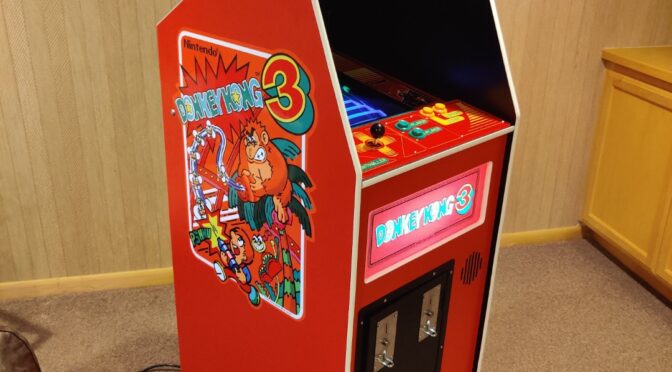
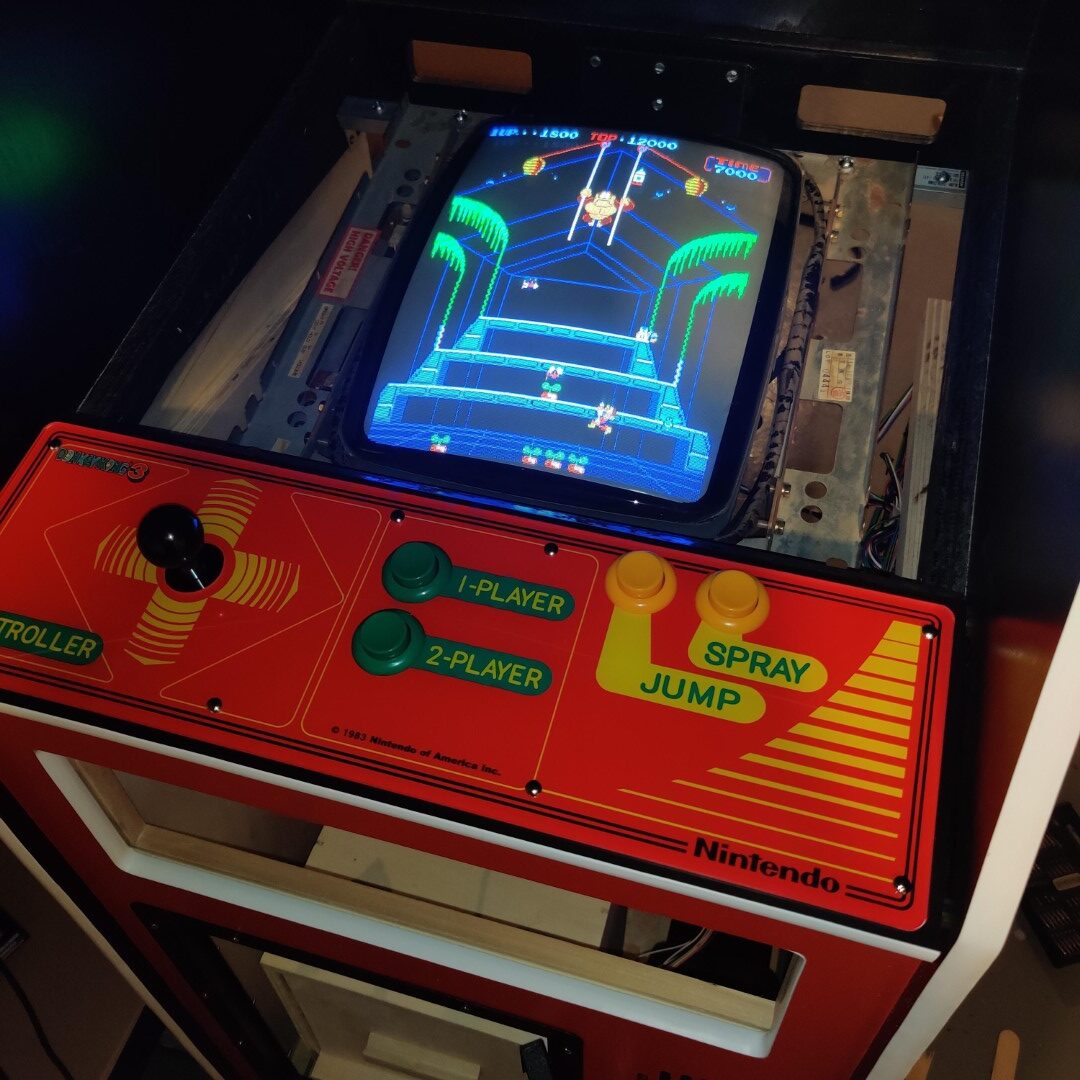
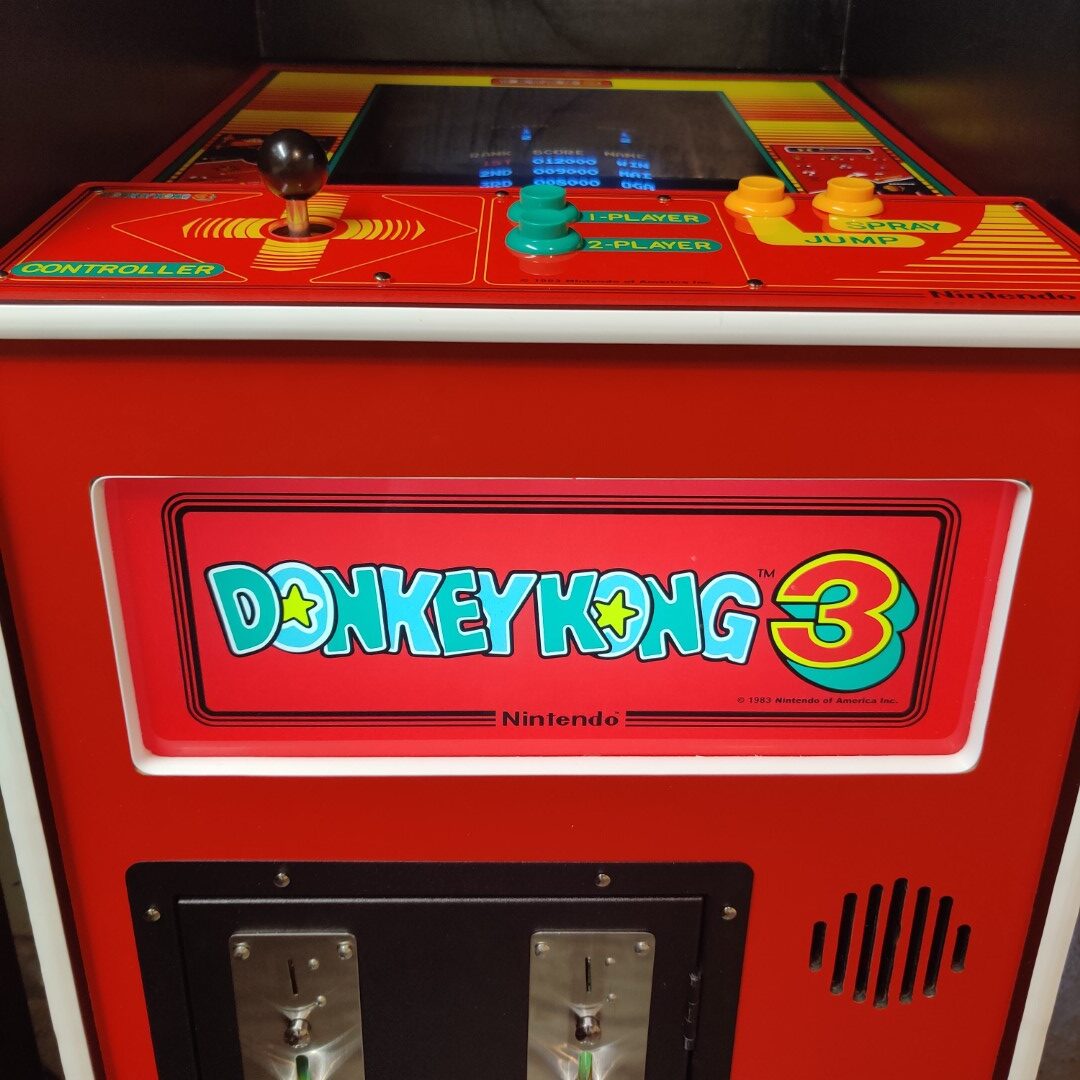
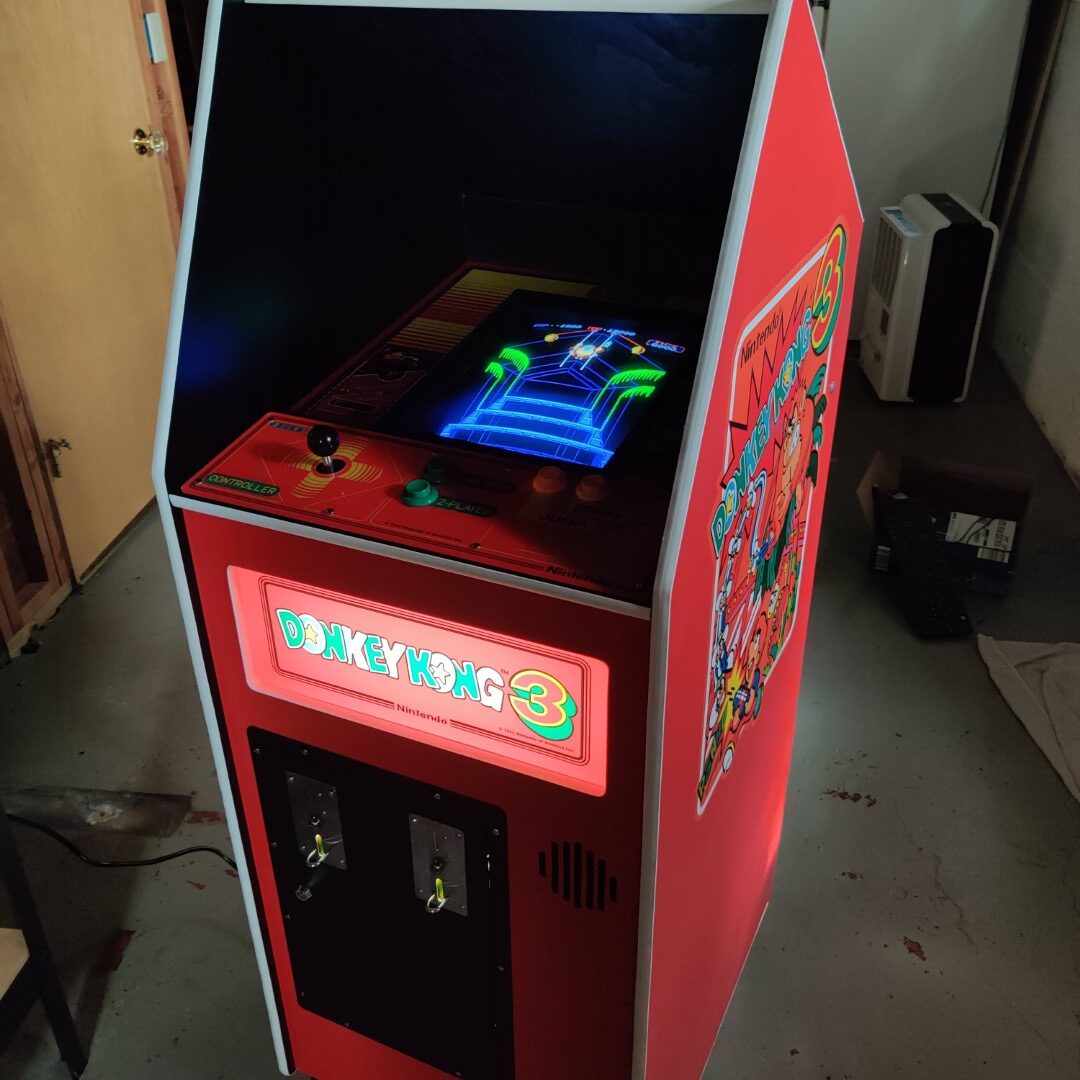
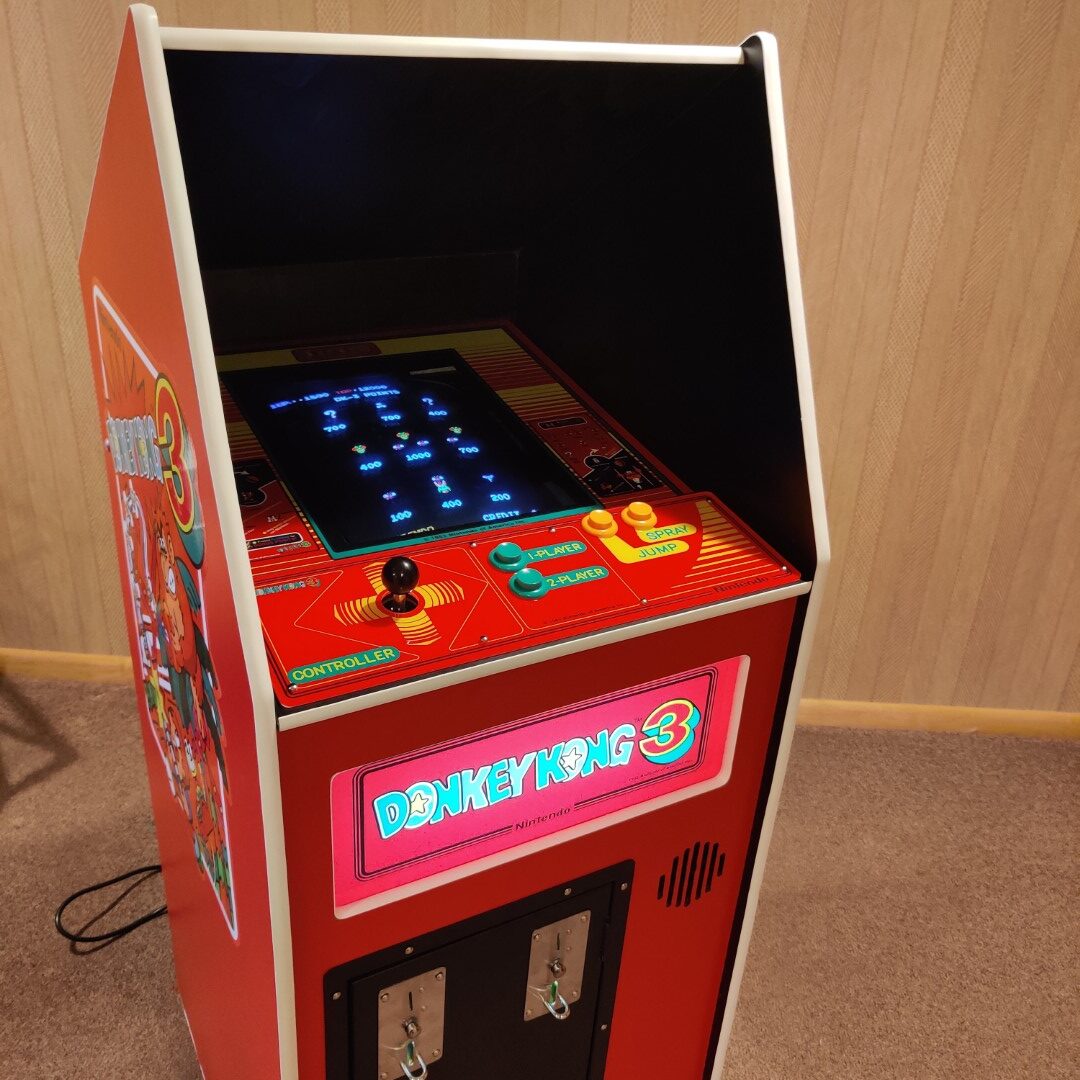
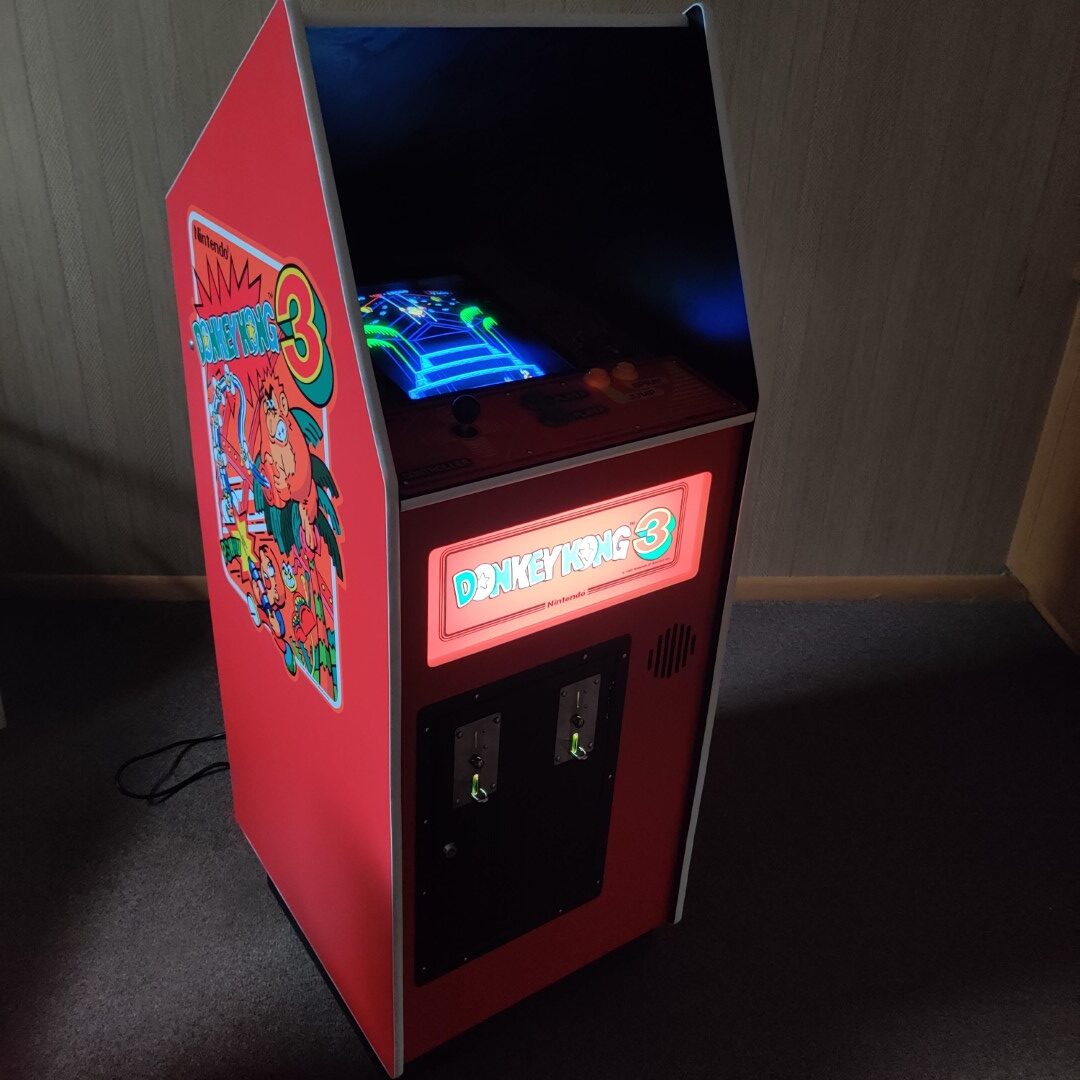
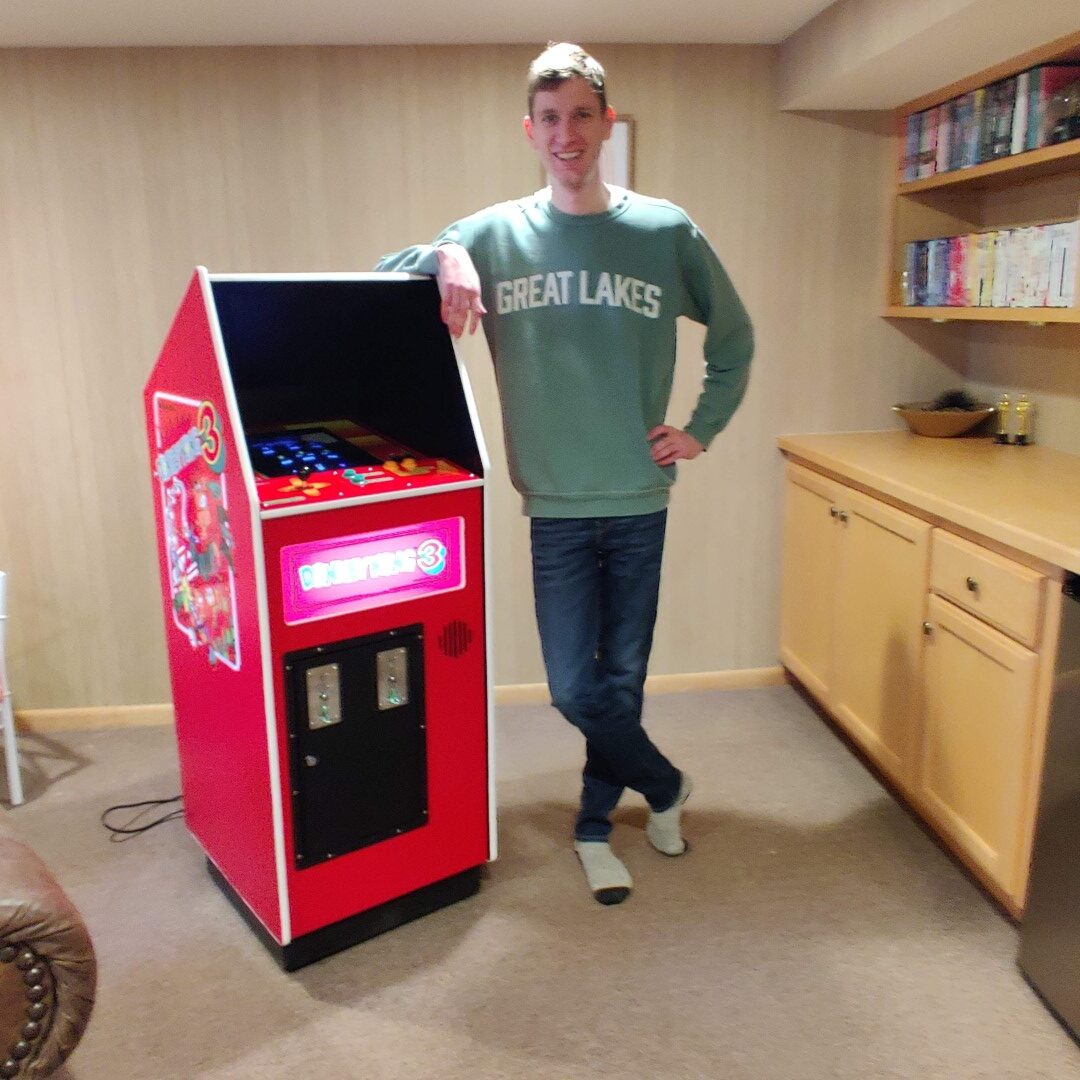
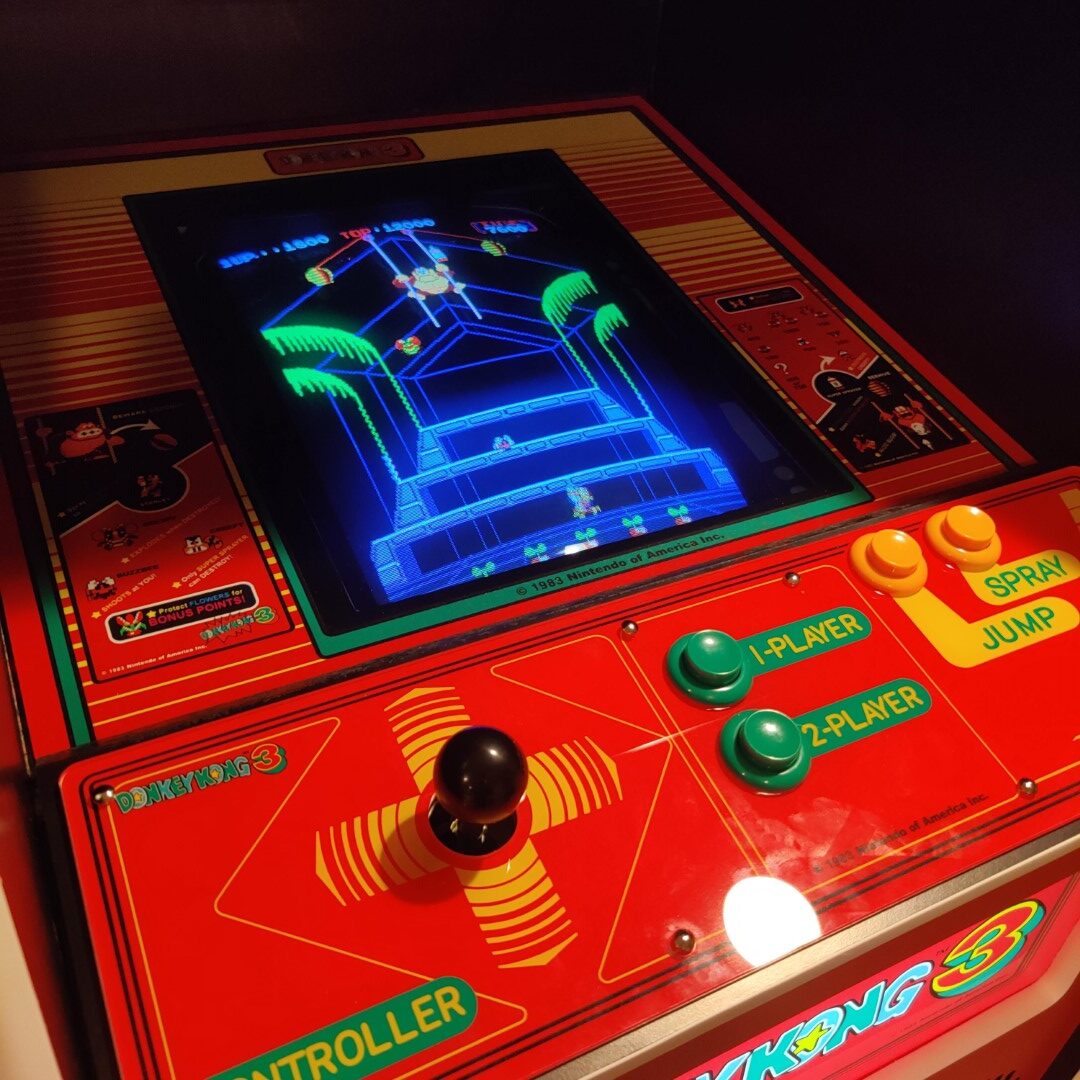
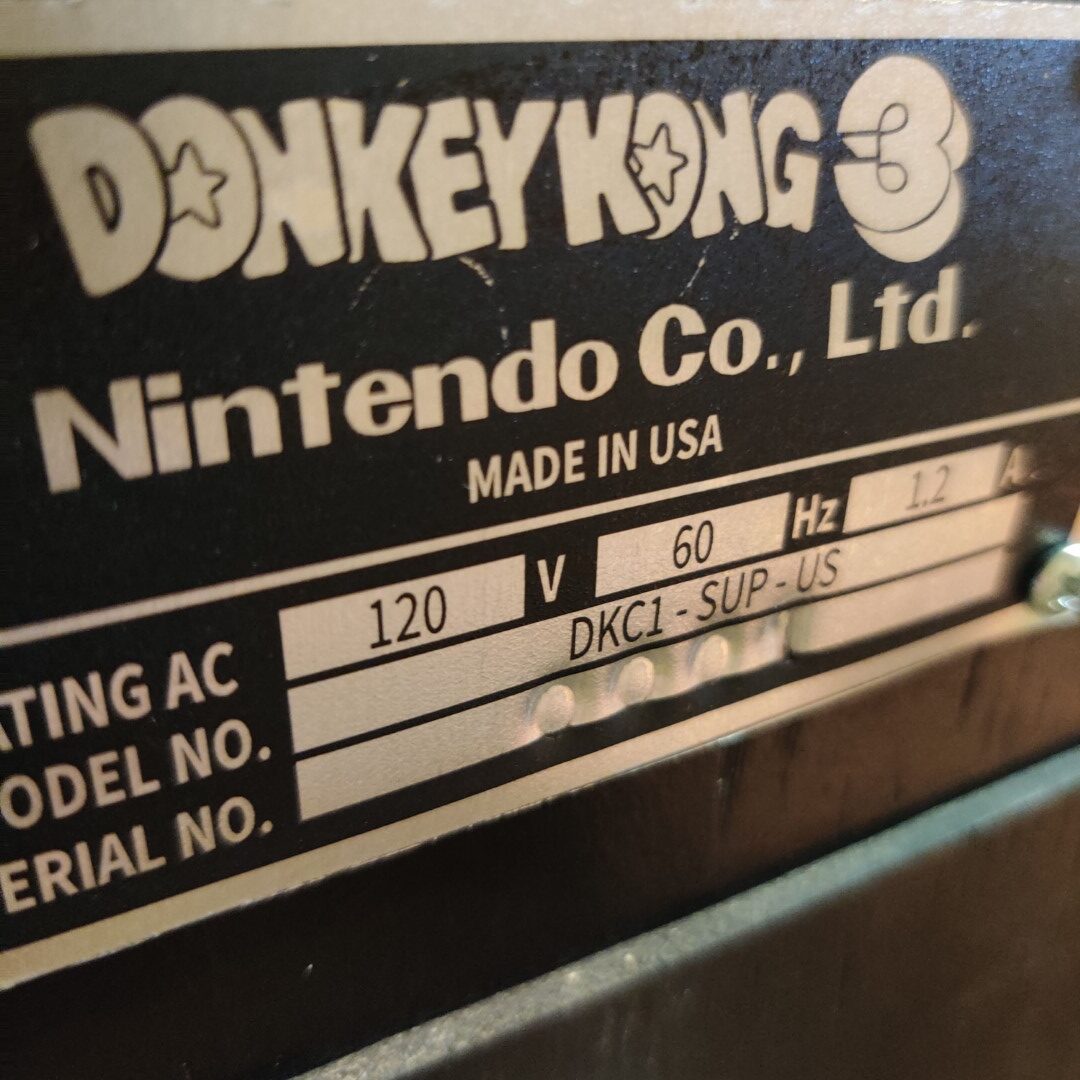
After finishing the Nintendo Red Tent, I’ve been eager to tackle another project. I knew I wanted to create something original again, but this time not completely dedicated hardware – I want something just a little bit versatile and also able to play my original games. Let’s talk about a Donkey Kong 3 cabaret
Nintendo arcade cabinets are still my favorite style and for a long time I’ve been a fan of their one and only cabaret style made for Donkey Kong. A fellow KLOV’er created a cabaret style Nintendo cabinet for DK Jr. a while back which really inspired me.
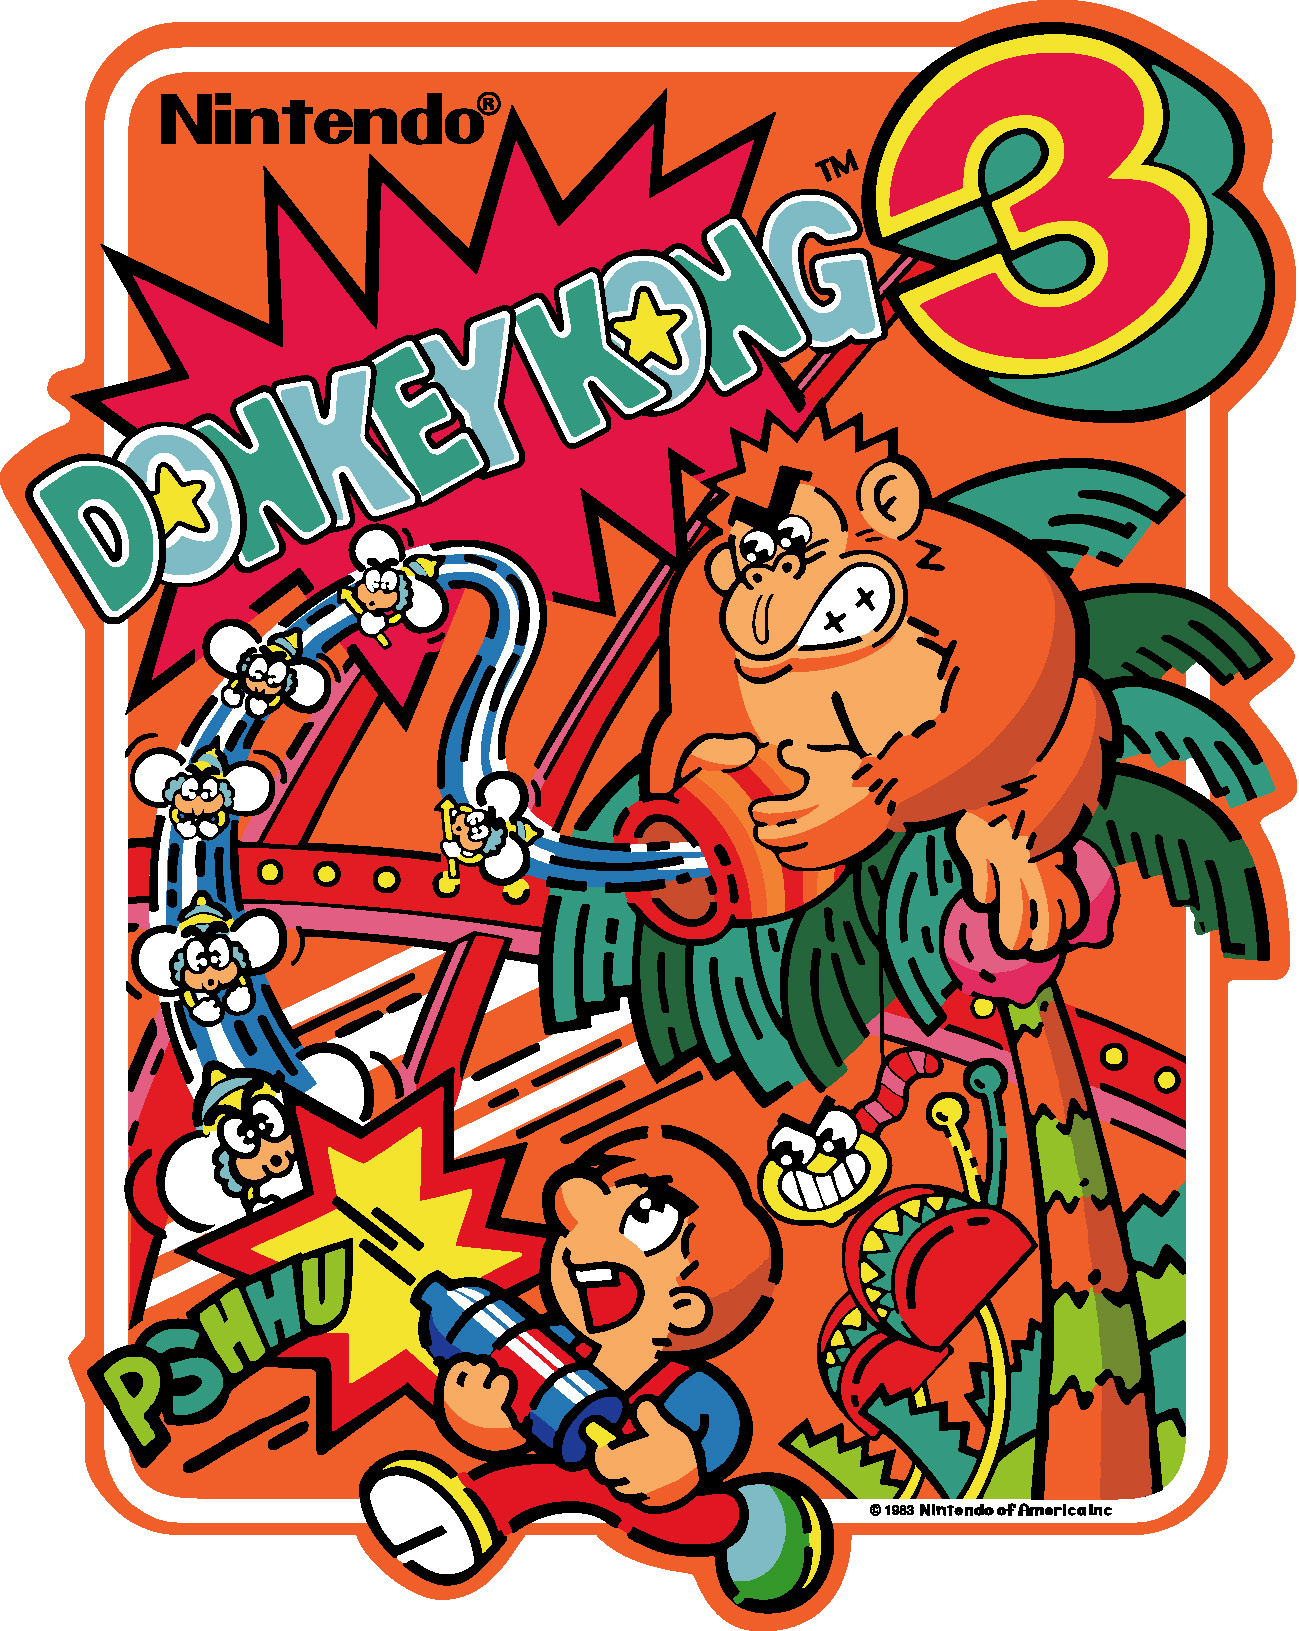
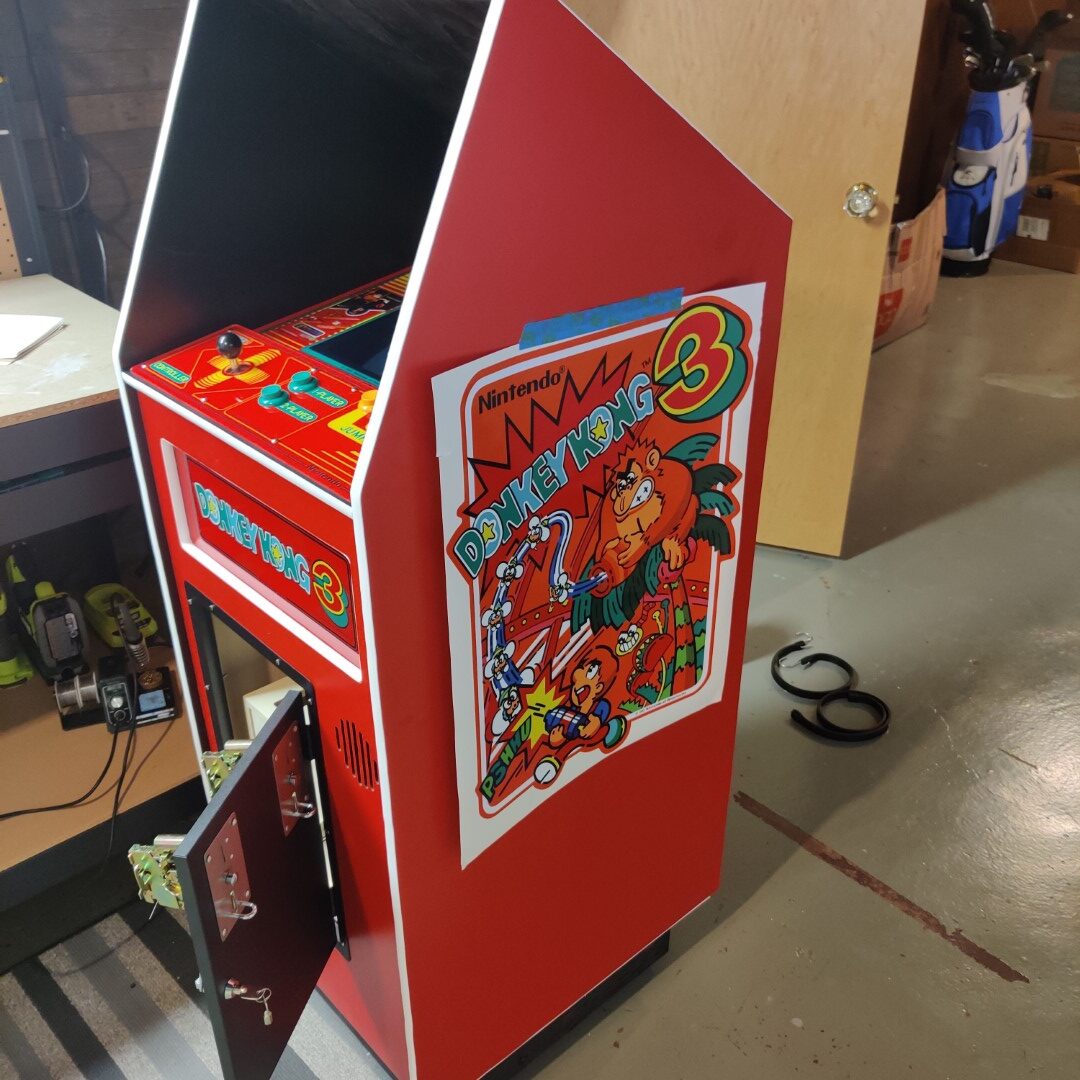
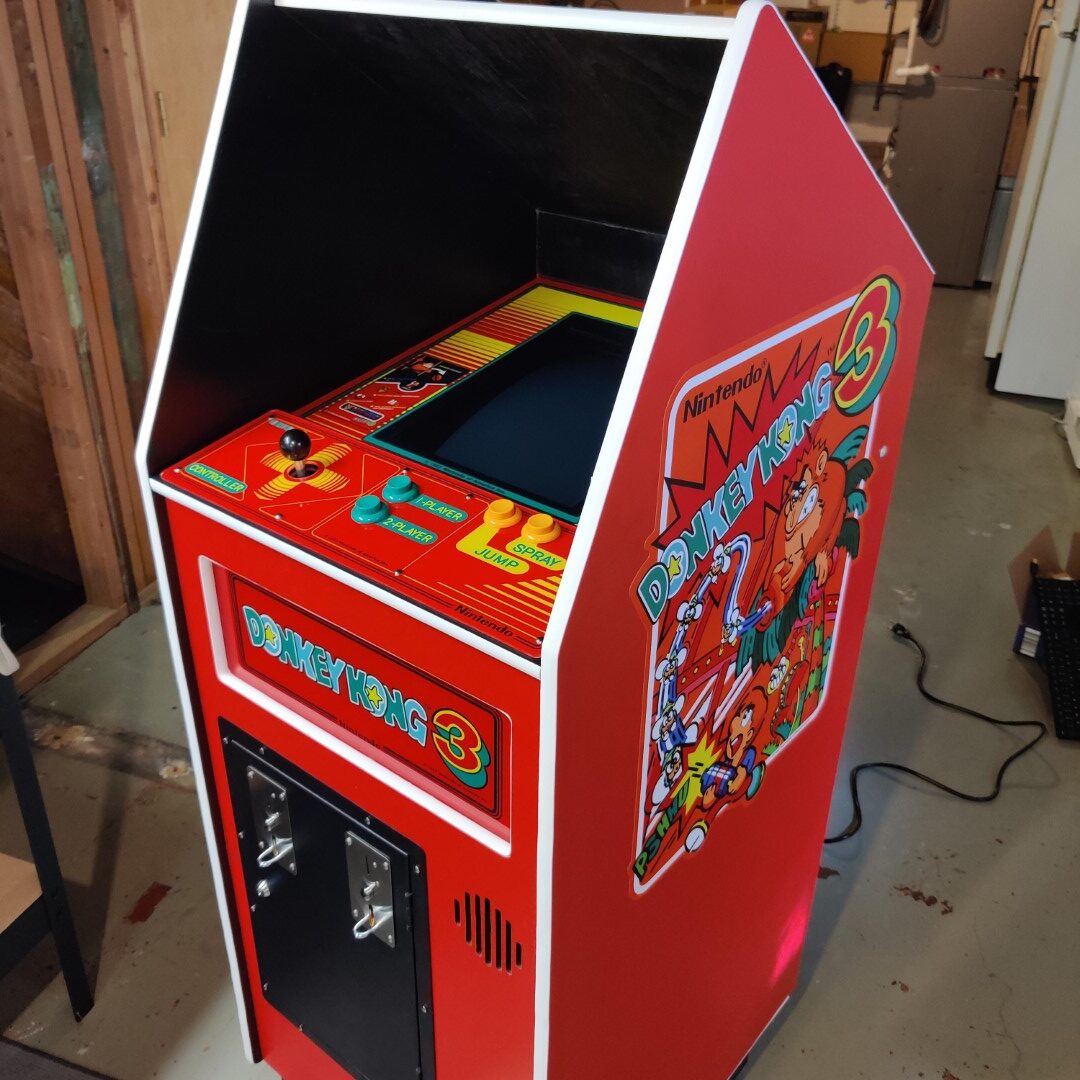
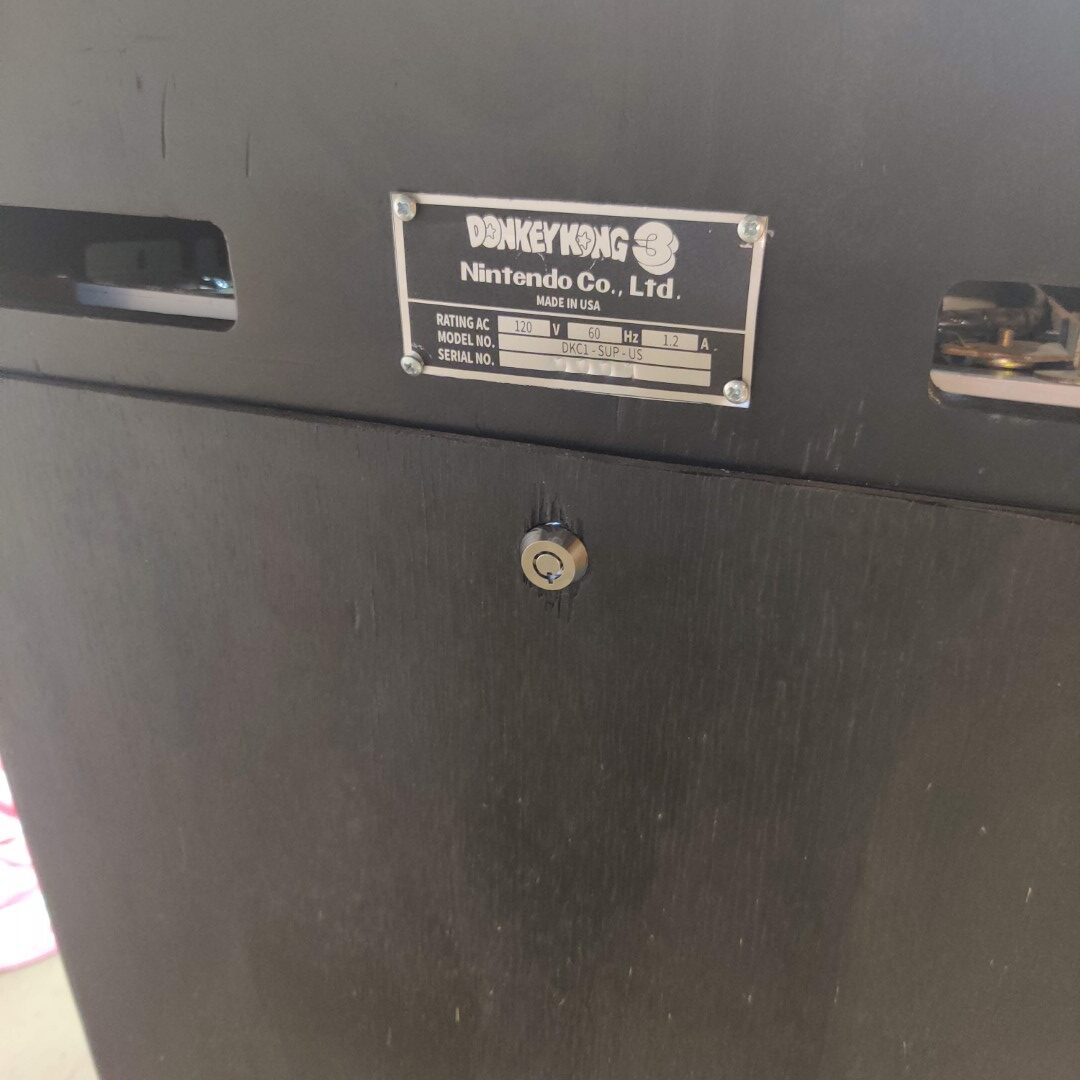
All of this leads me to making a Donkey Kong 3 cabaret!
It’s never been made before
It will let me experiment a bit with artwork
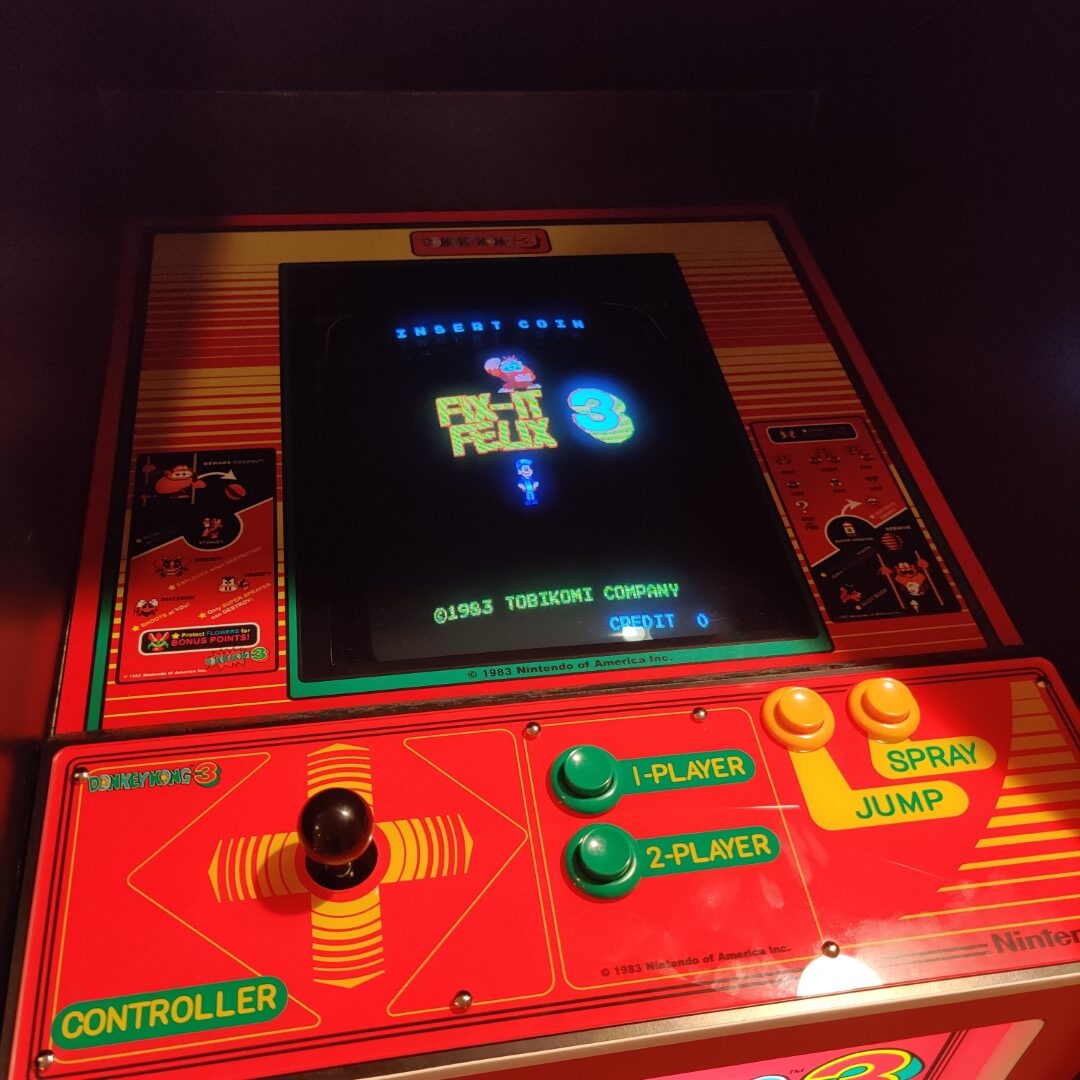
A fictional cabinet like this is the perfect home for Fix It Felix 3, a game I’m really proud of.
Let’s get started!
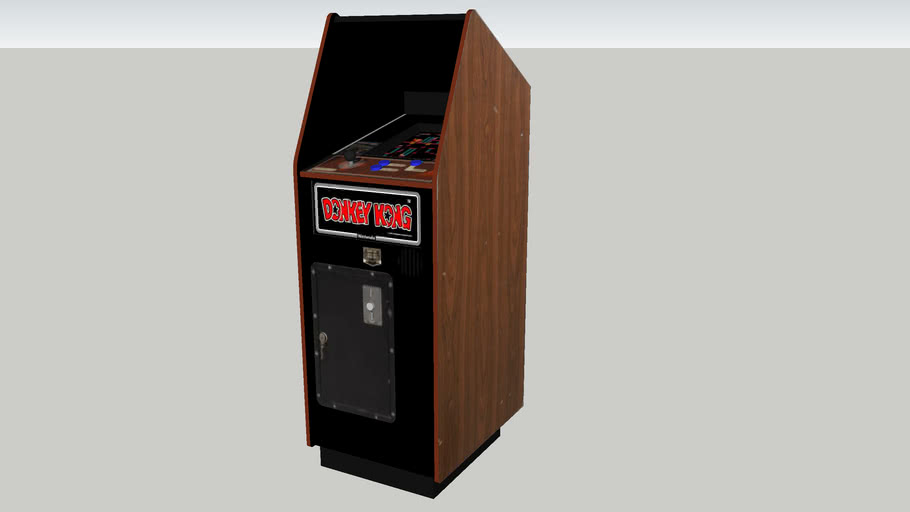
A Nintendo Cabaret
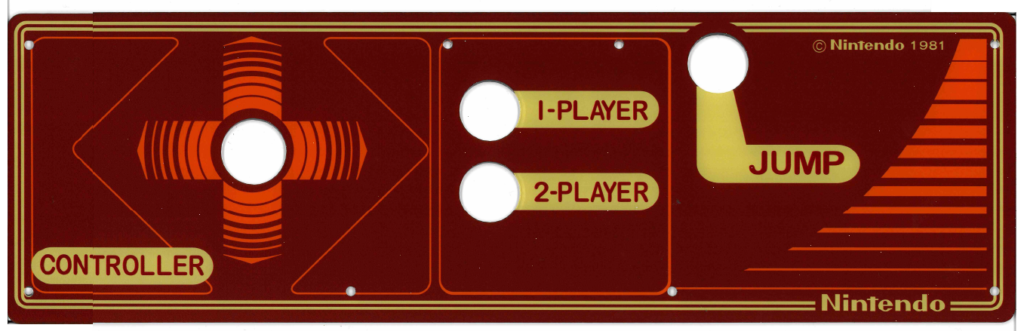
The cabinet is just like the original Donkey Kong cabarets, as far as shape, size, and construction goes. You can see what one of those looks like below.
A Donkey Kong cabaret
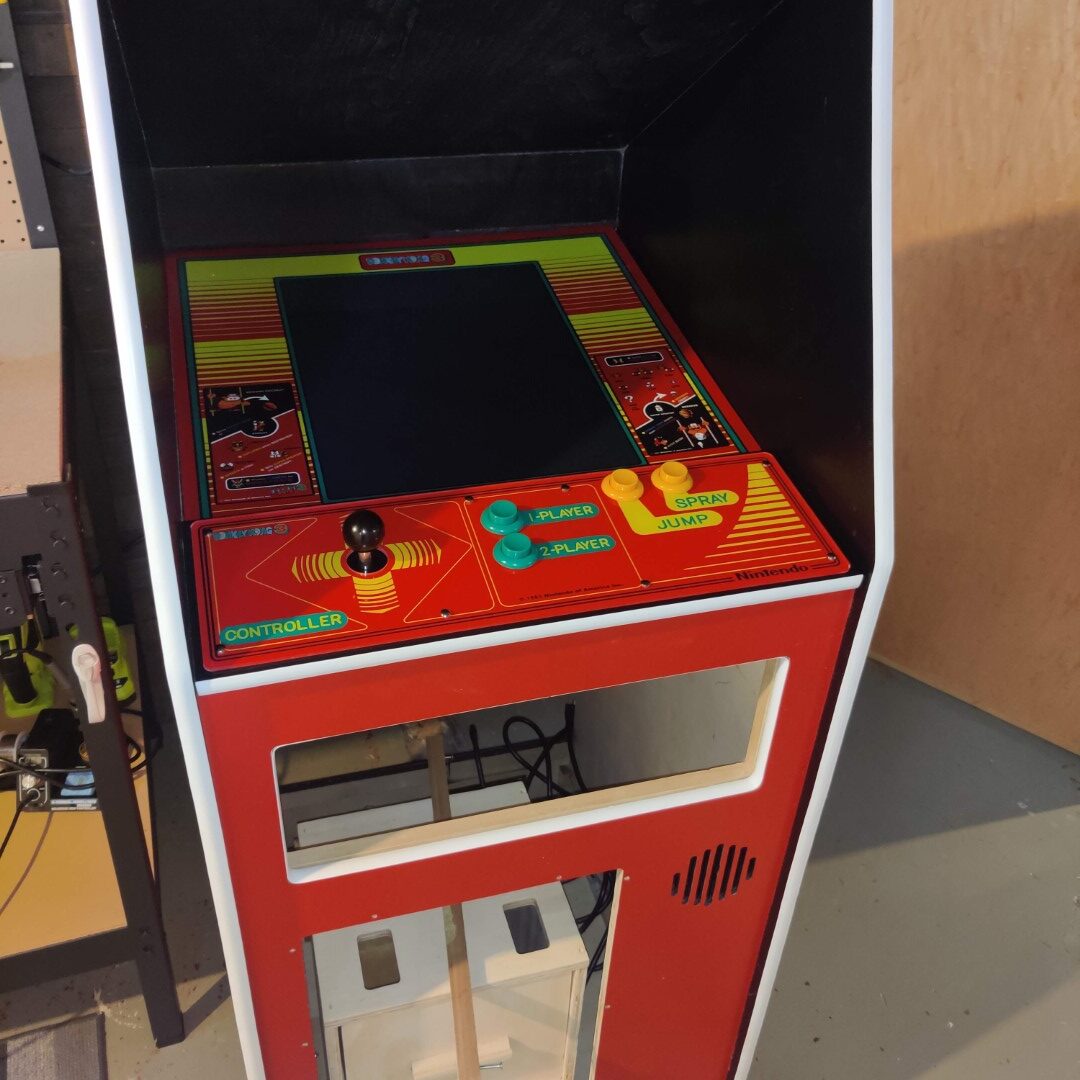
I will take this opportunity to do a few things differently though. First, I won’t be using wood grain. Second, I’ll use a light up marquee instead of just a sticker. Lastly, in general, I’m going to be upgrading the artwork a bit. It will still be completely inspired by Donkey Kong 3, and a cabaret. So, it won’t be super garish with lots of simple shapes and lines like an original cabaret.
Artwork
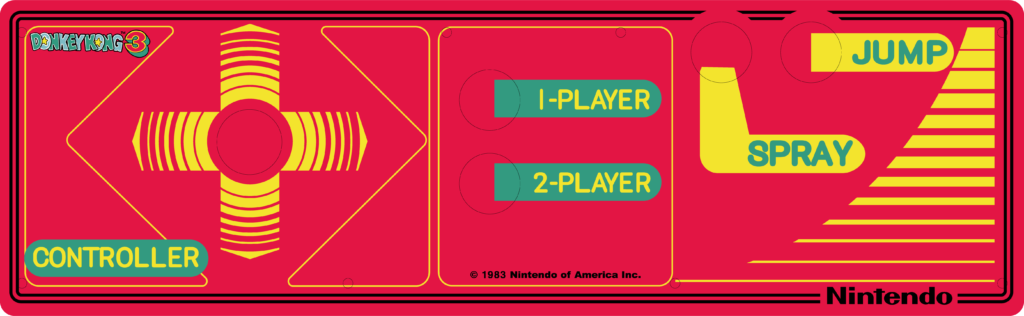
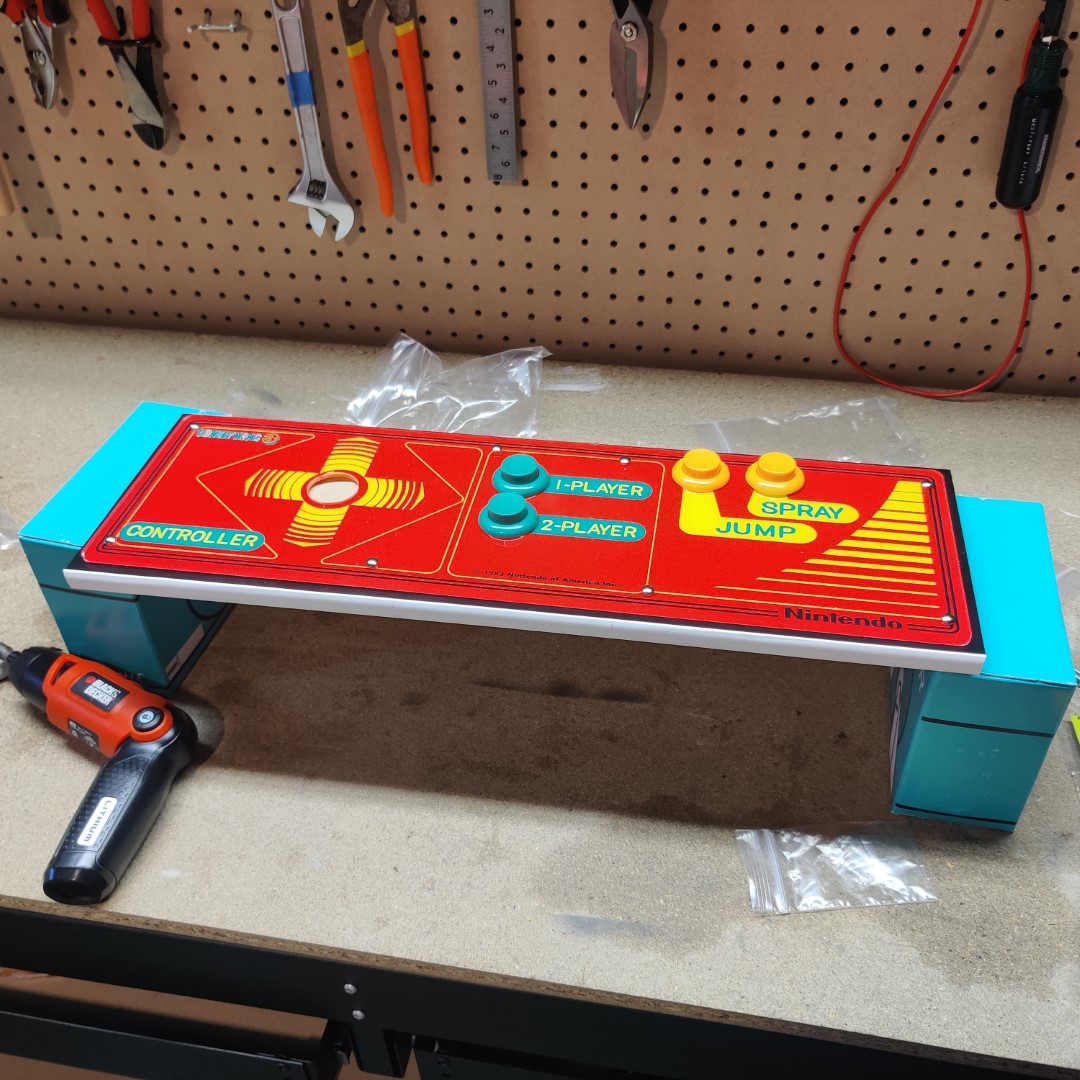
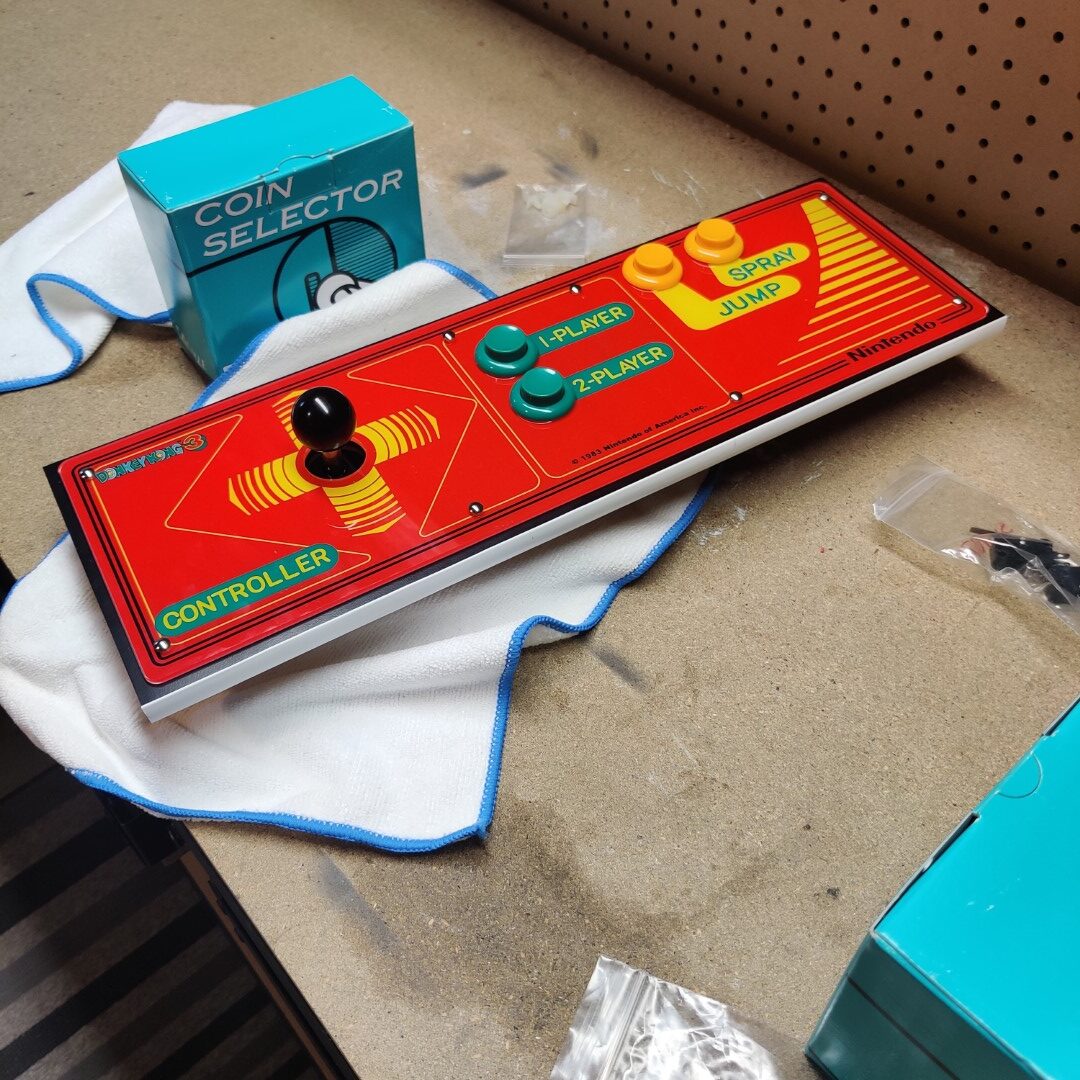
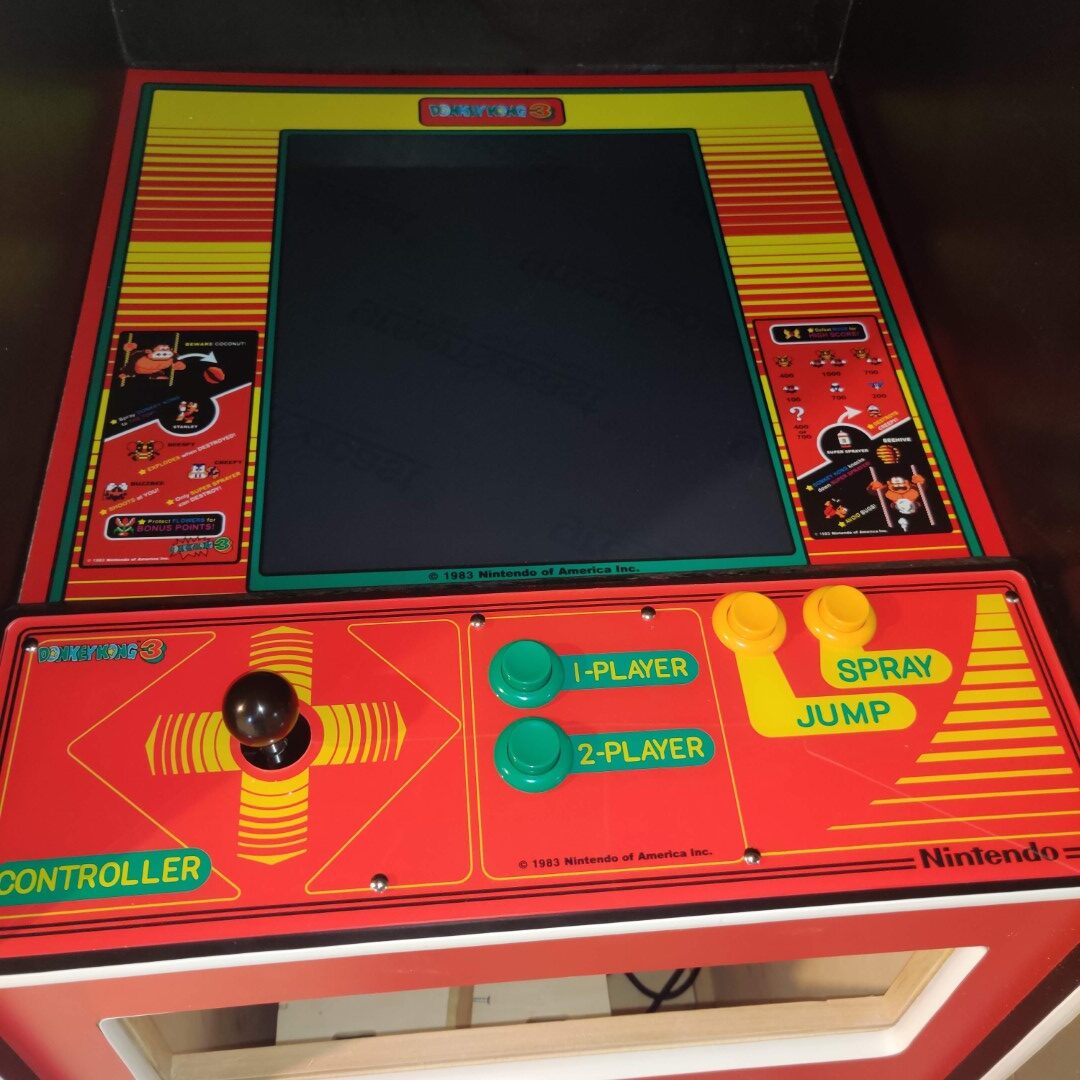
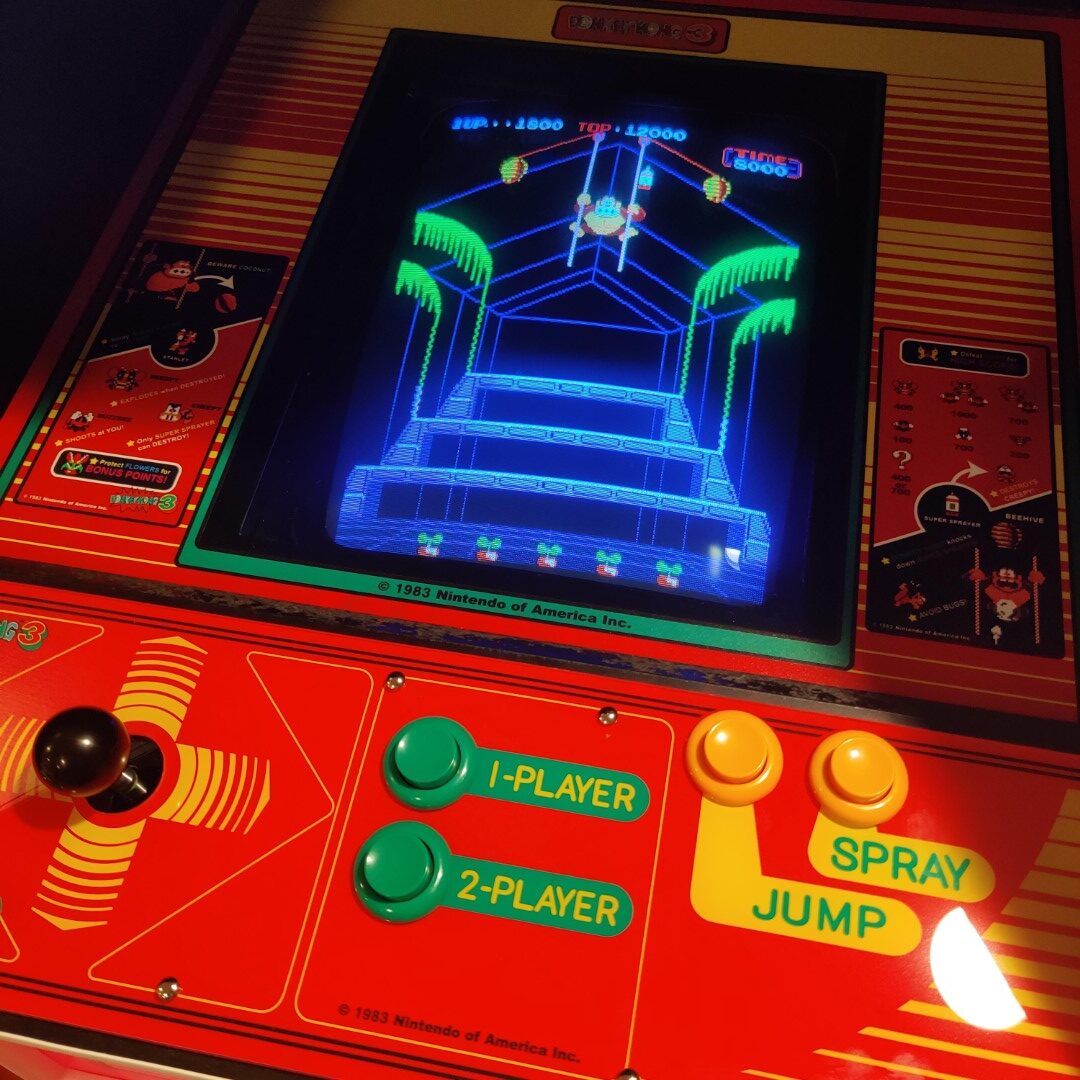
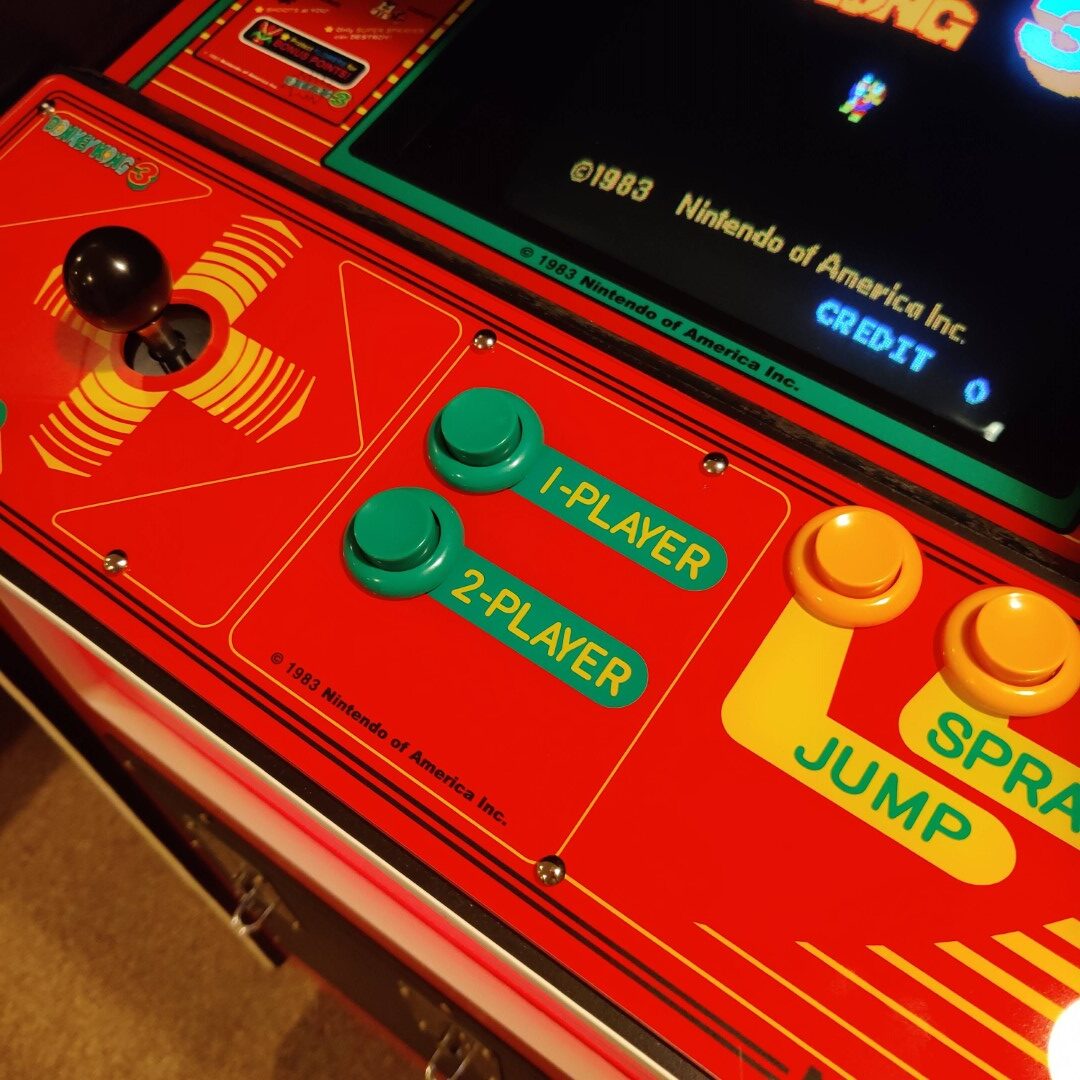
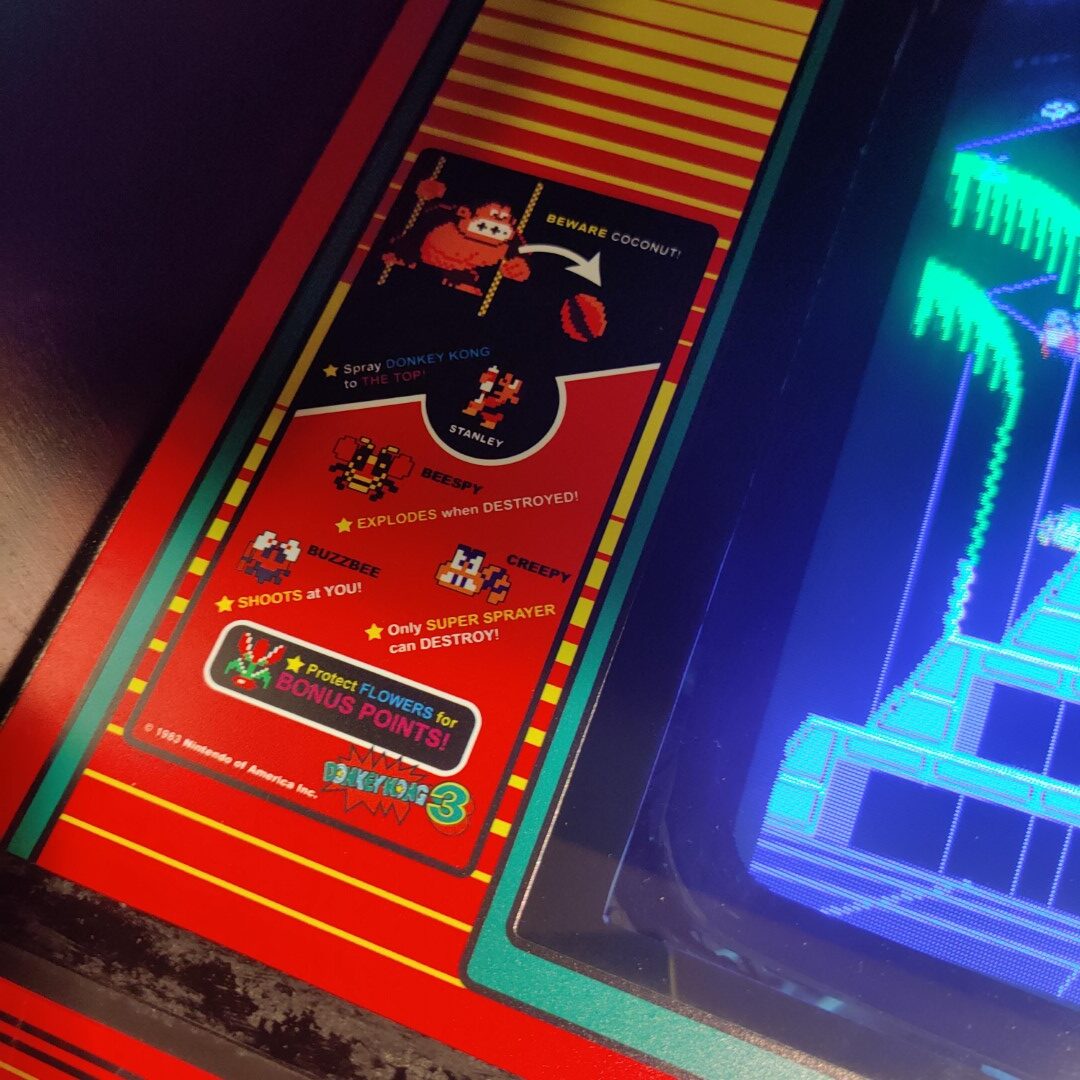
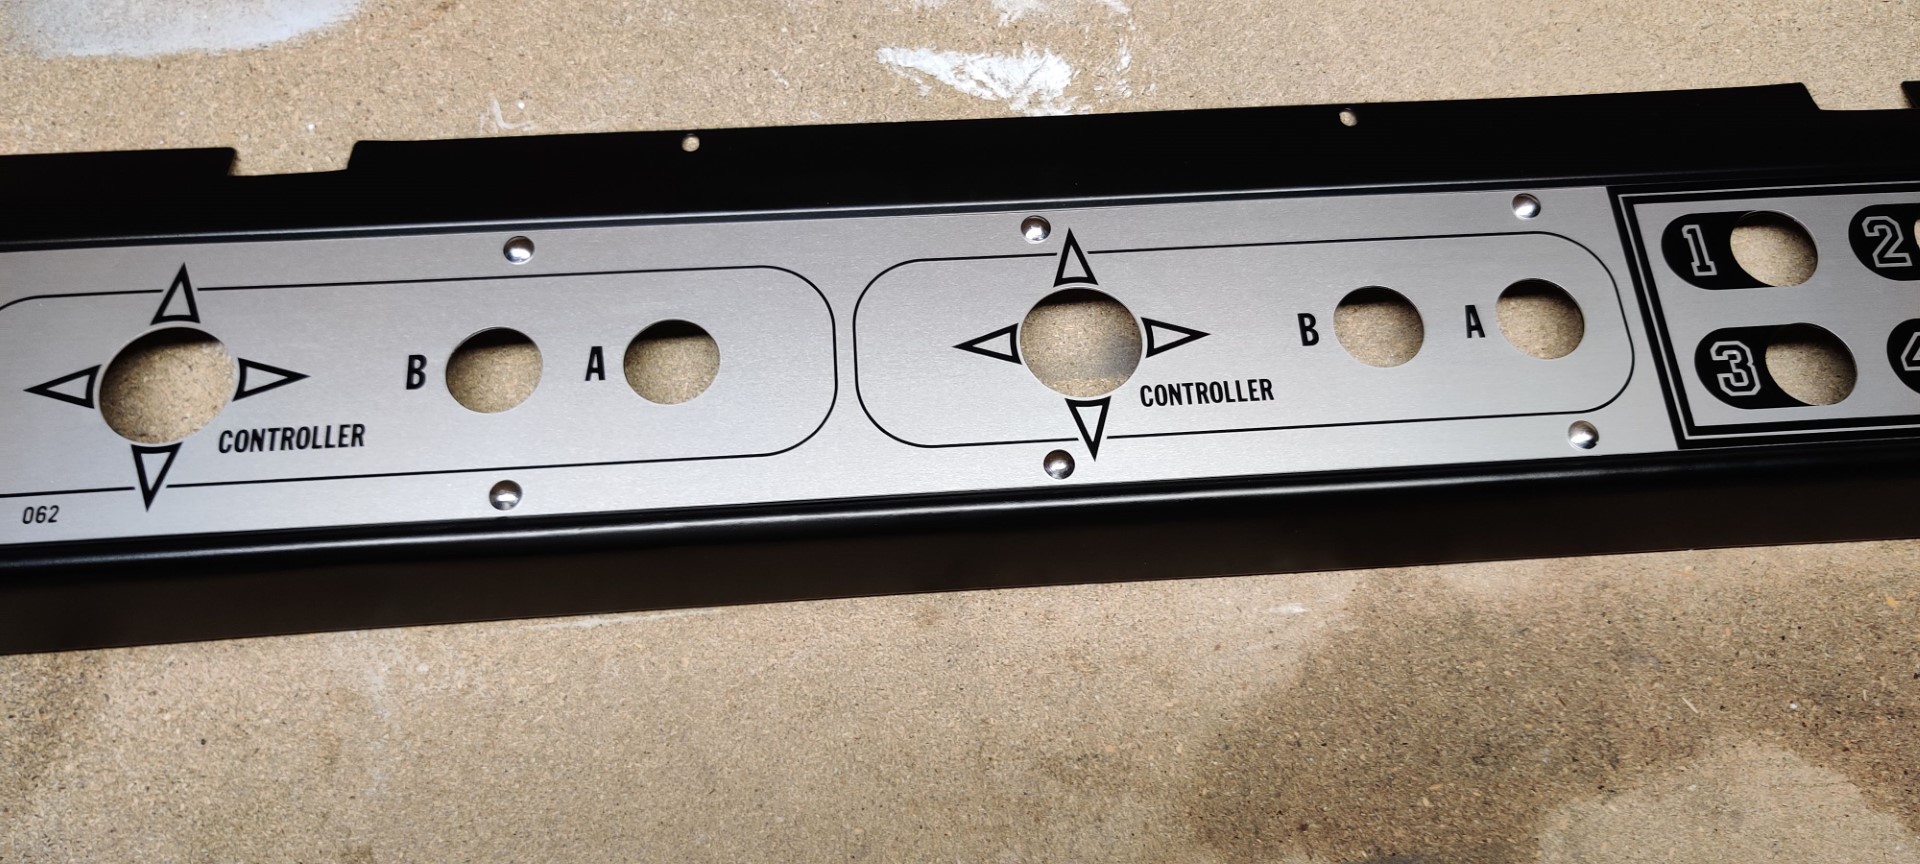
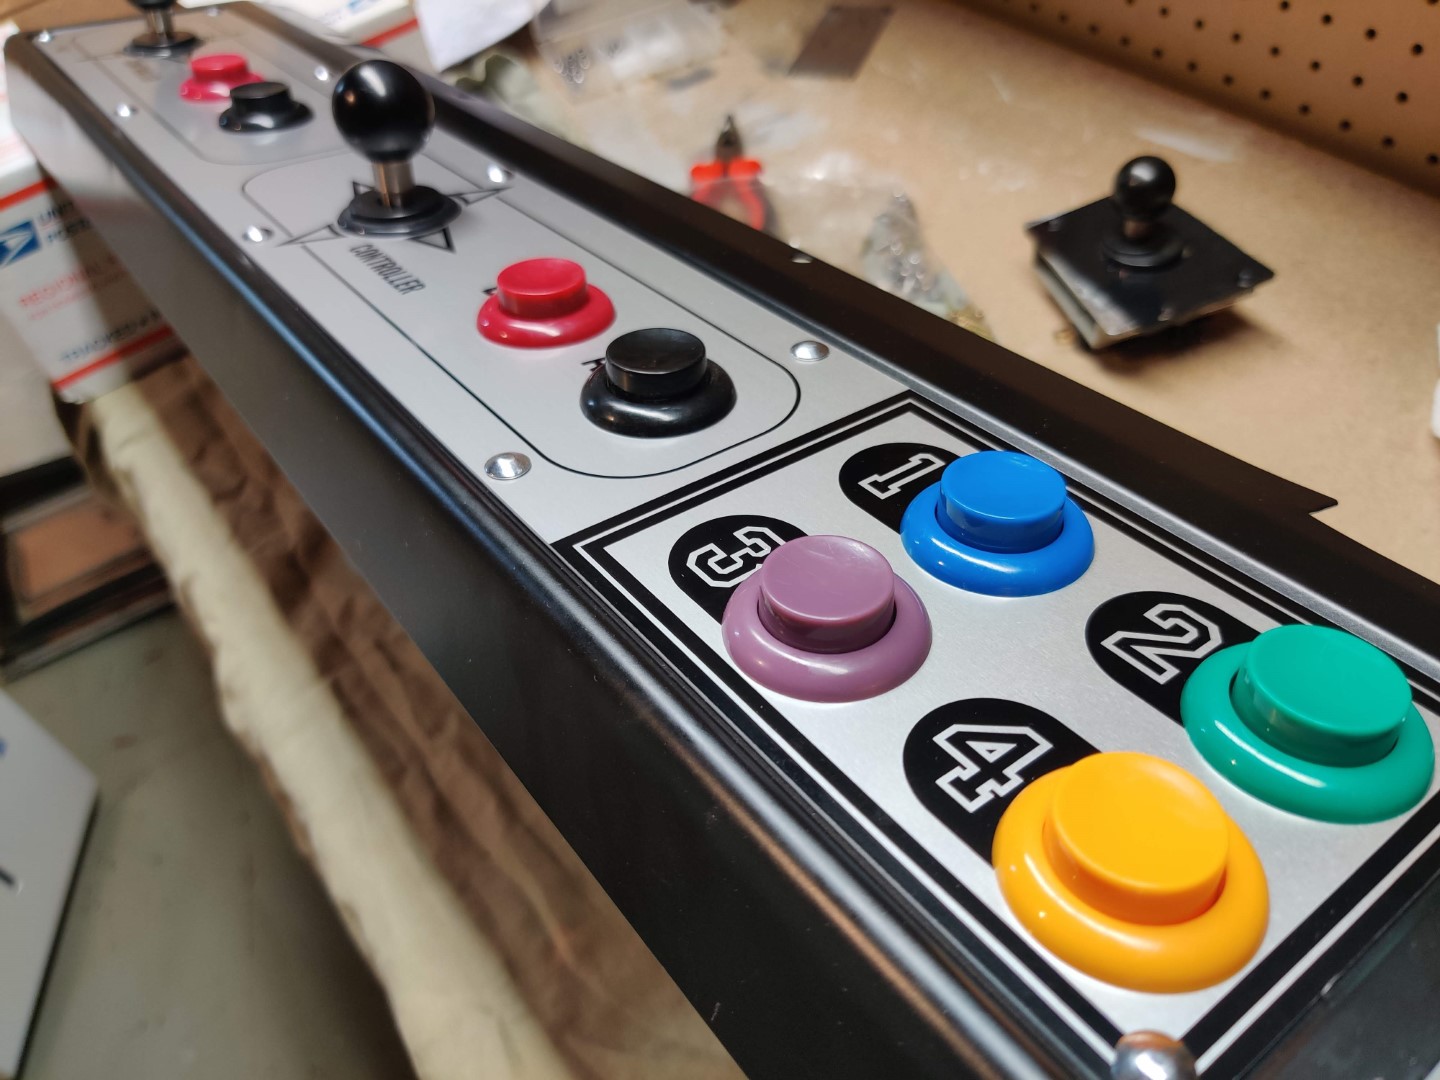
I created an entire art package for my game, primarily in Illustrator. To start, I made the control panel overlay. By tracing an original and then shaping and sizing it for an extra button, giving it some color, and a few small graphics for a splash – I end up with something new and awesome. See my control panel compared to an original below.
A scan of the Donkey Kong cabaret control panel overlayMy Donkey Kong 3 cabaret control panel
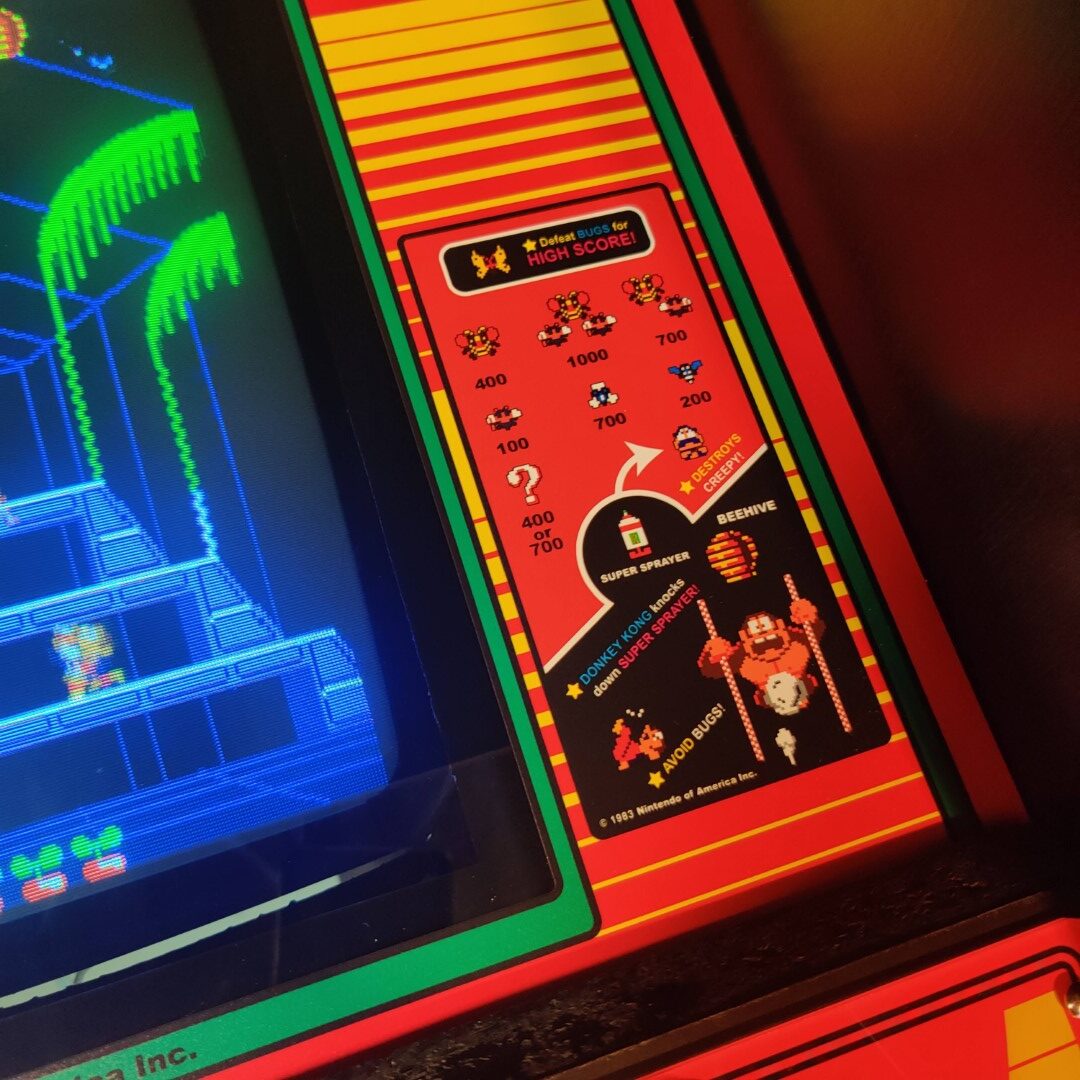
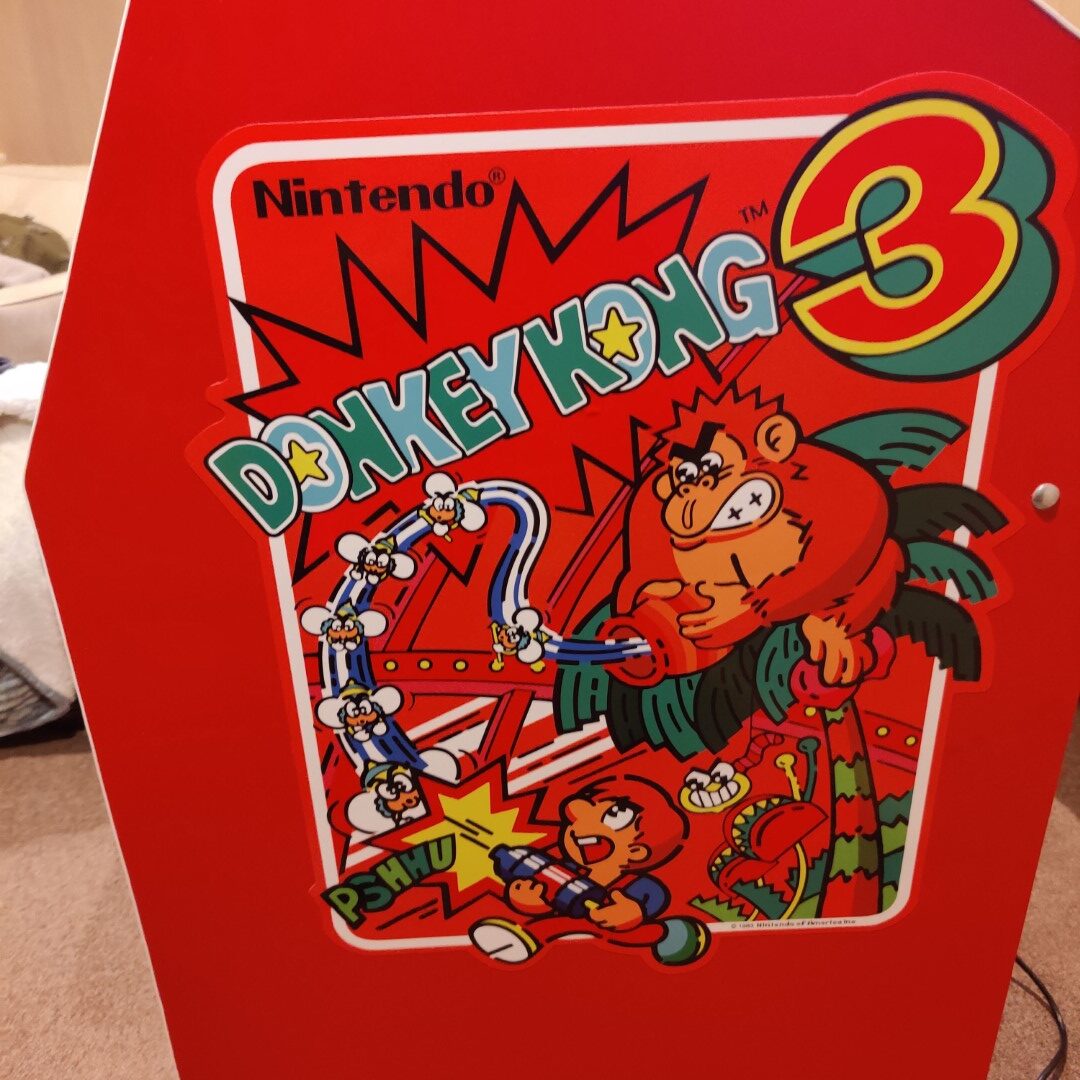
The rest of the artwork came together pretty quickly after that. I kept the sideart just like full-size upright and the marquee is similar to a Donkey Kong cabaret marquee except colored to match my pieces. Lastly, the bezel was inspired by the KLOV member who made a DK Jr cabaret except in my colors and with two instruction panels I dreamed up.
DK3 Bezel
DK3 Sideart
DK3 Marquee
Other art pieces for the Donkey Kong 3 cabaret
I had to be very careful on sizes – measuring multiple times, over and over, before sending it off to print. You don’t want to get anything wrong and have to reorder, artwork can be expensive. I used Arcade Art Shop in the UK for my pieces, specifically because of their ability to reverse print on plexi.
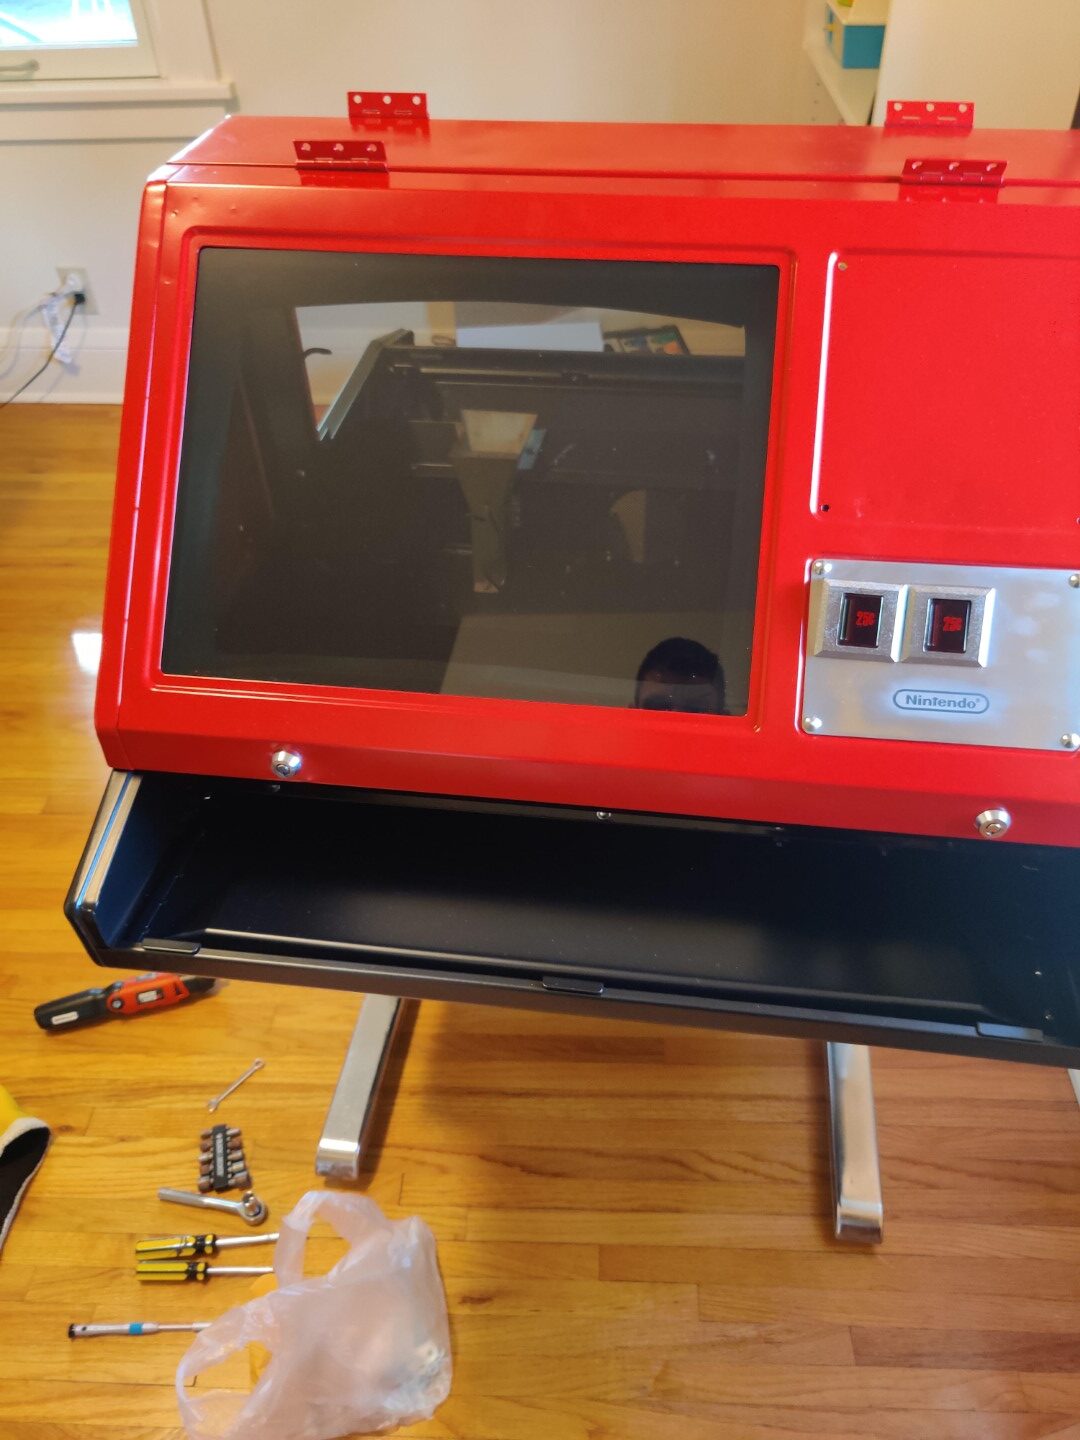
Hardware and Electronics
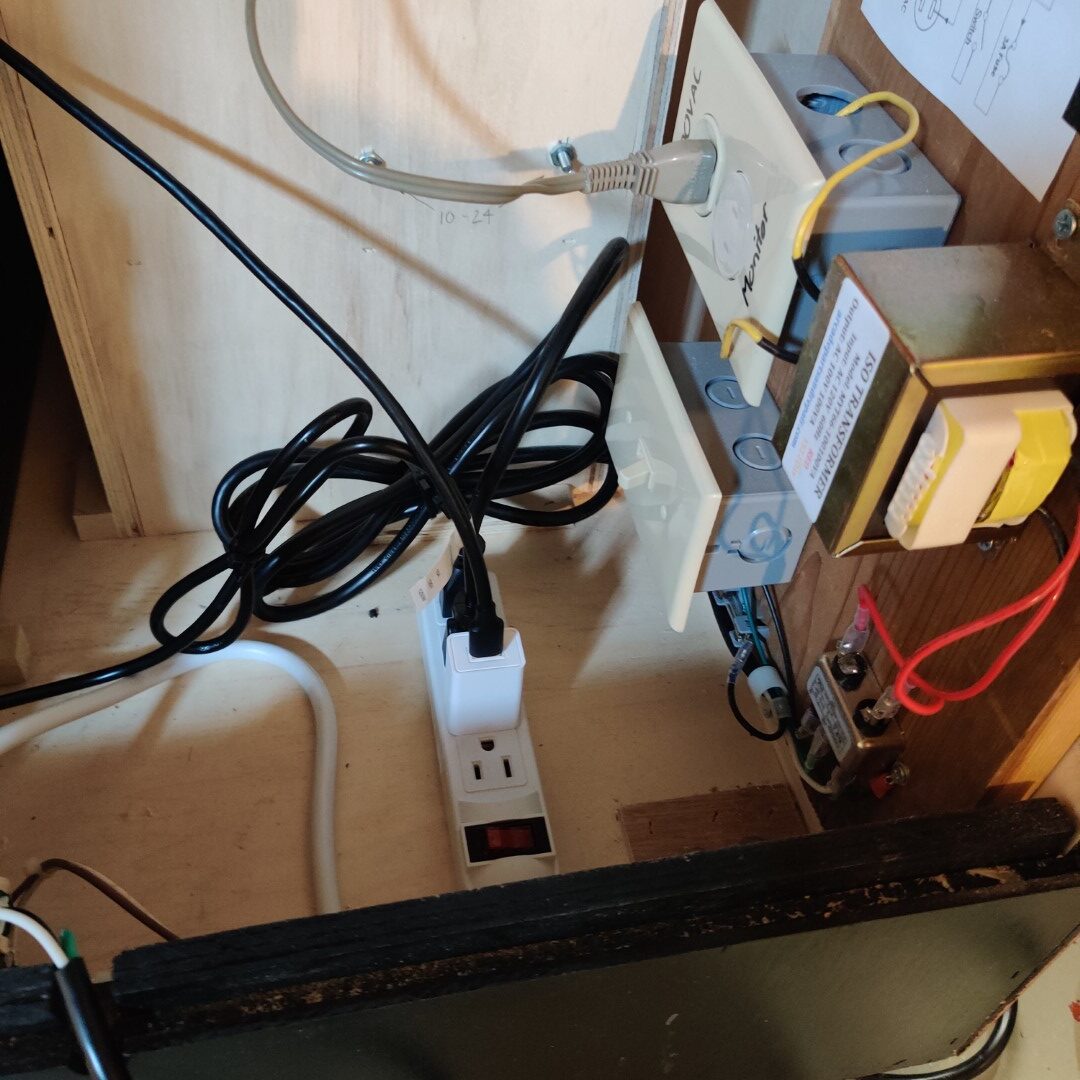
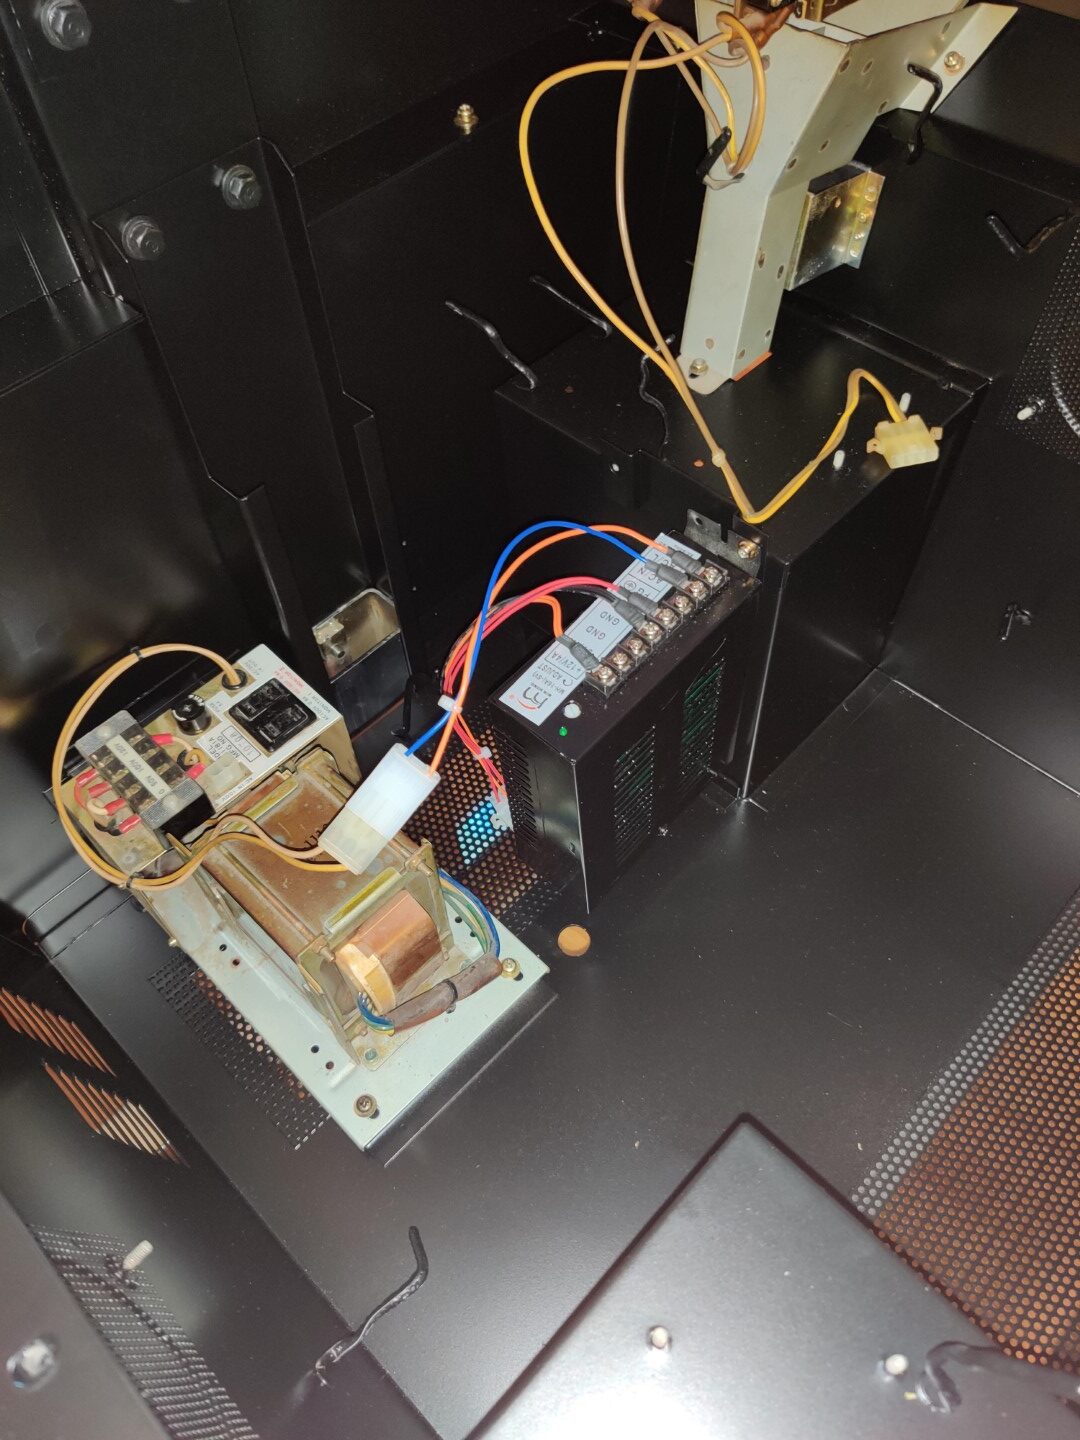
For most arcade pieces that are Nintendo related, I’ll be using Mike’s Arcade. Items like a jamma harness, iso transformer, etc, I’m ordering from Arcade Shop.
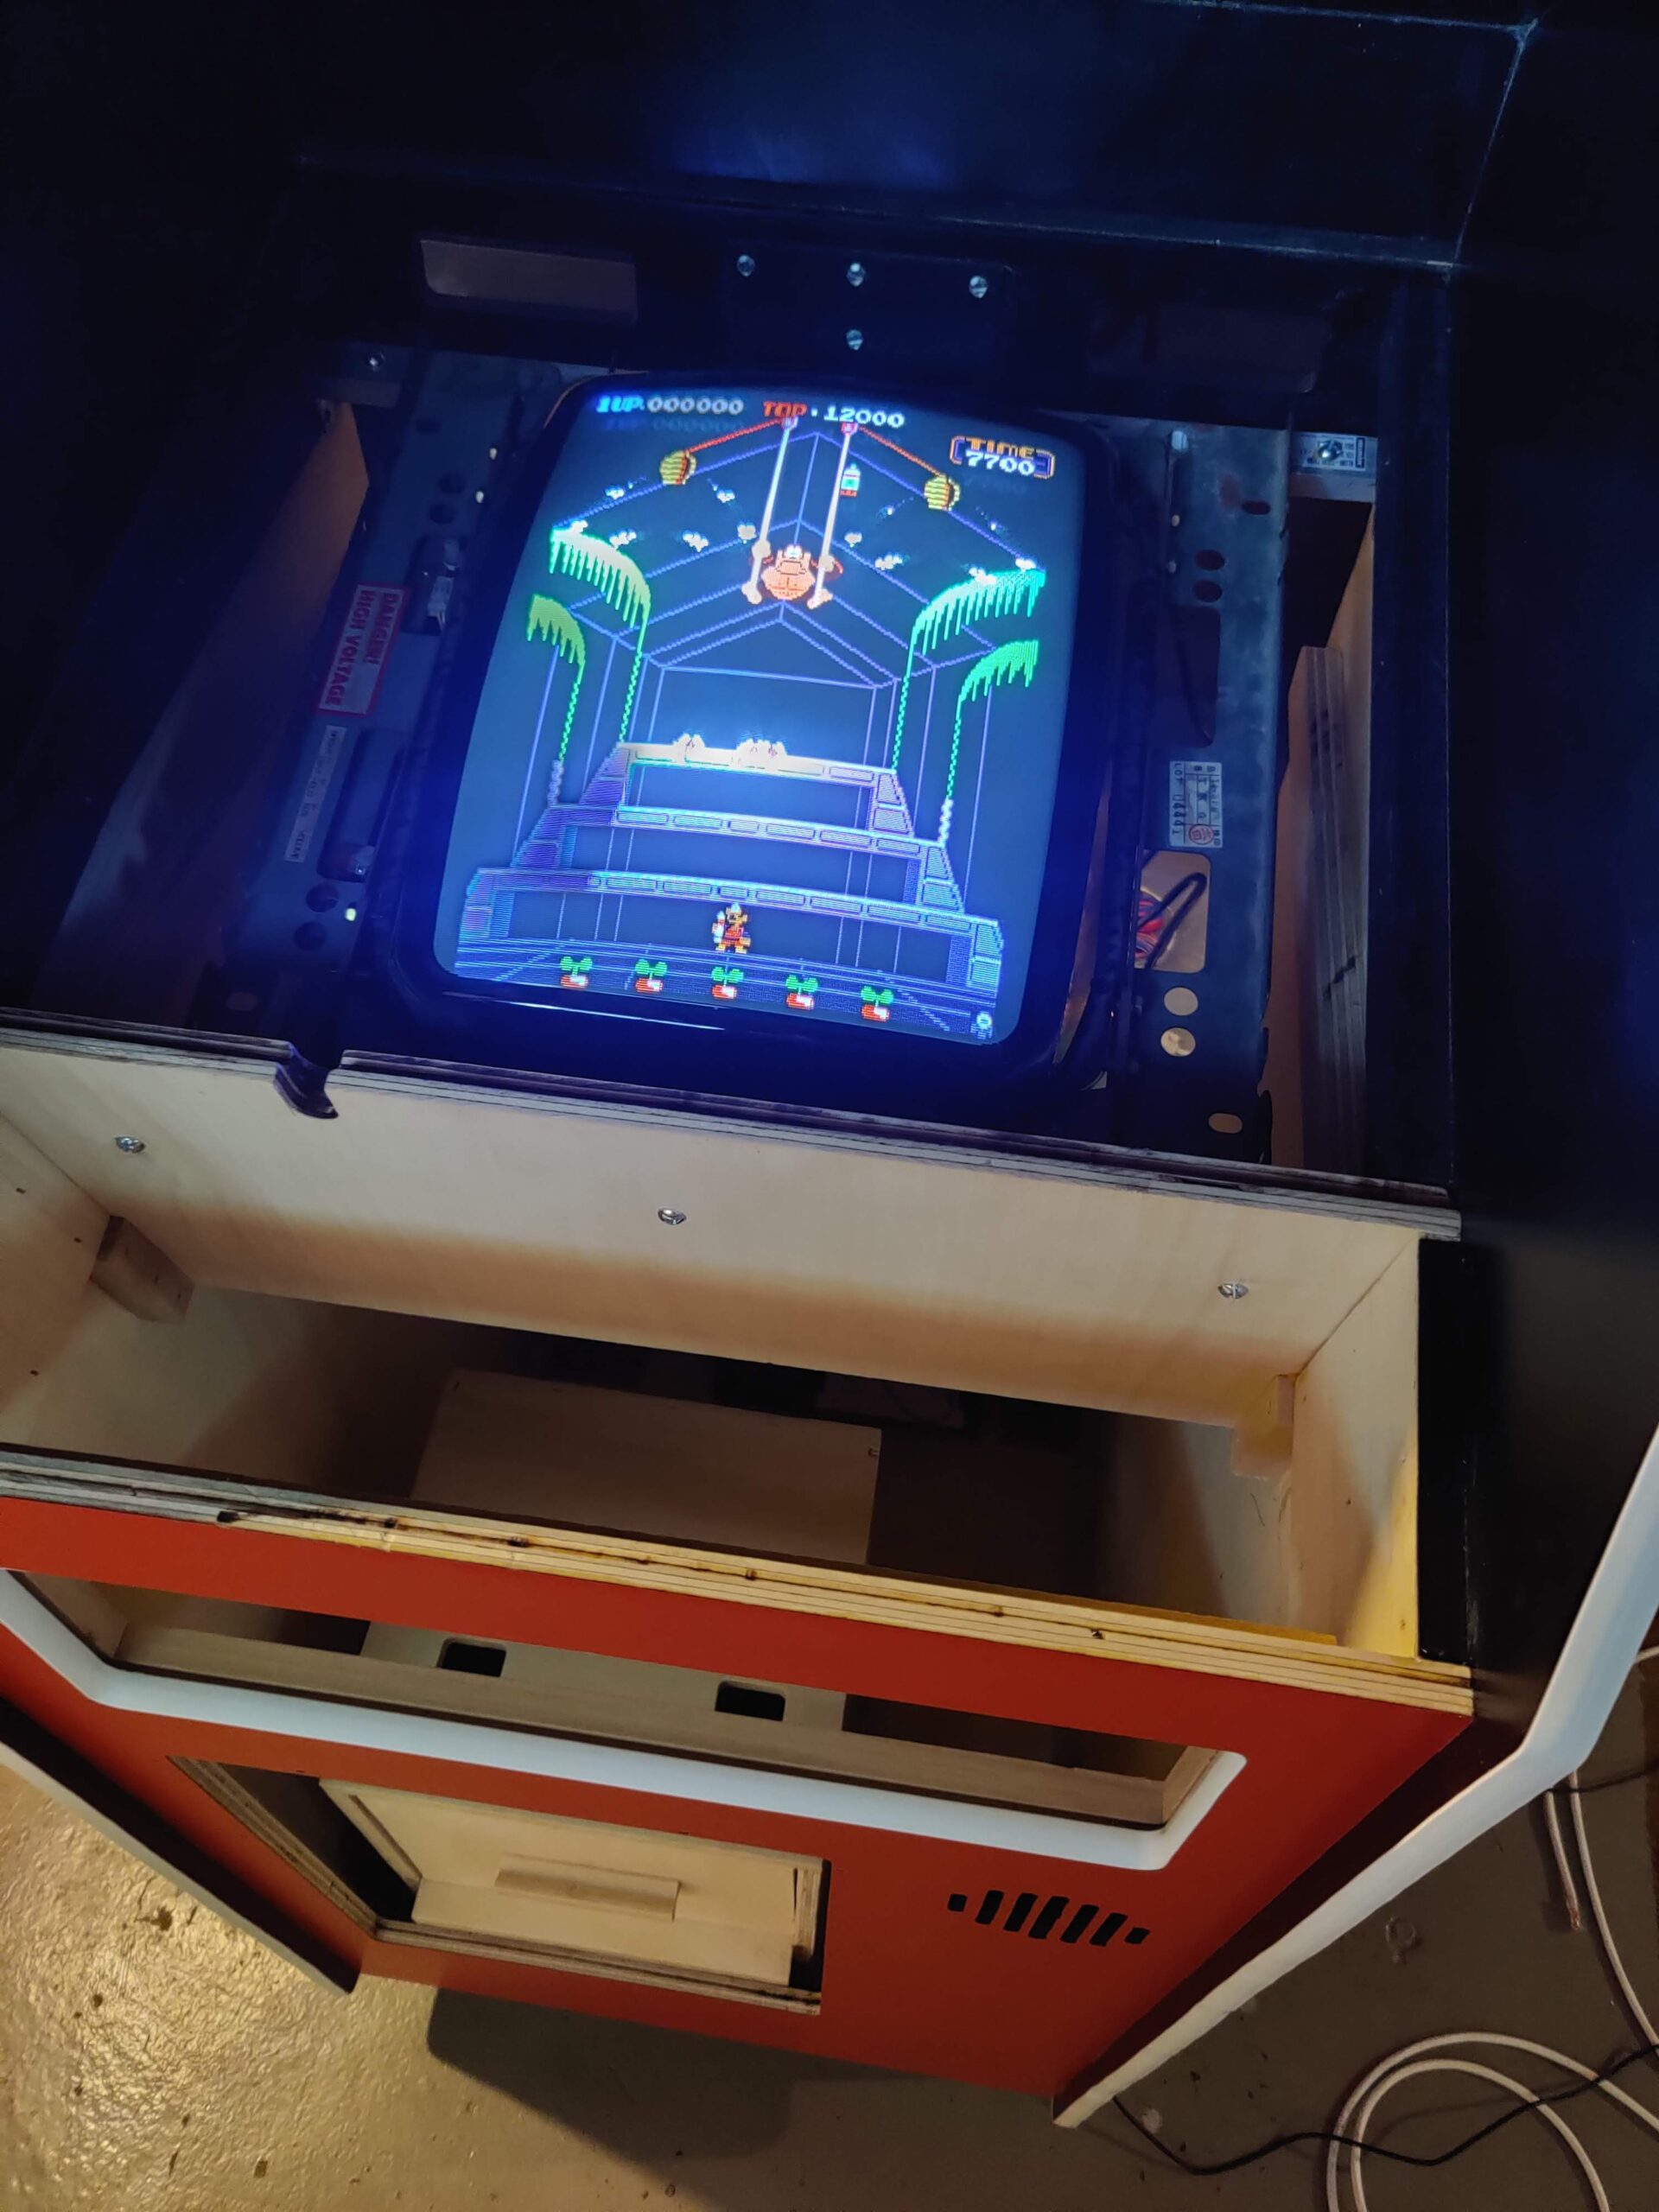
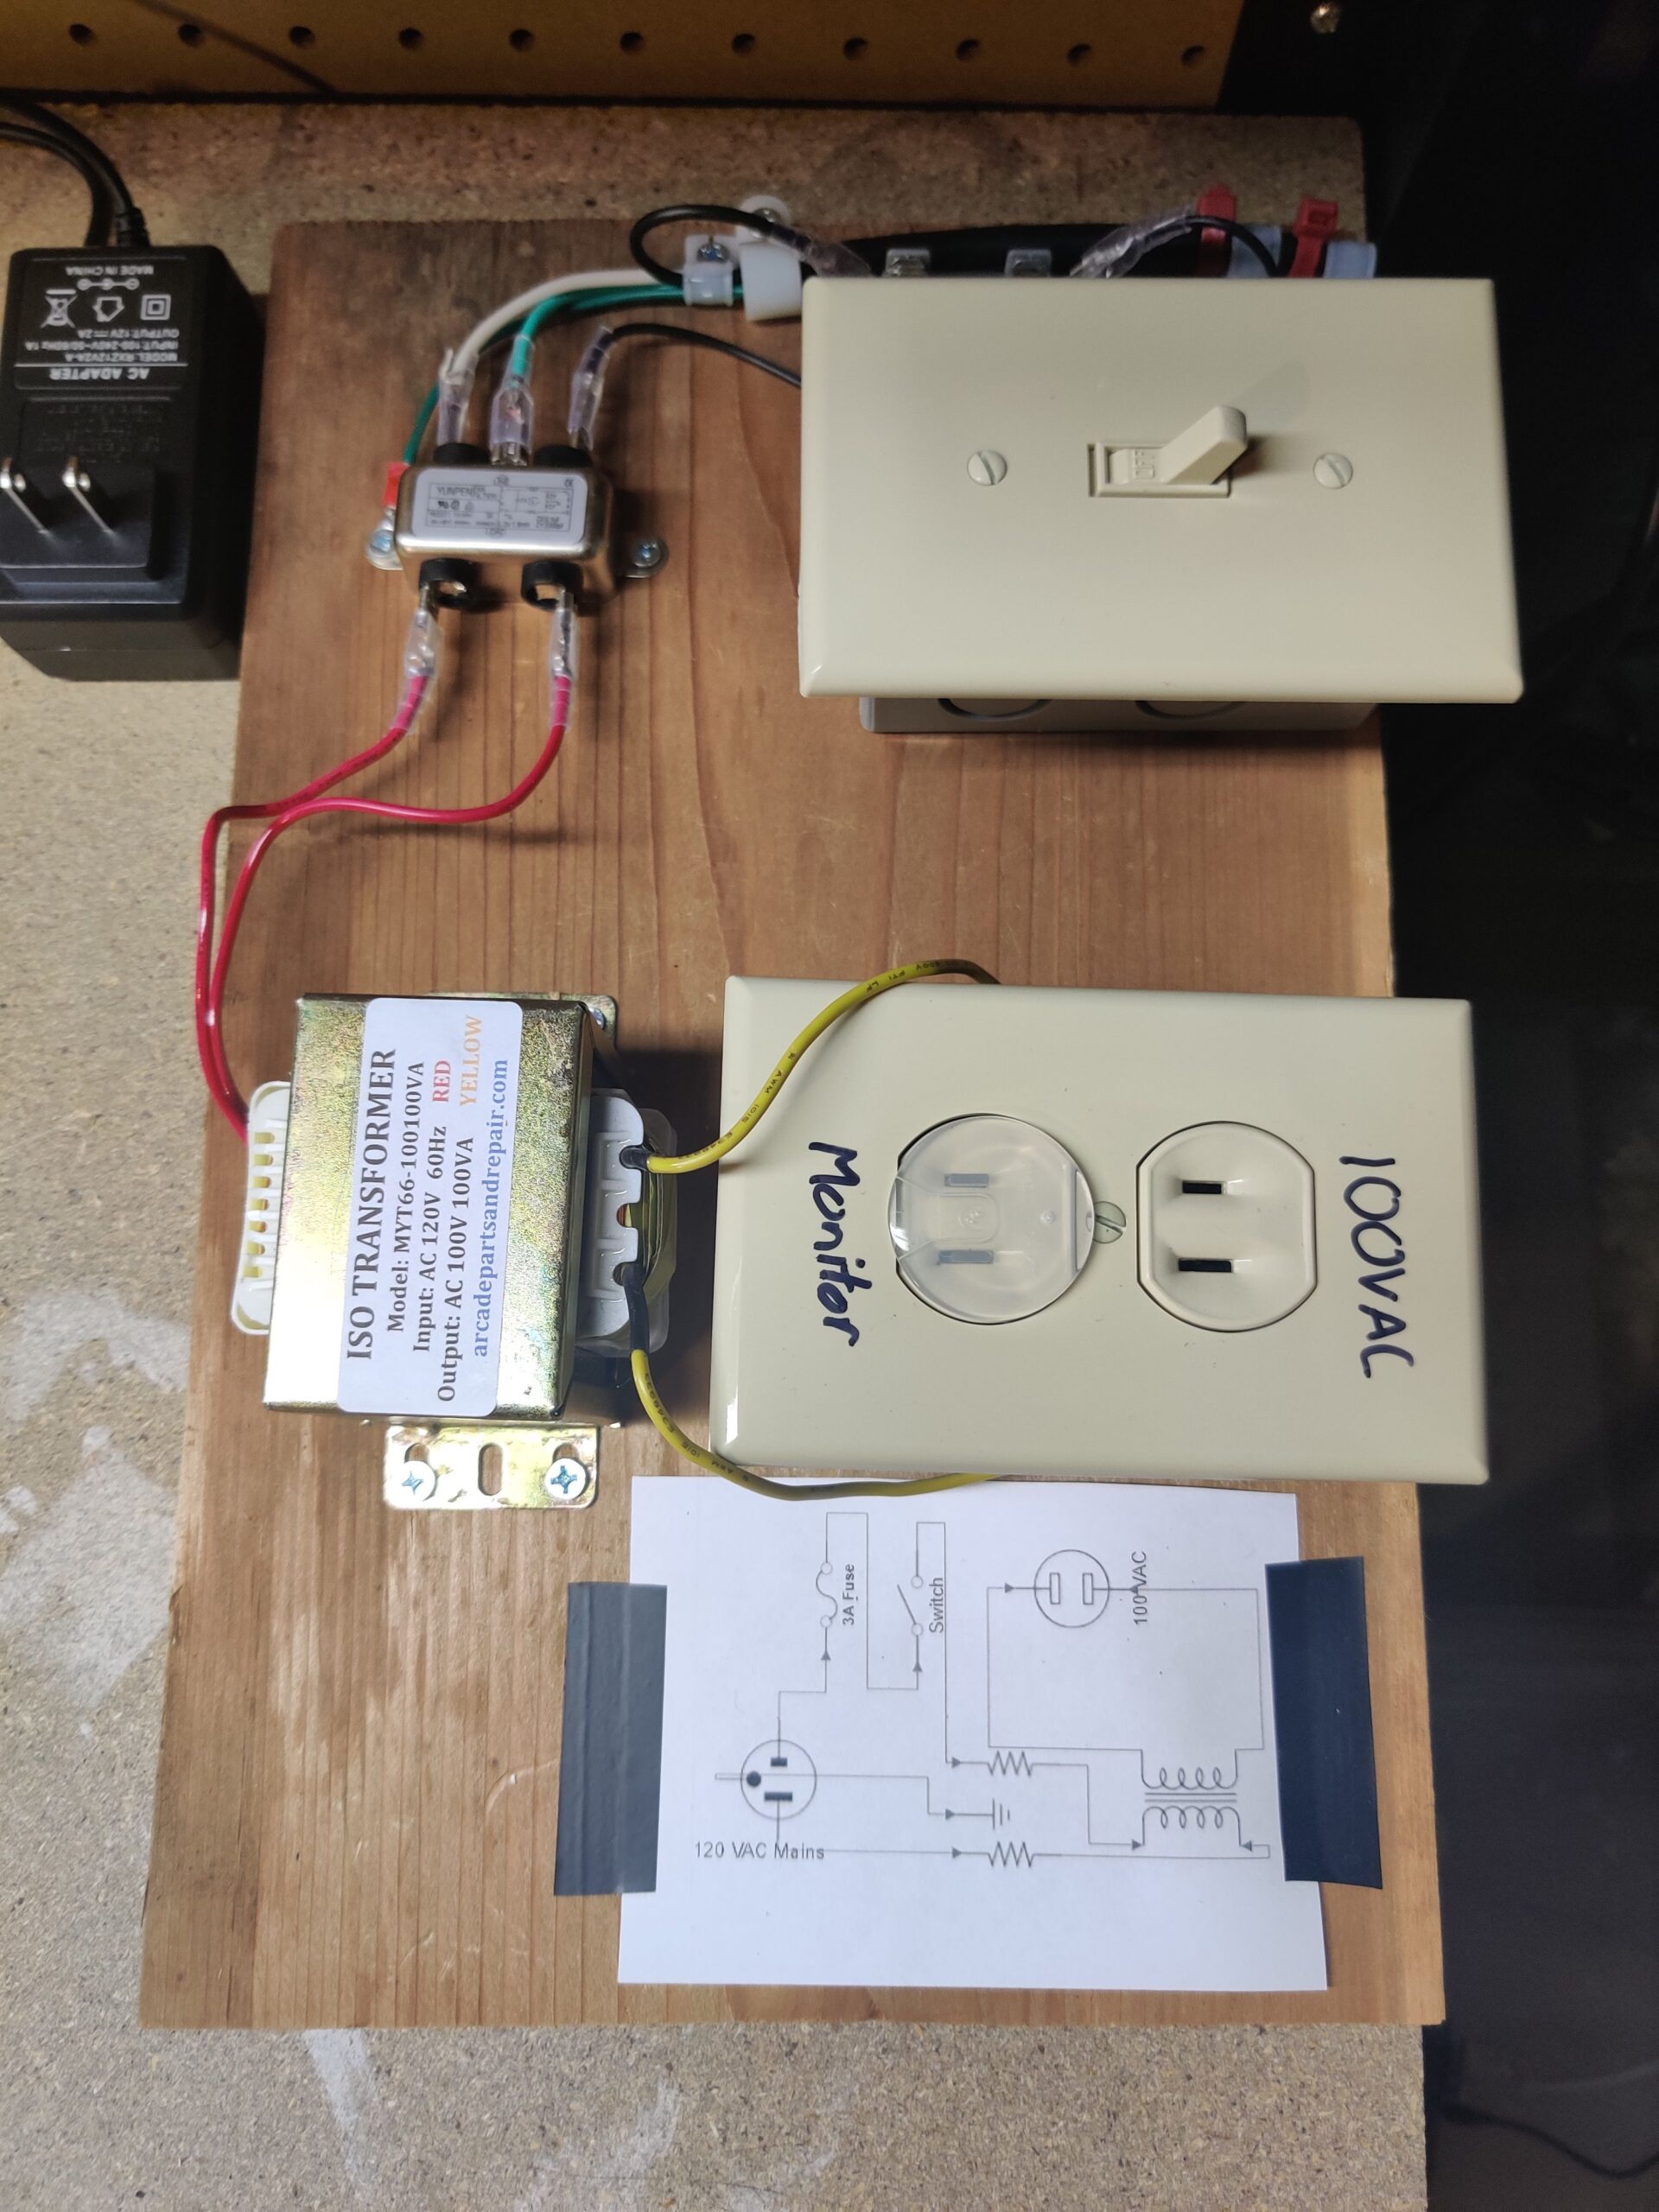
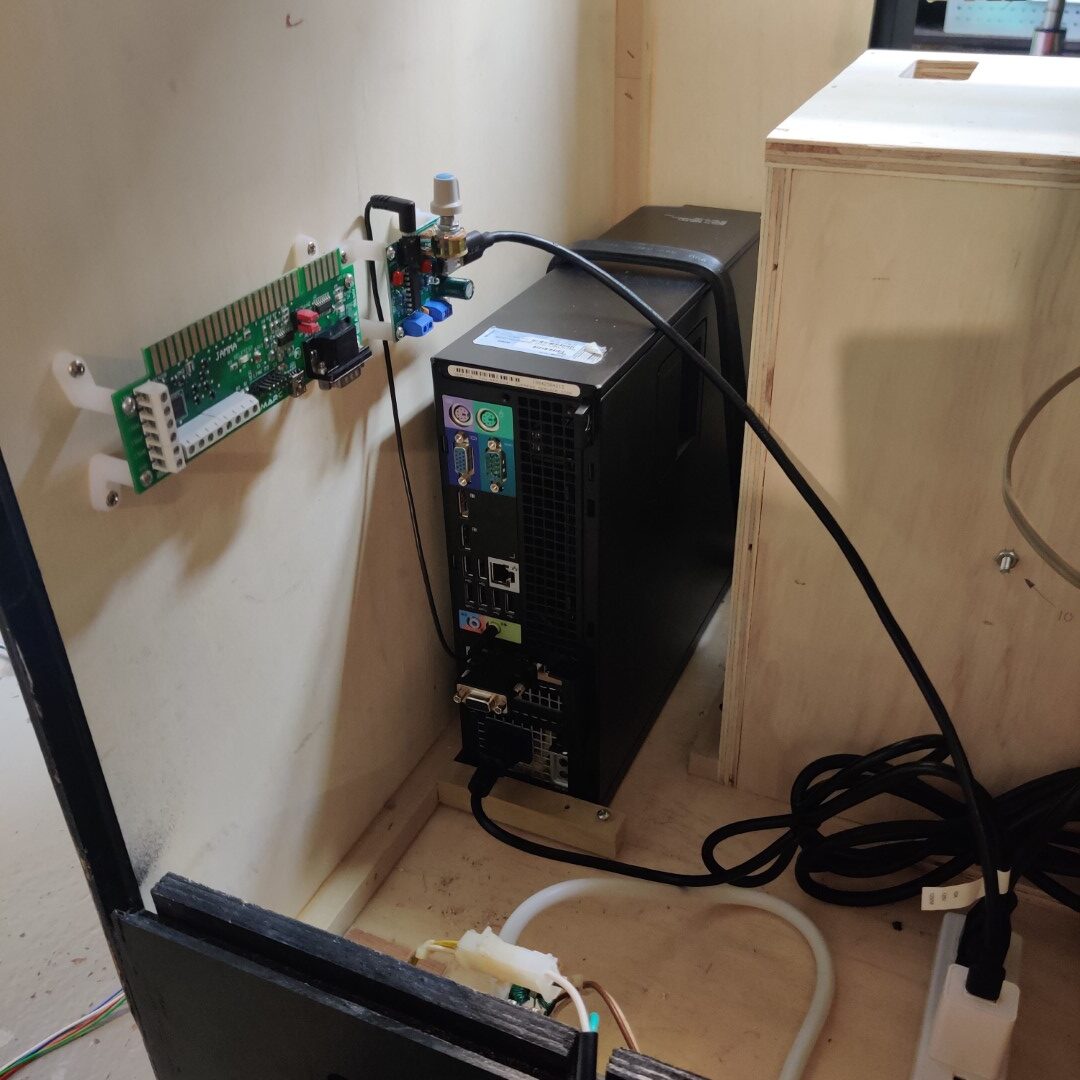
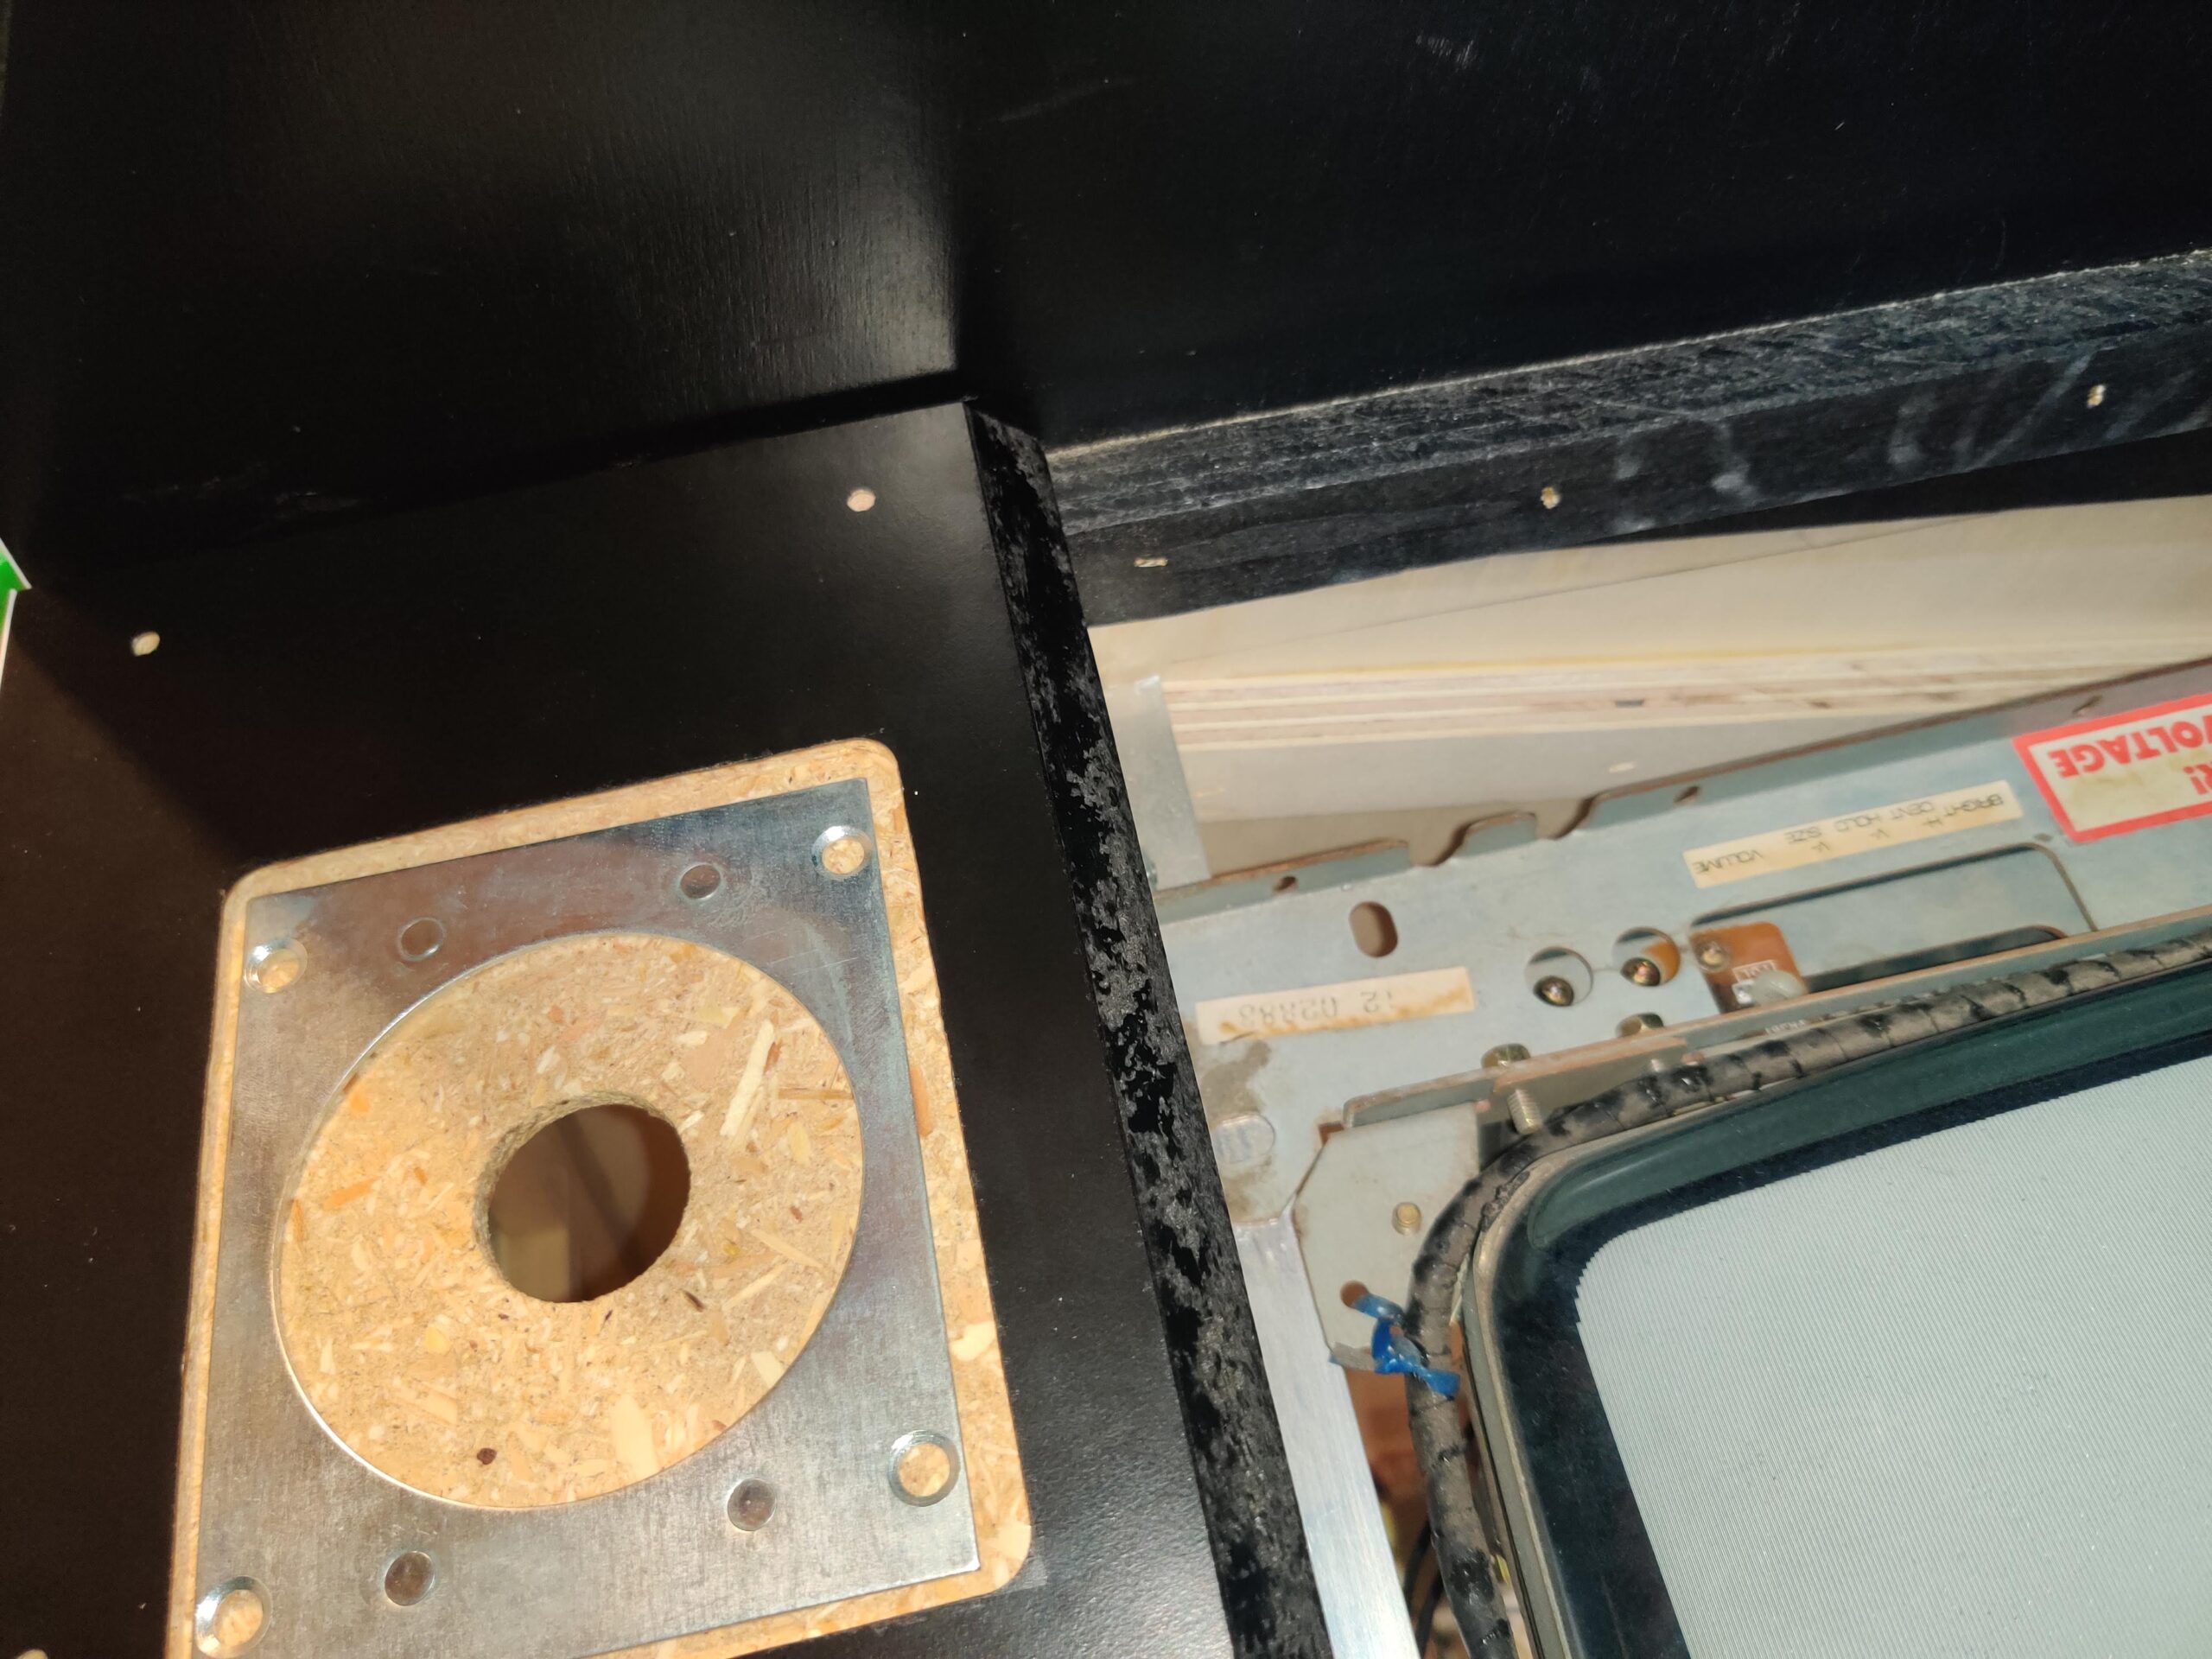
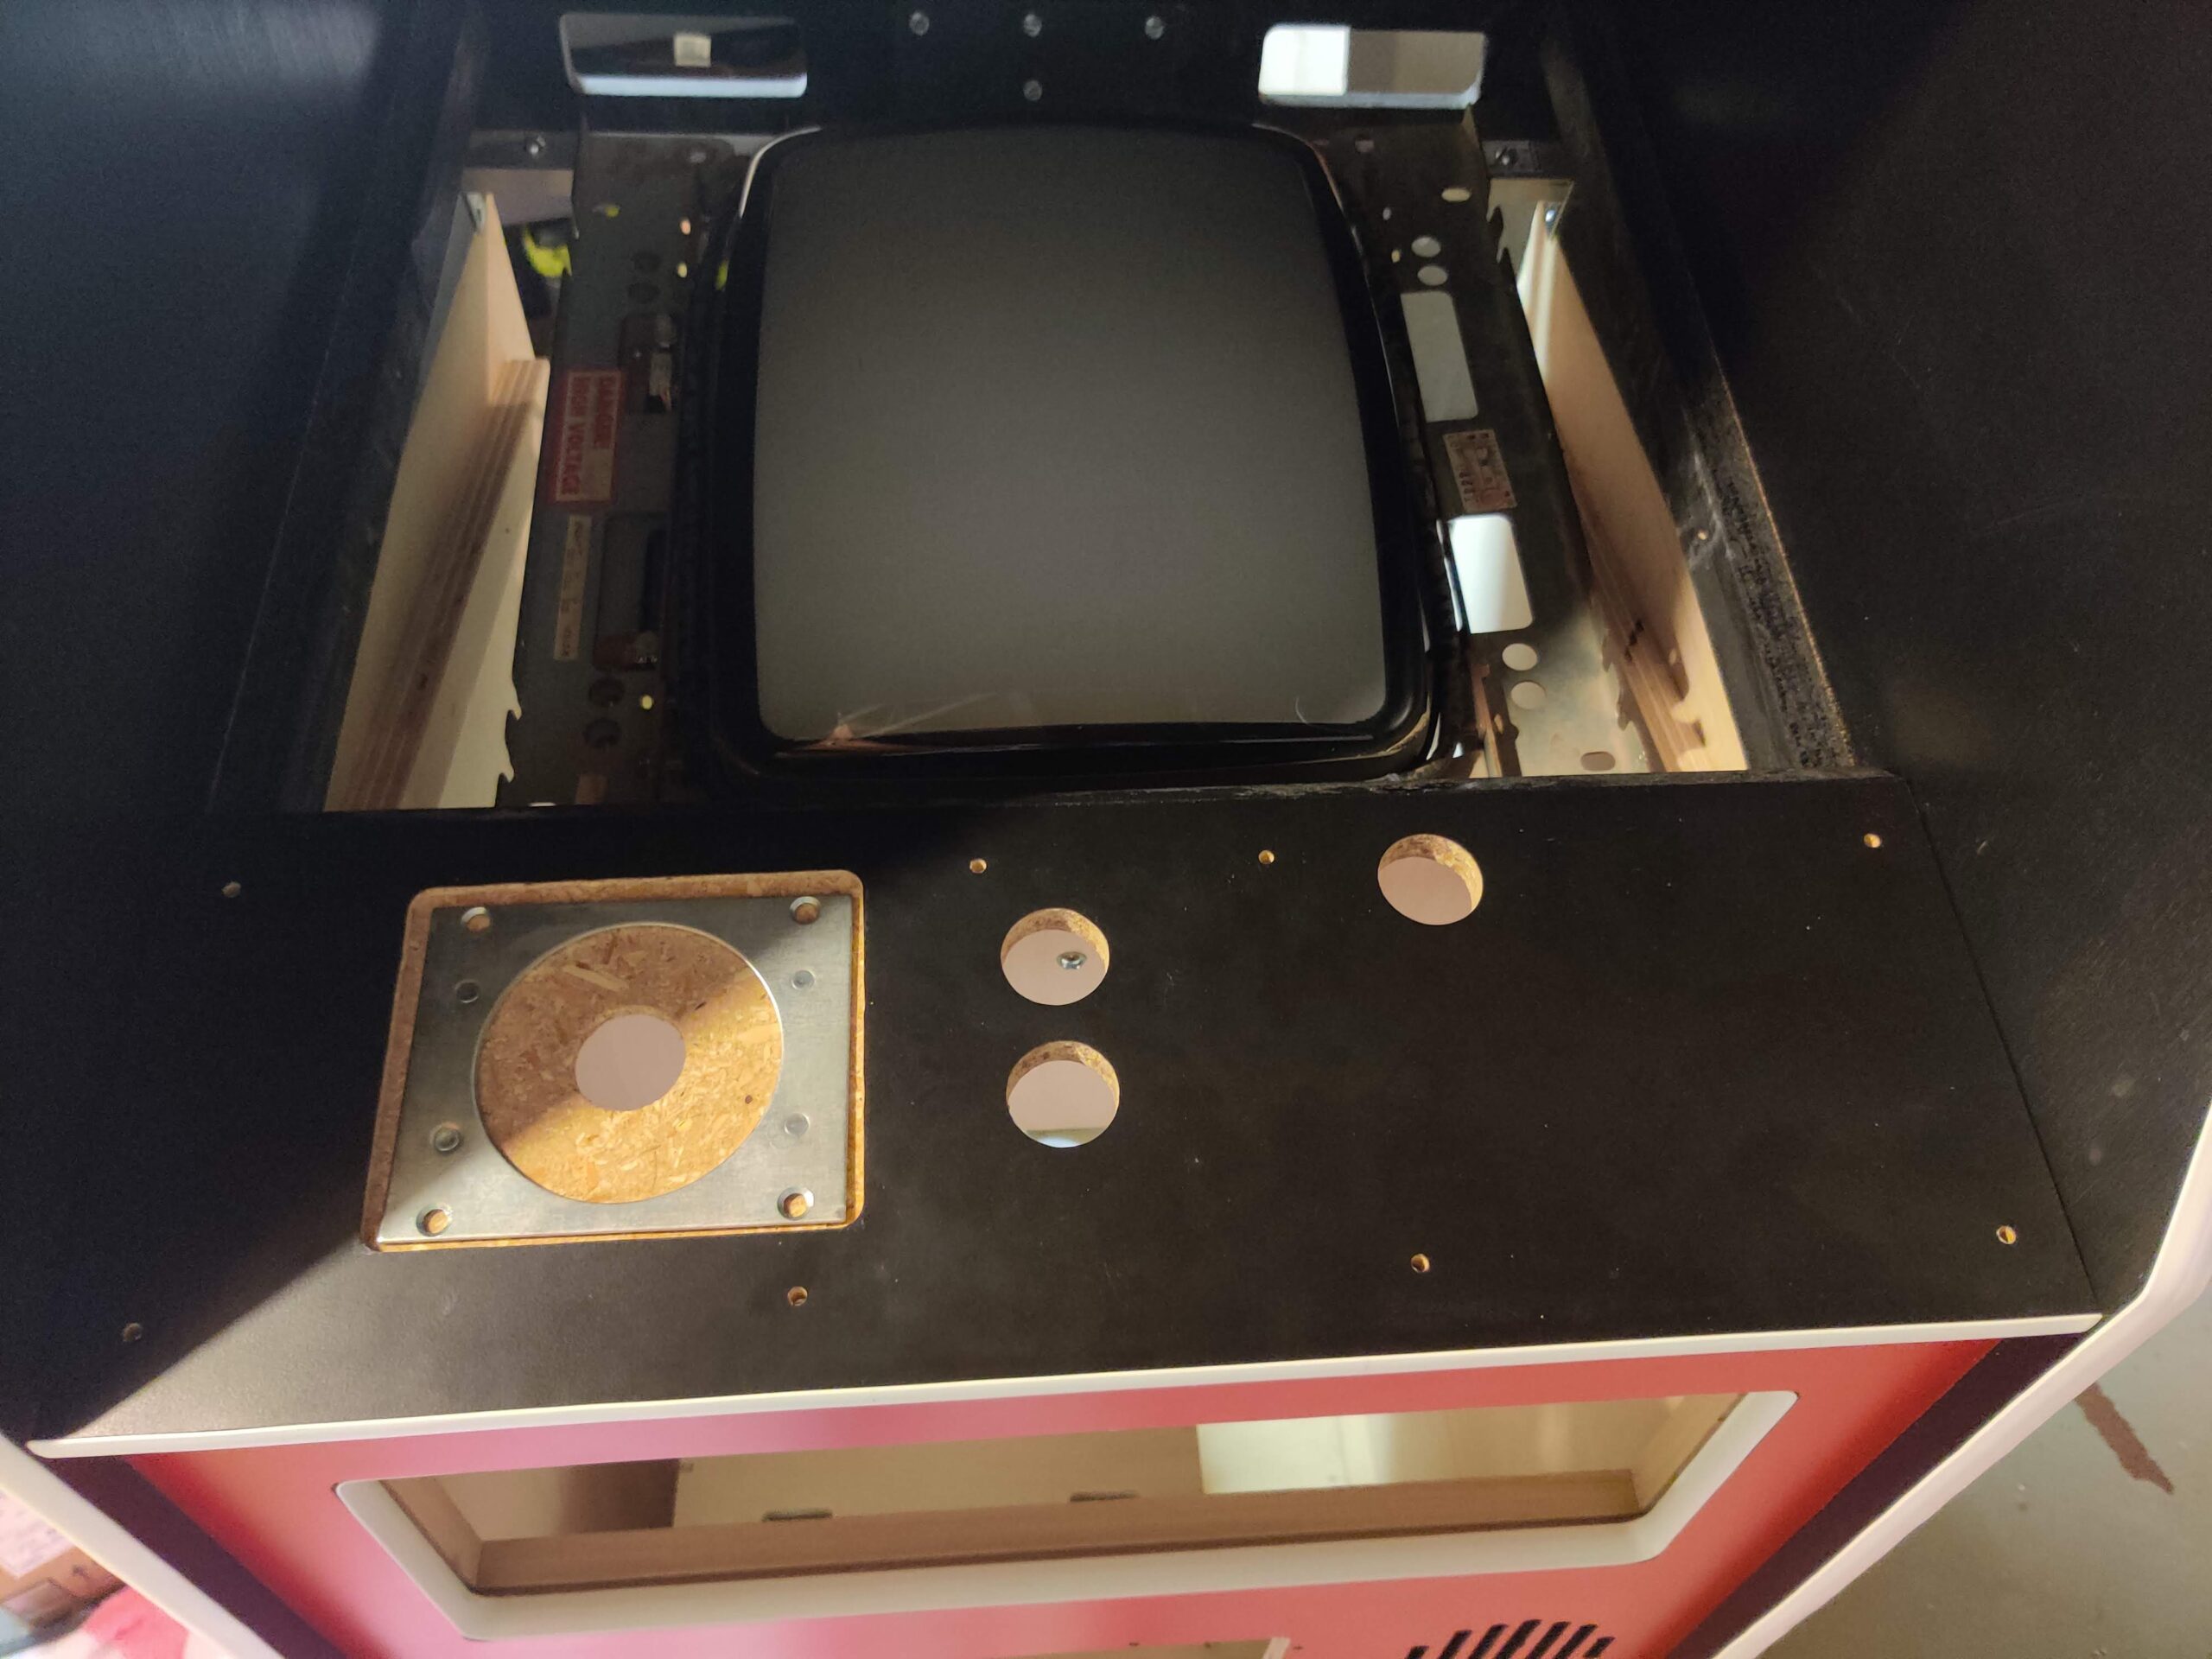
Wiring to the cabaret for power is pretty standard, but once inside I’m using some additional AC power to run a full desktop computer. I had to also build my own monitor power transformer since I’m using a 14″ Sanyo monitor which runs on 100VAC.
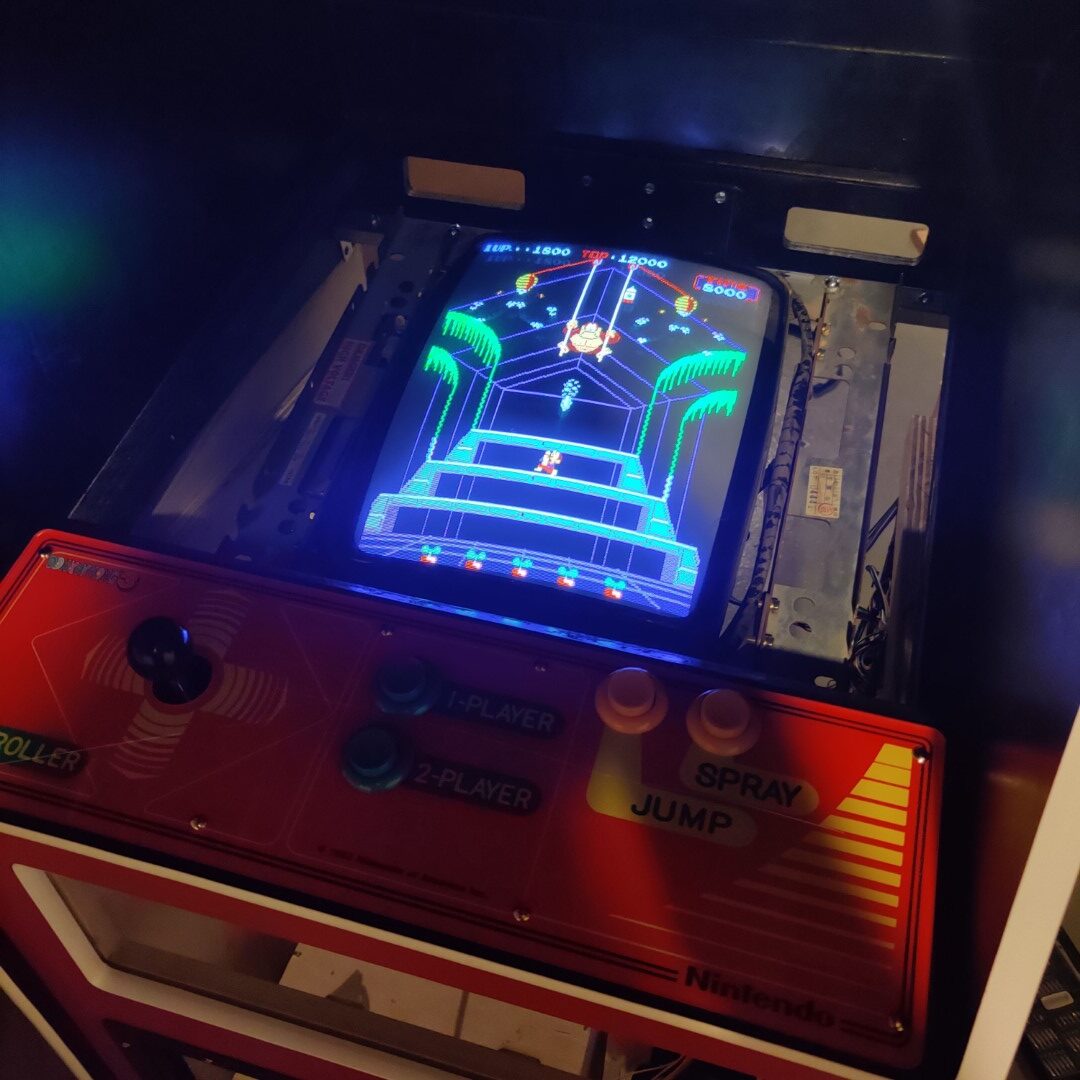
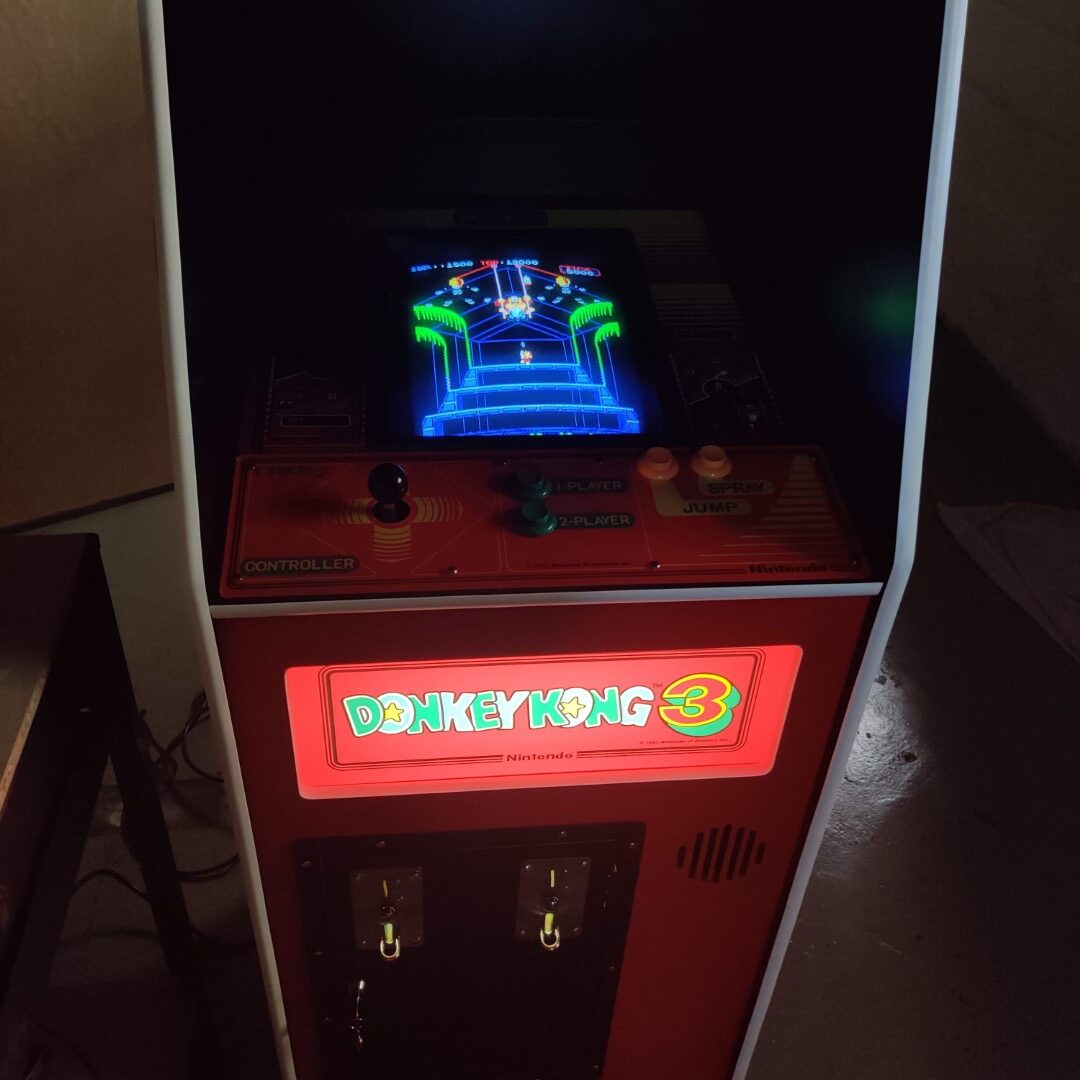
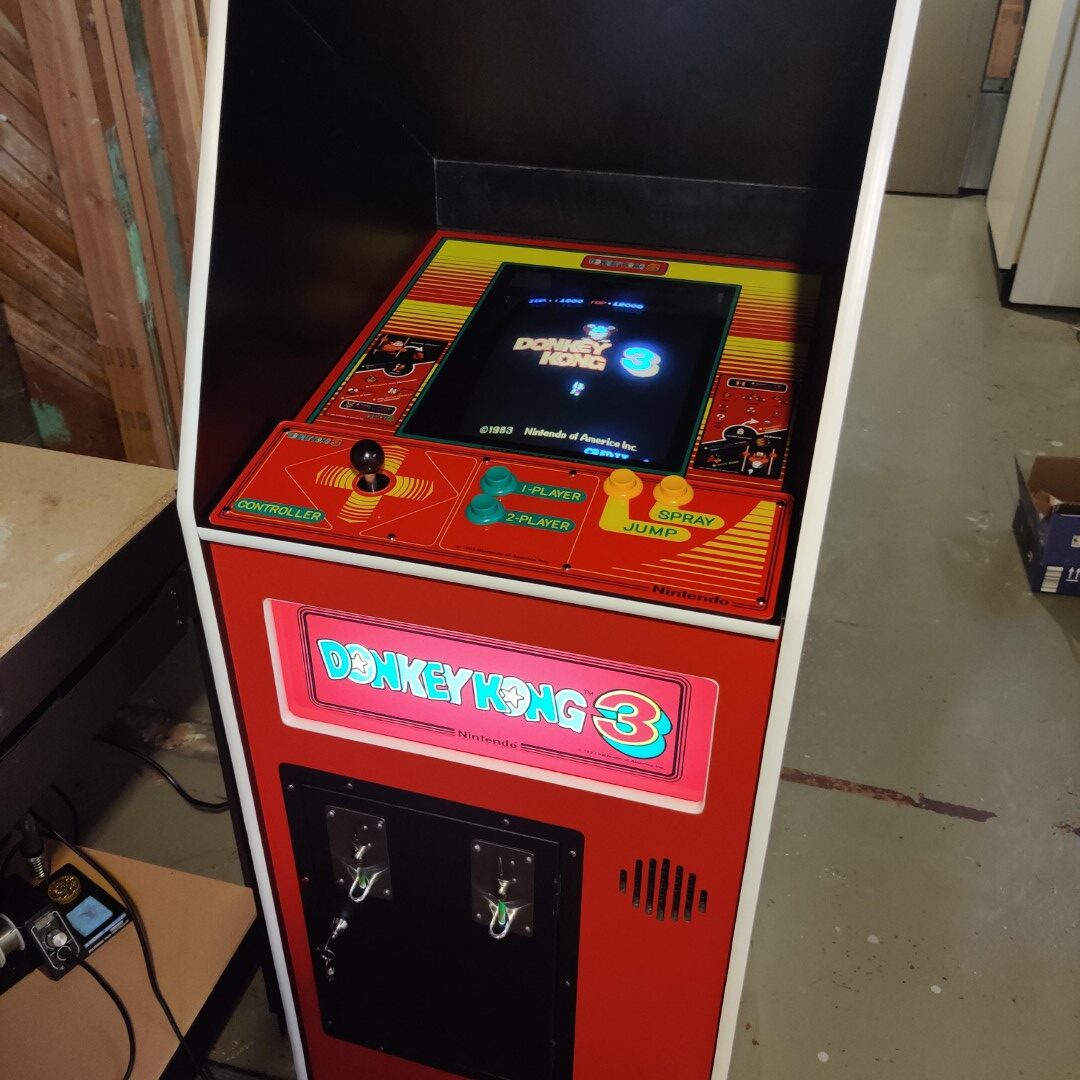
Donkey Kong 3 running in the cabaret
A 100VAC power transformer
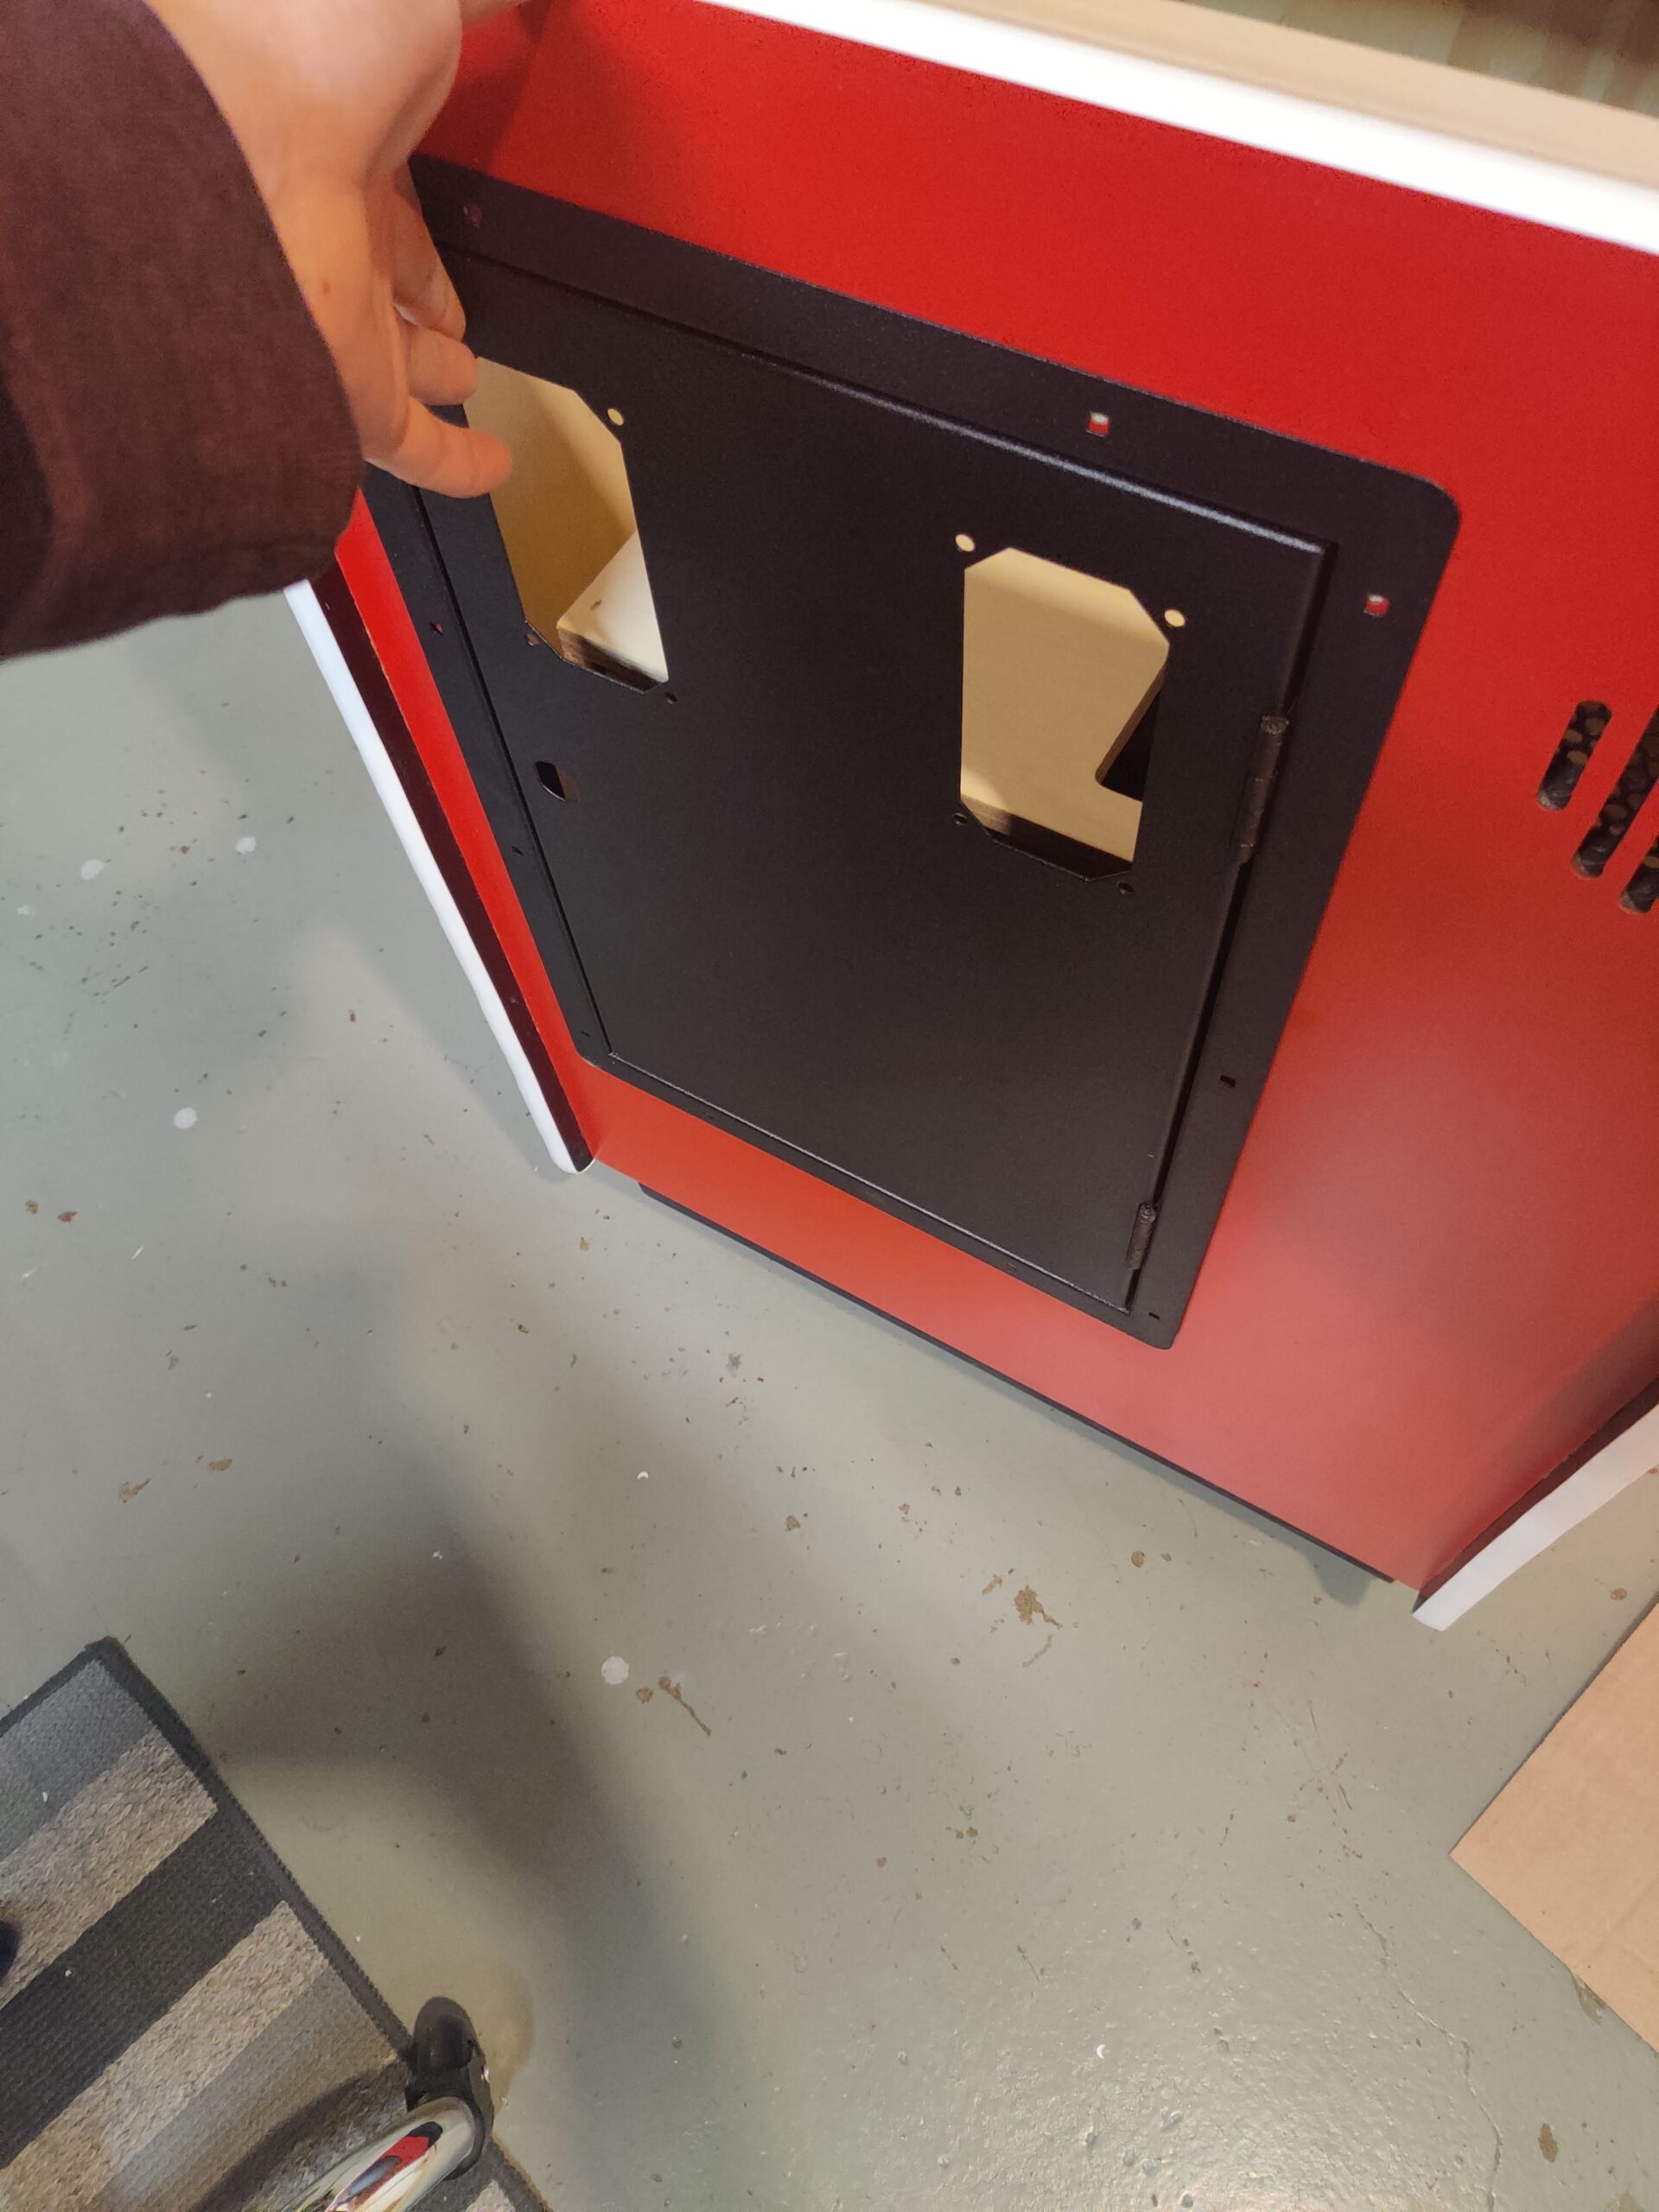
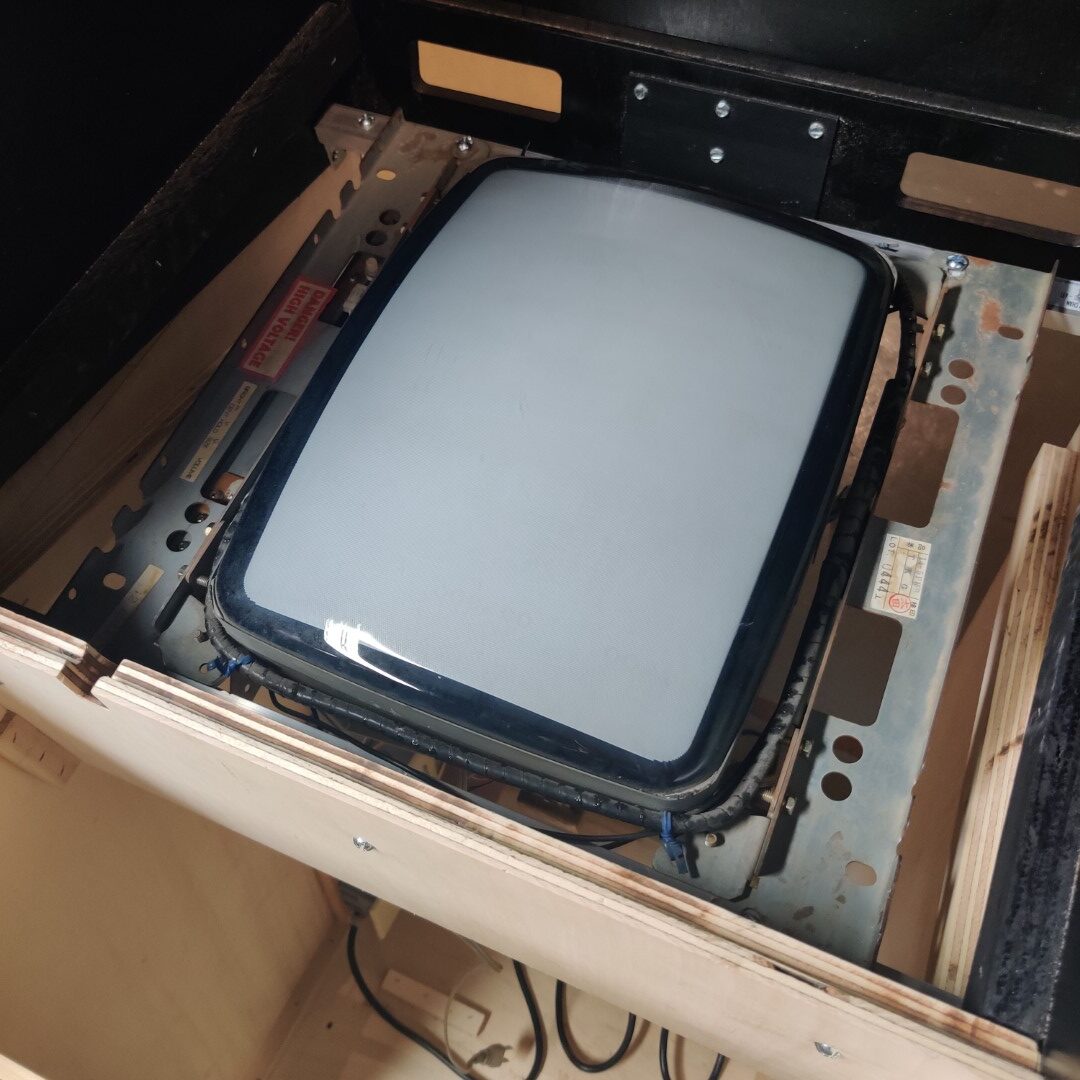
Test fitting a coin door
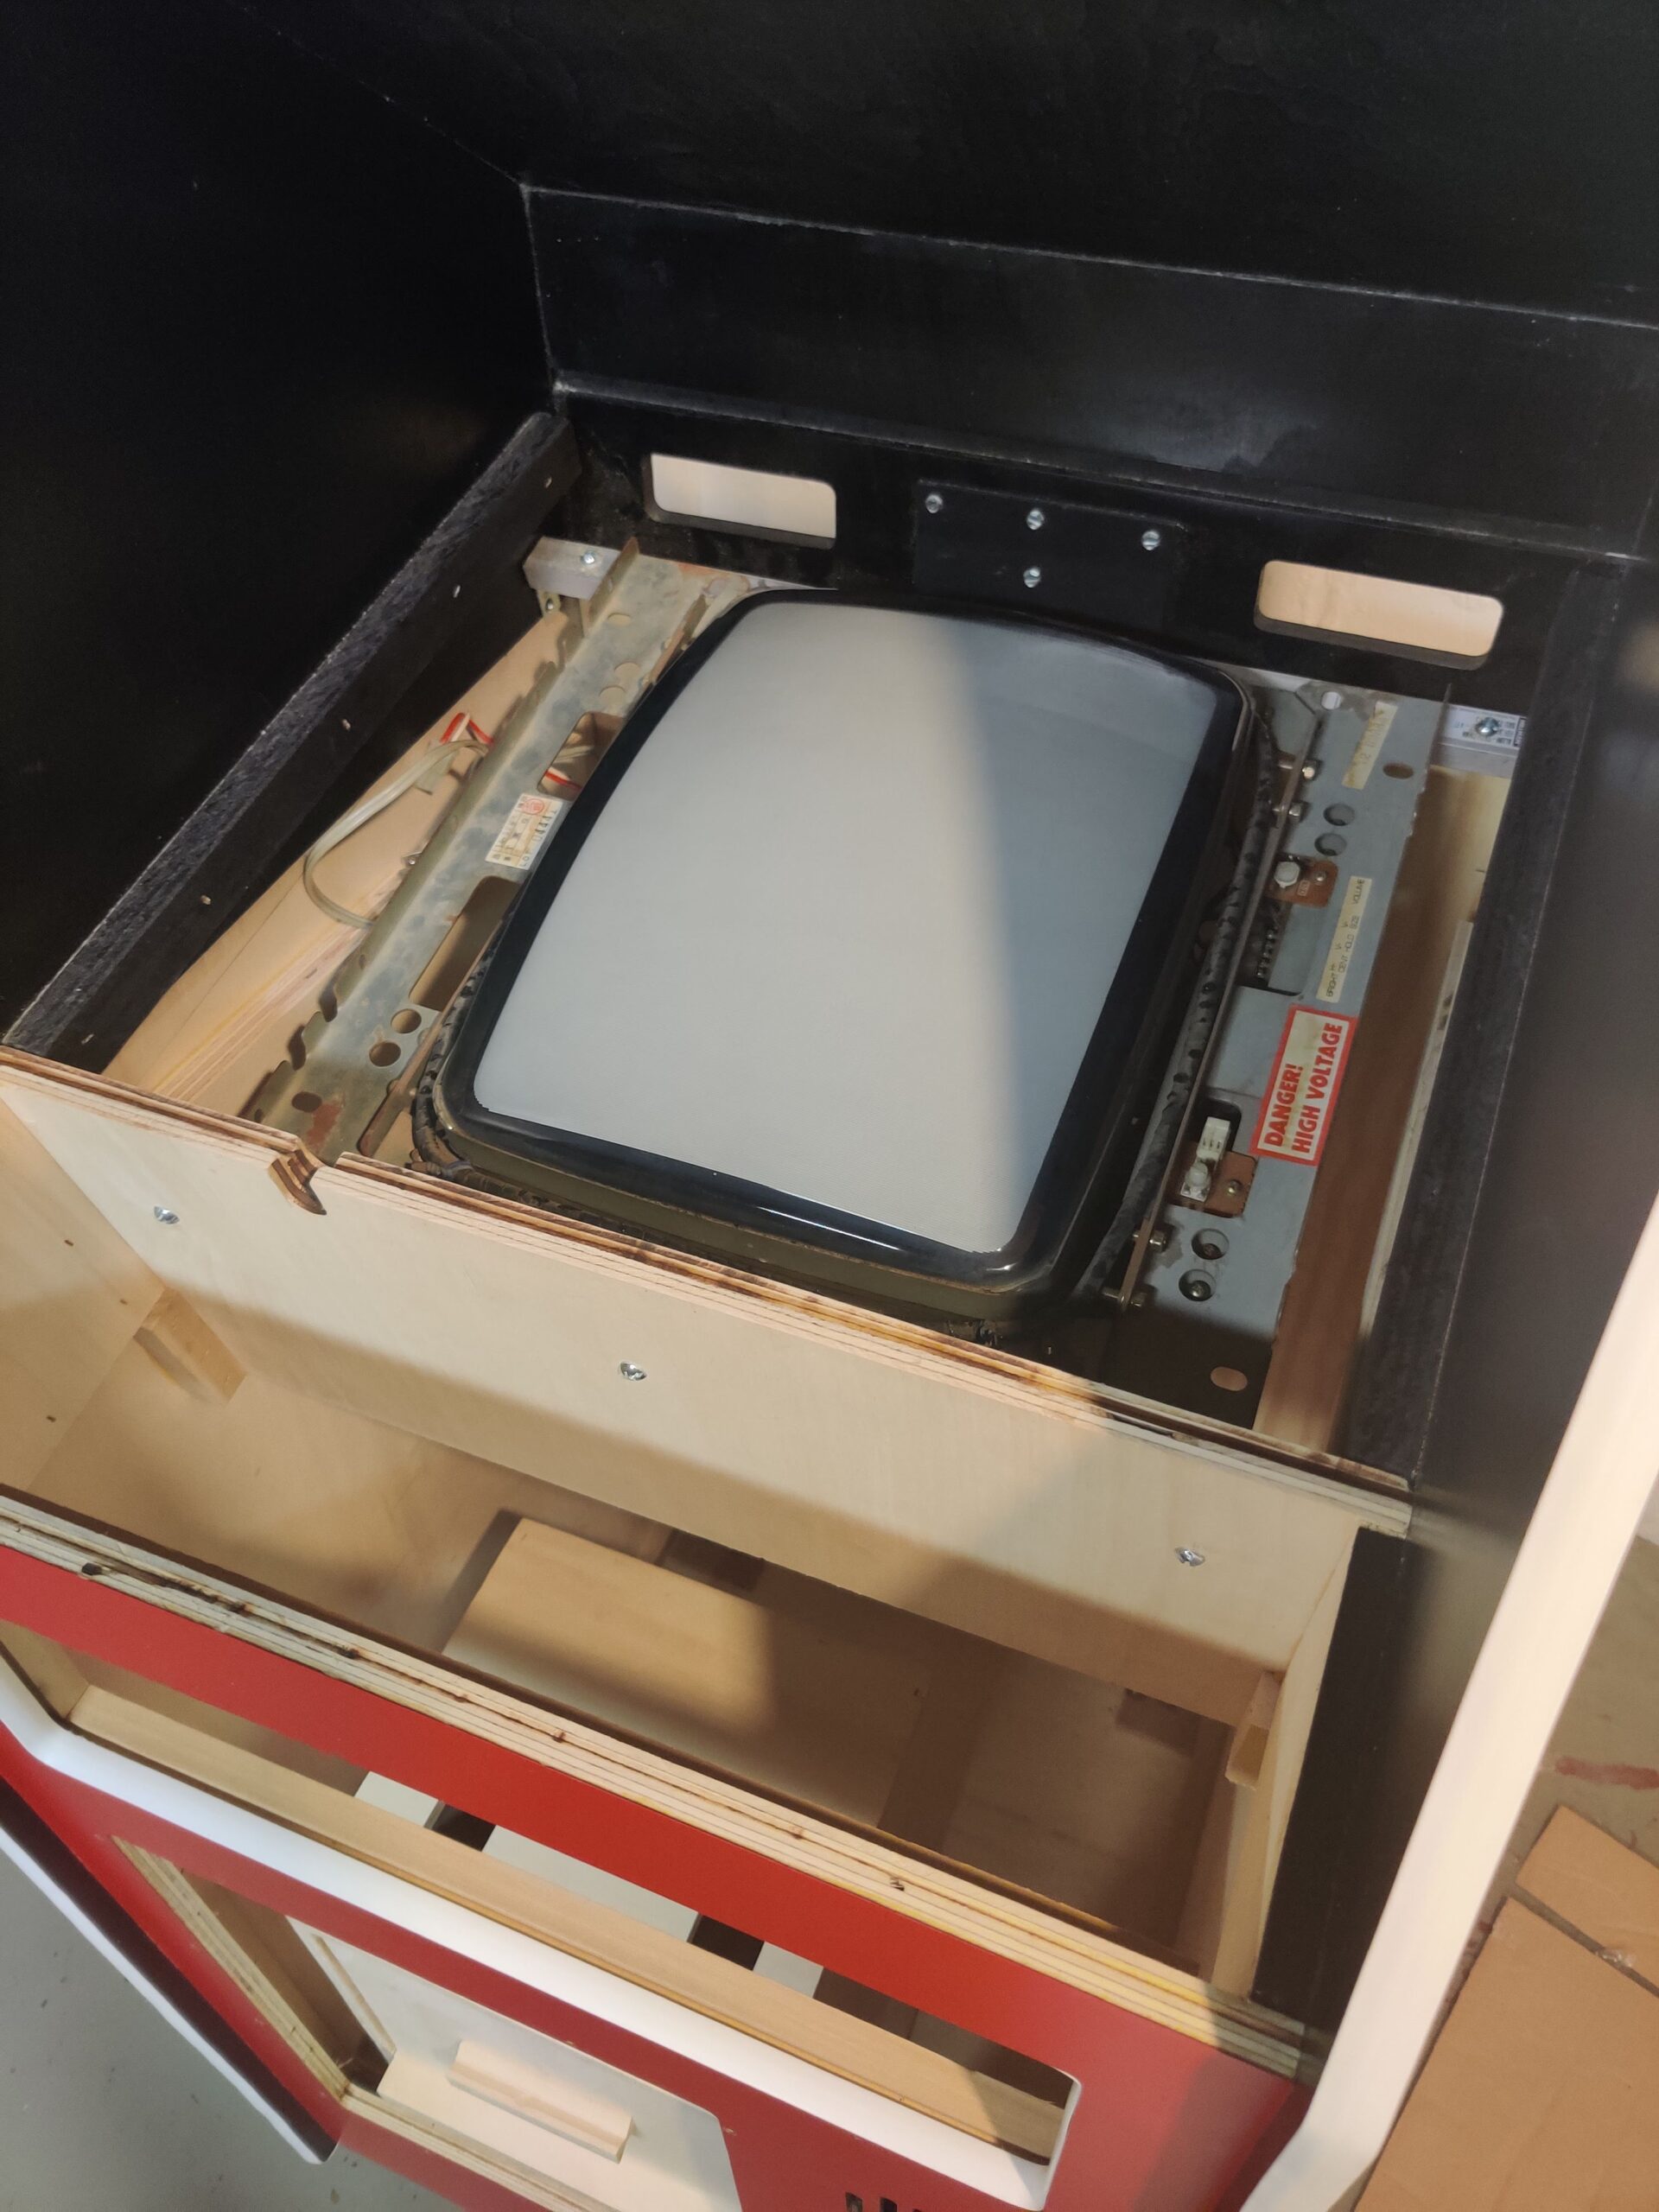
Monitor sits snuggly in place
Testing the monitor inside the cabaret after building a power station for it
The desktop is using CRTEmudriver so that it can properly send out 15khz with a combination of GroovyMAME and Switchres to properly set each game that I play for my monitor.
Assembling the Donkey Kong 3 Cabaret
The artwork is in so it’s time to assemble this bad boy! There are a few little things to prep the cabinet, like drilling mounting holes for the monitor and crimping ends on a bunch of wires. In the span of one weekend, I took care of that.
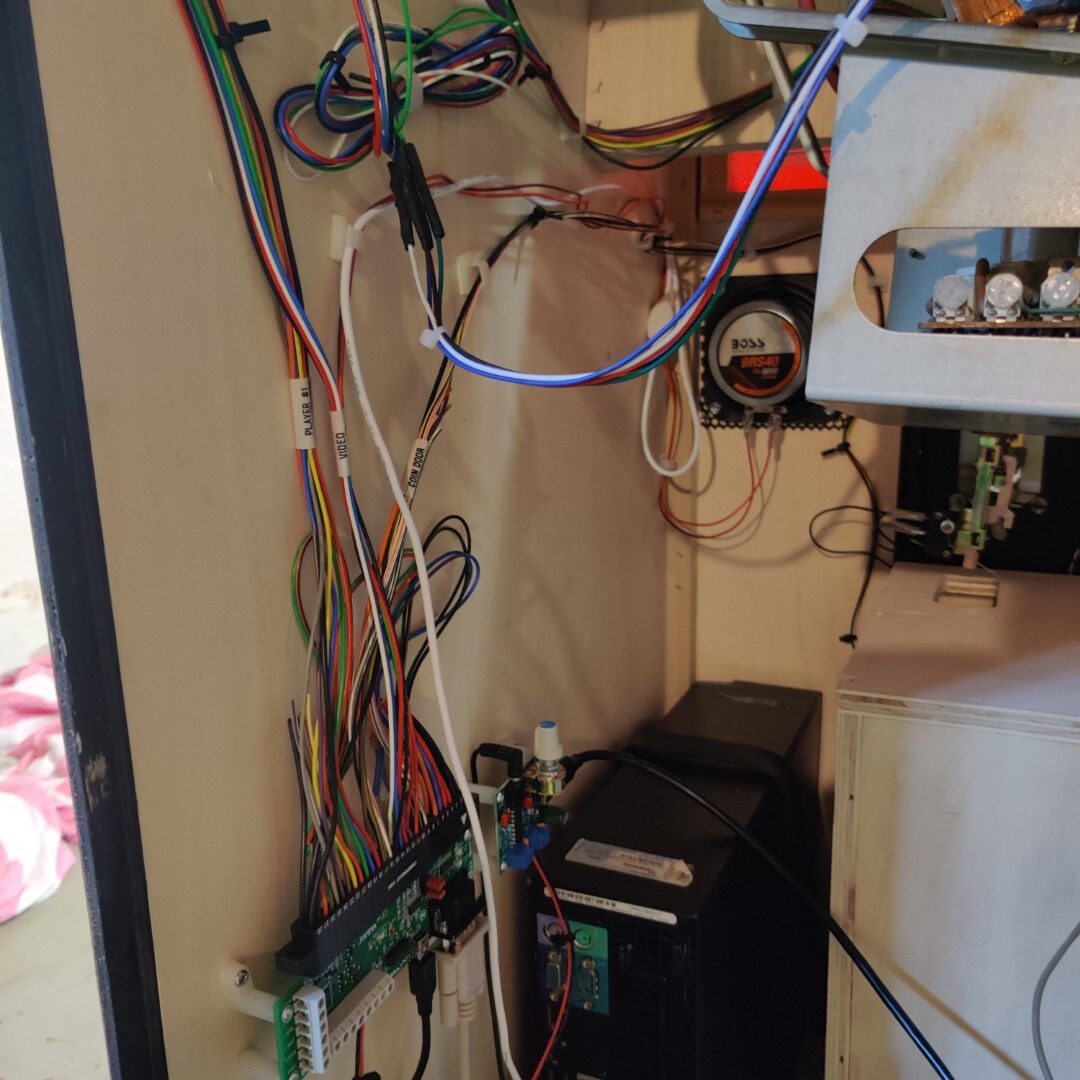
jpac and audio amp mounted
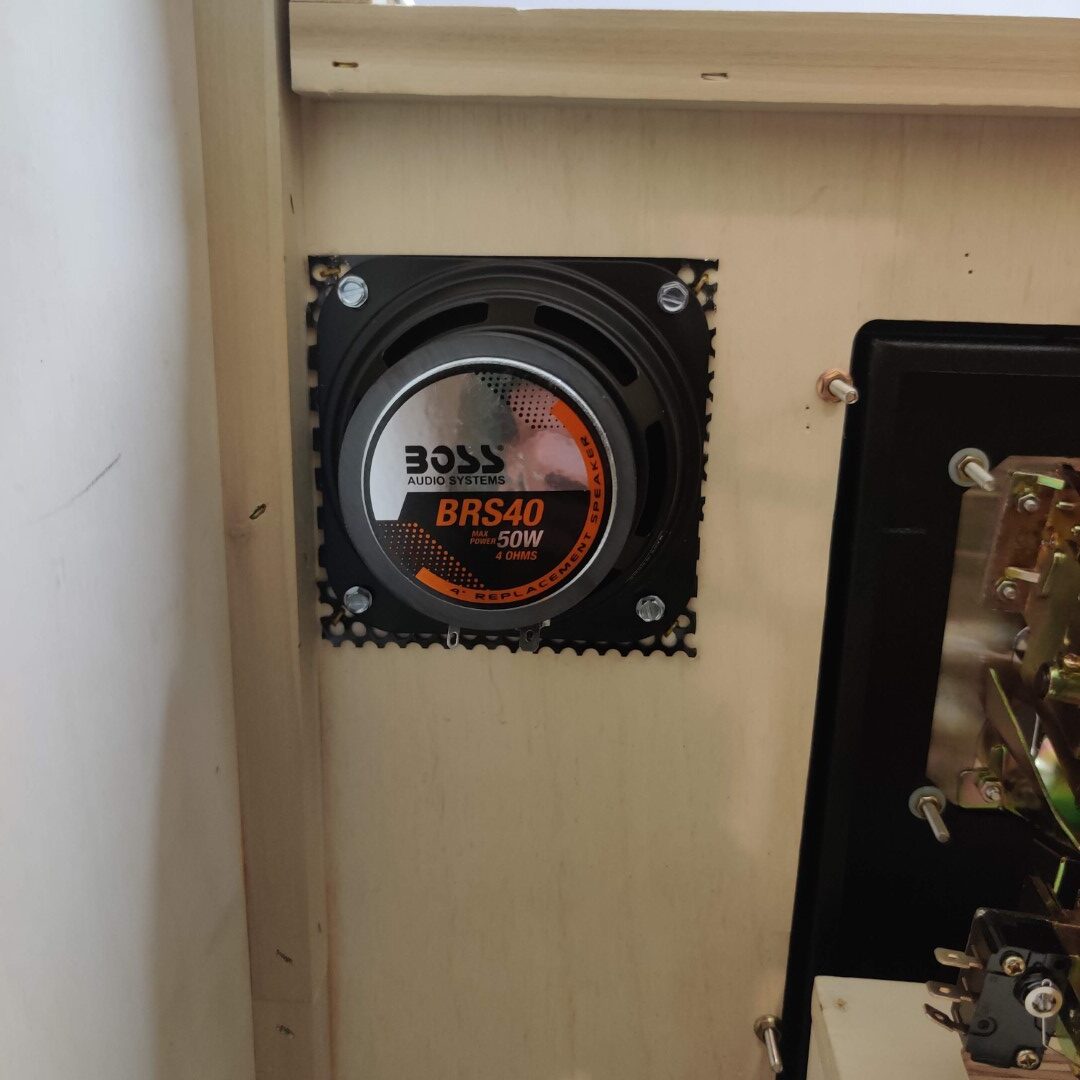
Speaker mounted
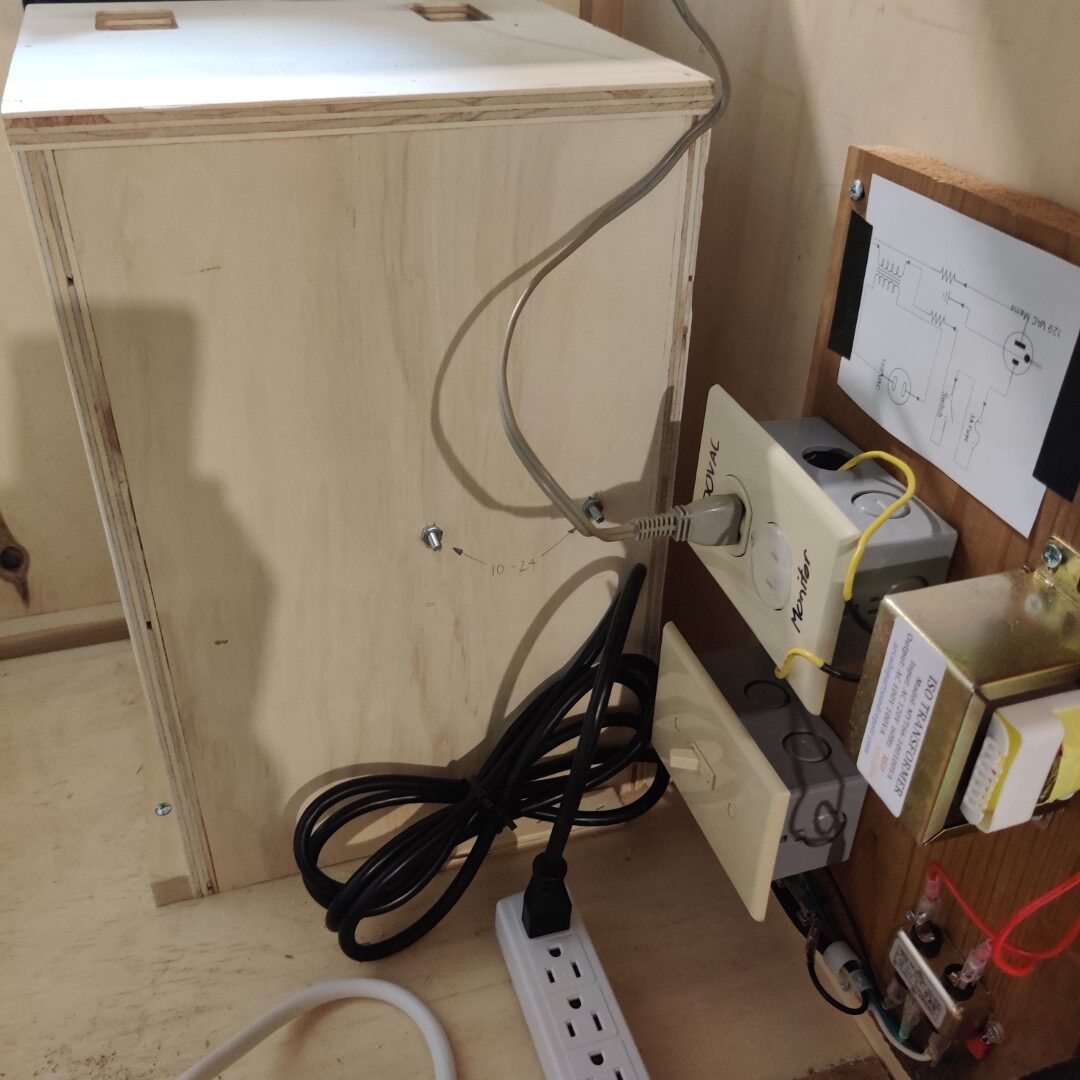
Power transformer moutned
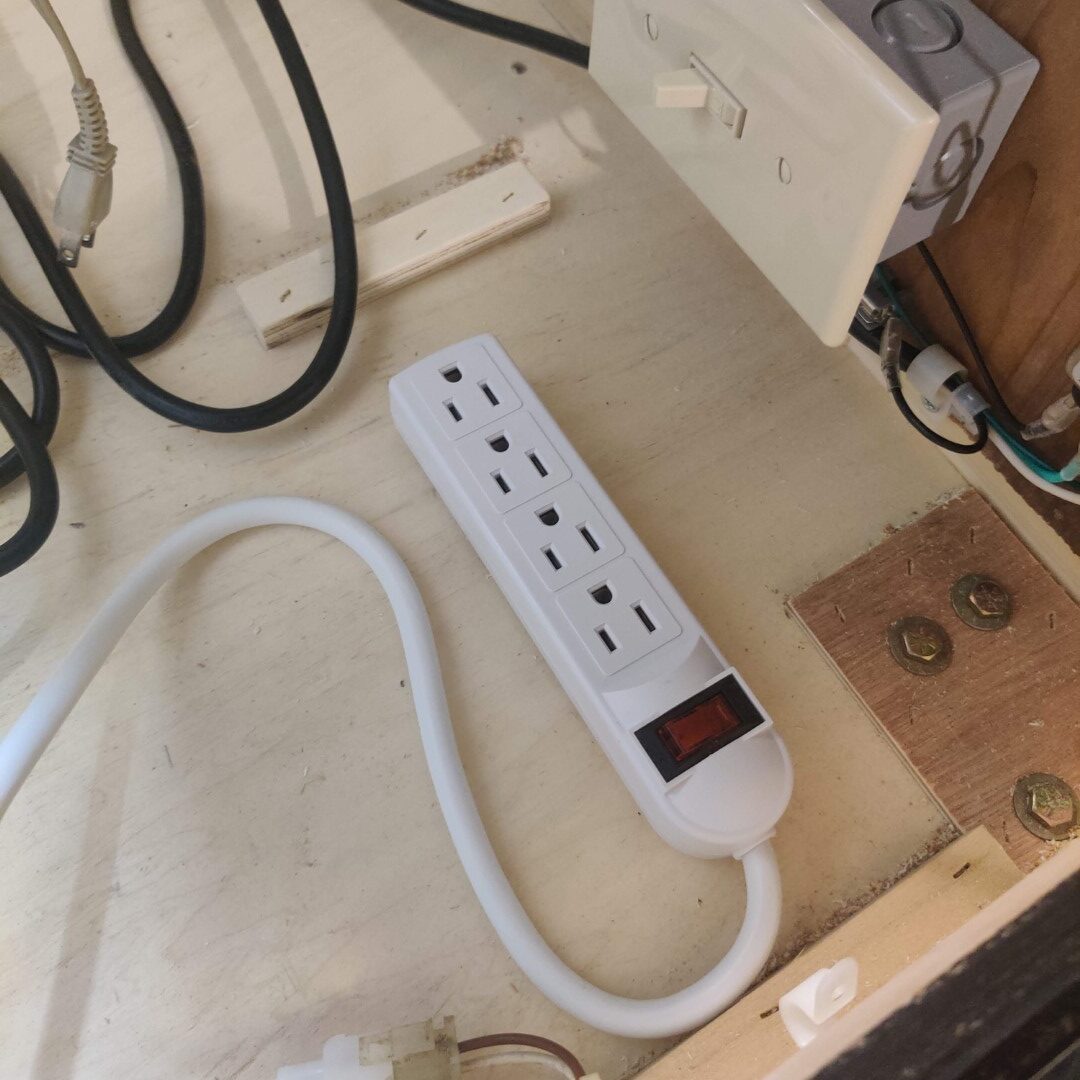
Power stirip mounted
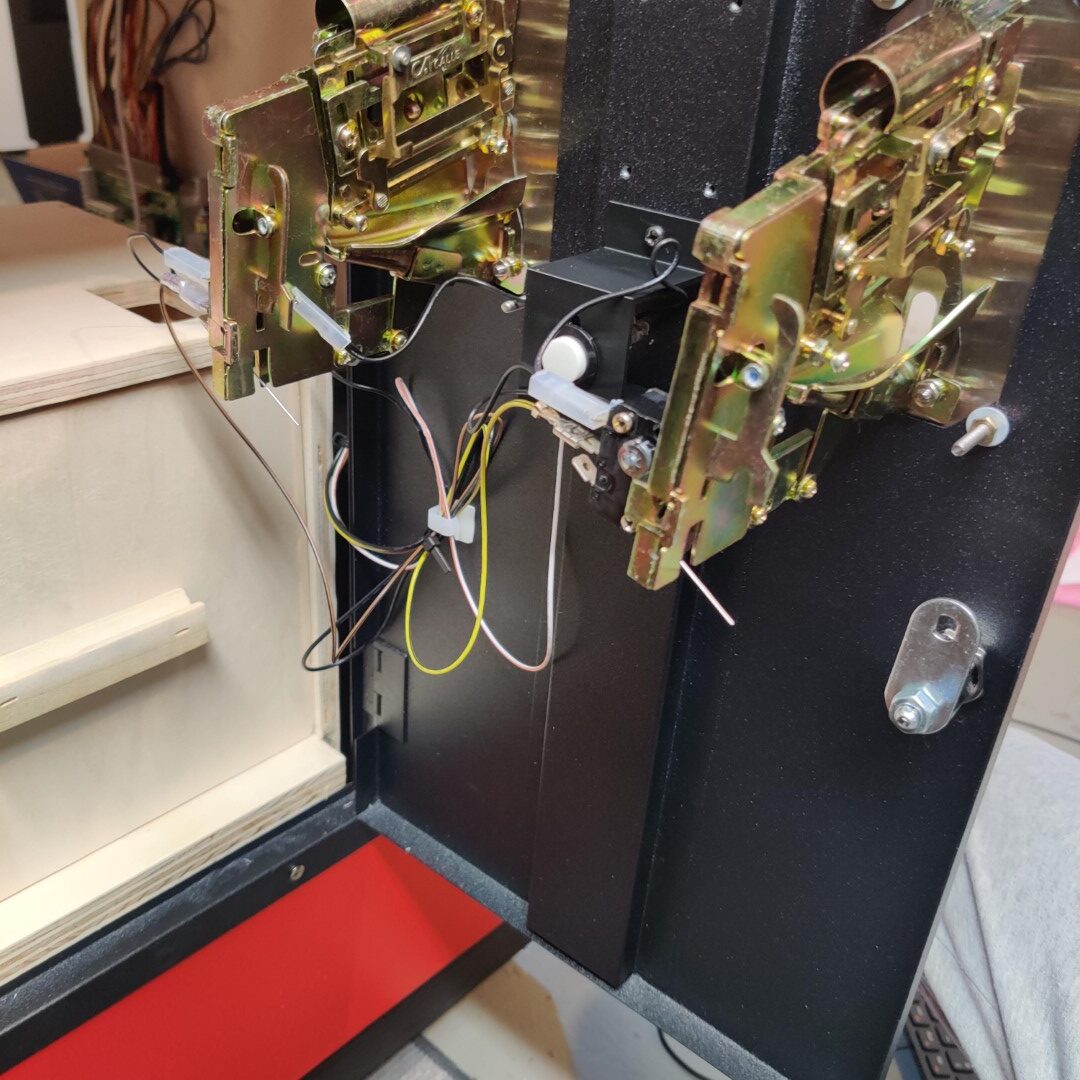
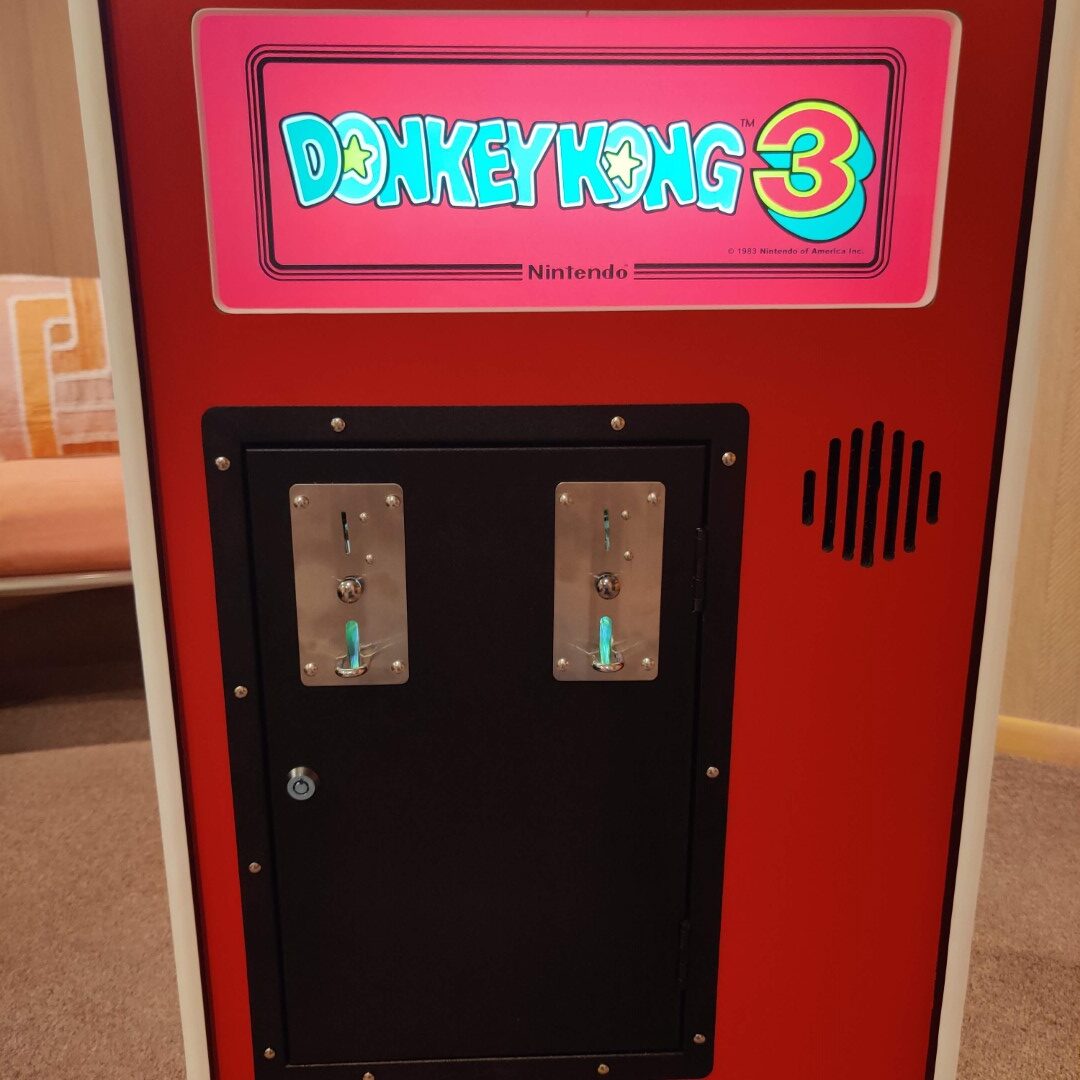
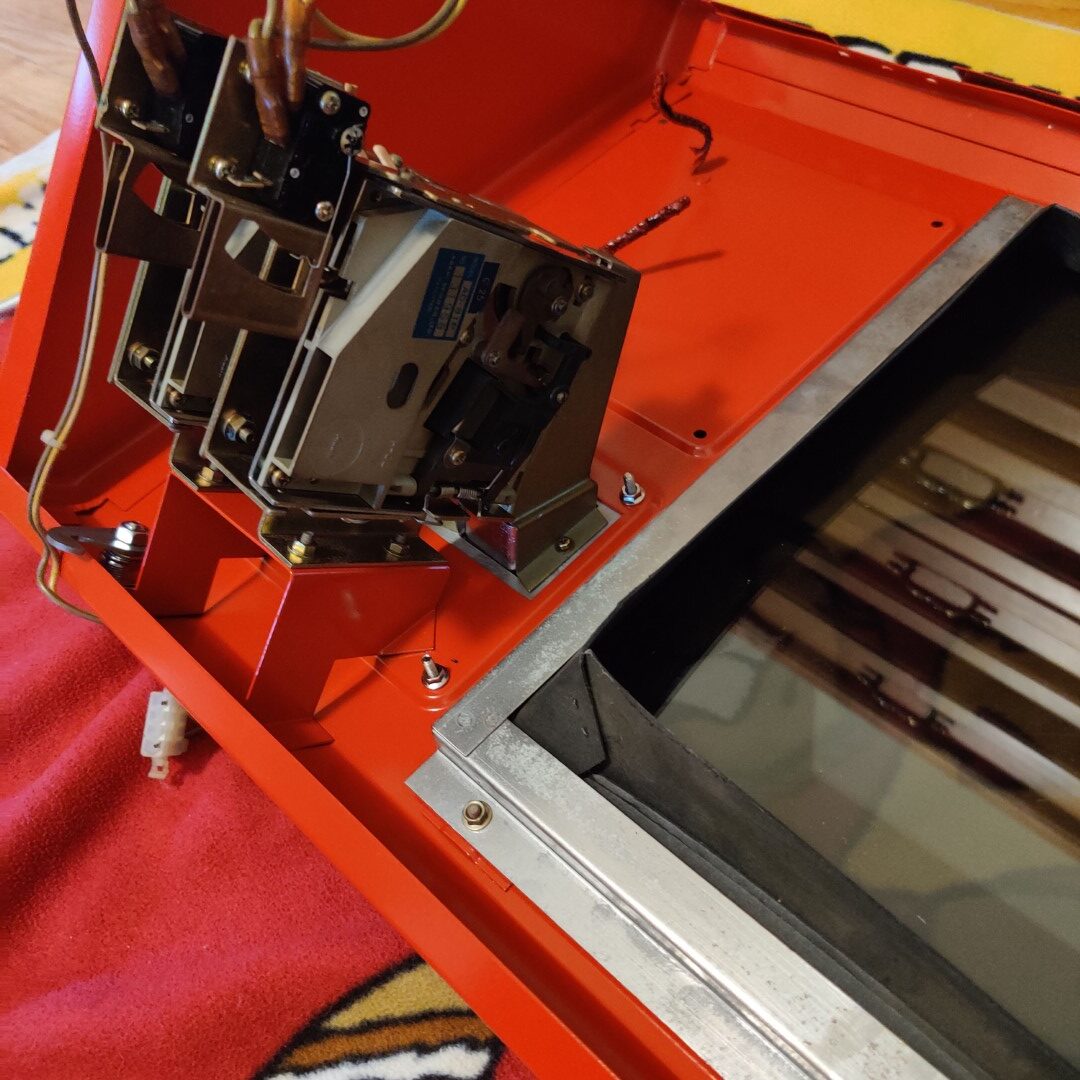
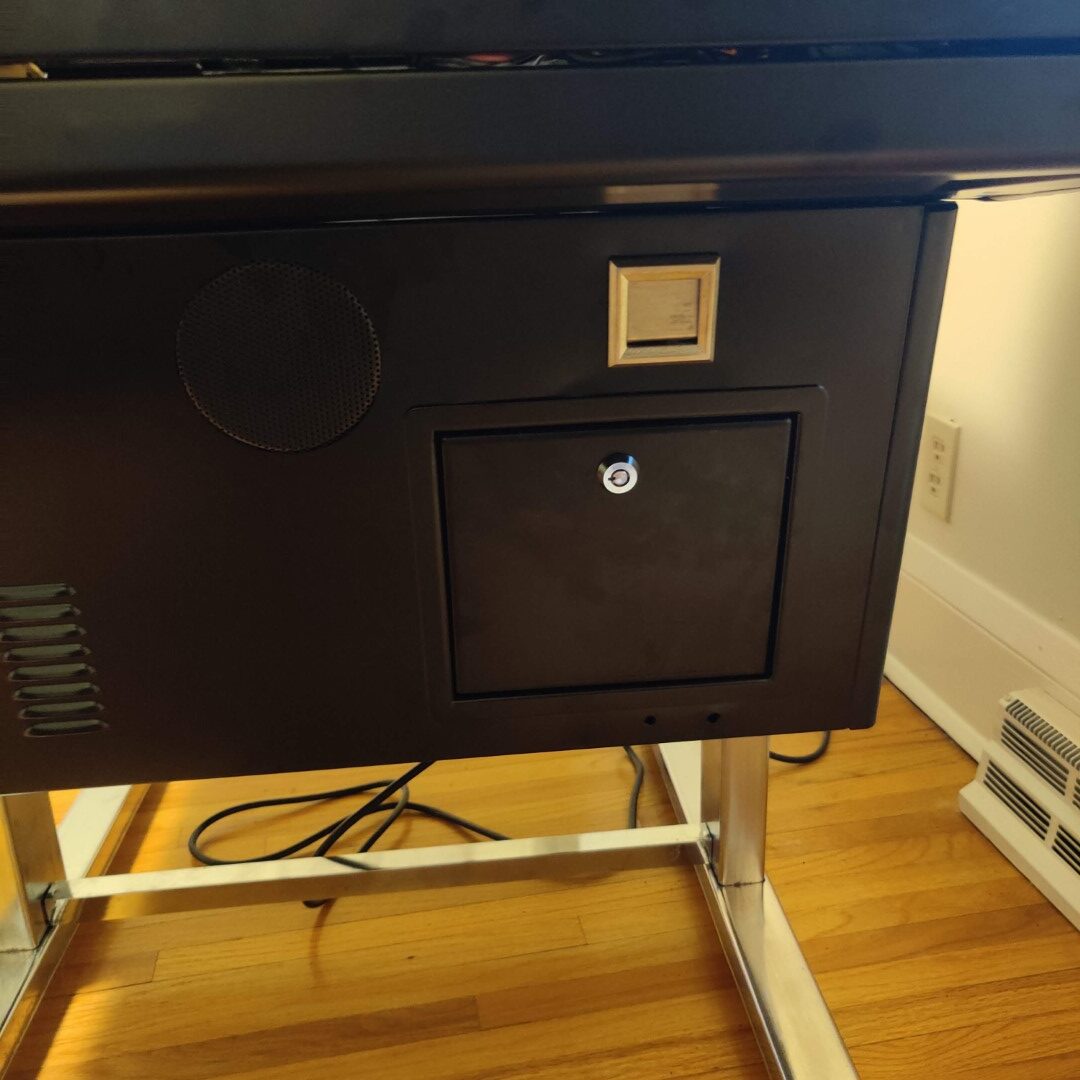
Coin box
Dry fitting the coin door
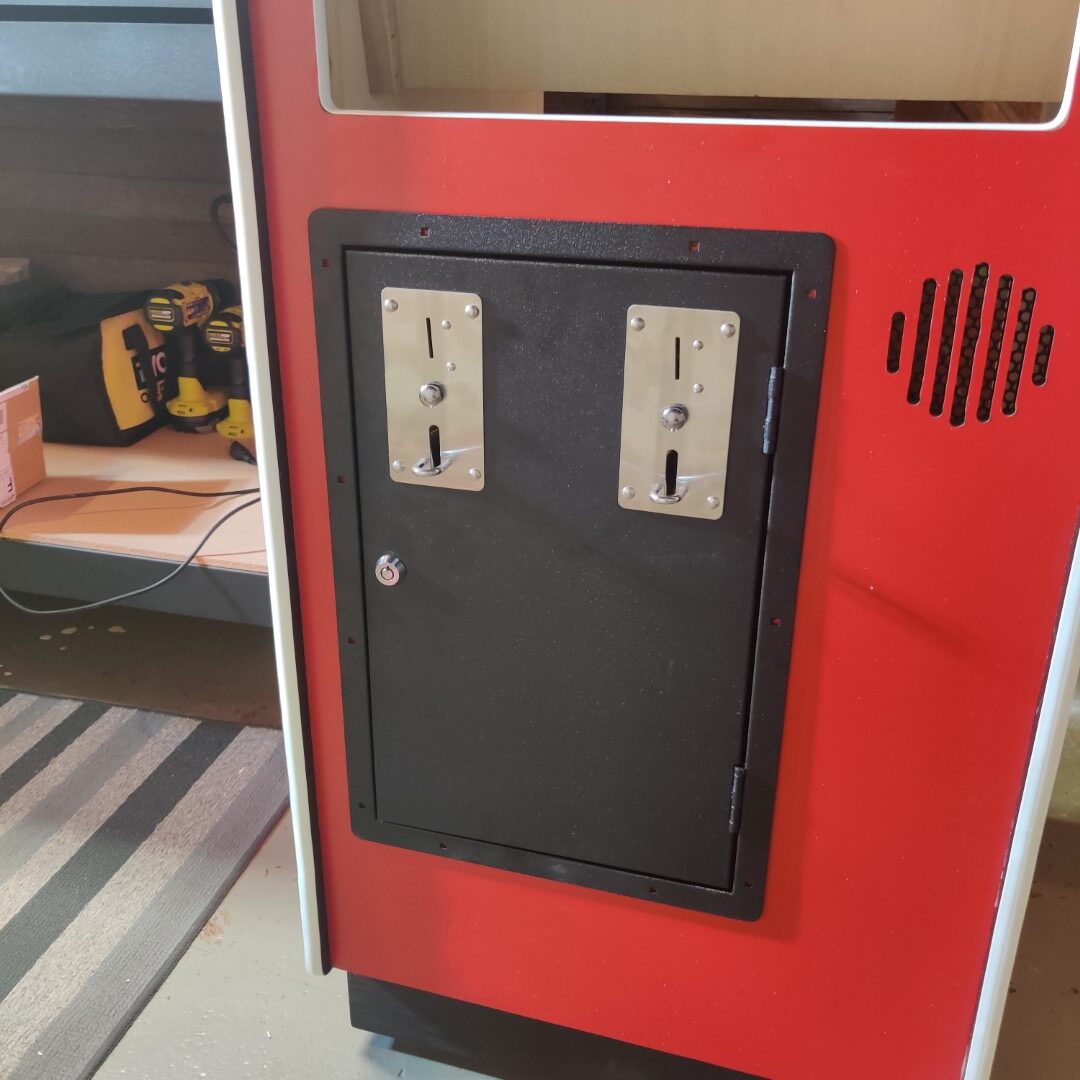
Bolting in coin door
Monitor bolted in
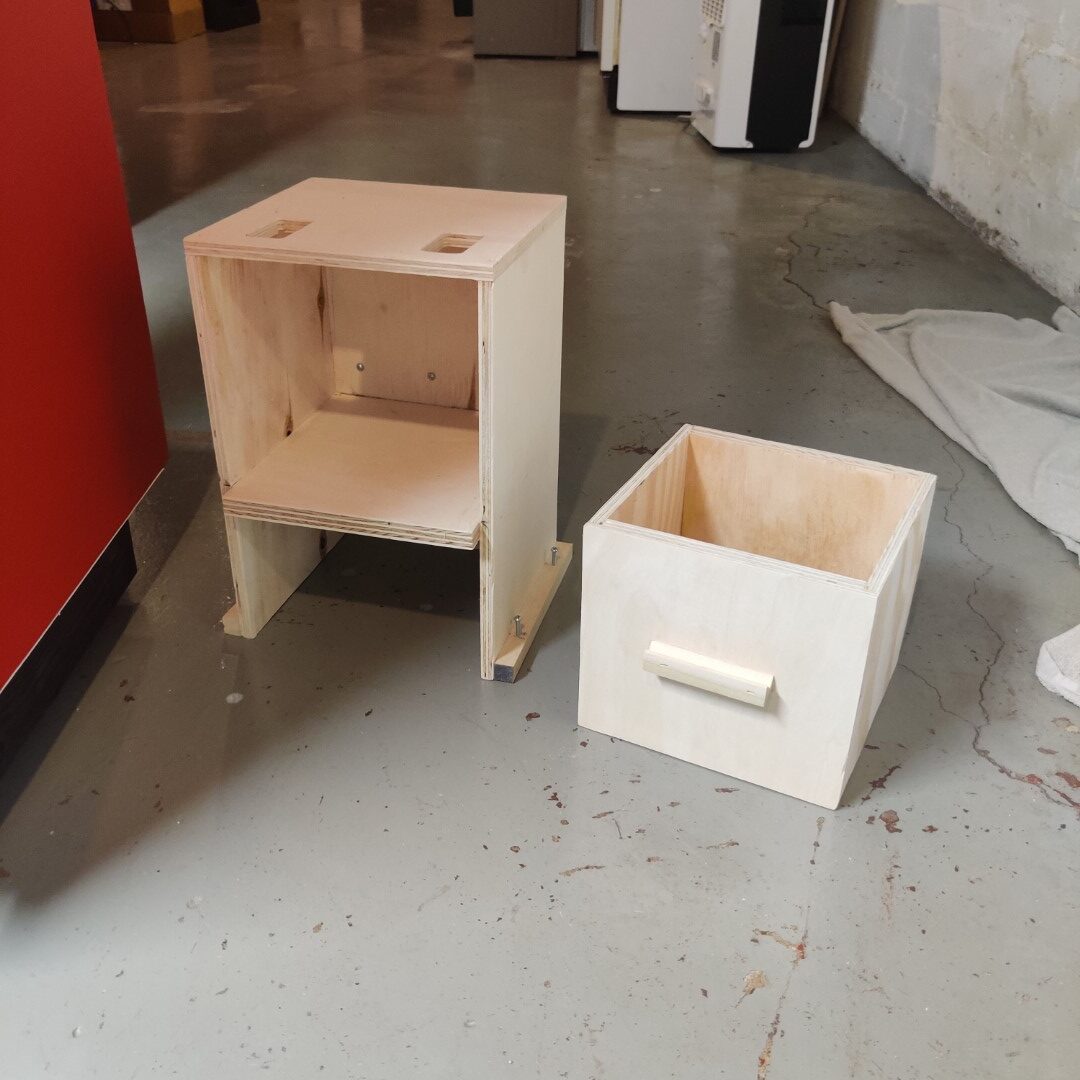
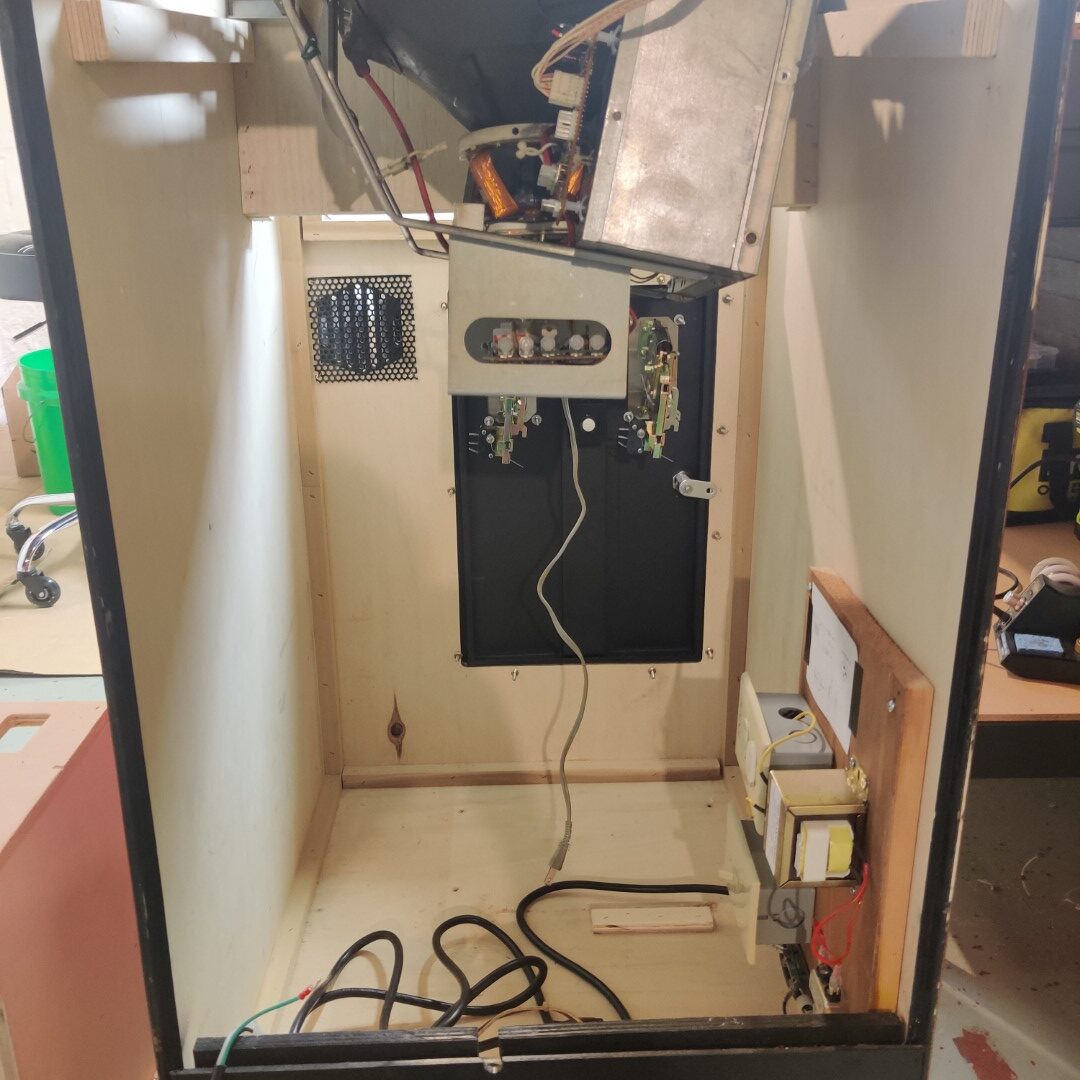
About half the items in place
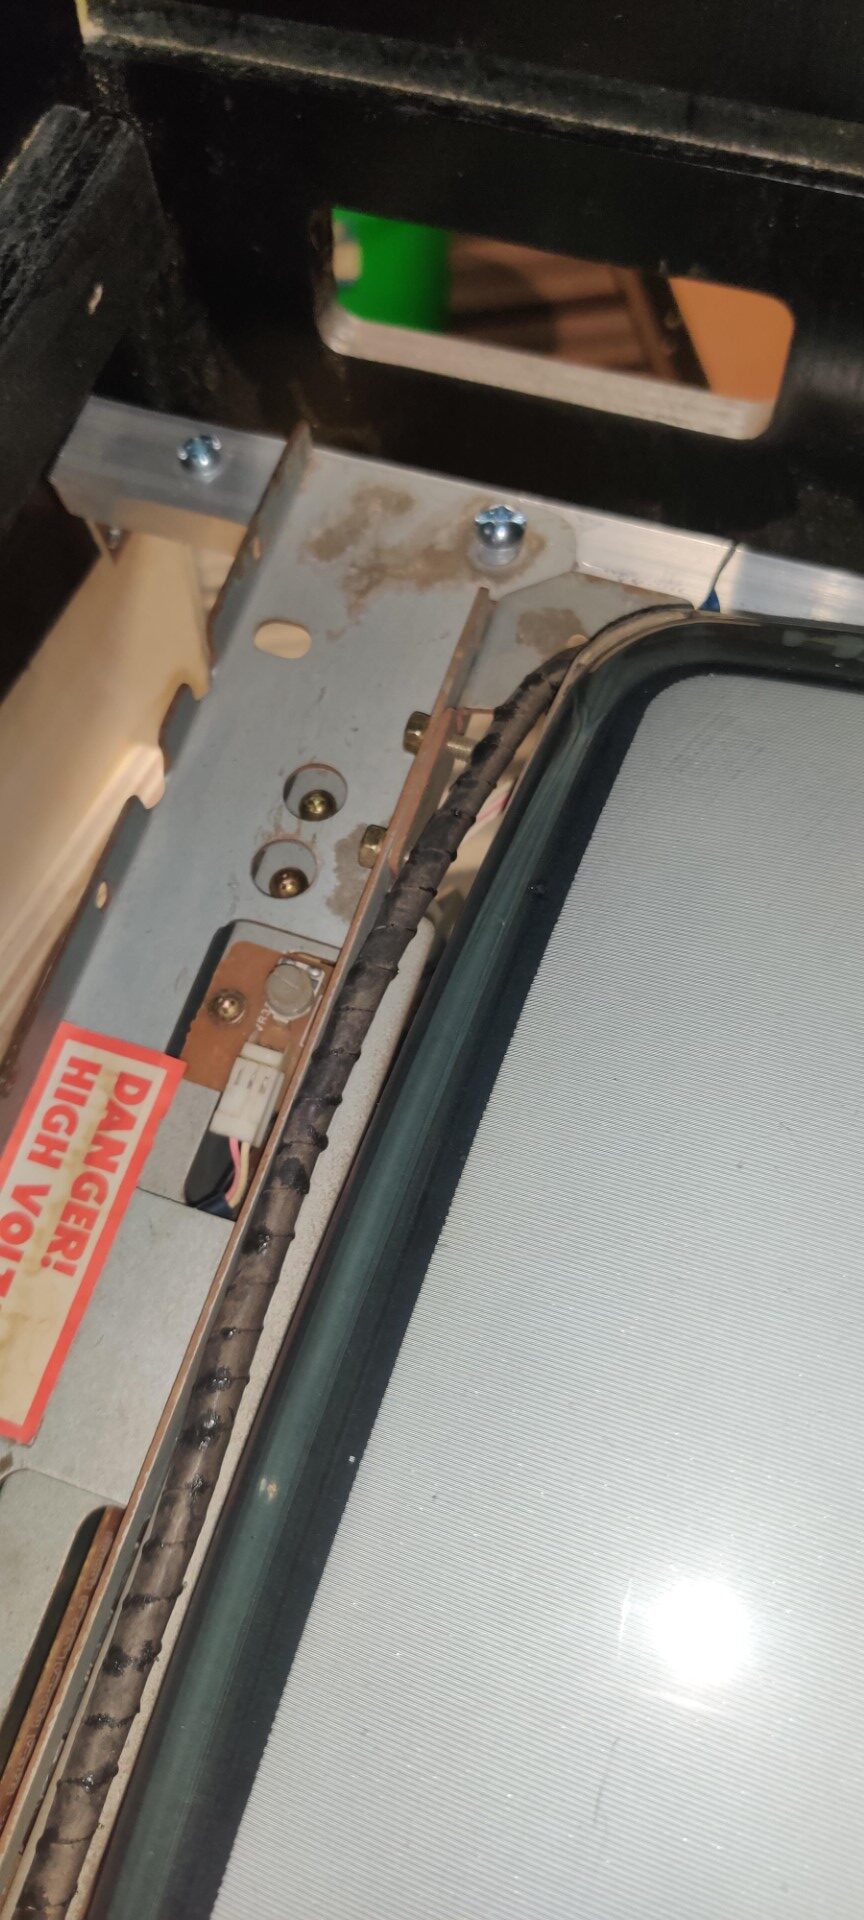
Closeup of monitor bolts
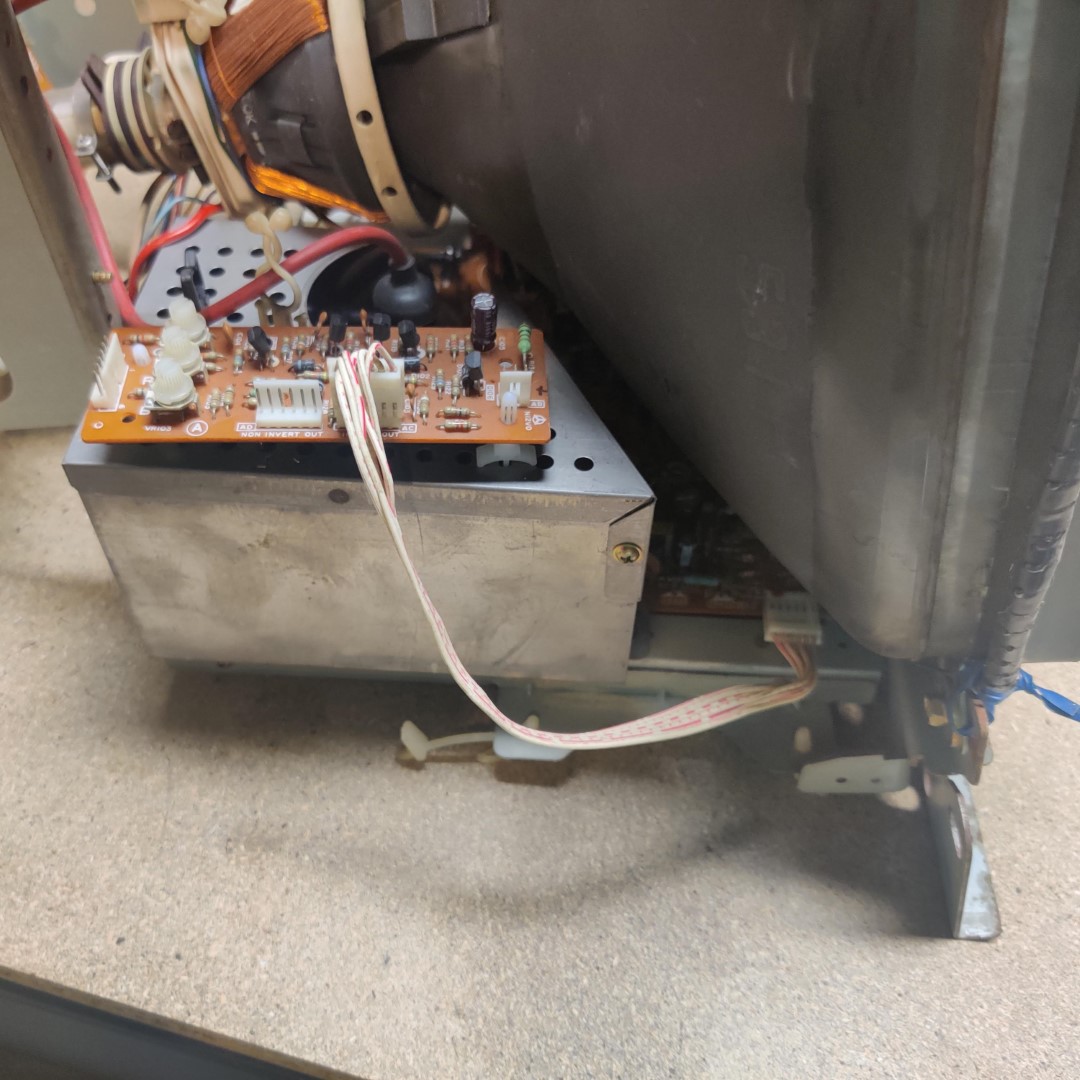
Nintendo color inverter board mounted to monitor
Nintedo 14″ Sanyo CRT monitor
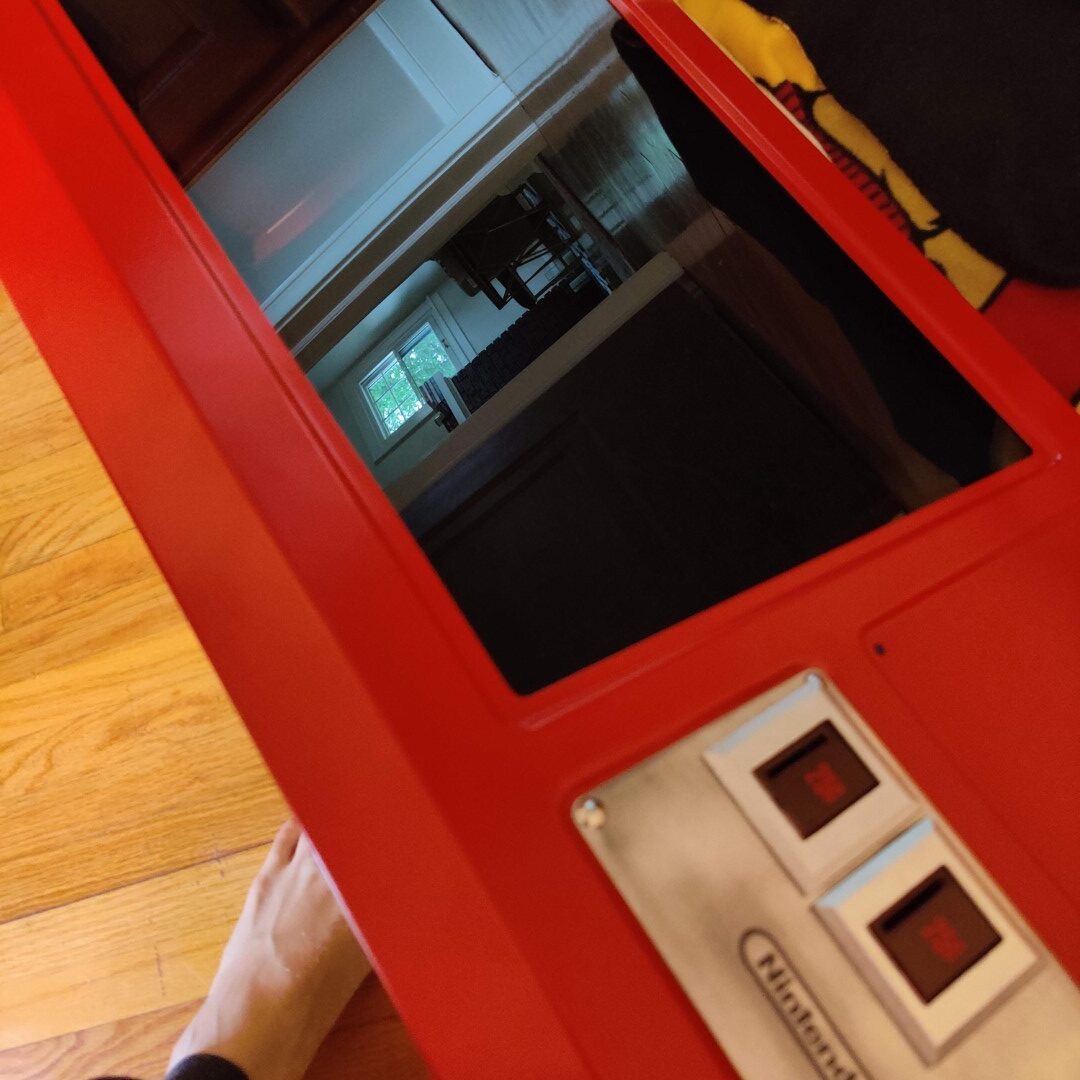
Testing the control panel
Testing the control panel
Assembling control panel
Assembling control panel
Assembling control panel
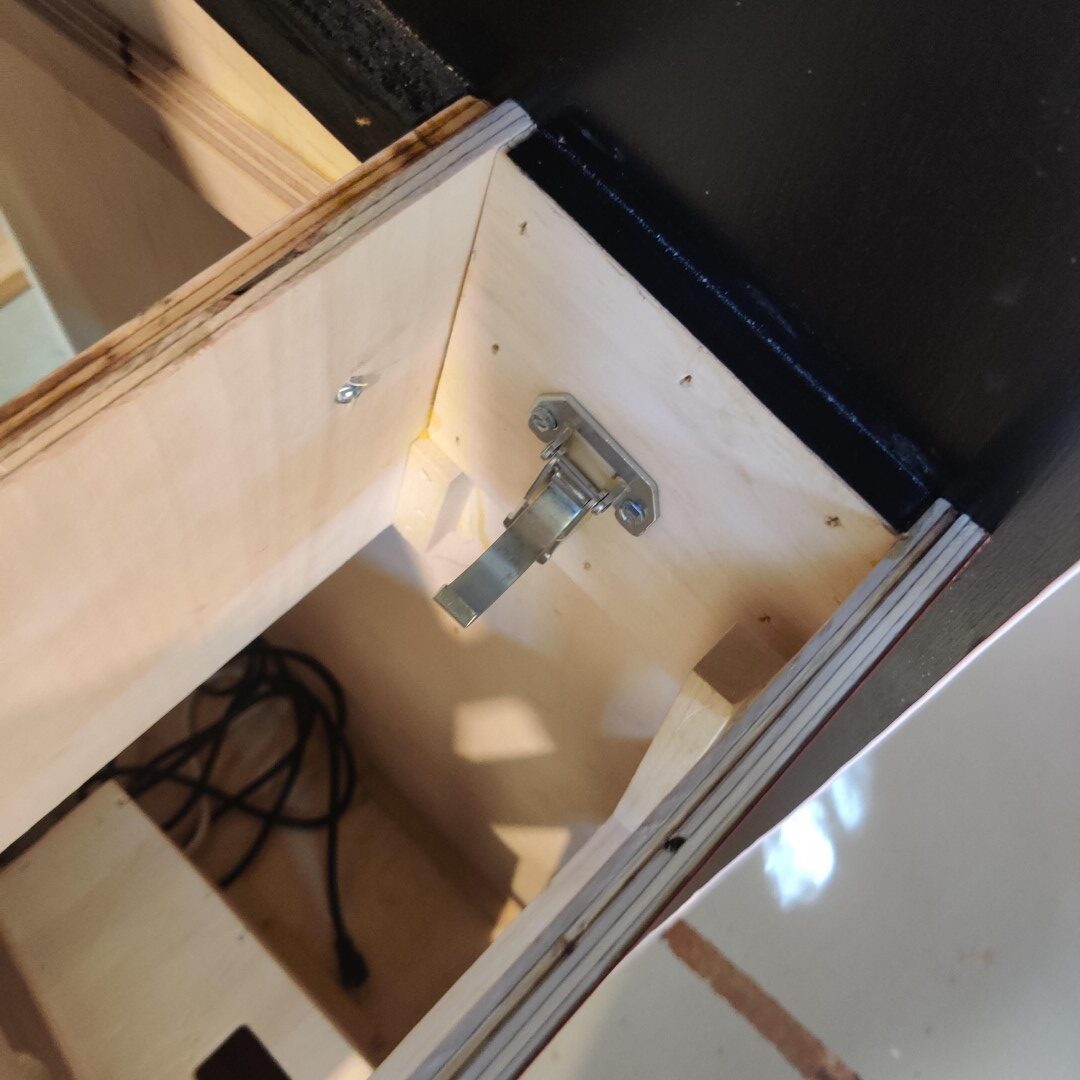
Installing control panel latches
Previewing the arwork
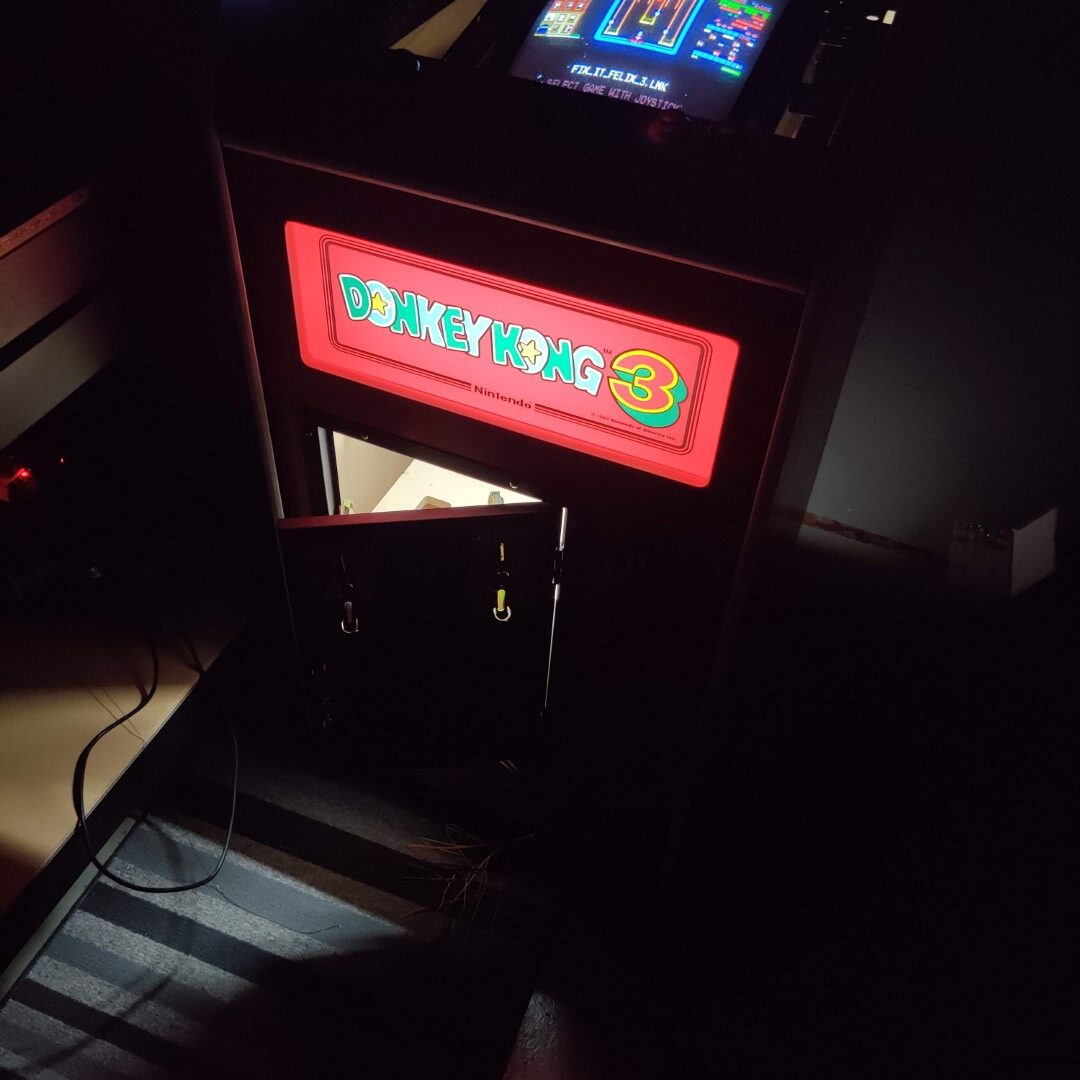
Donkey Kong 3 running
Donkey Kong 3 running
Dry fitting the control panel and bezel
Dry fitting the control panel and bezel
Closeup of marquee
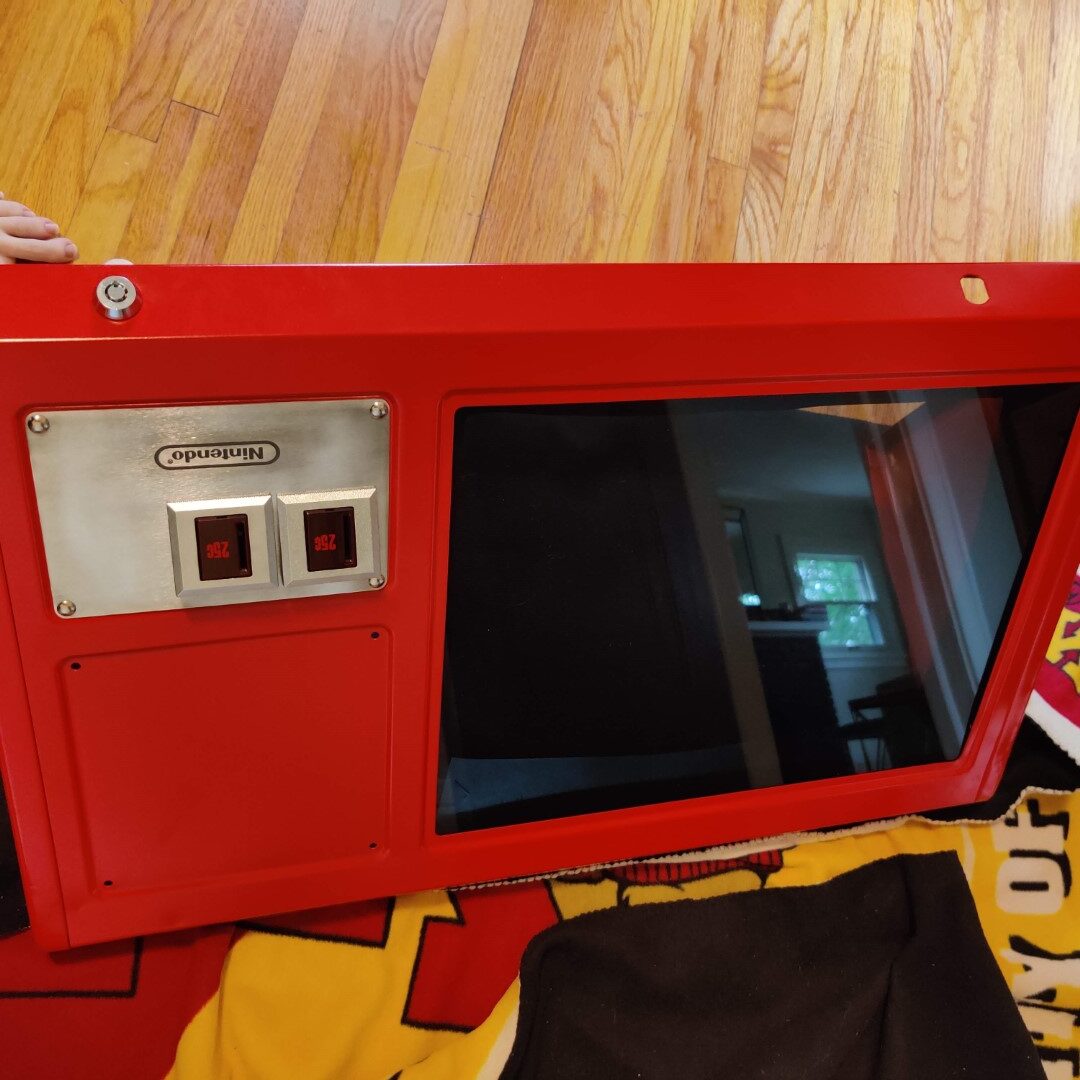
Closeup of control panel
Closeup of bezel
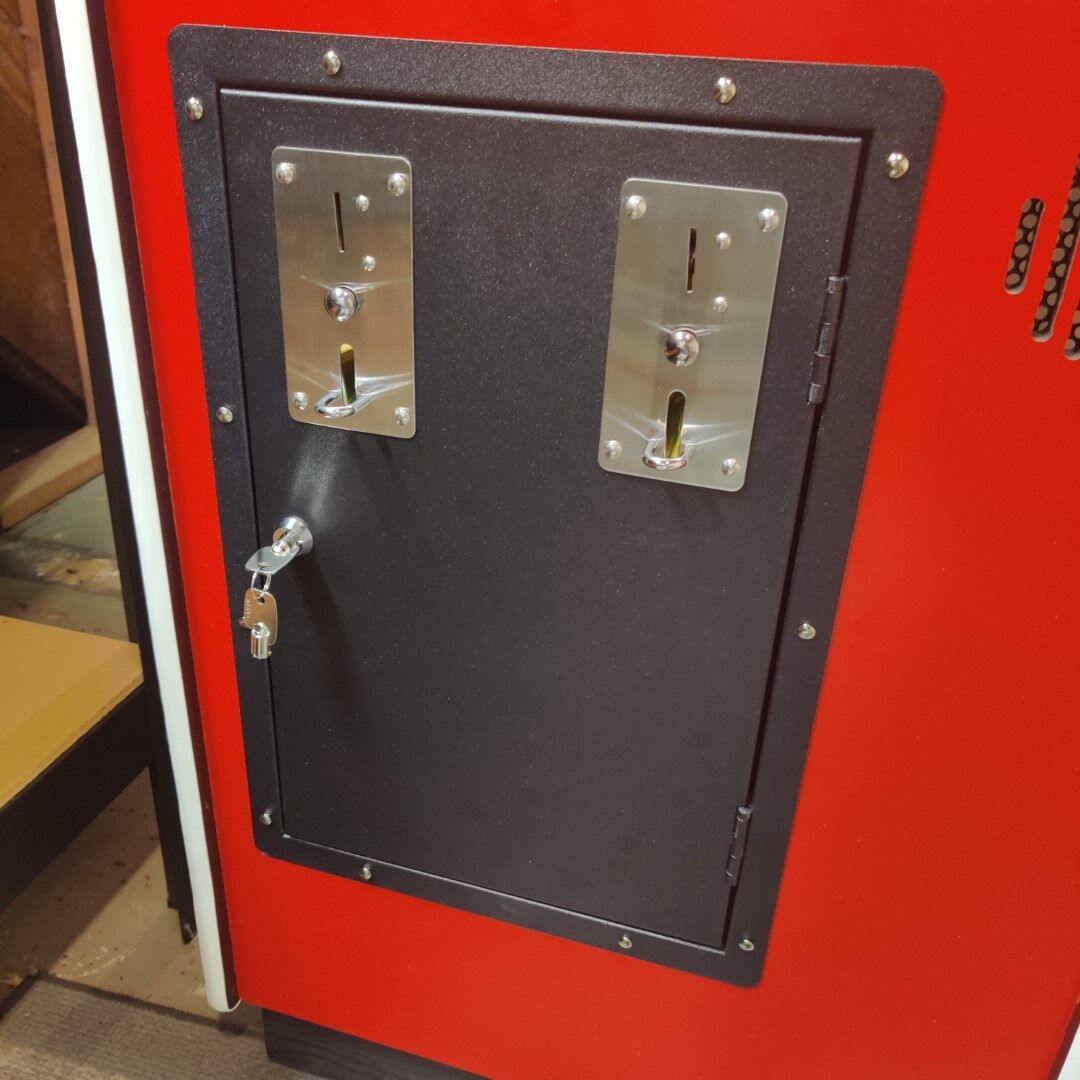
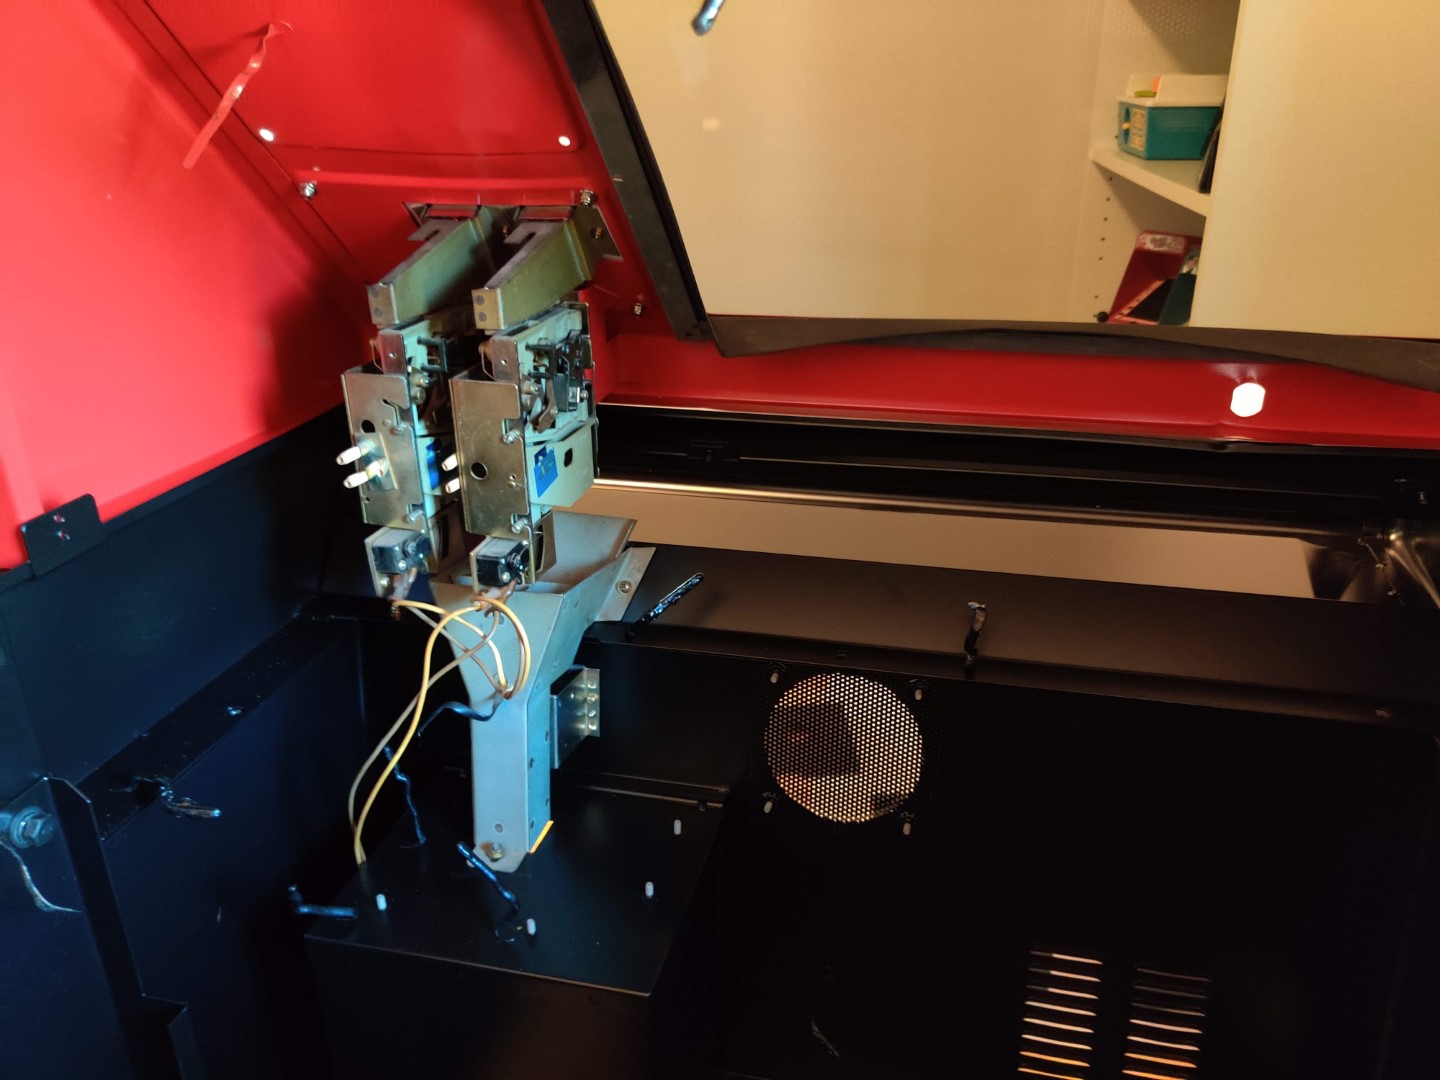
Coin mechs installed and wired
Starting to power items
Wiring in place
Testing marquee light
Testing marquee light
Installed power switch
Dry fitting the control panel and bezel
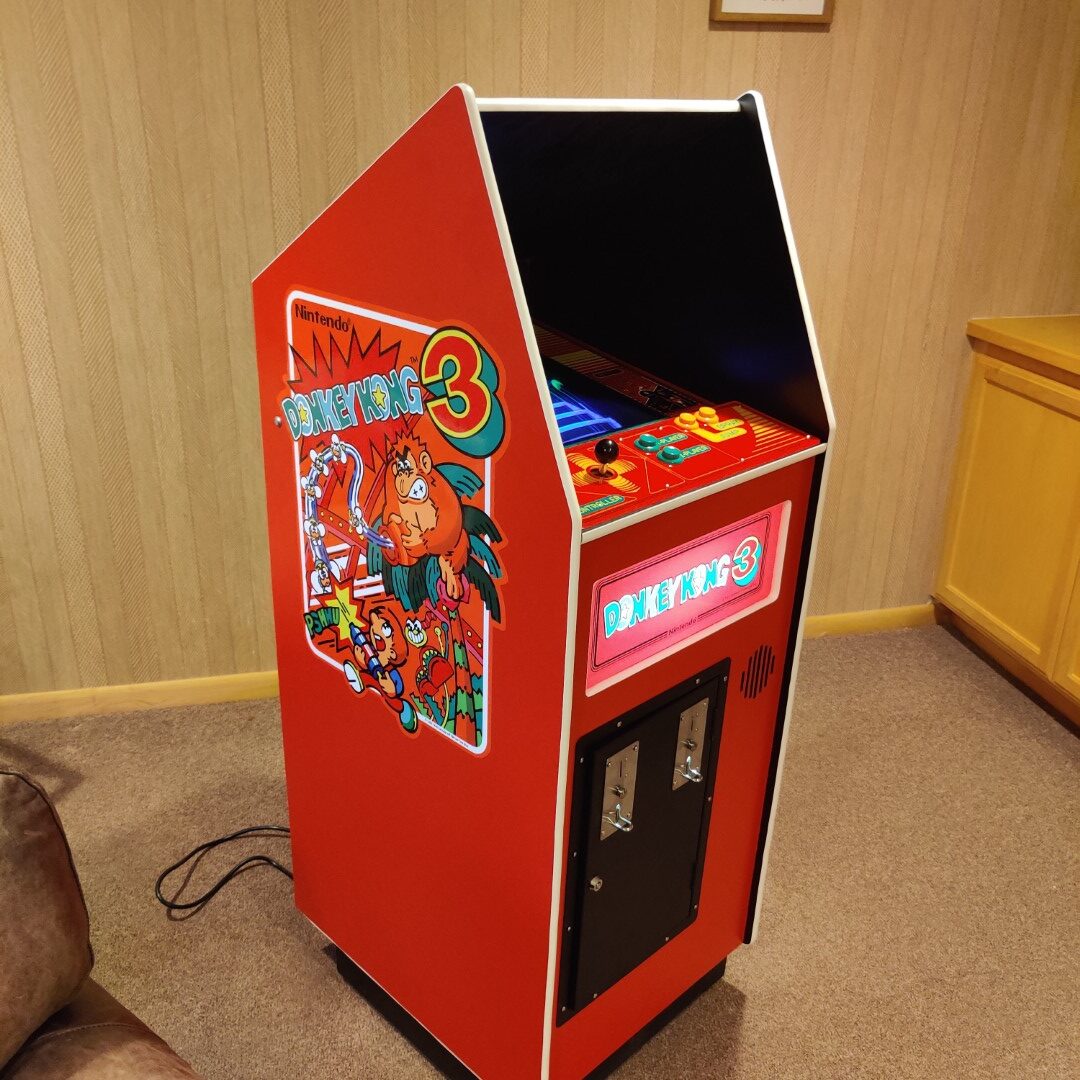
Dry fitting the artowrk
Sideart on
Sideart on with marquee lit up
Donkey Kong 3 Cabaret Tour Video
Here are some final beauty shots, me with the cabinet, and a tour video!
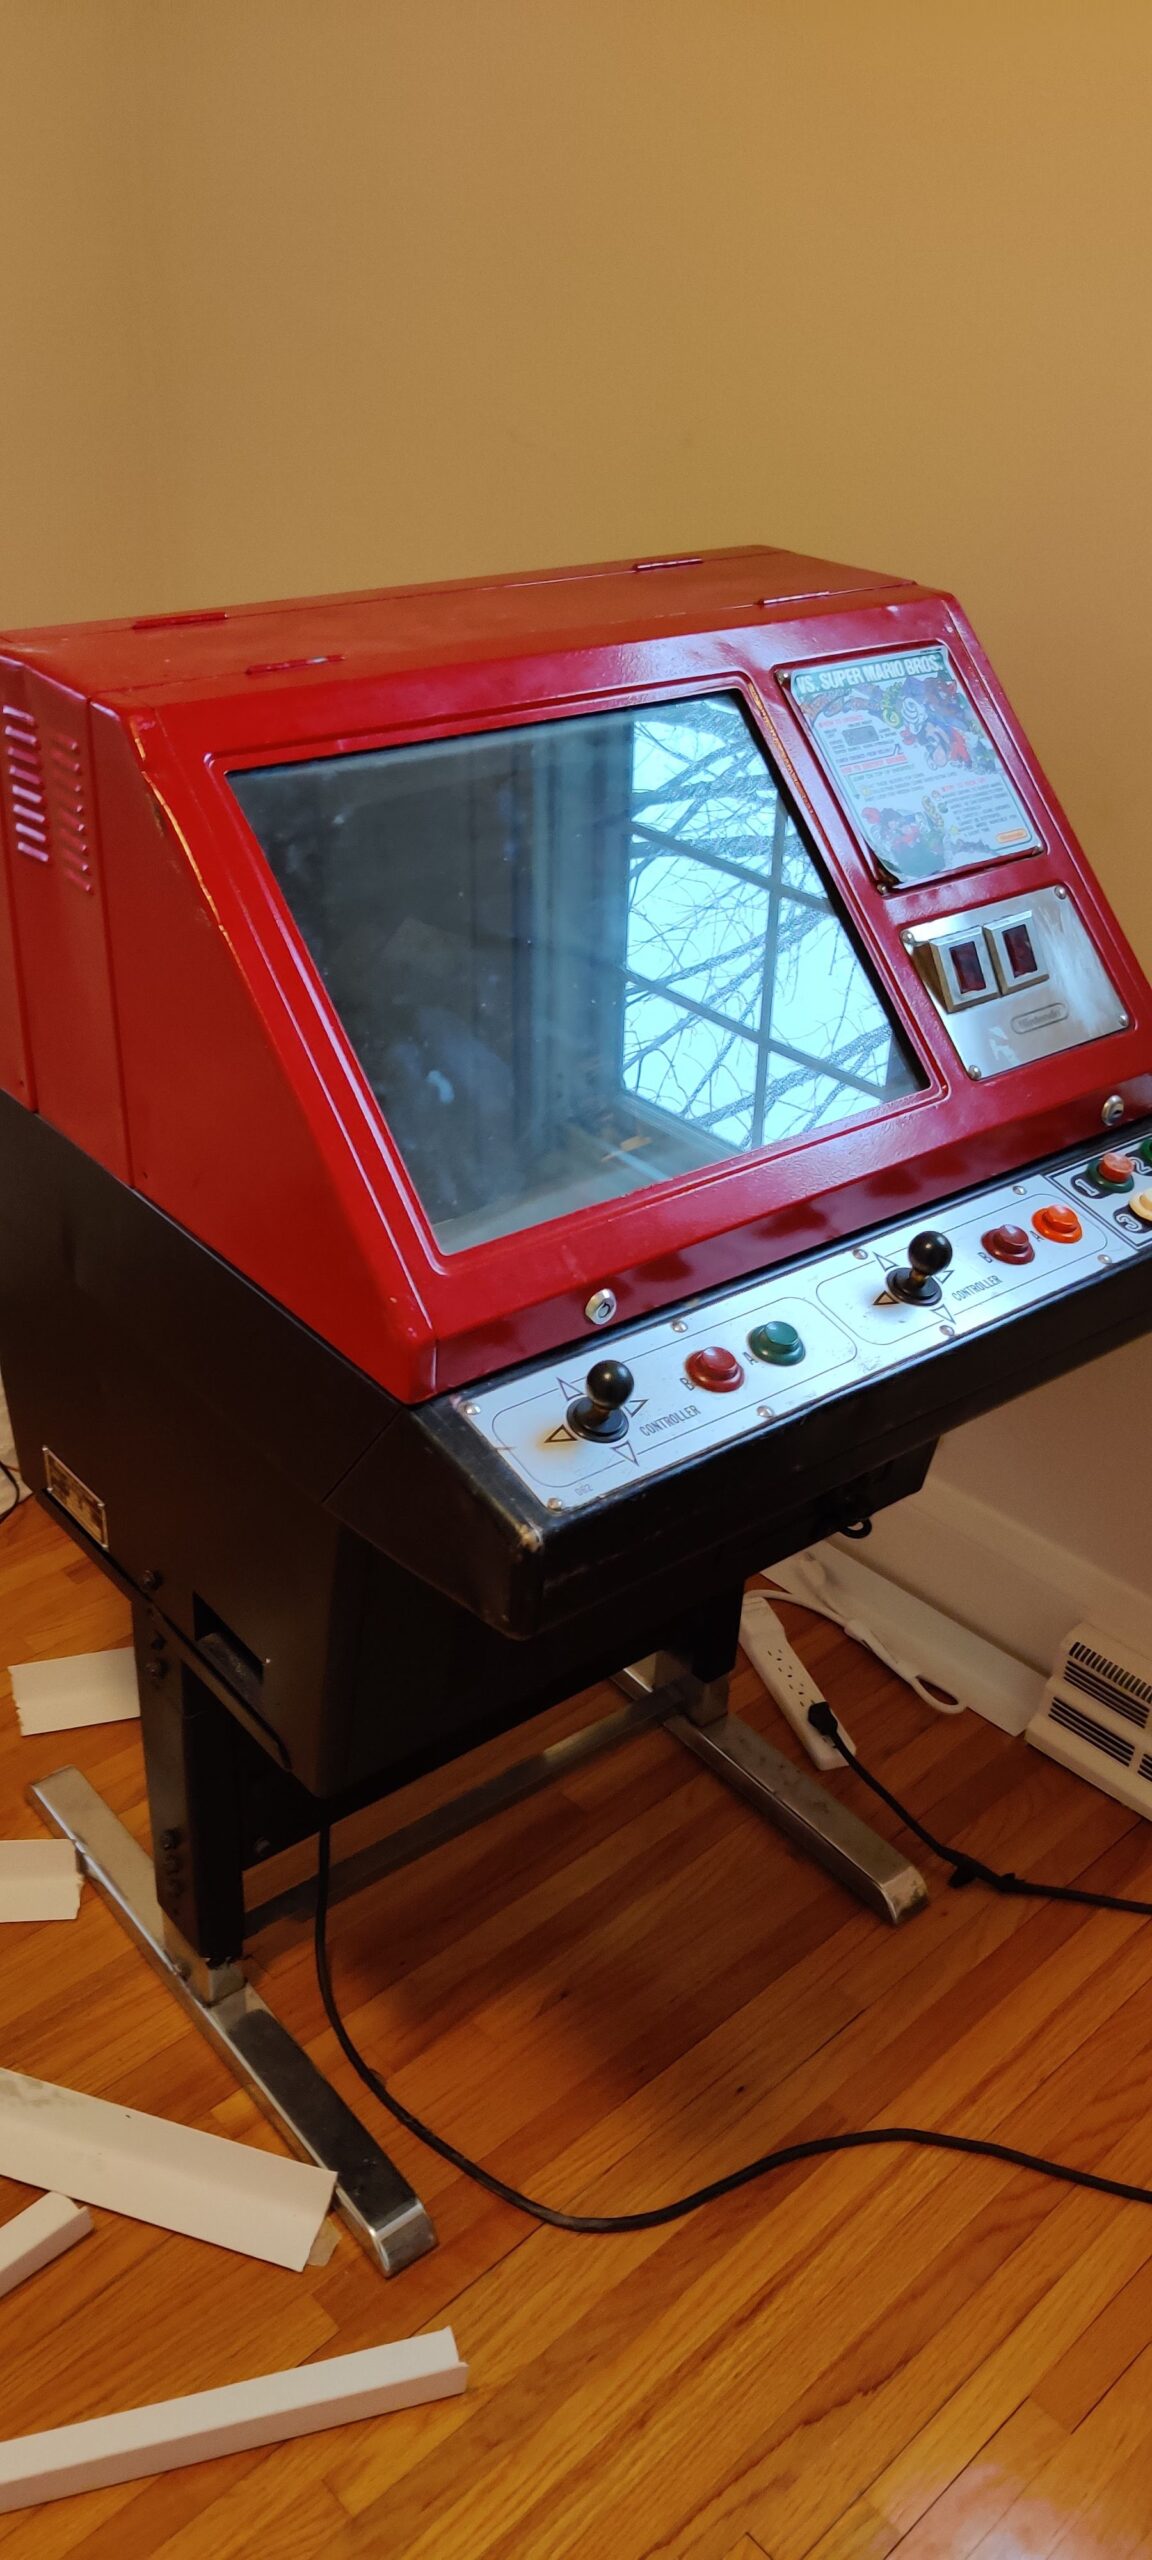
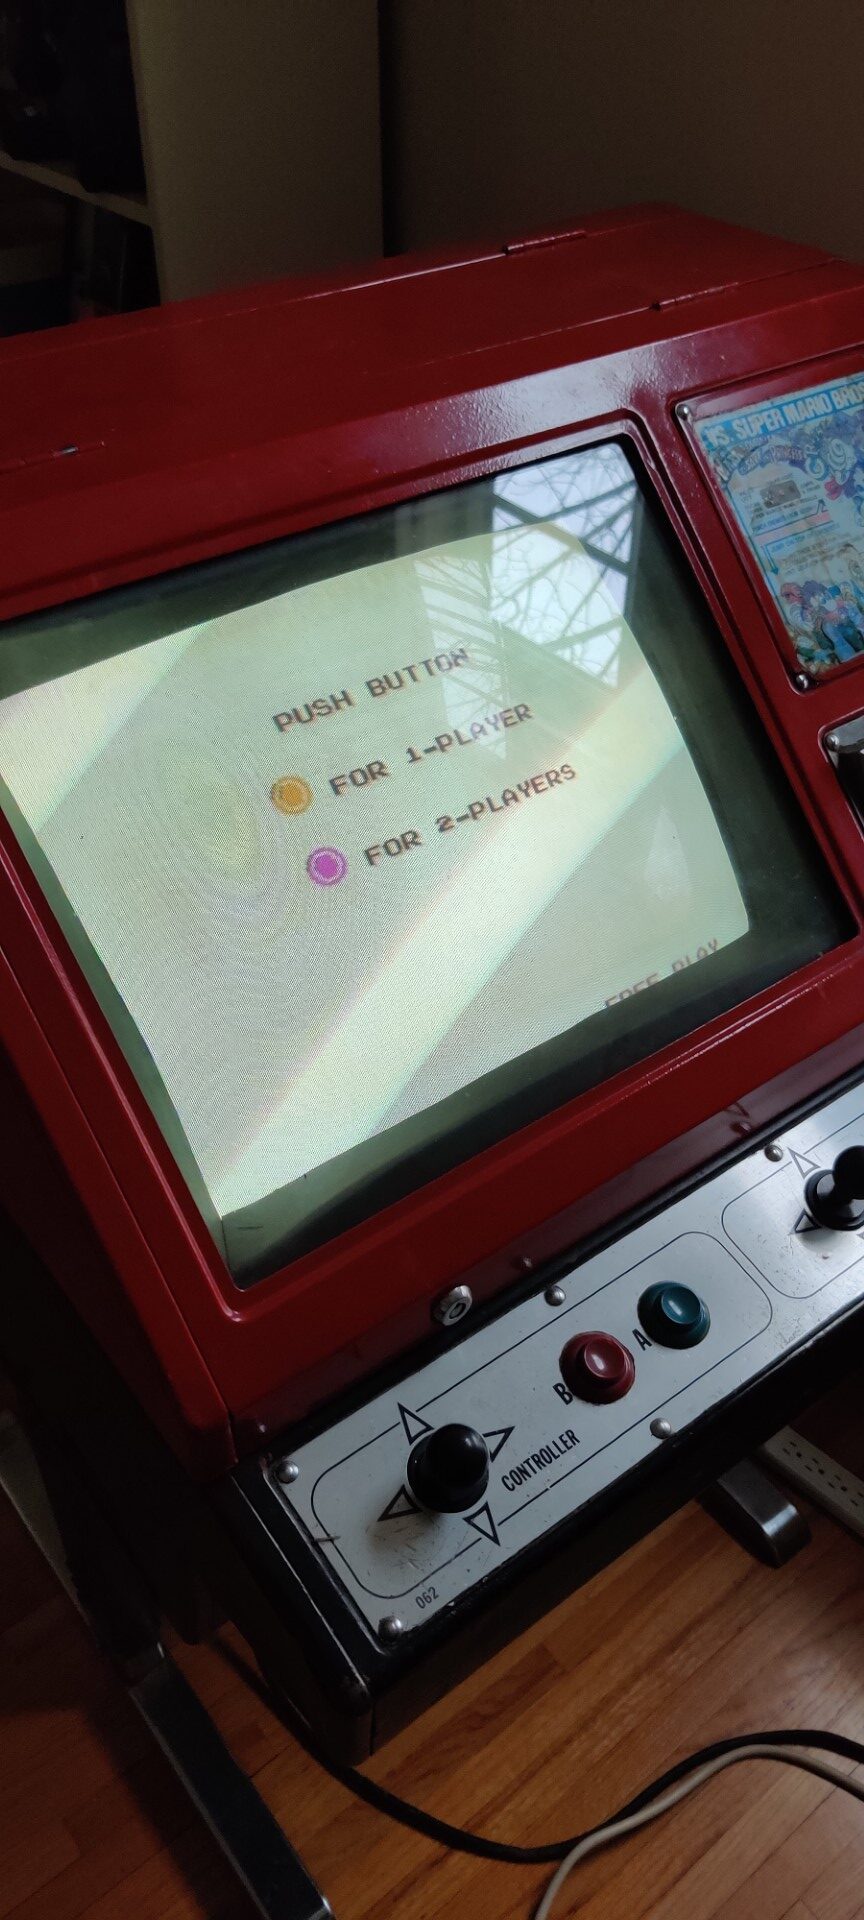
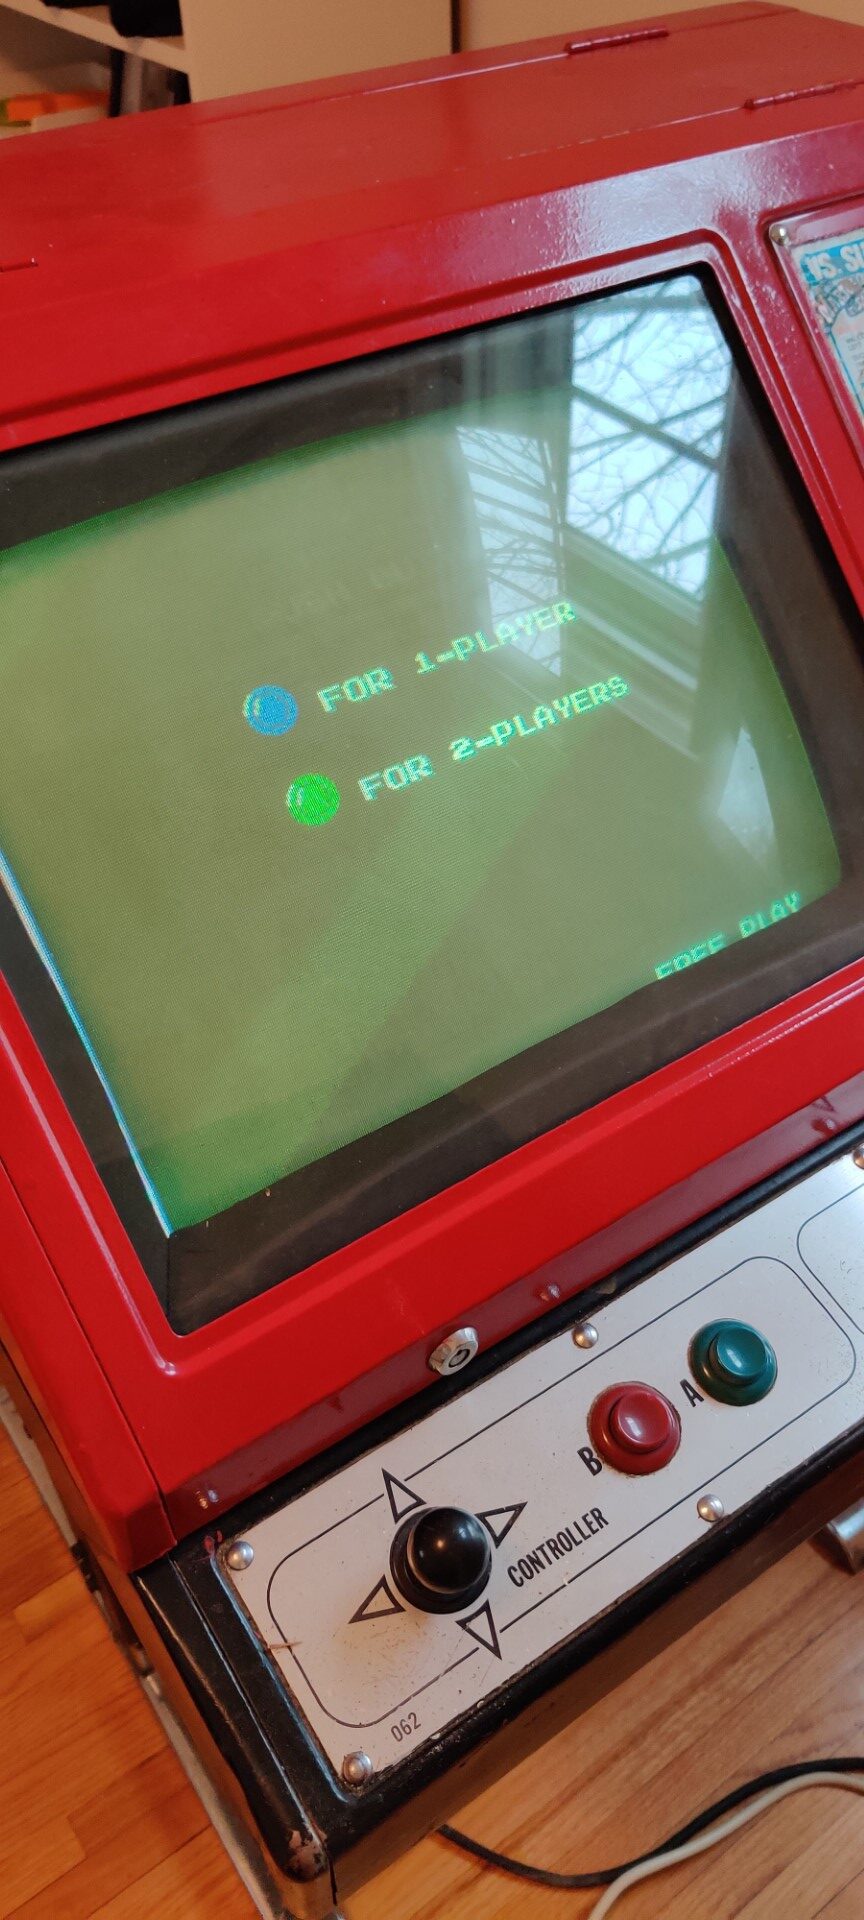
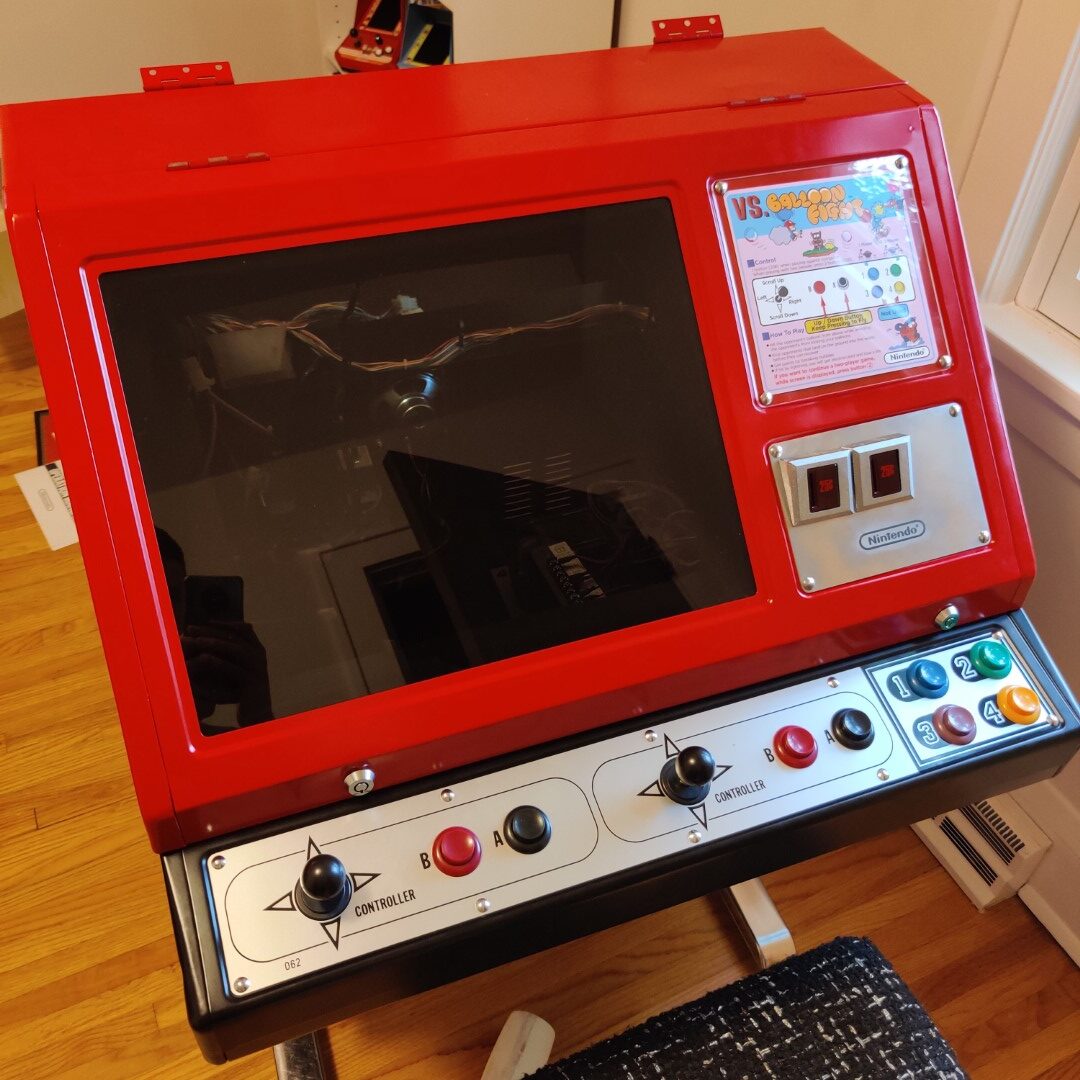
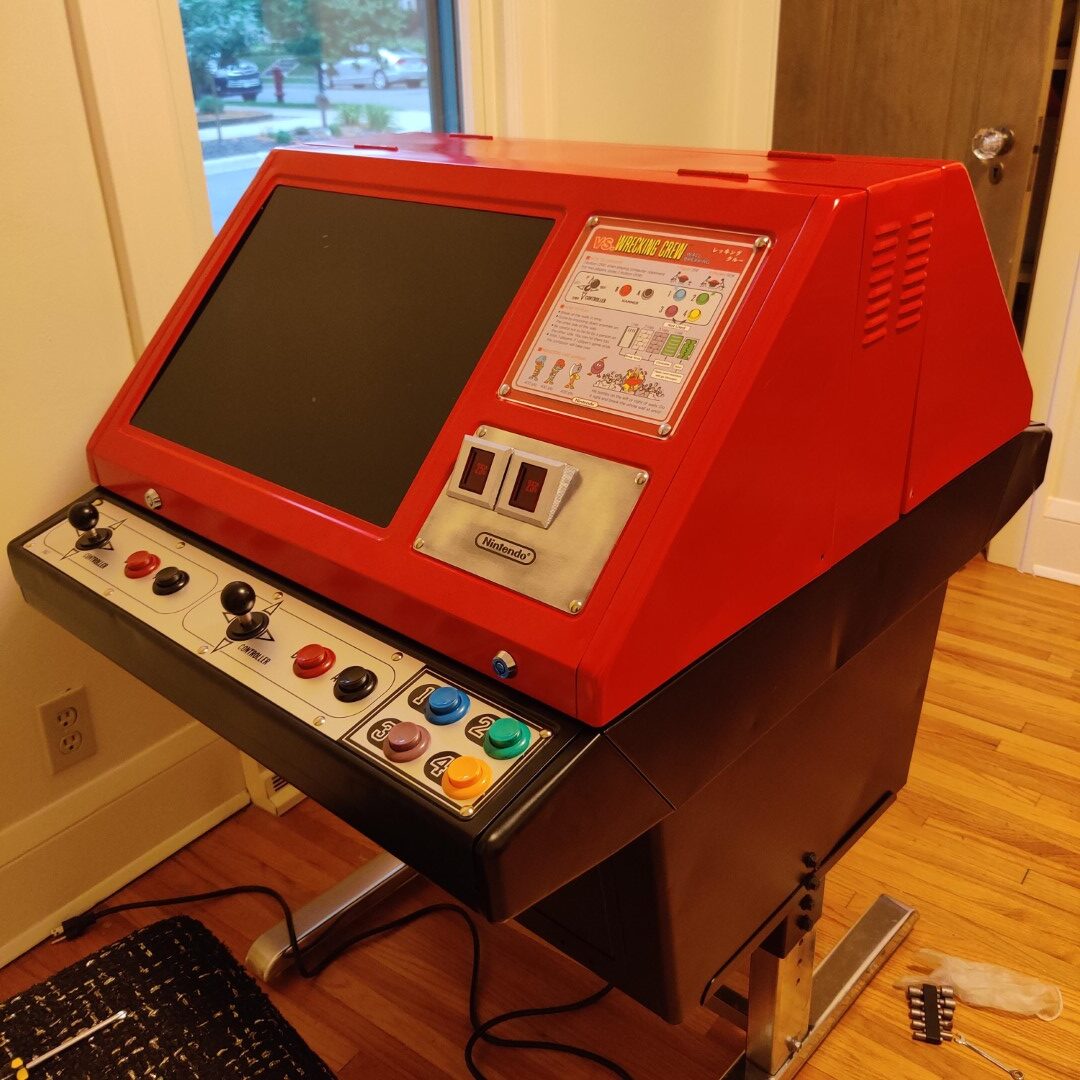
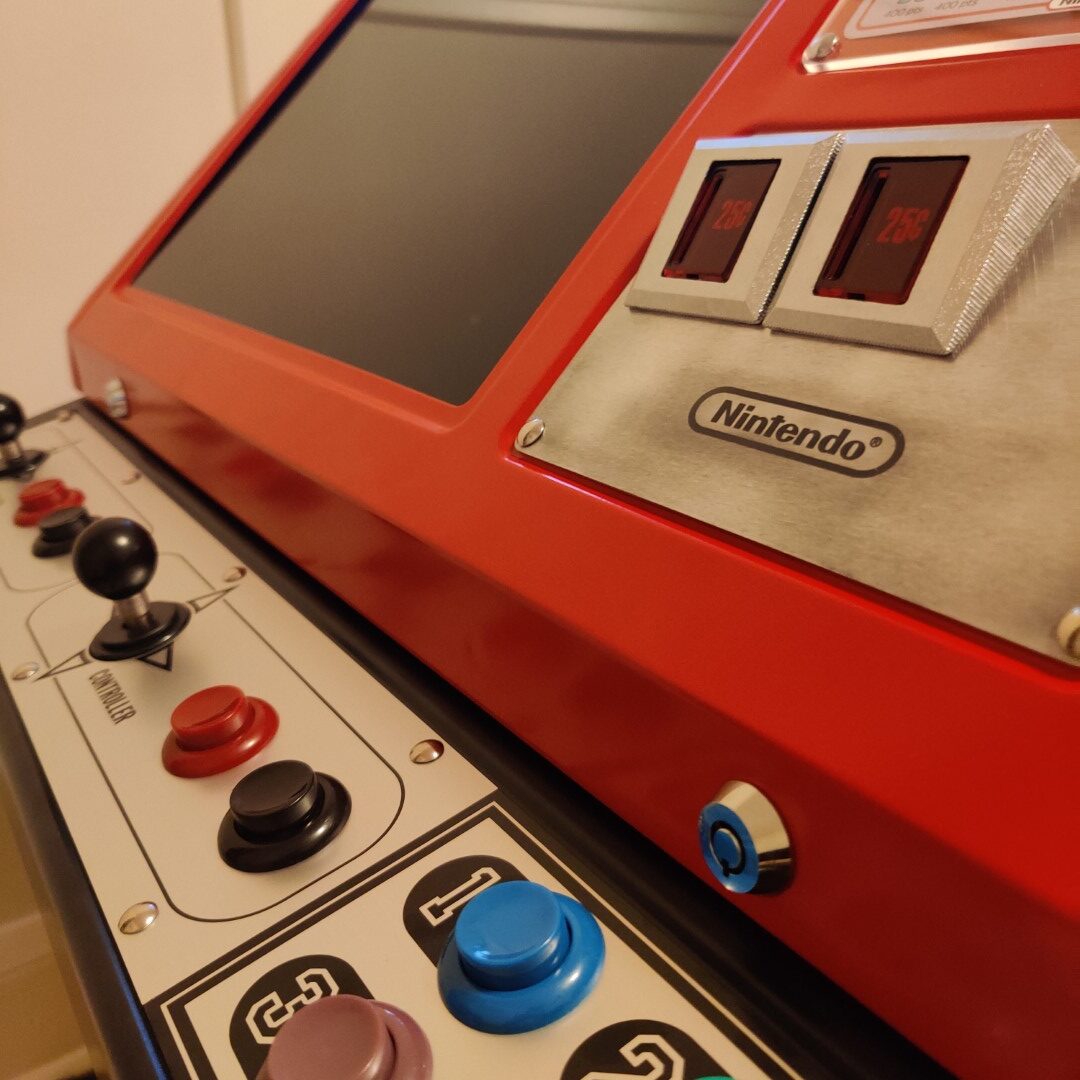
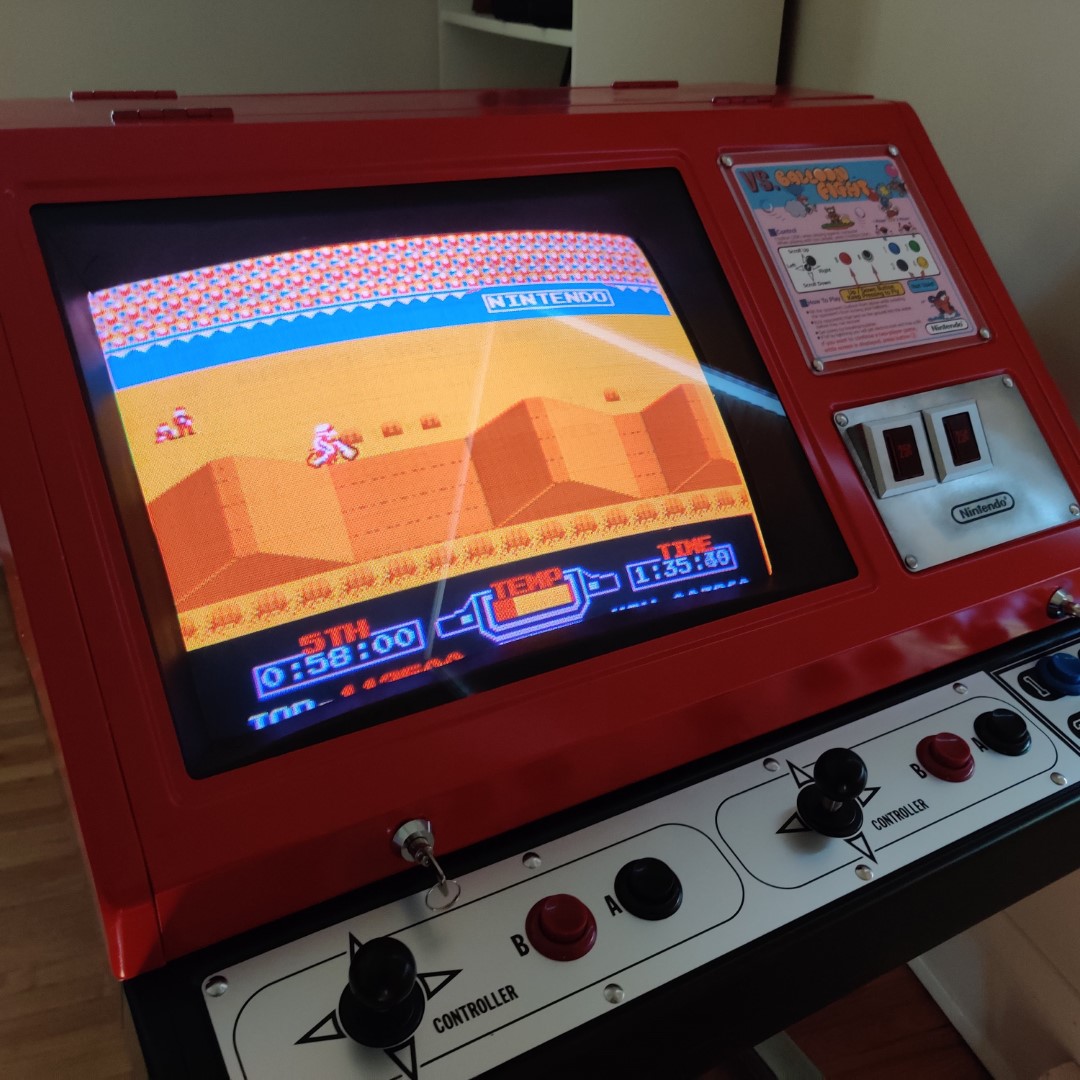
Well folks, this is a big one! I’ve always wanted an original arcade machine (most of my experience is in MAME or scratch-built cabinets) and I decided to go big for my first. I acquired a Nintendo Vs. DualSystem “Red Tent” in need of restoring. Specifically, the red tent is called the Vs DualSystem Cocktail or Model MDS-TBL (meaning multi-display system table).
Restored Nintendo Red Tent Vs. DualSystem
An original Nintendo Red Tent
Some History About the Nintendo Red Tent
The Nintendo Vs. DualSystem is sort of a precursor to the NES (Nintendo Entertainment System) in the United States. It was part of the Vs System of arcade cabinets and were quite popular. Since the technology is largely the same as the NES, many of the games were practically direct ports. Other games were quite different though – and took advantage of the dual-monitor nature of the DualSystem cabinets.
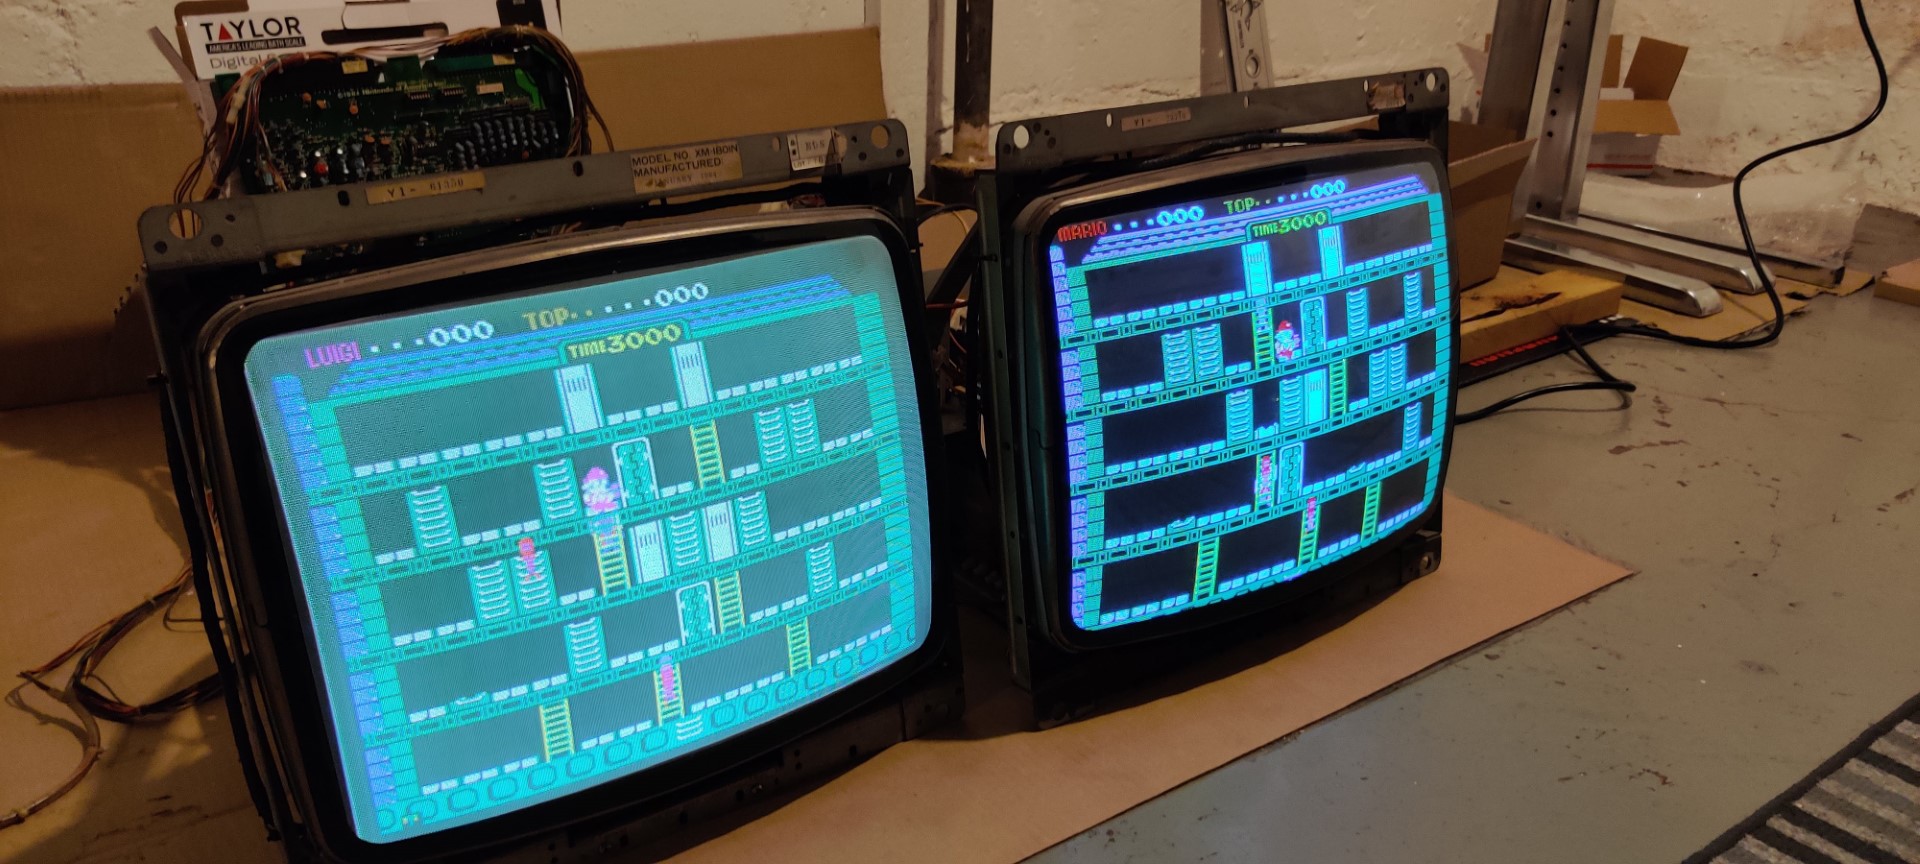
For example, Vs. Balloon Fight uses both screens, giving each player their own view of the action, and letting players “scroll” vertically on the screen.
I kept on eye out for one of these for maybe 3 months, making several offers but losing out. One popped up on KLOV early in the year so I bit as quick as I could! Everything was in “working” order but, of course, that didn’t mean it wouldn’t need a lot of work, which I’ll be discussing soon.
I had to arrange shipping from a few states over but with the difficulty in finding this specific machine, I figure it’s worth it. Here is how the machine appeared when it first arrived.
Nintendo Red Tent
Red Tent open
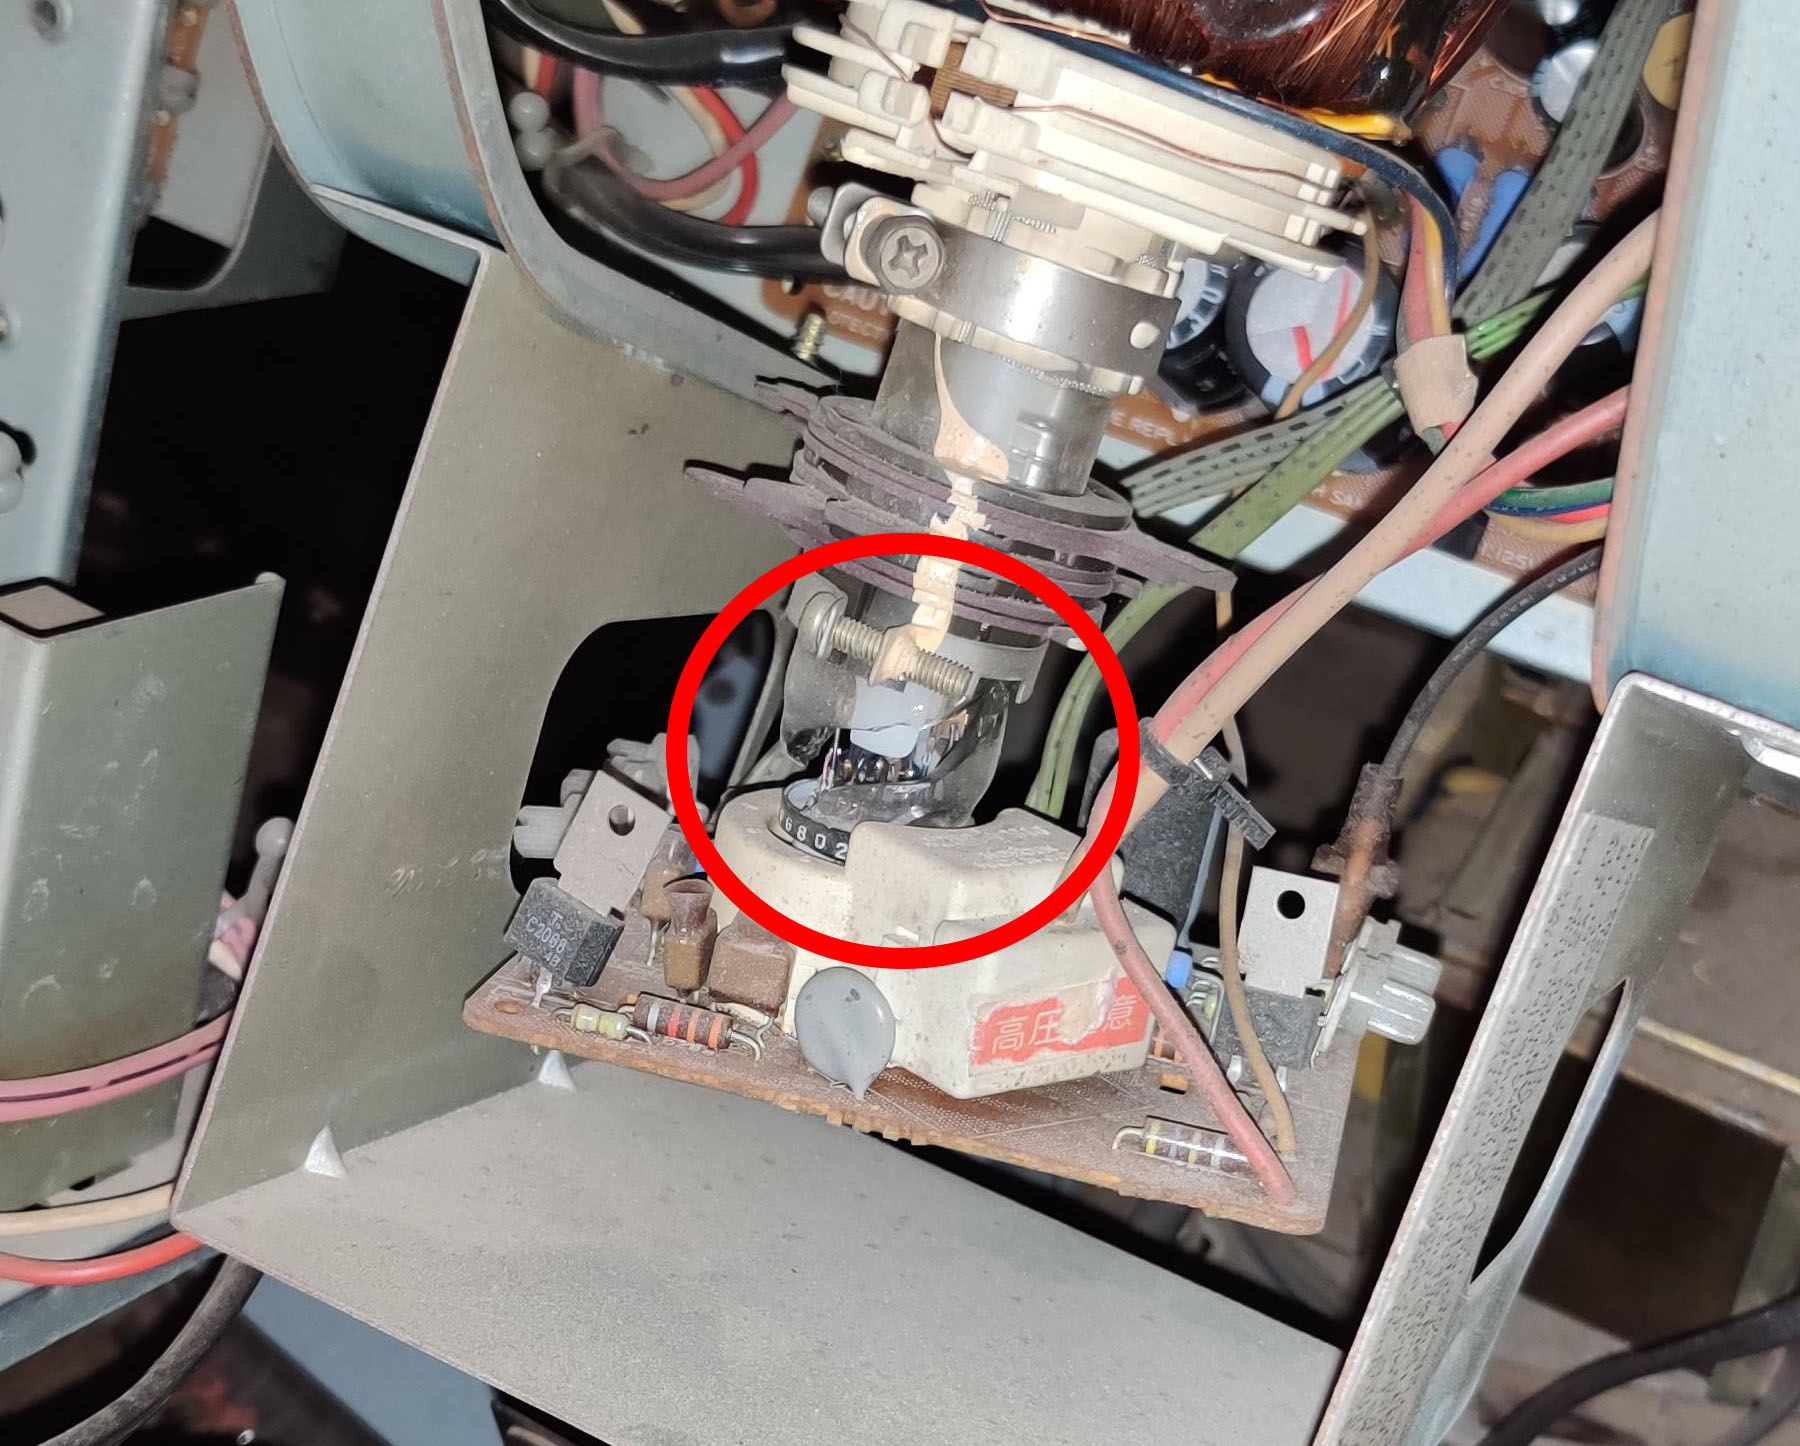
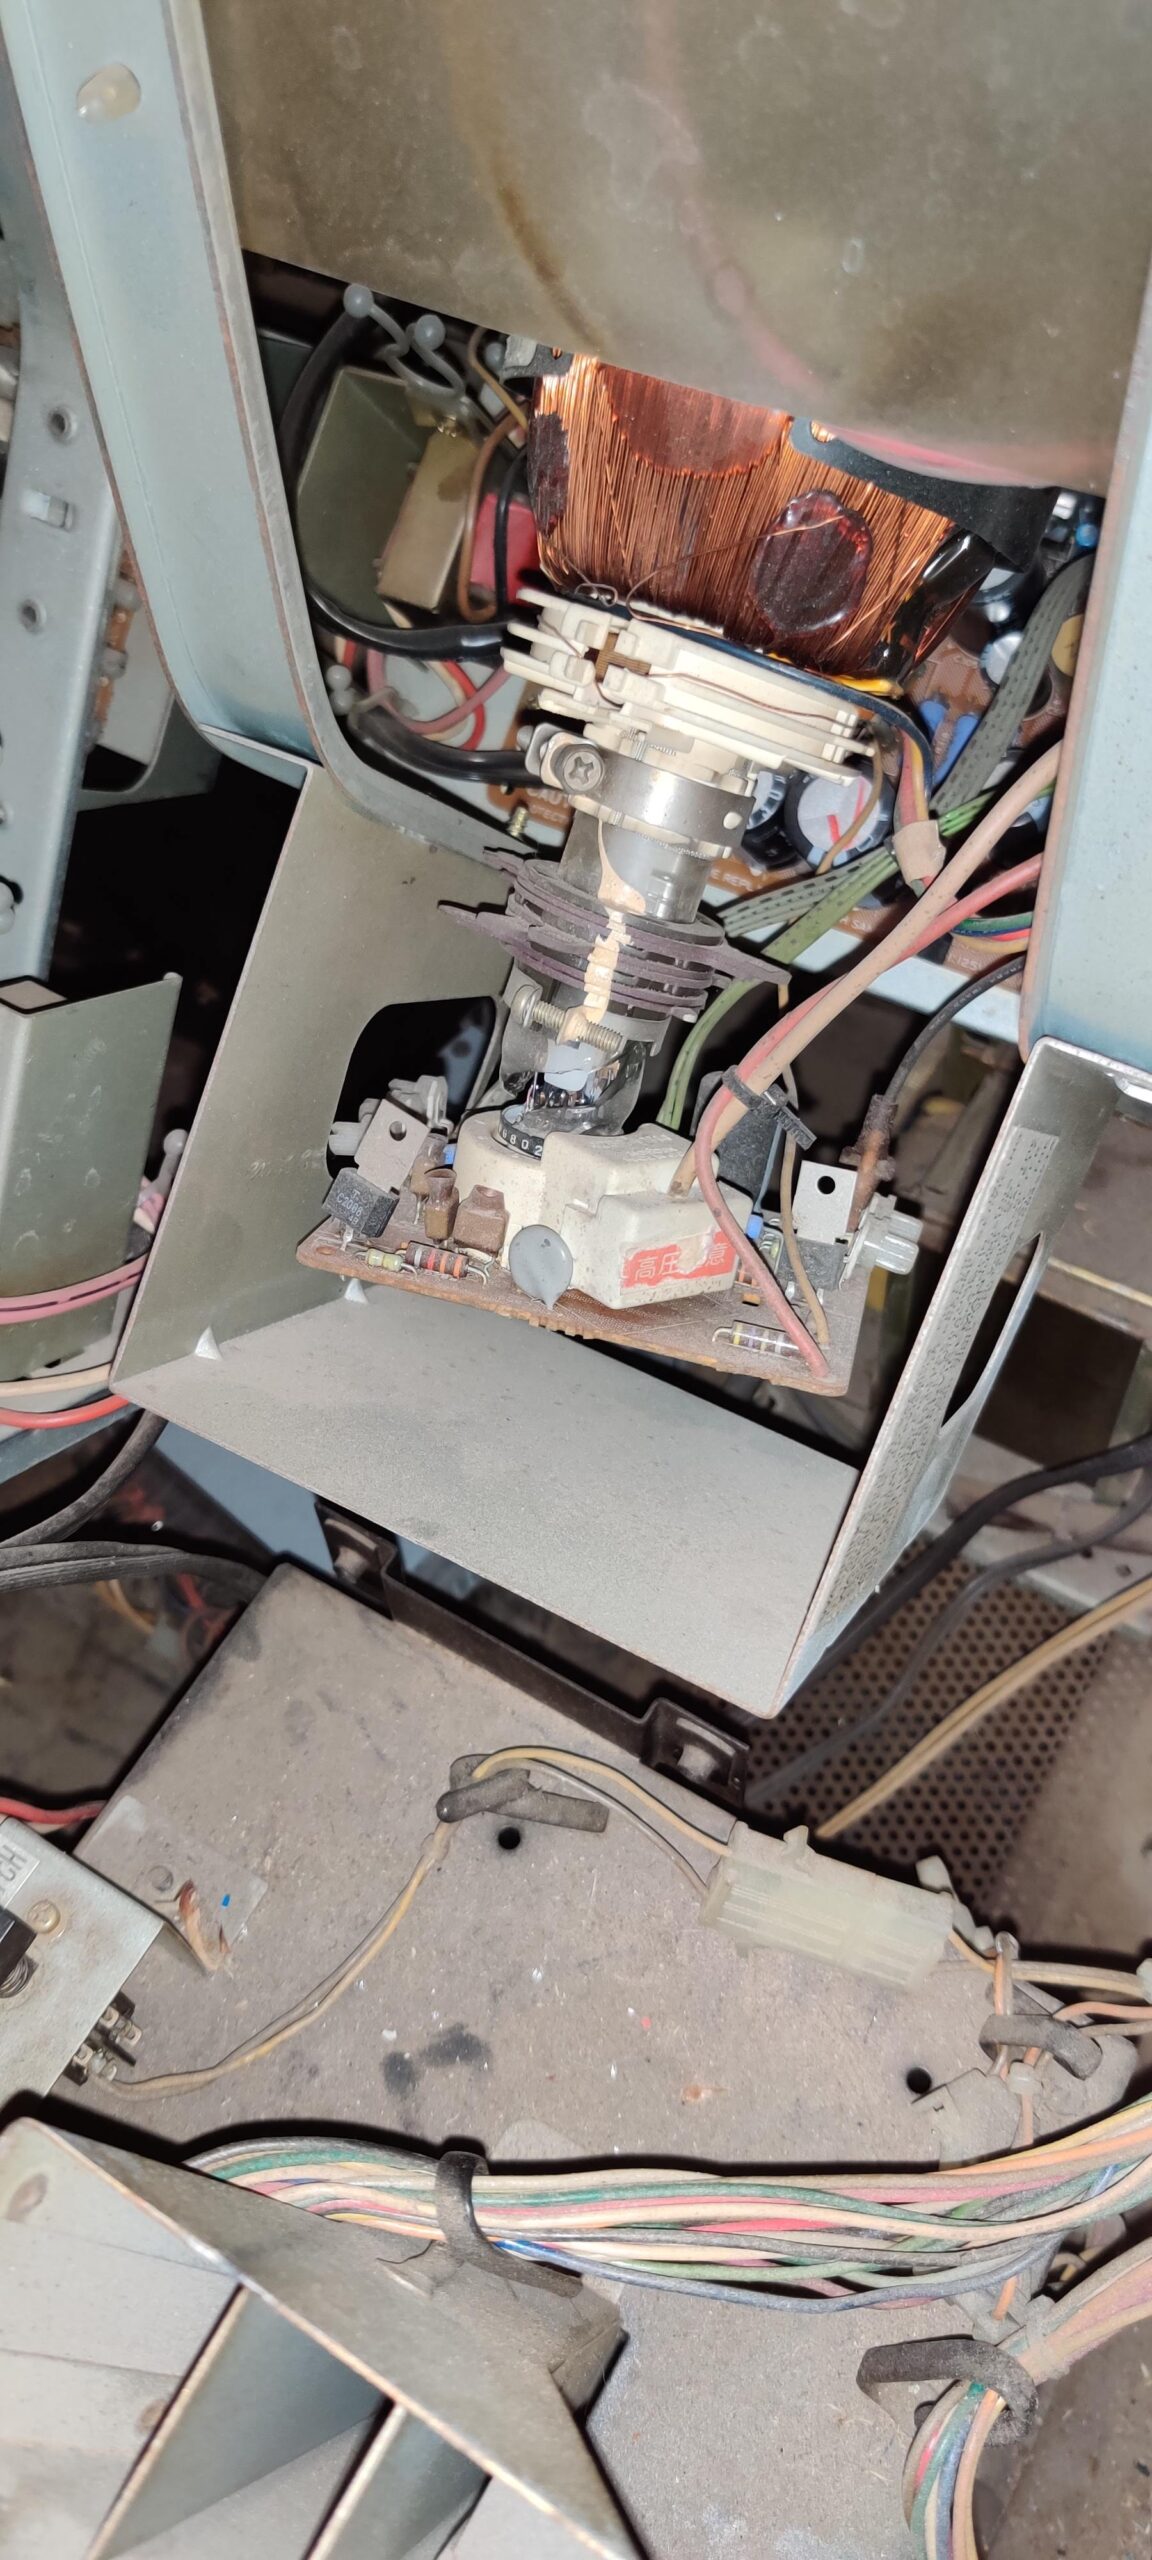
Cracked neck circled
Cracked neck
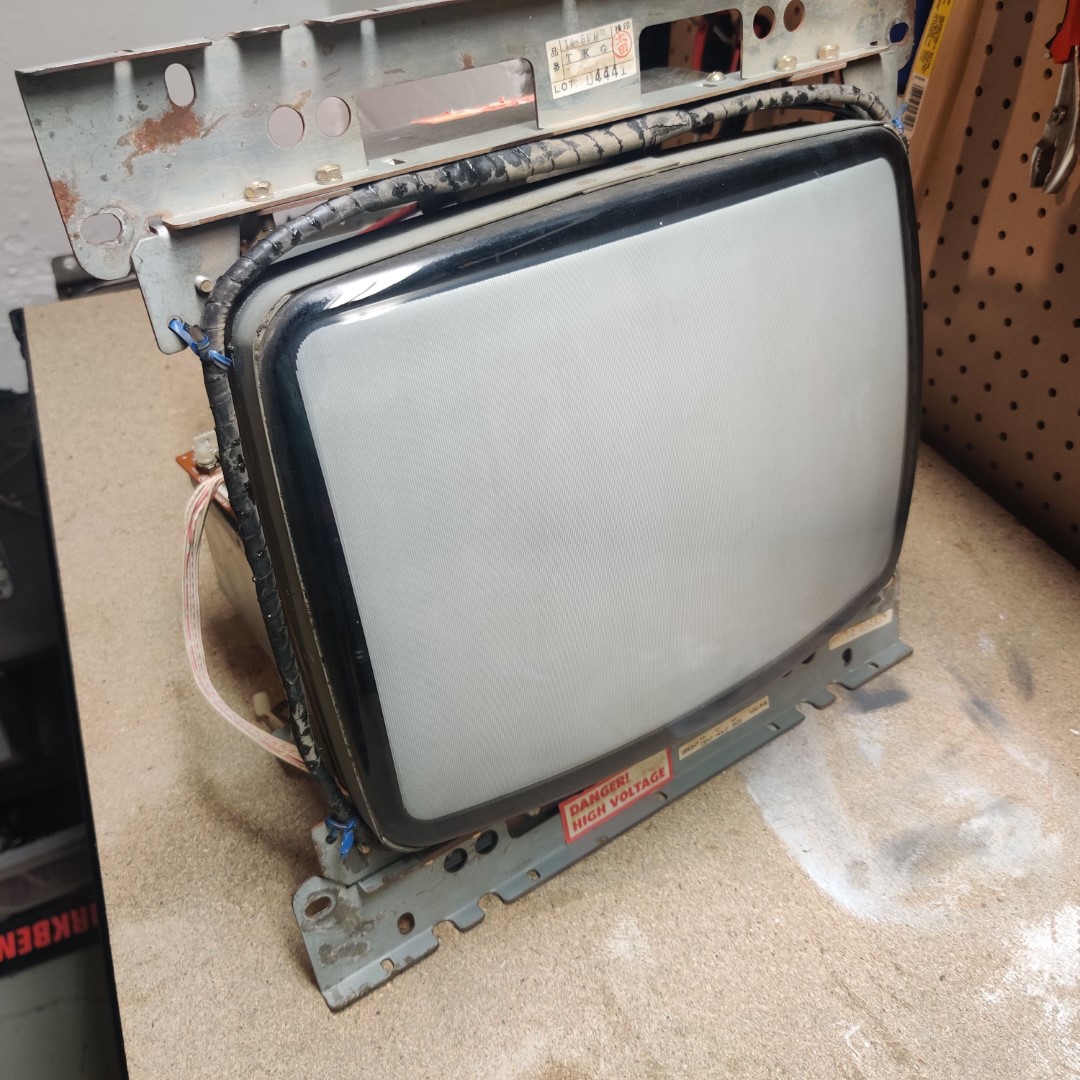
Dead monitor
You can see above I had some very bad news when the game arrived. Once plugged it in and immediately started hearing some scary noises so unplugged it quickly. Next, I opened one side up, plugged it in briefly again, and pretty quickly saw electrical arcing. And that’s when I realized one monitor had been necked! This is terrible news. It’s pretty much the one part of the monitor that cannot be fixed, the vacuum is broken and you need a whole new CRT tube.
In addition, these monitors are VERY hard to come by. They aren’t nearly as common as some other CRTs out there, which are all getting rarer by the day. So, I put the word out that I needed one on Facebook, KLOV, and elsewhere.
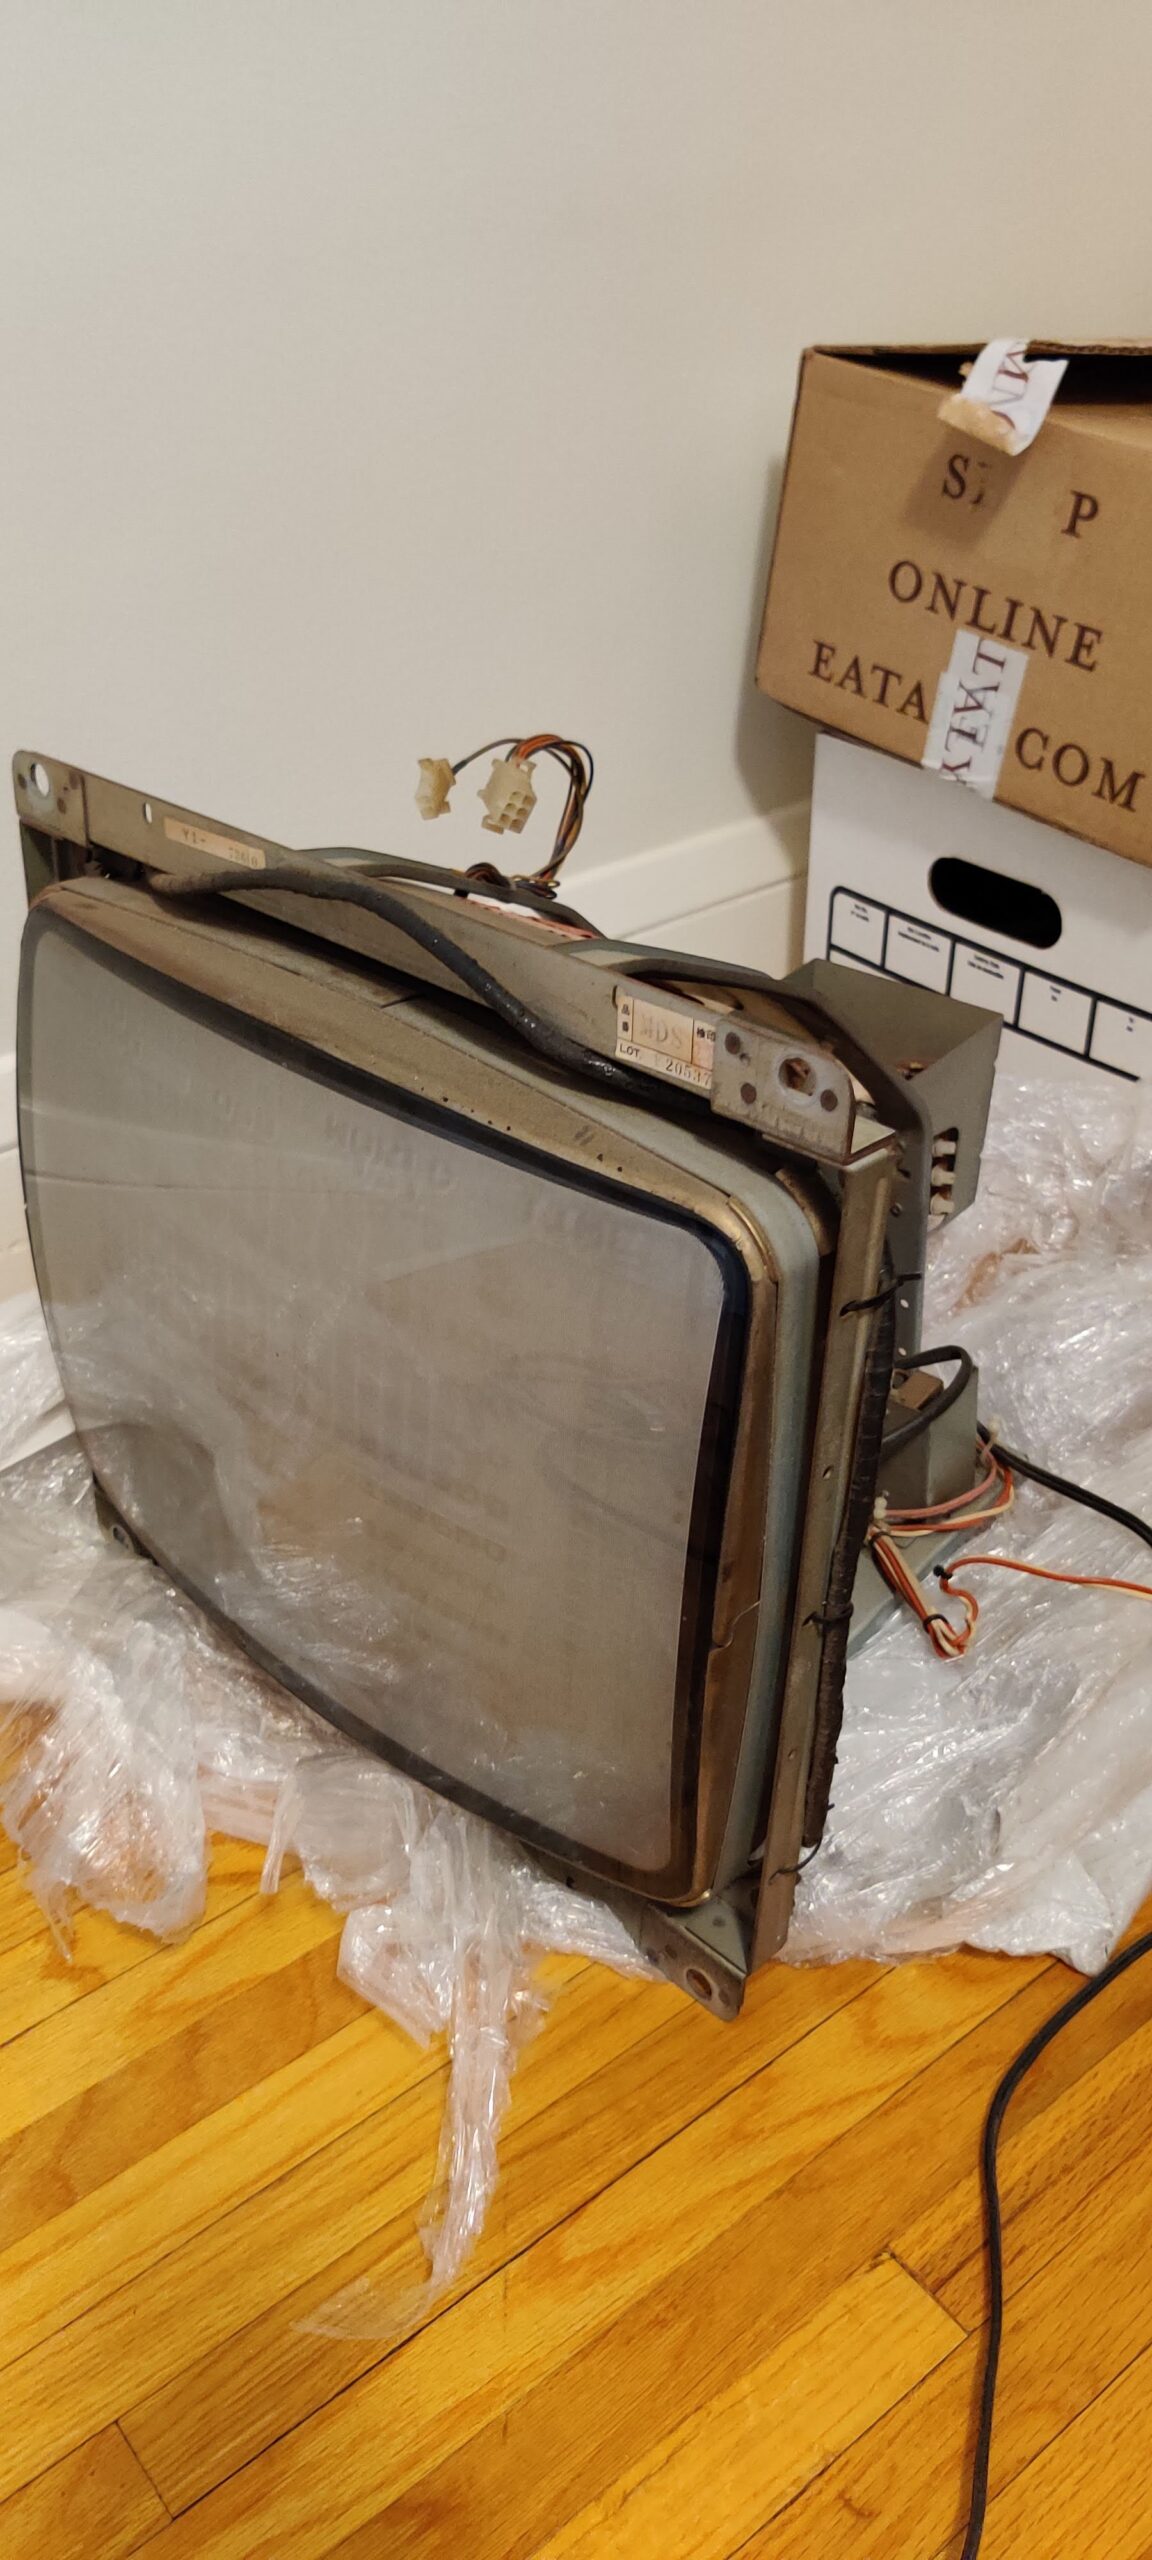
Monitor Found
Eventually, someone was willing to sell a spare in South Dakota which was even close enough for me to drive to; an 8 hour trip later and I had another working monitor.
As work began, I can’t stress how important having proper diagrams and manuals for this stuff is. I got mine from the John’s Arcade Nintendo Vs. site, which has most of the manuals for these machines and parts.
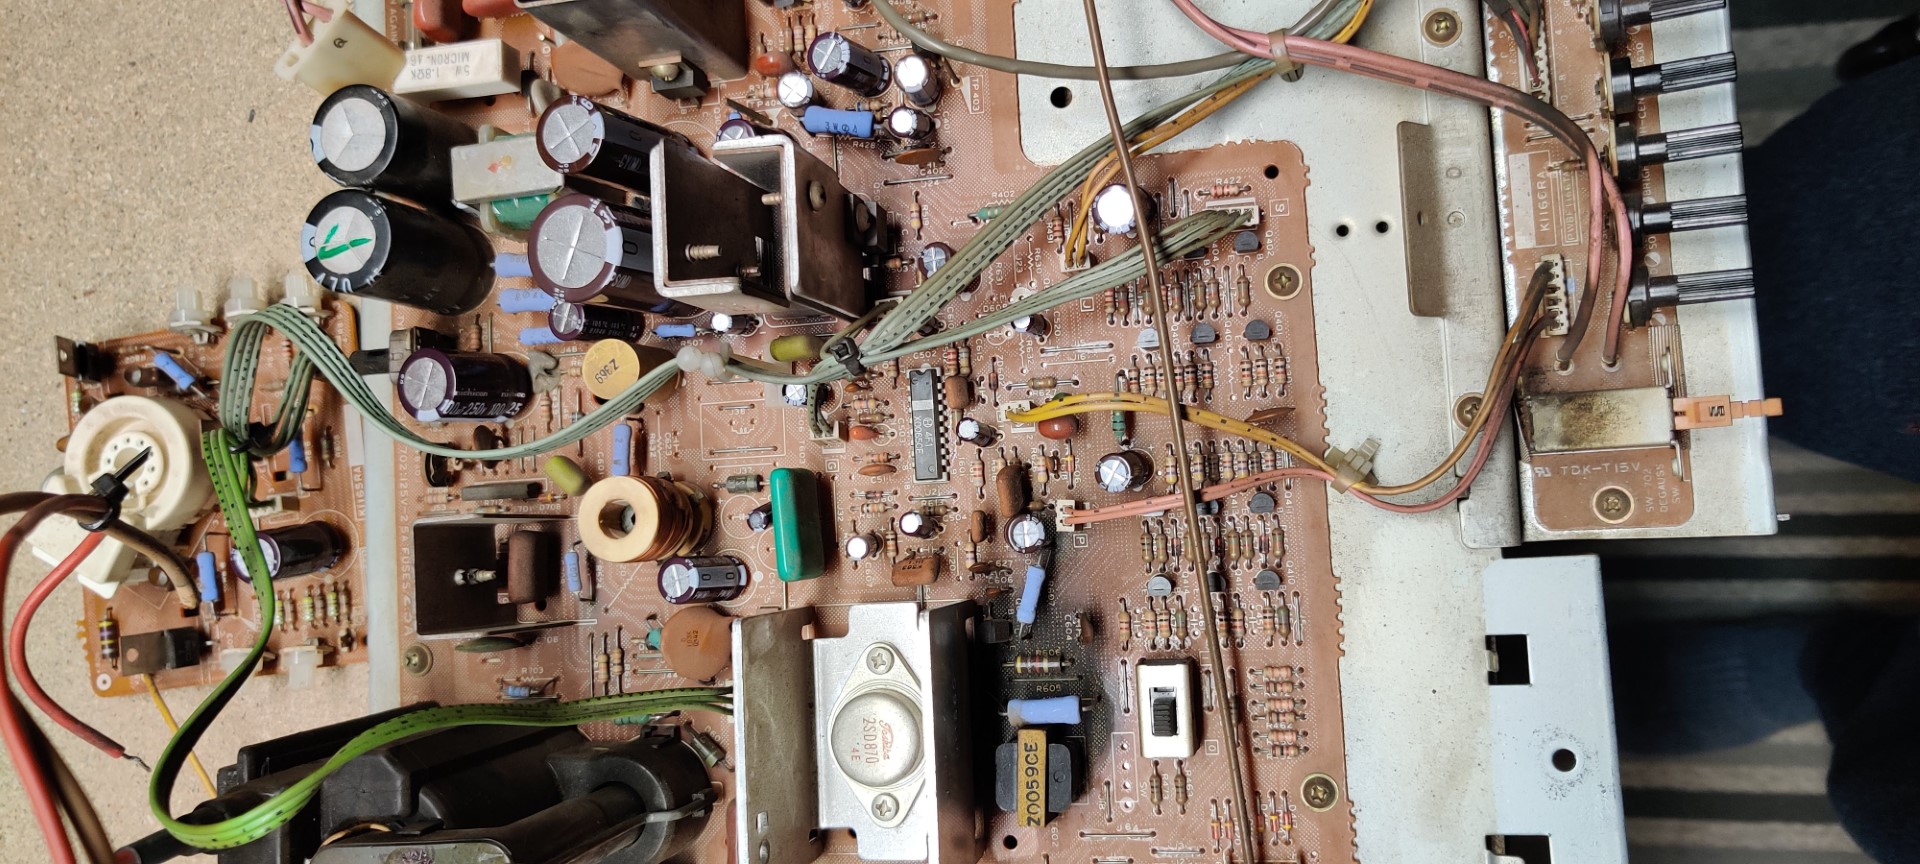
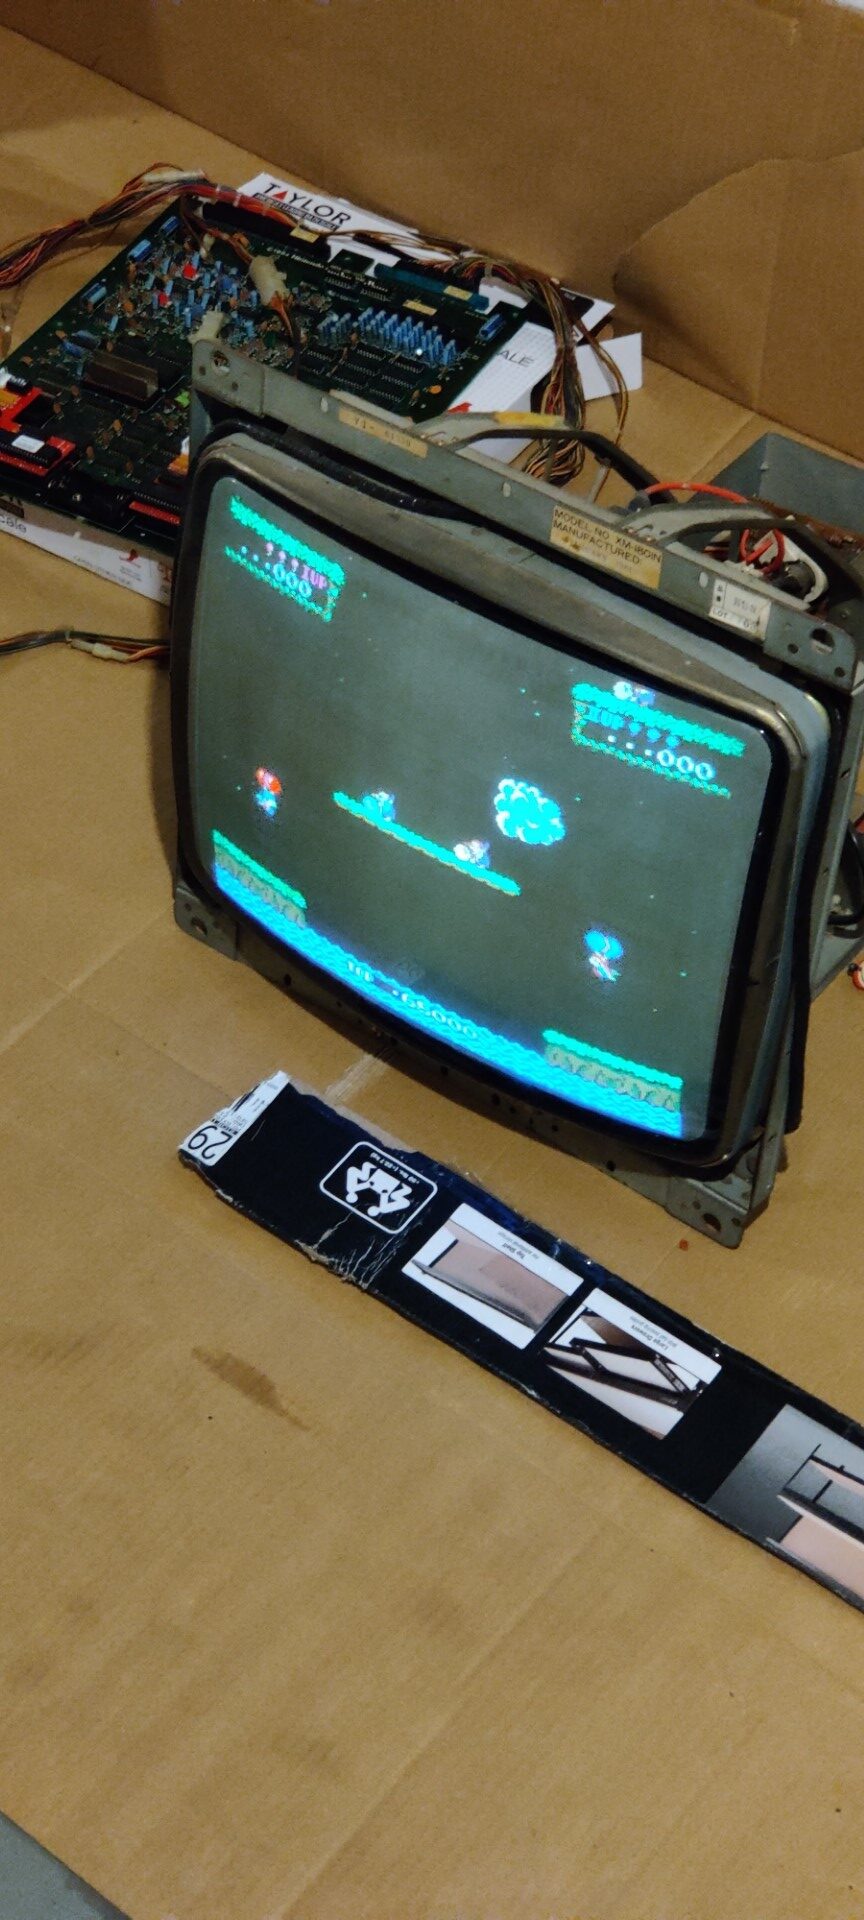
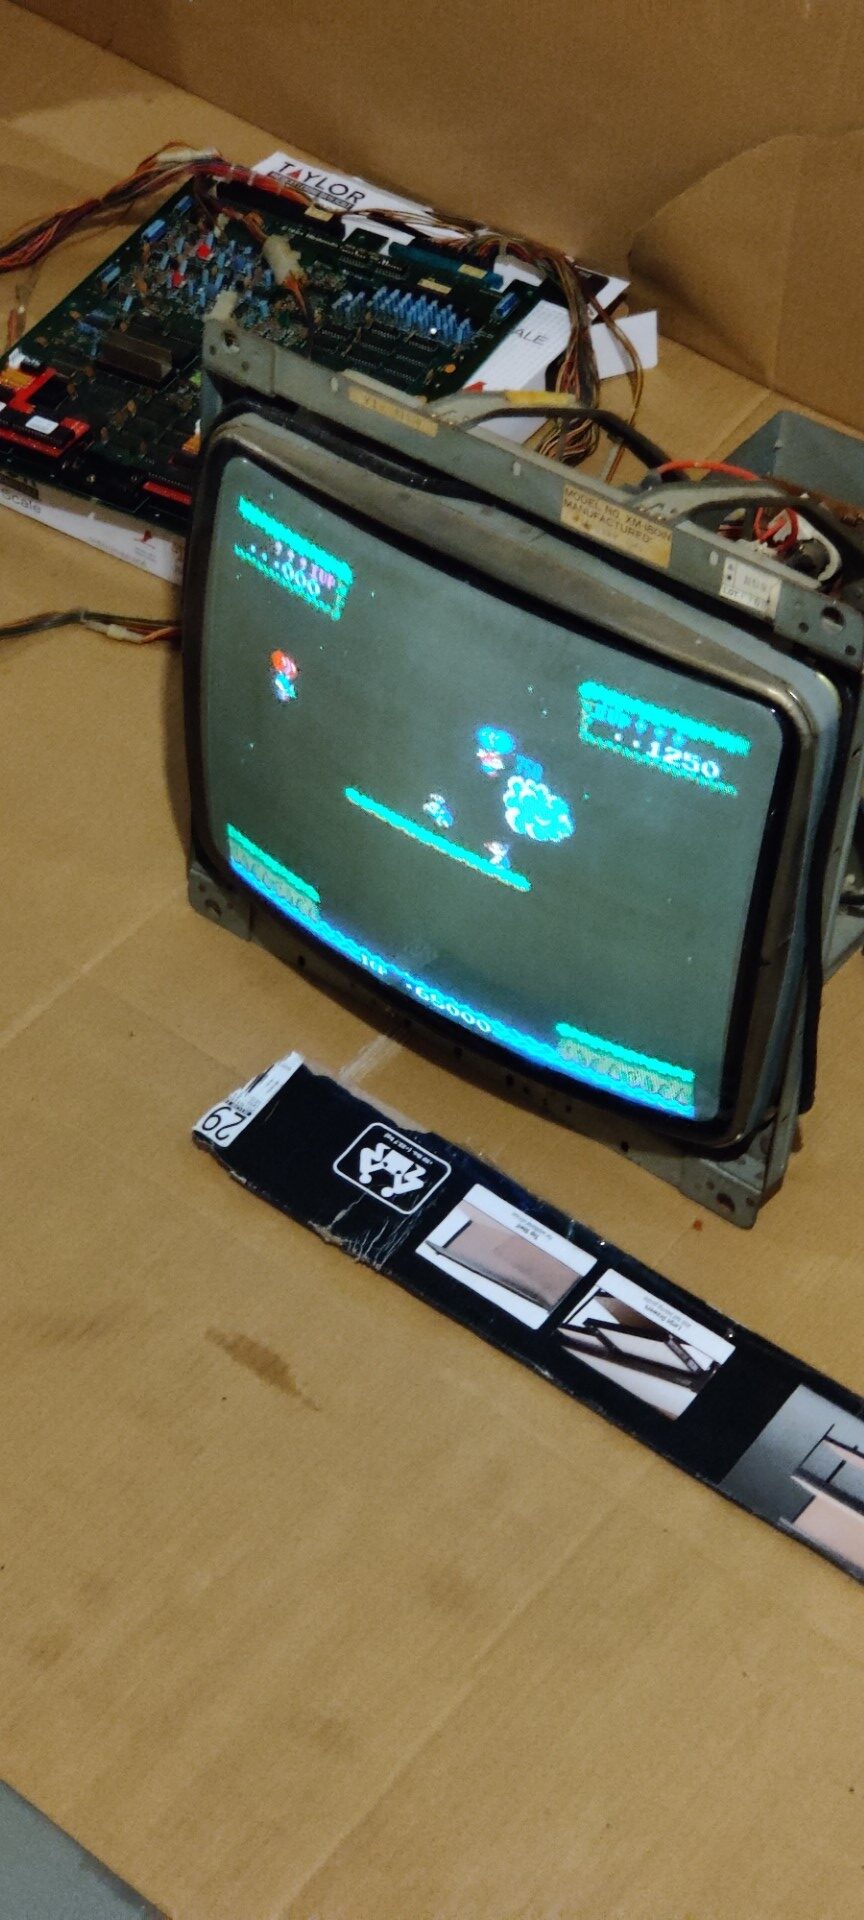
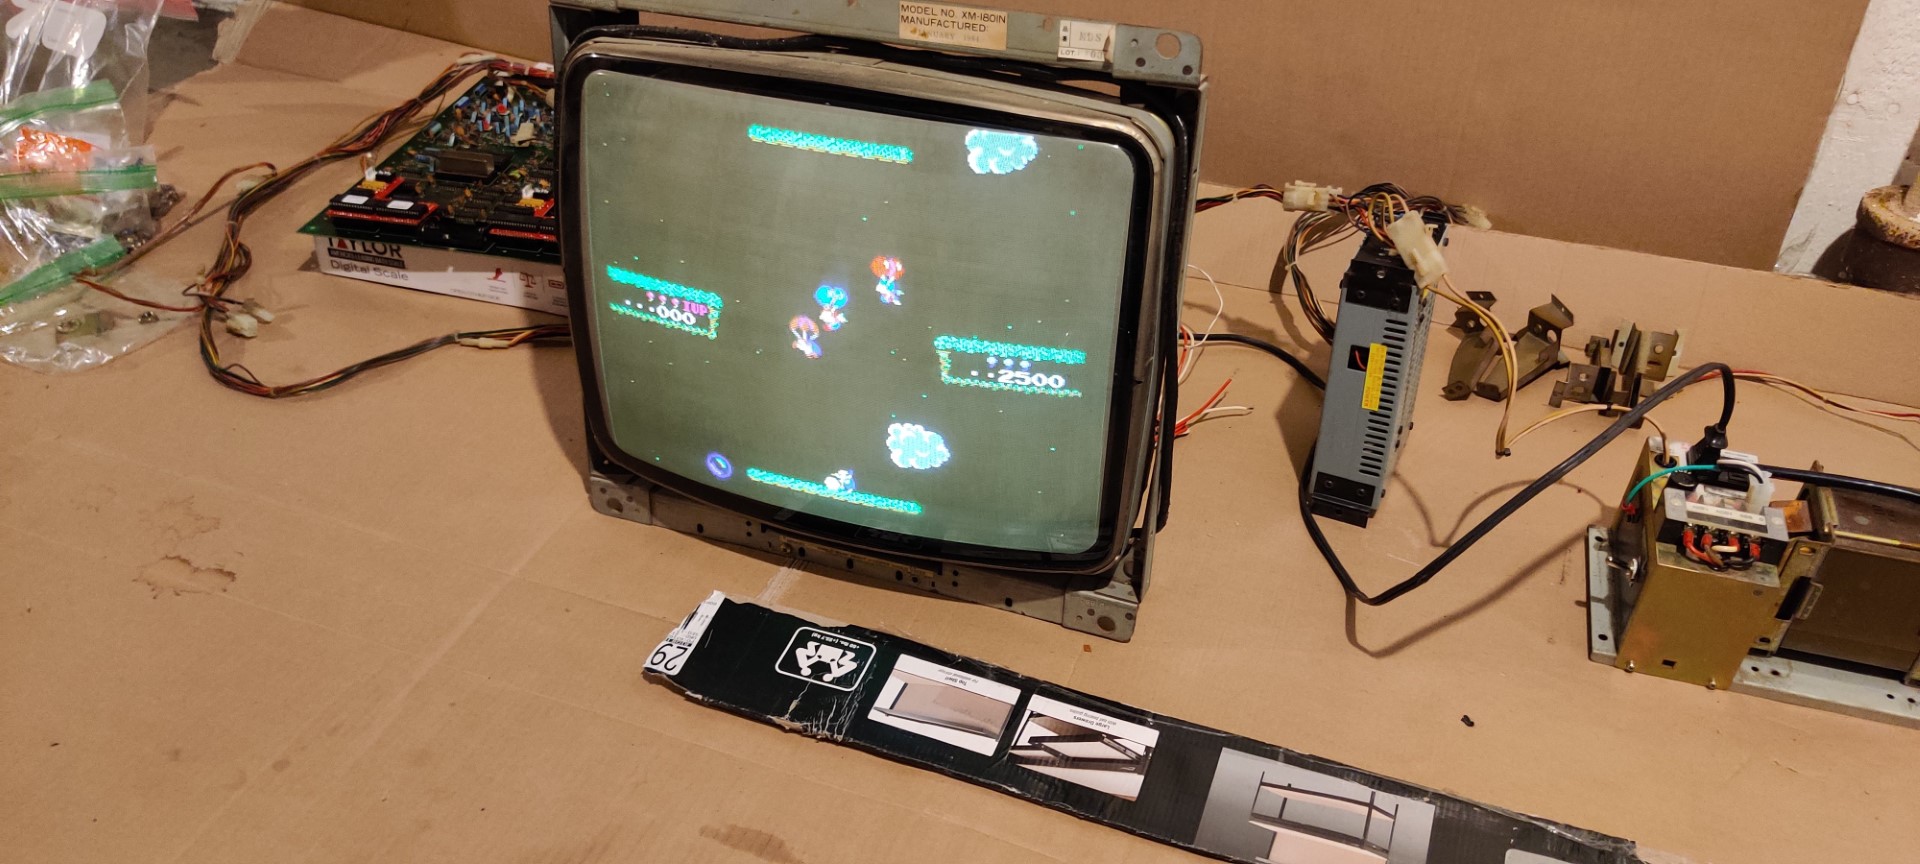
Sharp XM-1801 Monitors
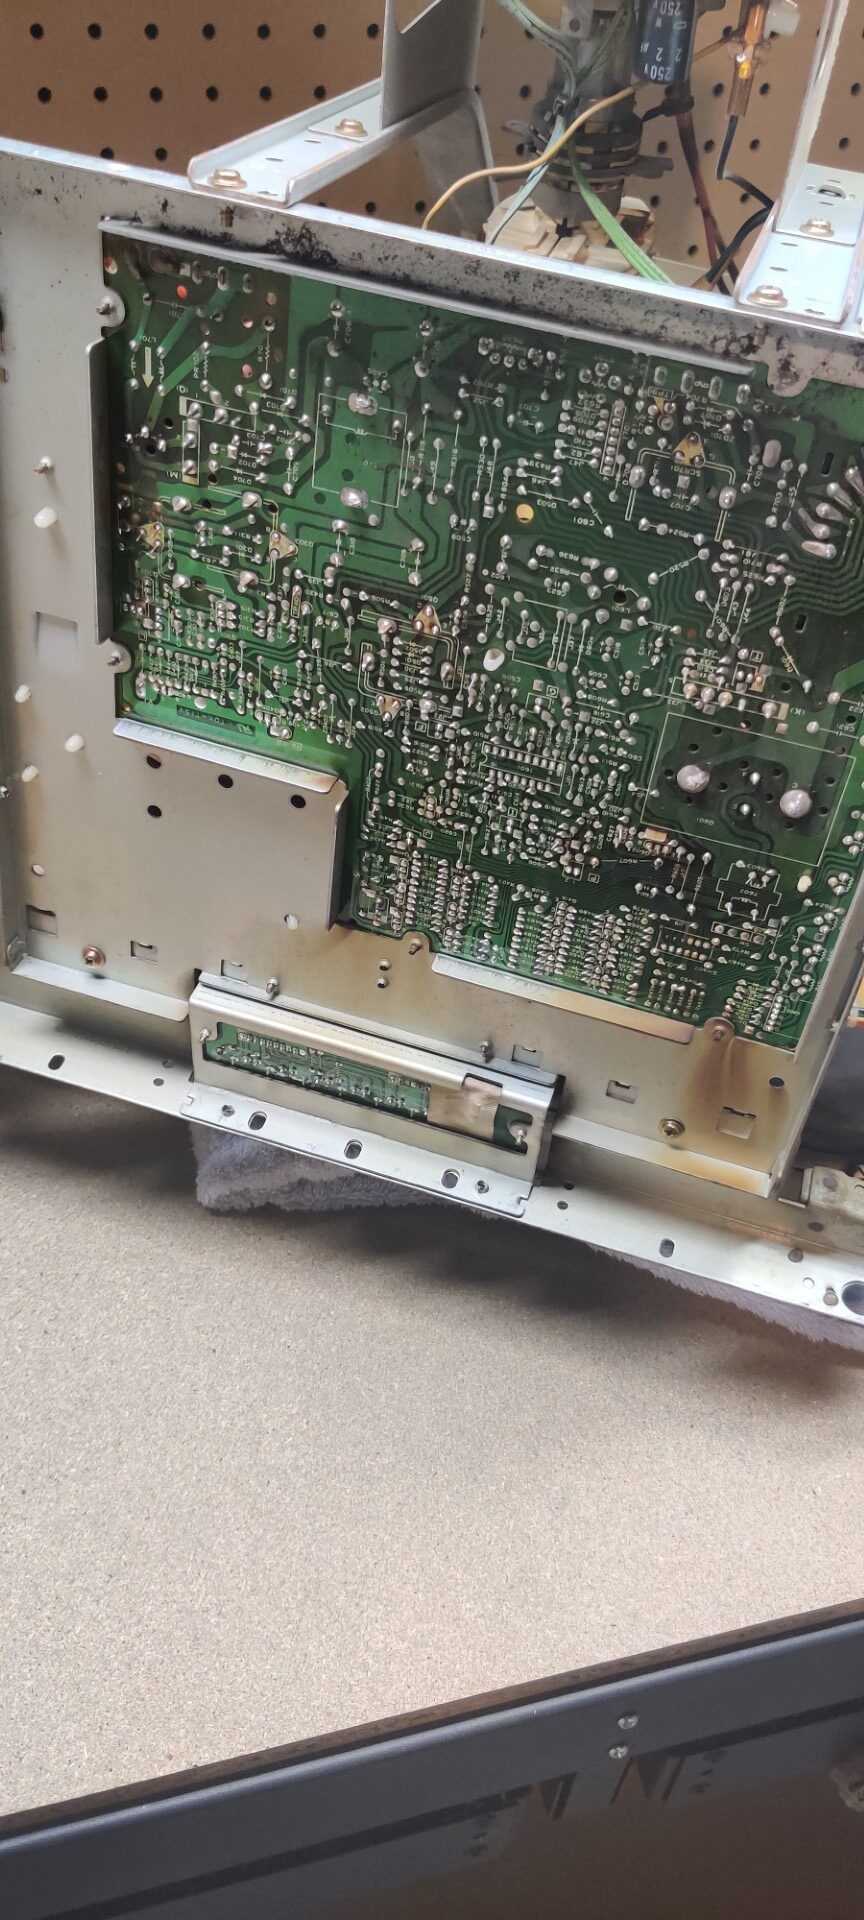
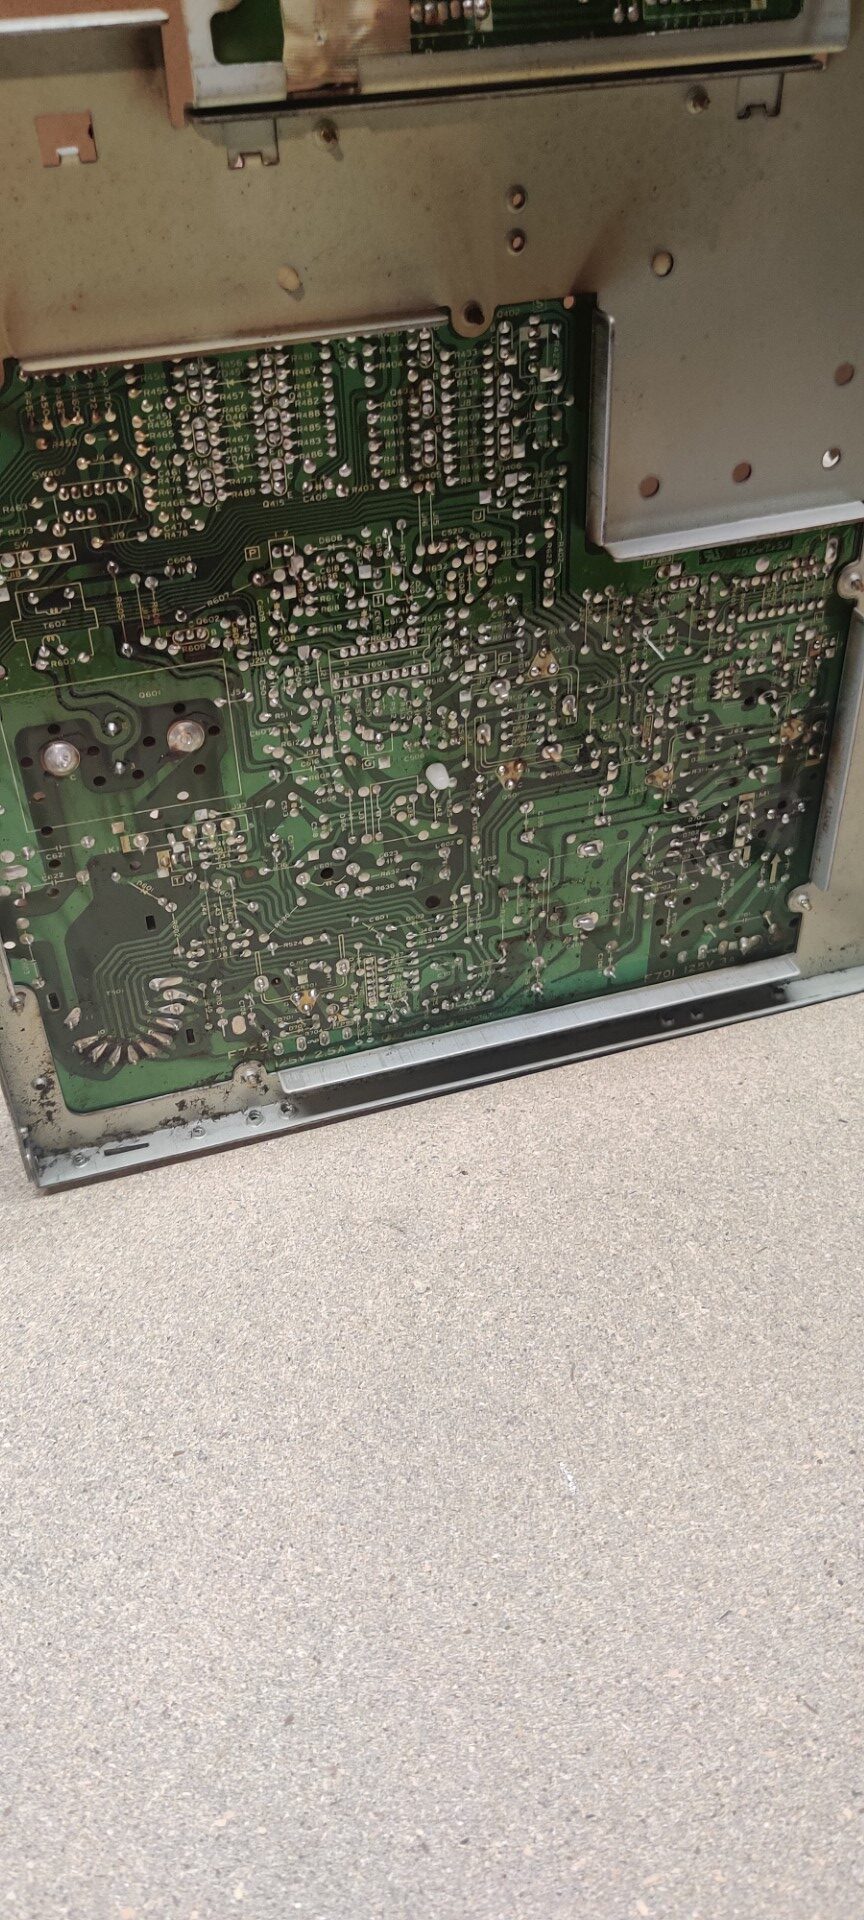
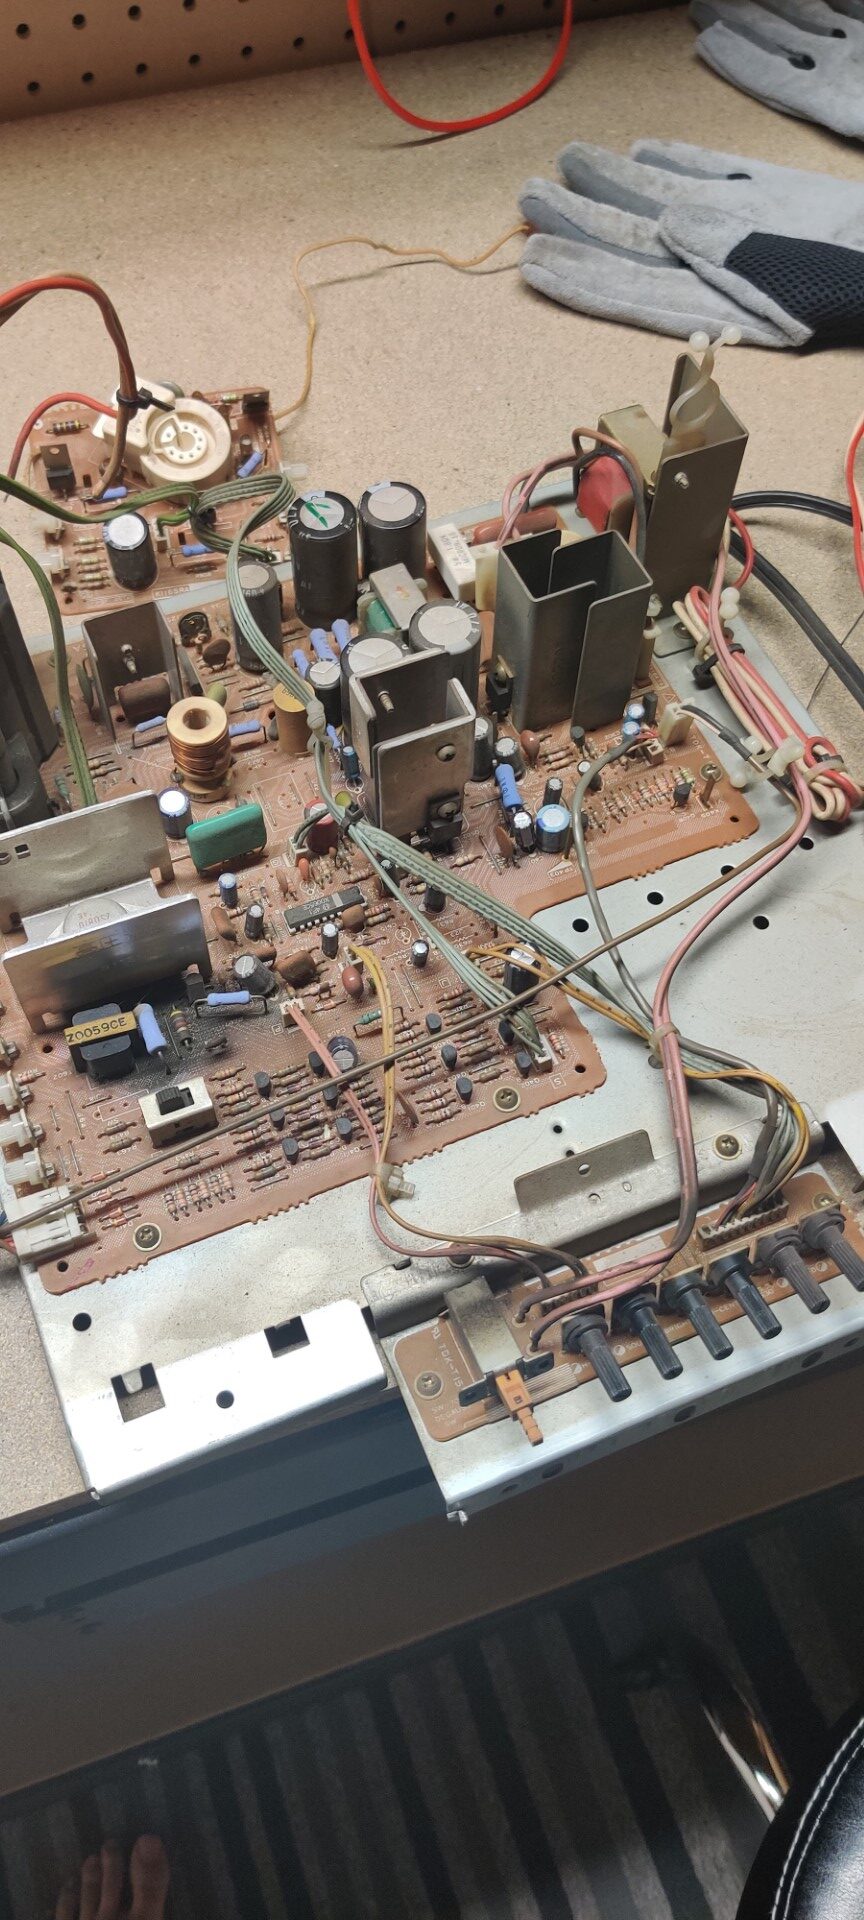
More information about these Red Tent monitors. They’re 18″, an unusual size. They use inverted colors, like all Nintendo arcade games. They’re rare and they break a lot. In theory, I now had two “working” monitors but in reality they both needed work.
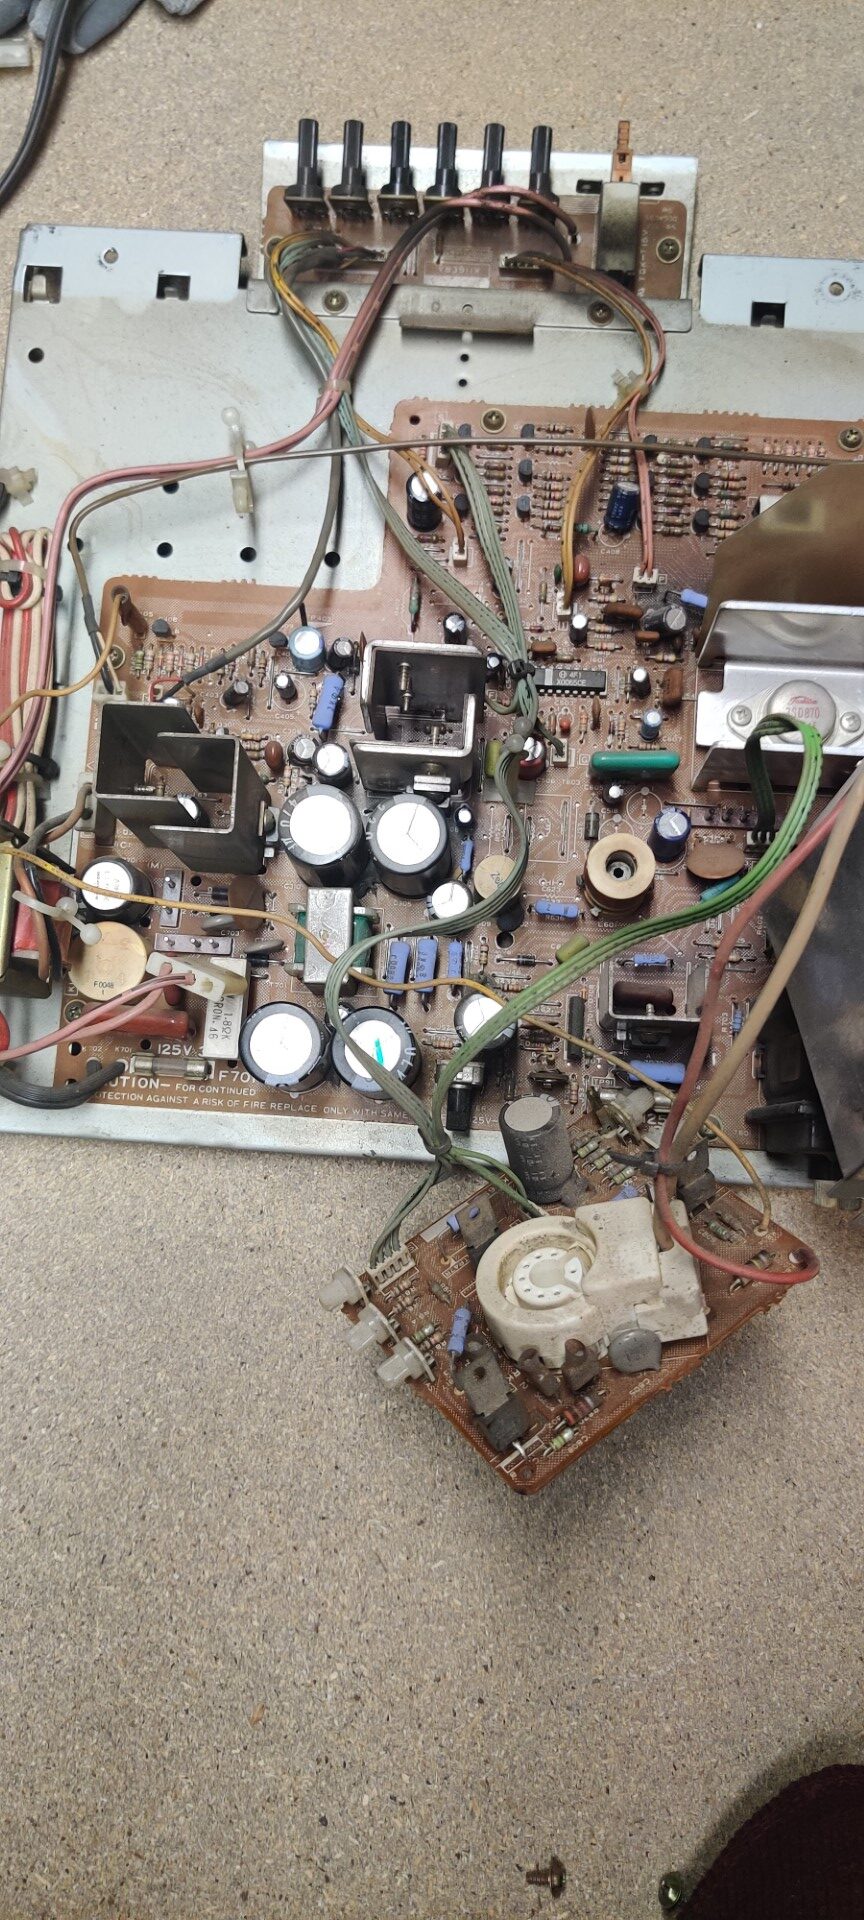
Bottom of the Sharp XM-1801 chassis
Top of the Sharp XM-1801 chassis
Bottom of the Sharp XM-1801 chassis
Top of the Sharp XM-1801 chassis
Bottom of the Sharp XM-1801 chassis
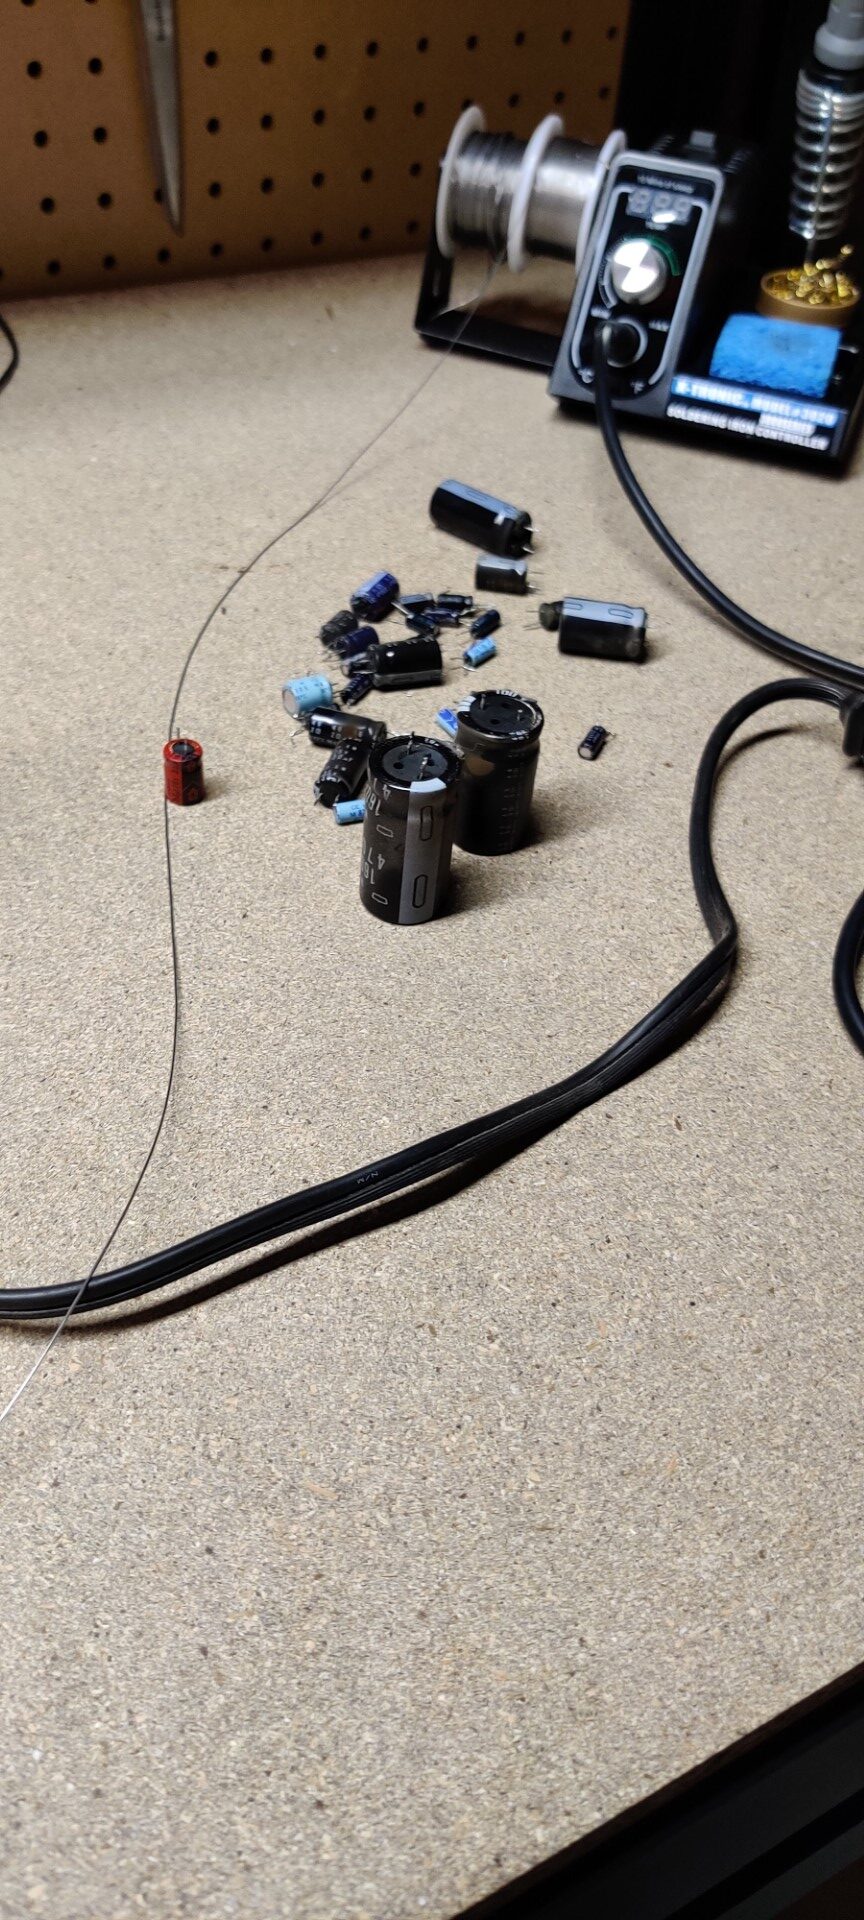
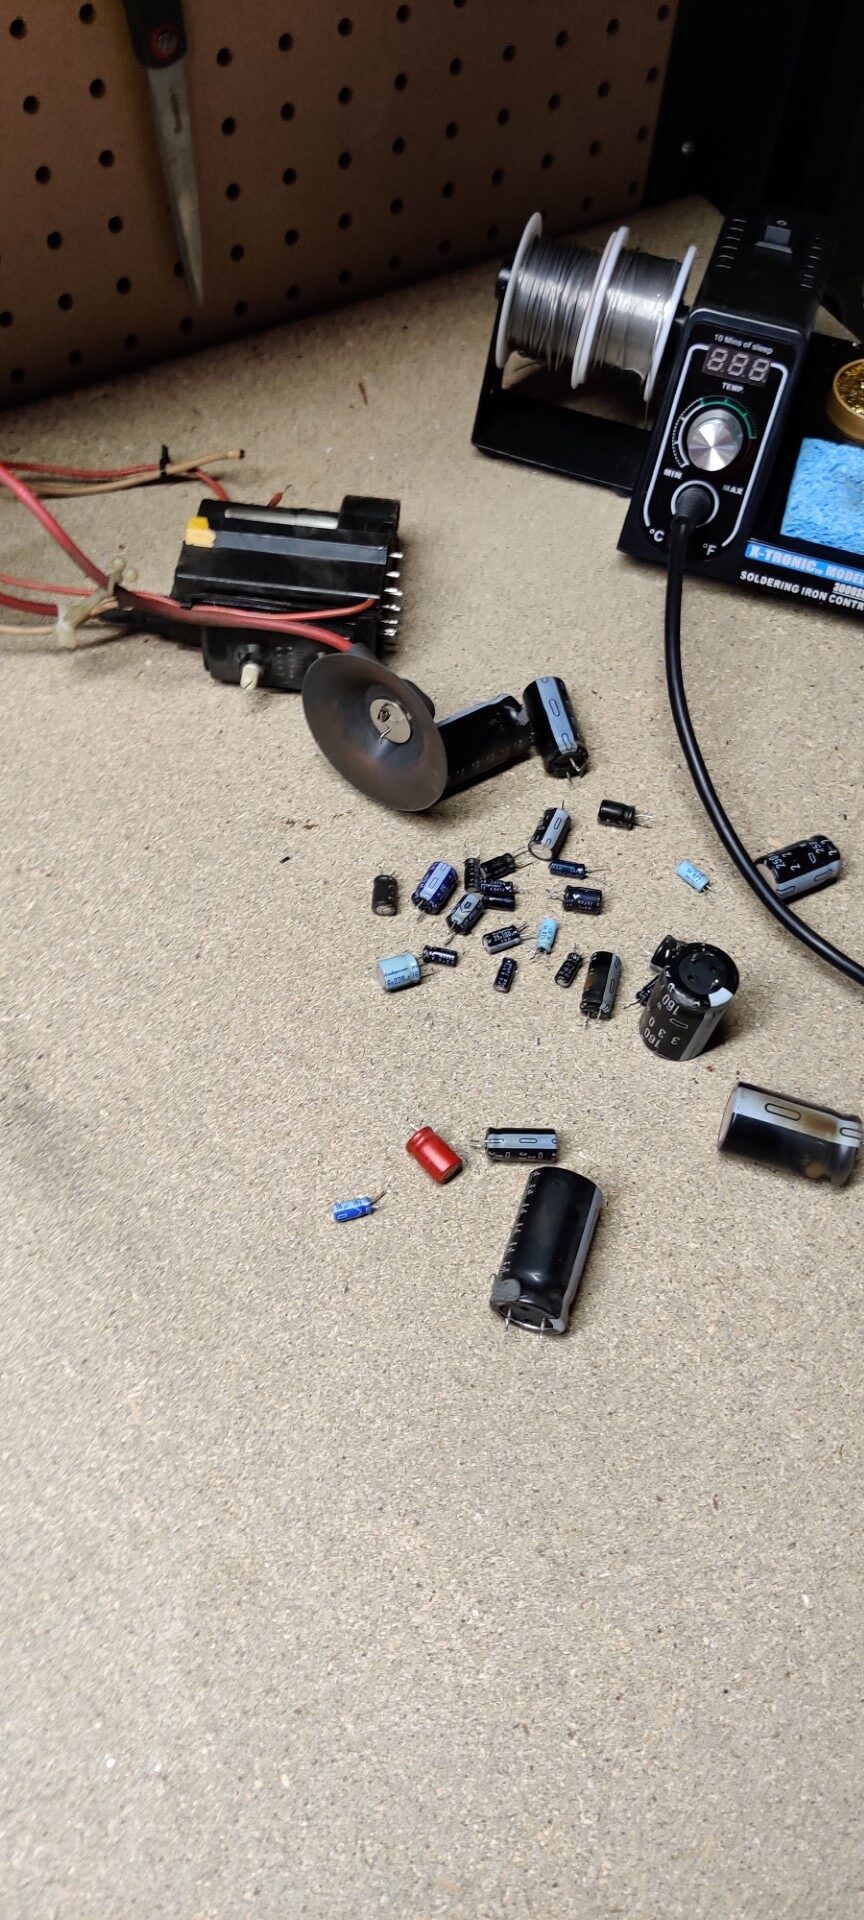
Old capacitors from the monitor
Top of the Sharp XM-1801 chassis
Old capacitors from the monitor
Colors when the monitor isn’t set to invert
Correct colors now that it’s inverting
Balloon fight
Balloon fight after some adjustments
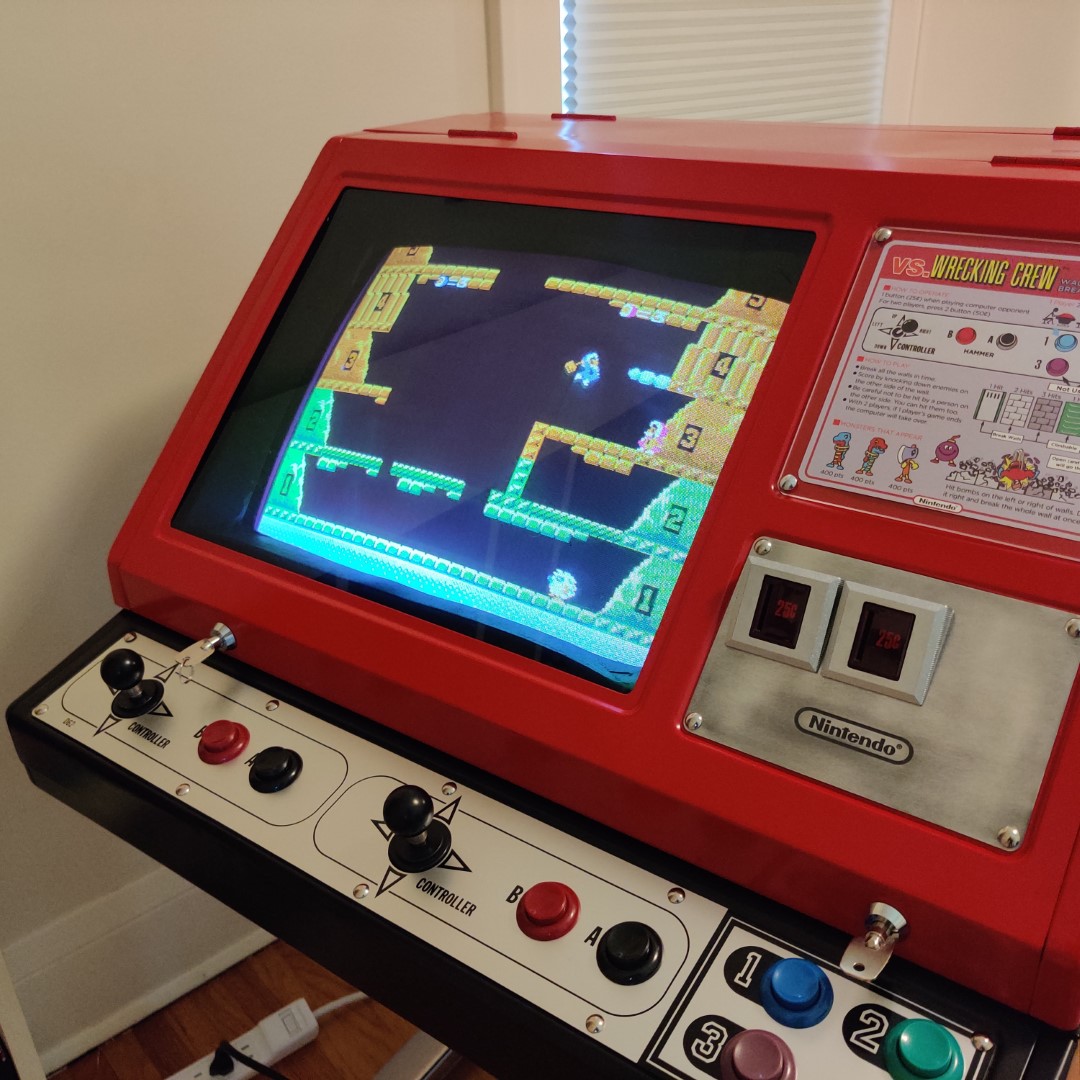
Vs Wrecking Crew on both monitors
Vs Pinball and Vs Mighty Bomb Jack
Vs Balloon fight with better colors
Top of the Sharp XM-1801 chassis
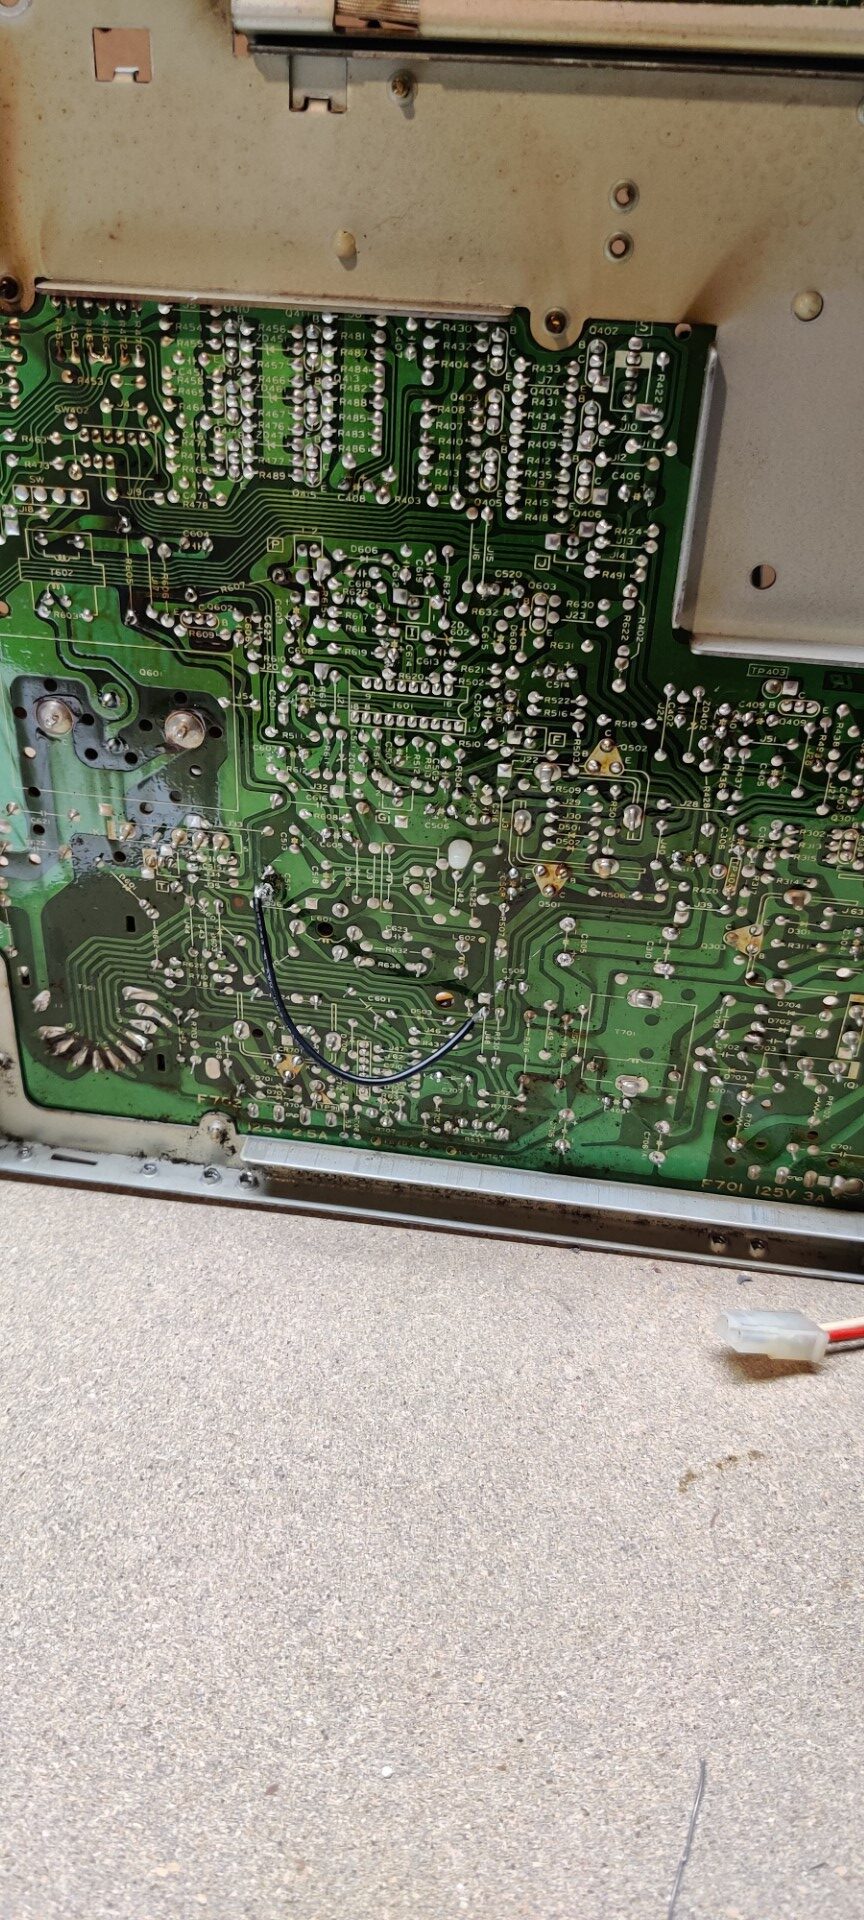
So, it’s time to work! I recapped one monitor and replaced the flyback. This was my first full recap job and I was super bummed when the monitor no longer powered on afterward. I had this monitor looked at by a professional and it turns out I did everything correctly but the replacement flyback I used was broken. Woot! At least, sort of good news. It wasn’t my fault. We put the old flyback in at it’s working again. Just have to hope it keeps working.
Monitor #2
Second monitor was working but no sound. Turns out it was just the volume potentiometer. The repair shop was able to diagnose this for me too, so just used the volume knob from the “cracked” monitor and it was good to go. Both monitors needed a lot of tuning in, and one is a little washed out no matter what I do. But at least my Nintendo Red Tent has two working screens again!
You can also see above what Nintendo arcade games look like if you don’t have a monitor that can invert the colors. These monitors, although pesky, do have a built in inverter switch so they’re easily compatible with both positive and negative color settings.
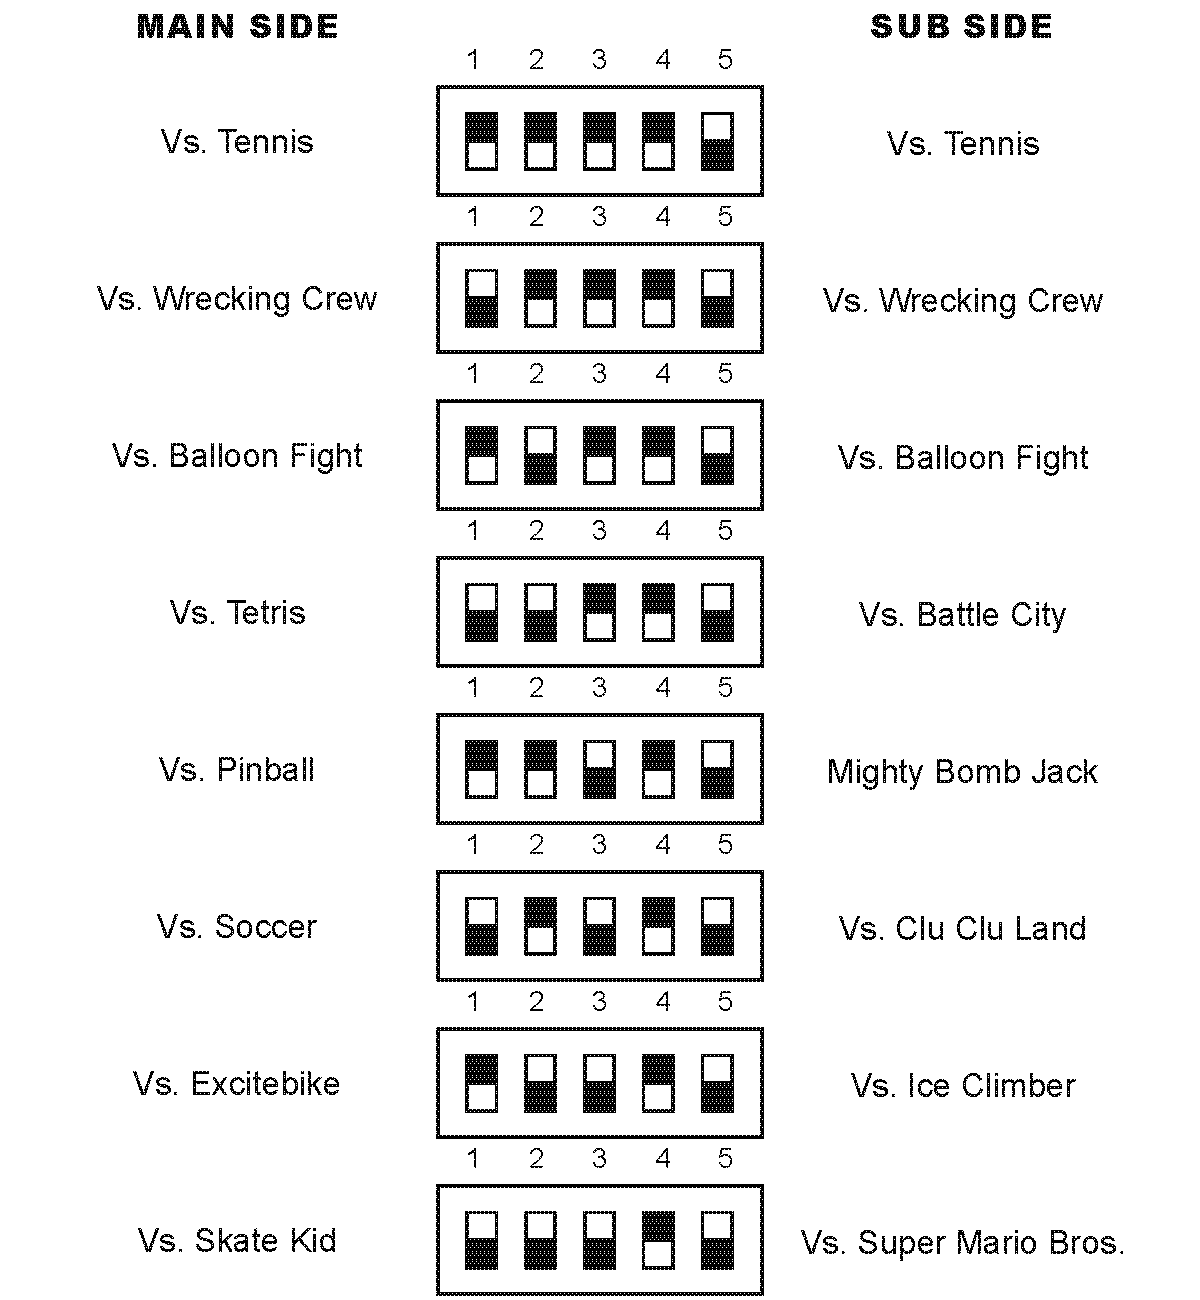
Multiple Games Switcher
A great decision for any Red Tent is to add two of the Multi Vs Lite Kits from HighScoreSaves.com. These let you easily switch between multiple games, all using the same PPU and CPU. You’ll also save a lot of money, no need to buy multiple PCBS!
For my cabinet, I created a little cheat sheet so I’d know what dips to quickly adjust for which games.
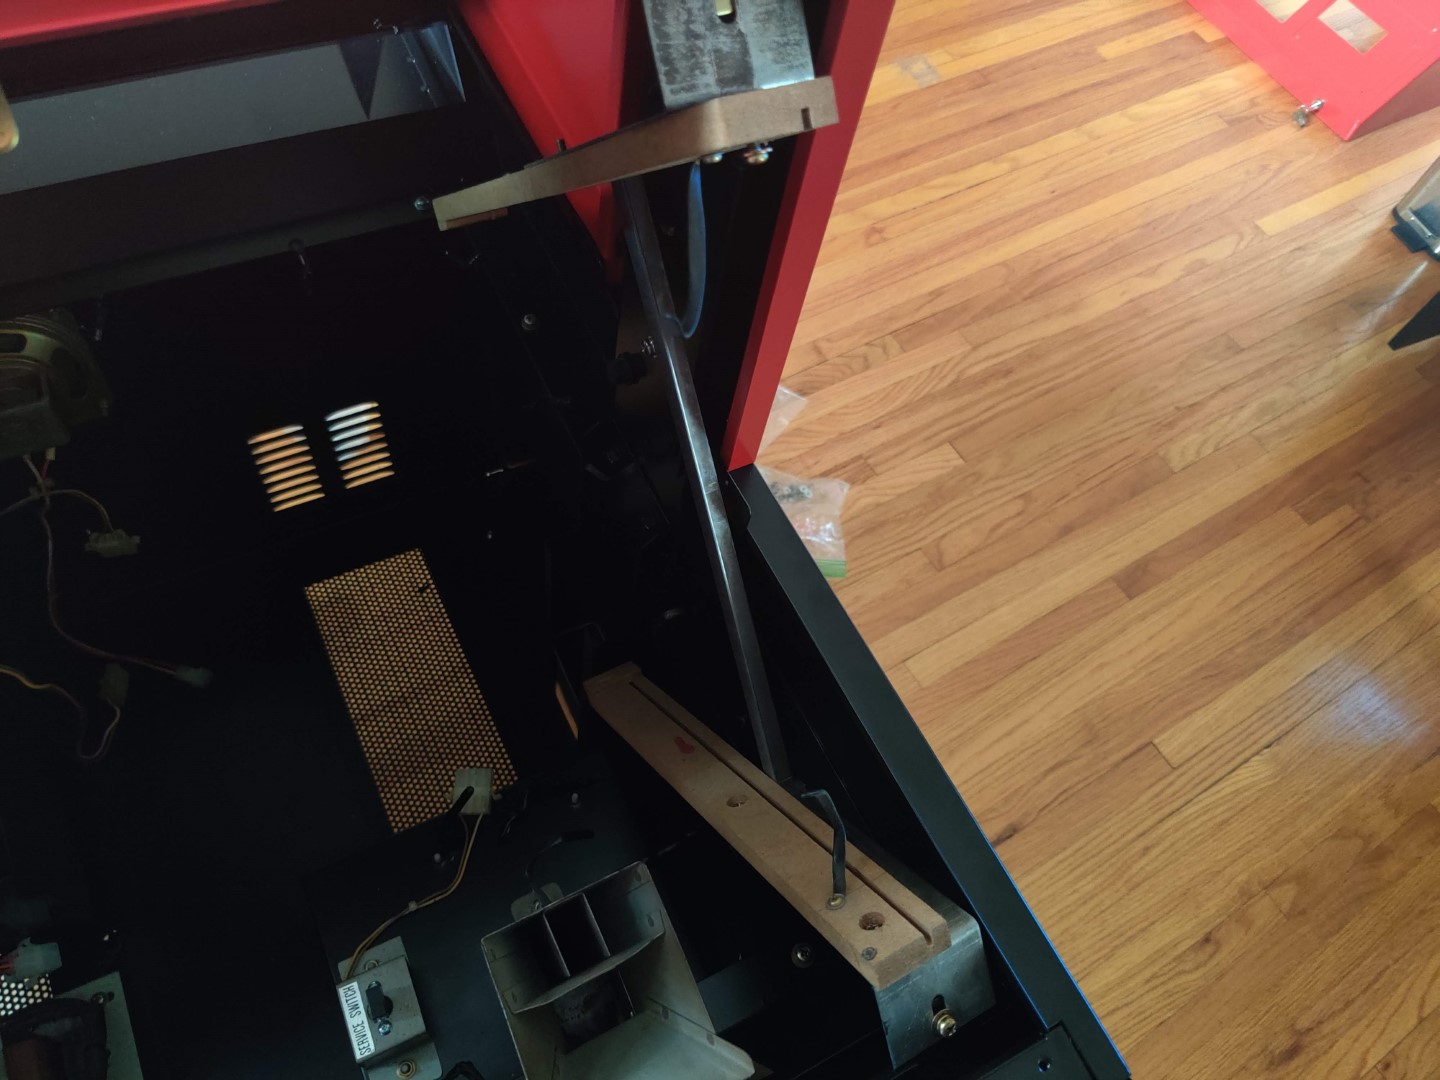
Disassembling a Nintendo Red Tent
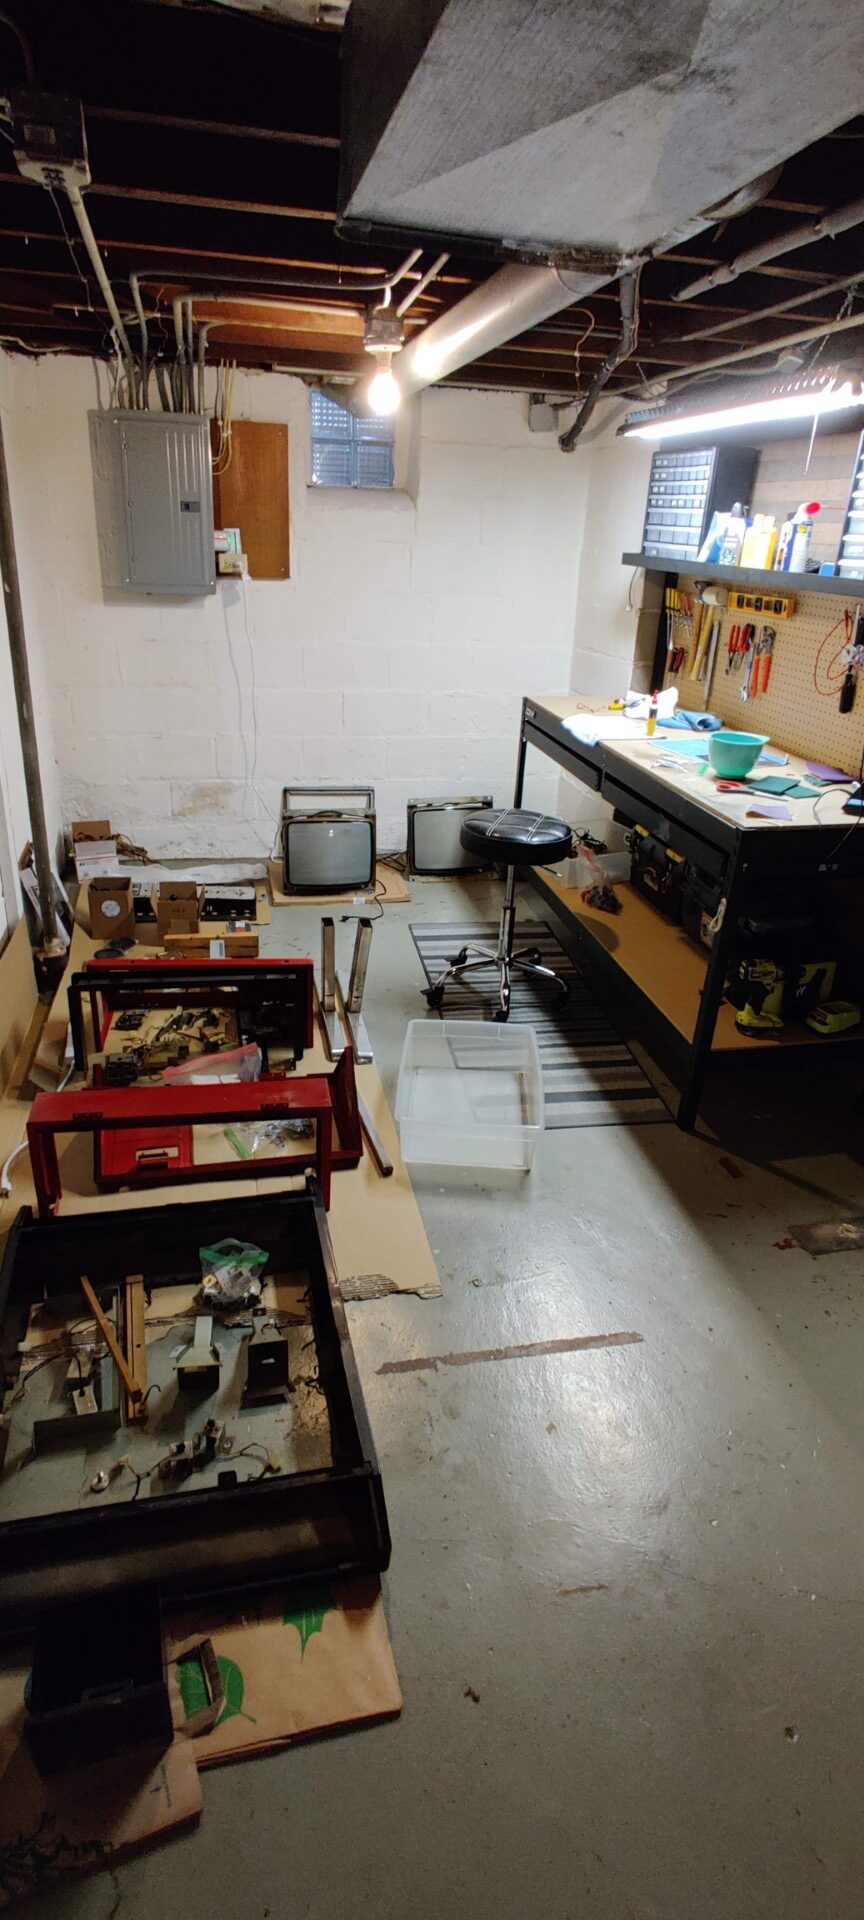
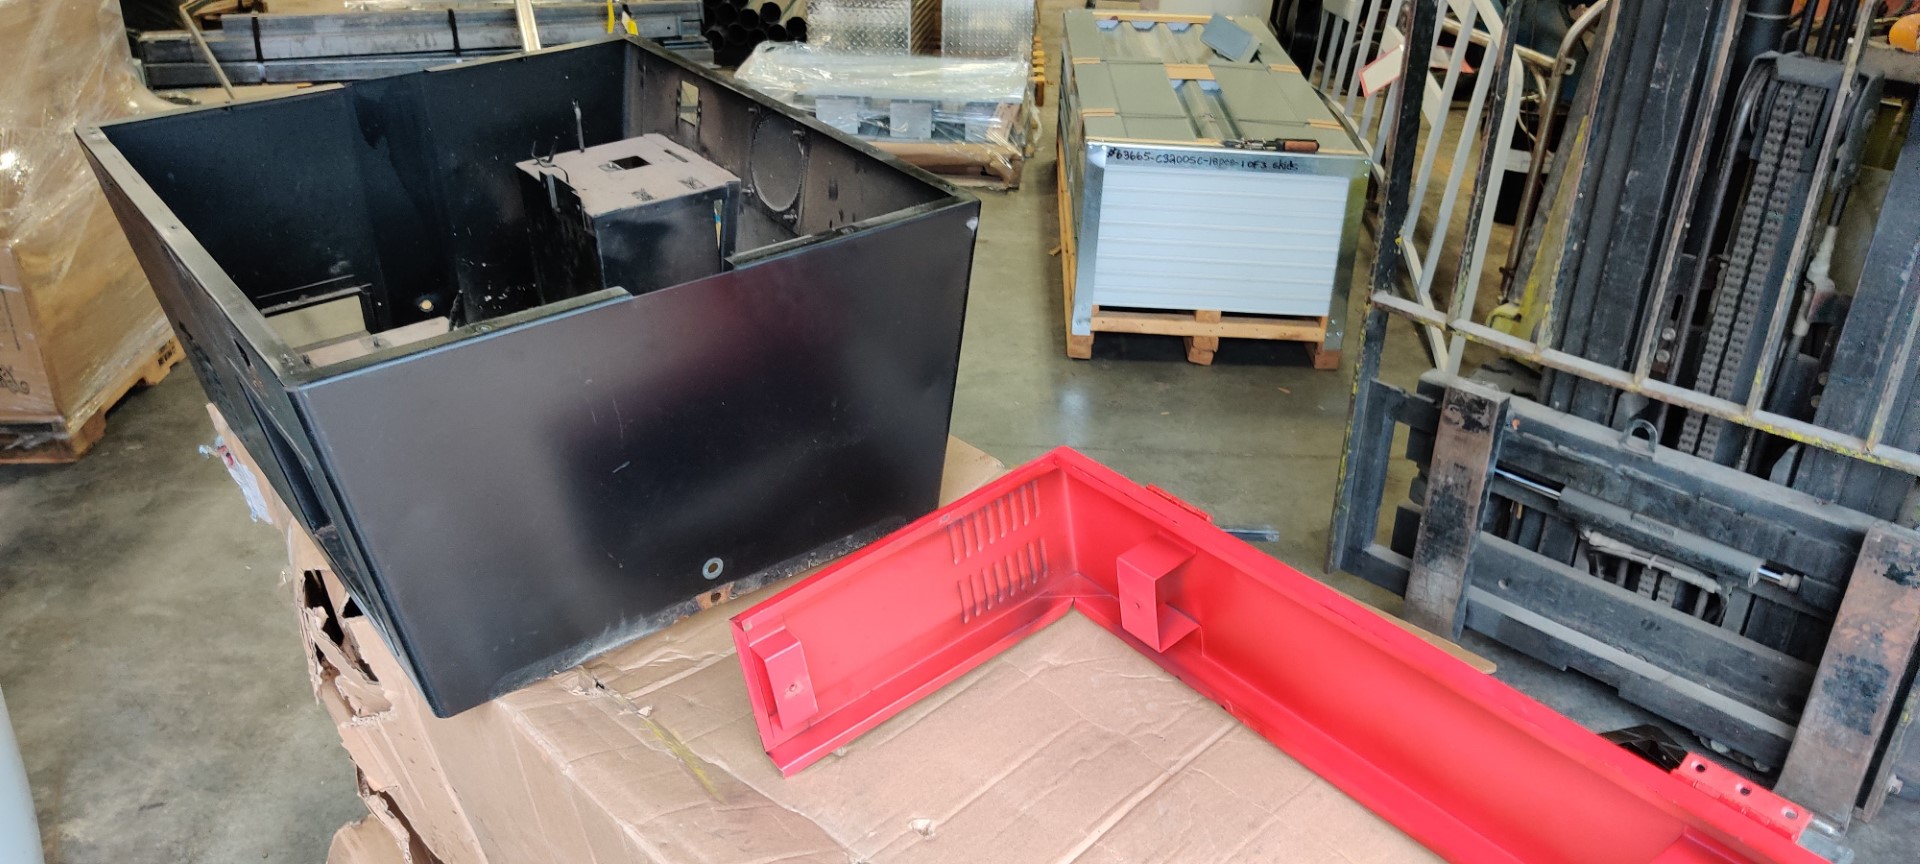
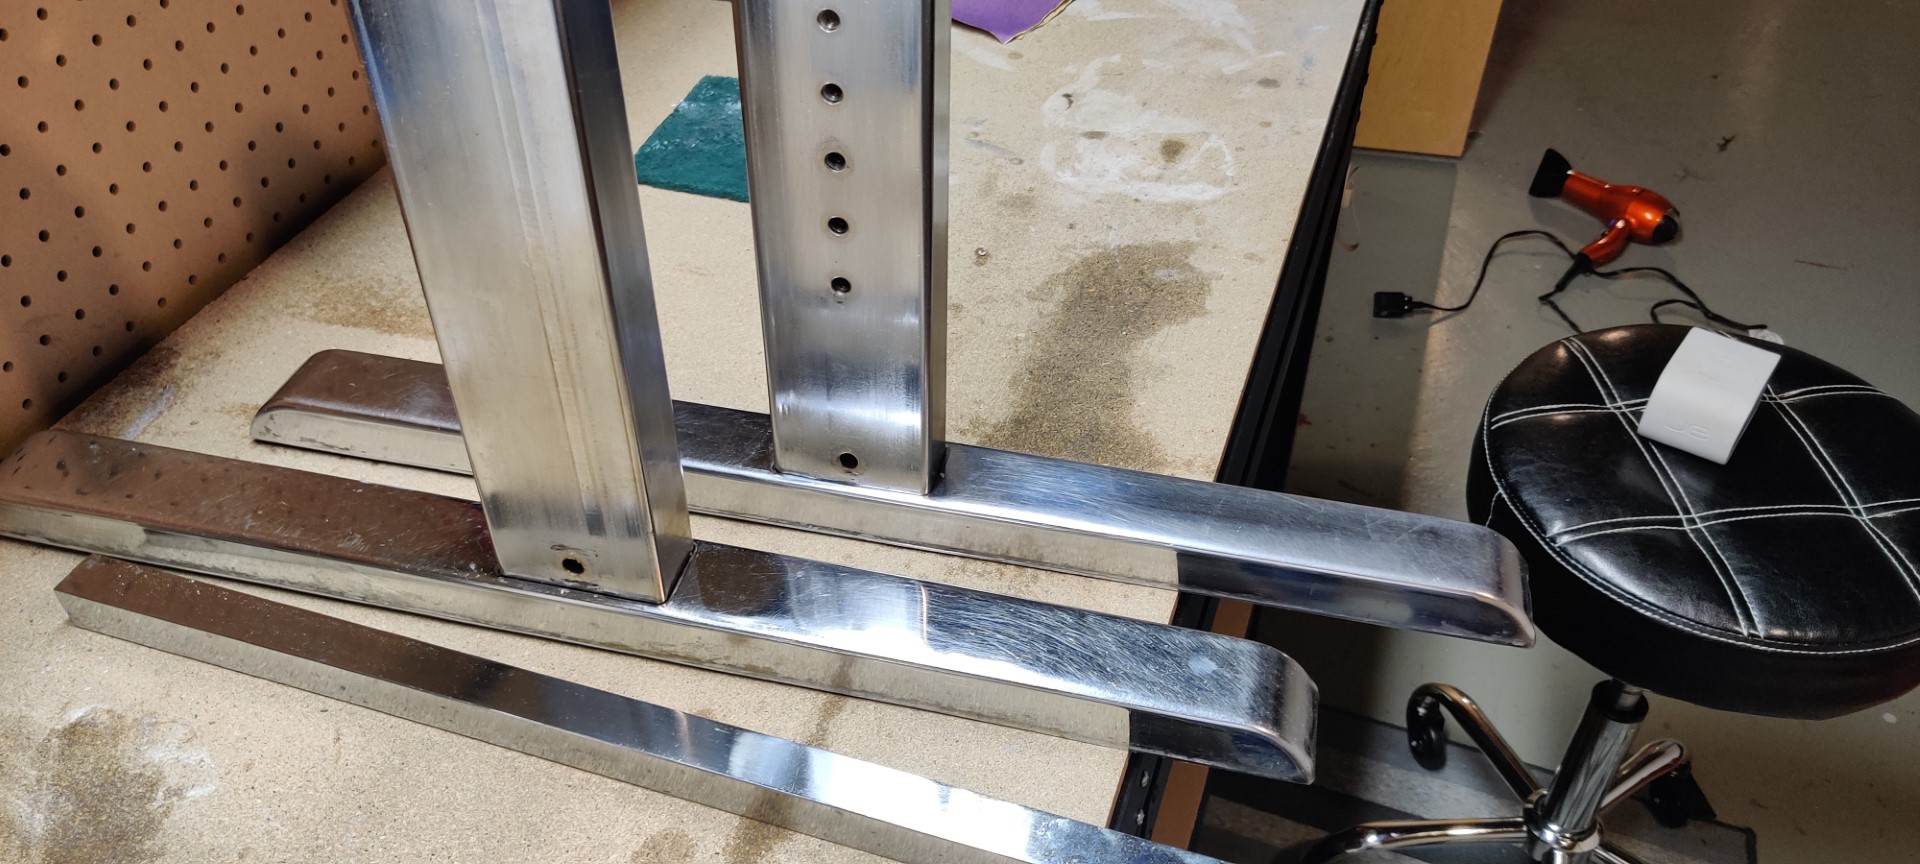
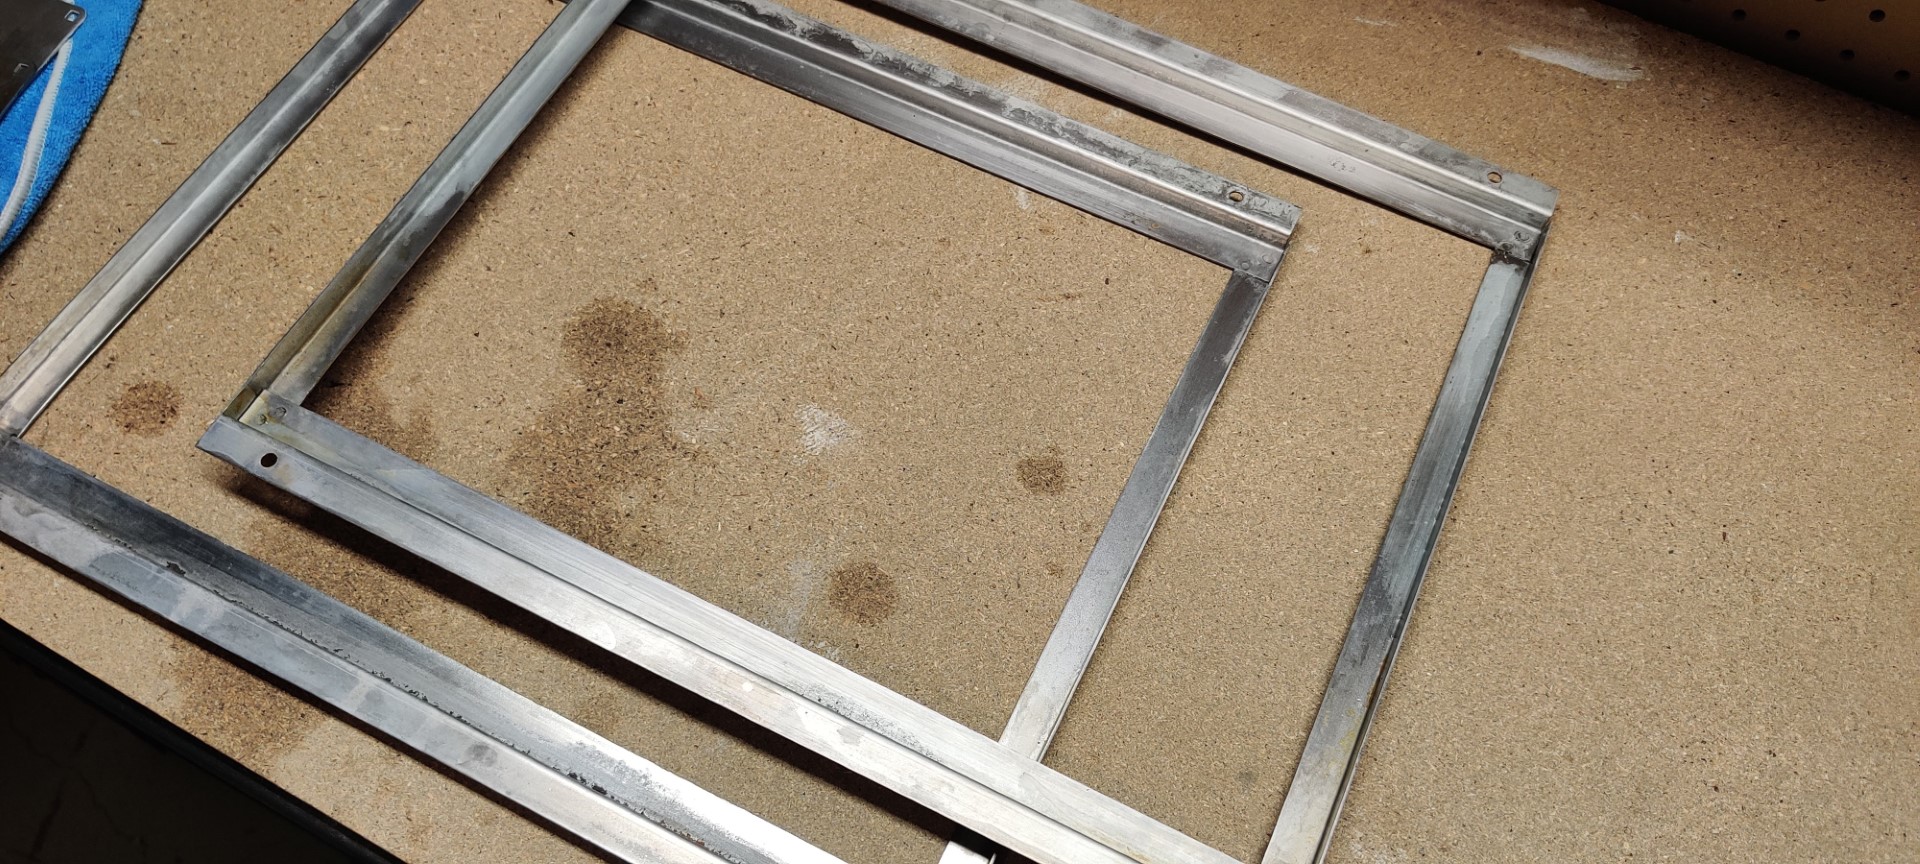
Now it was time to take everything apart so I could clean it. Disassembly is NOT easy on something like this, which has bolts that haven’t been touched in 35 years. I’m telling you, getting this thing apart was a bear and I did it over 1 or 2 weeks time.
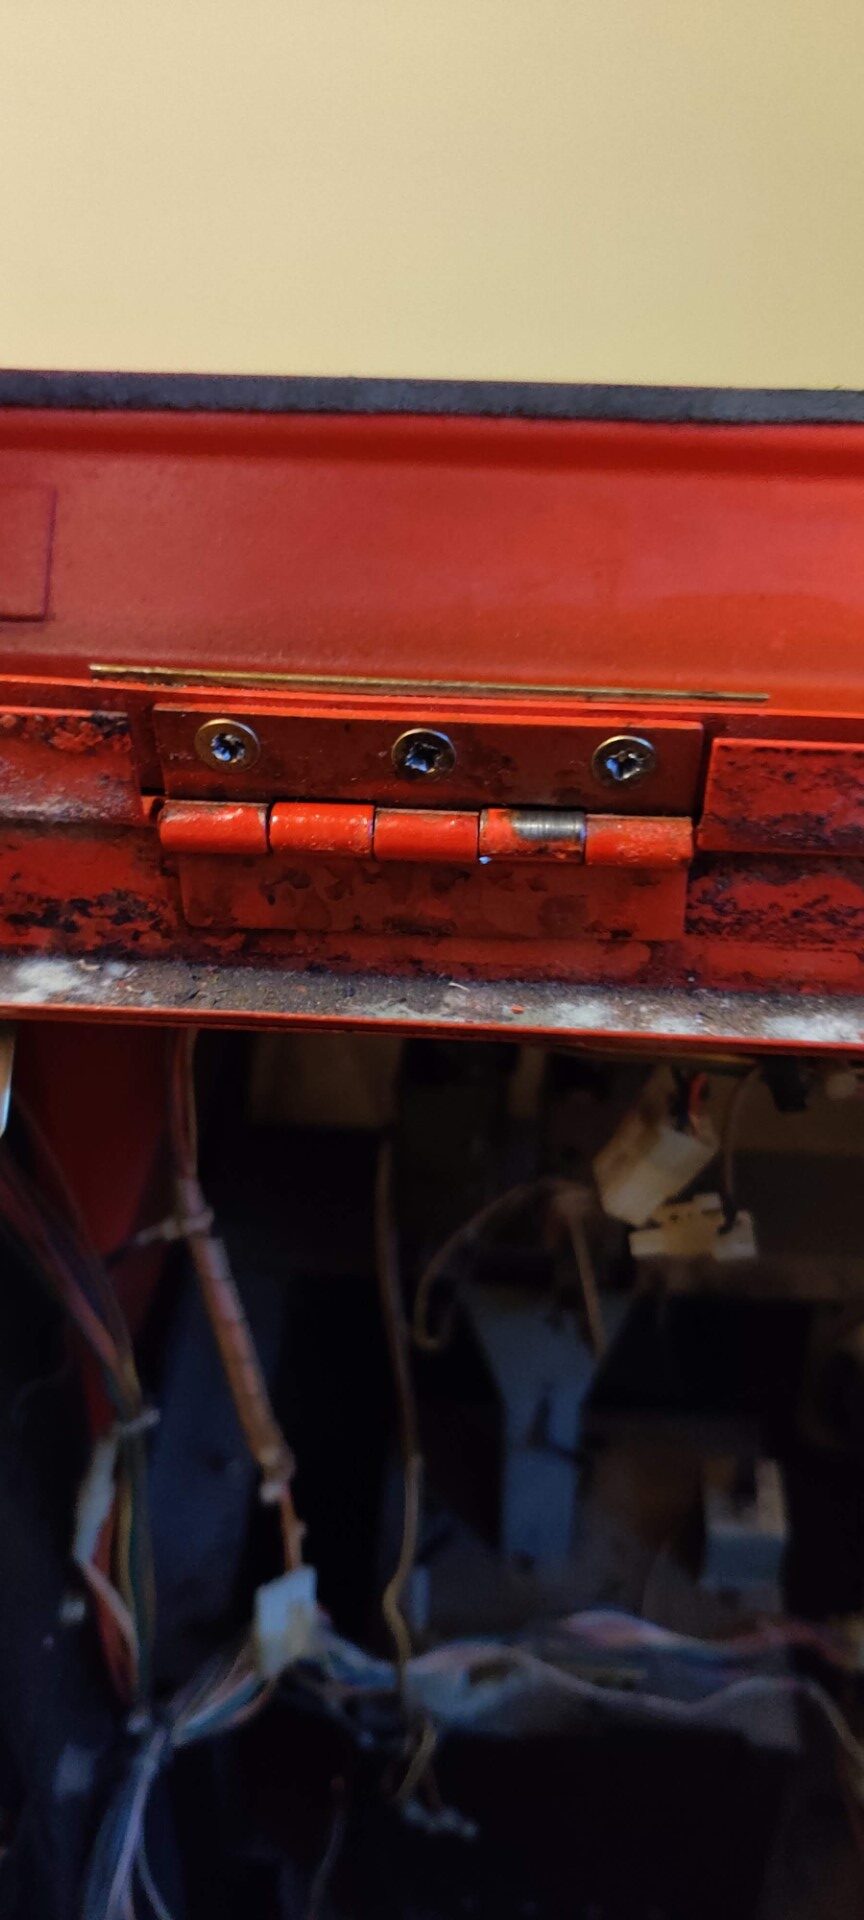
The hardest pieces were removing the hood (which uses much too small countersunk phillips screws that strip super easily). These hoods are seemingly too heavy for the hinges also.
Red Tent hinges
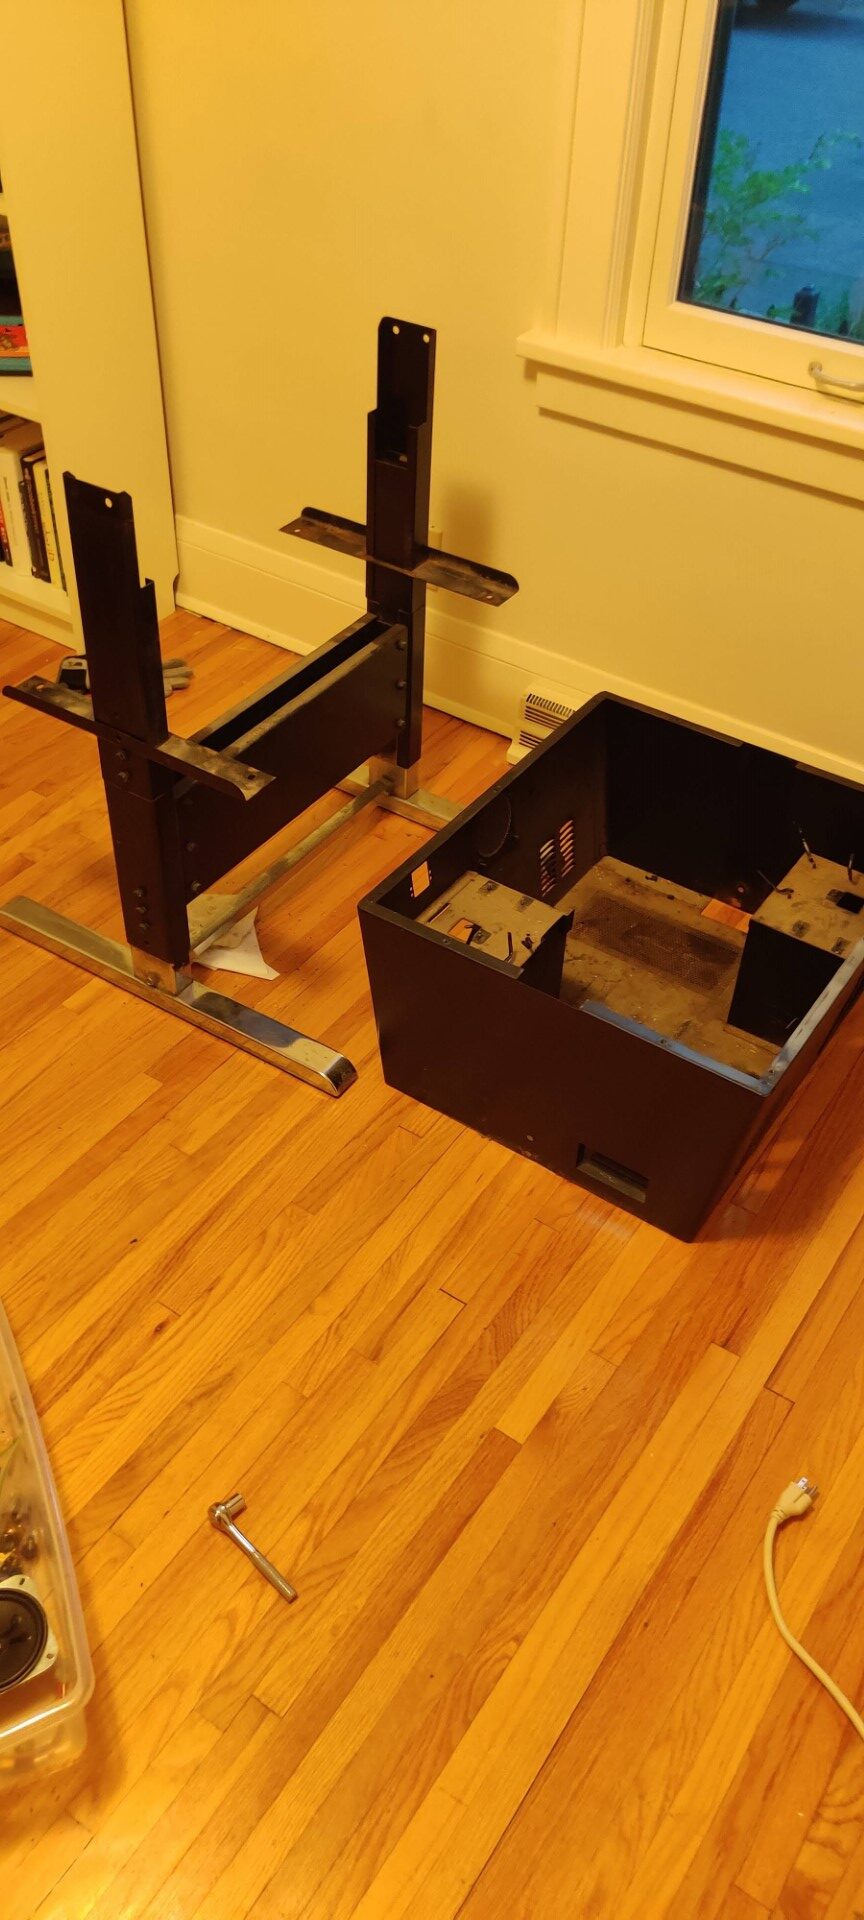
Main cabinet off legs
removing the extra lockbar bolts
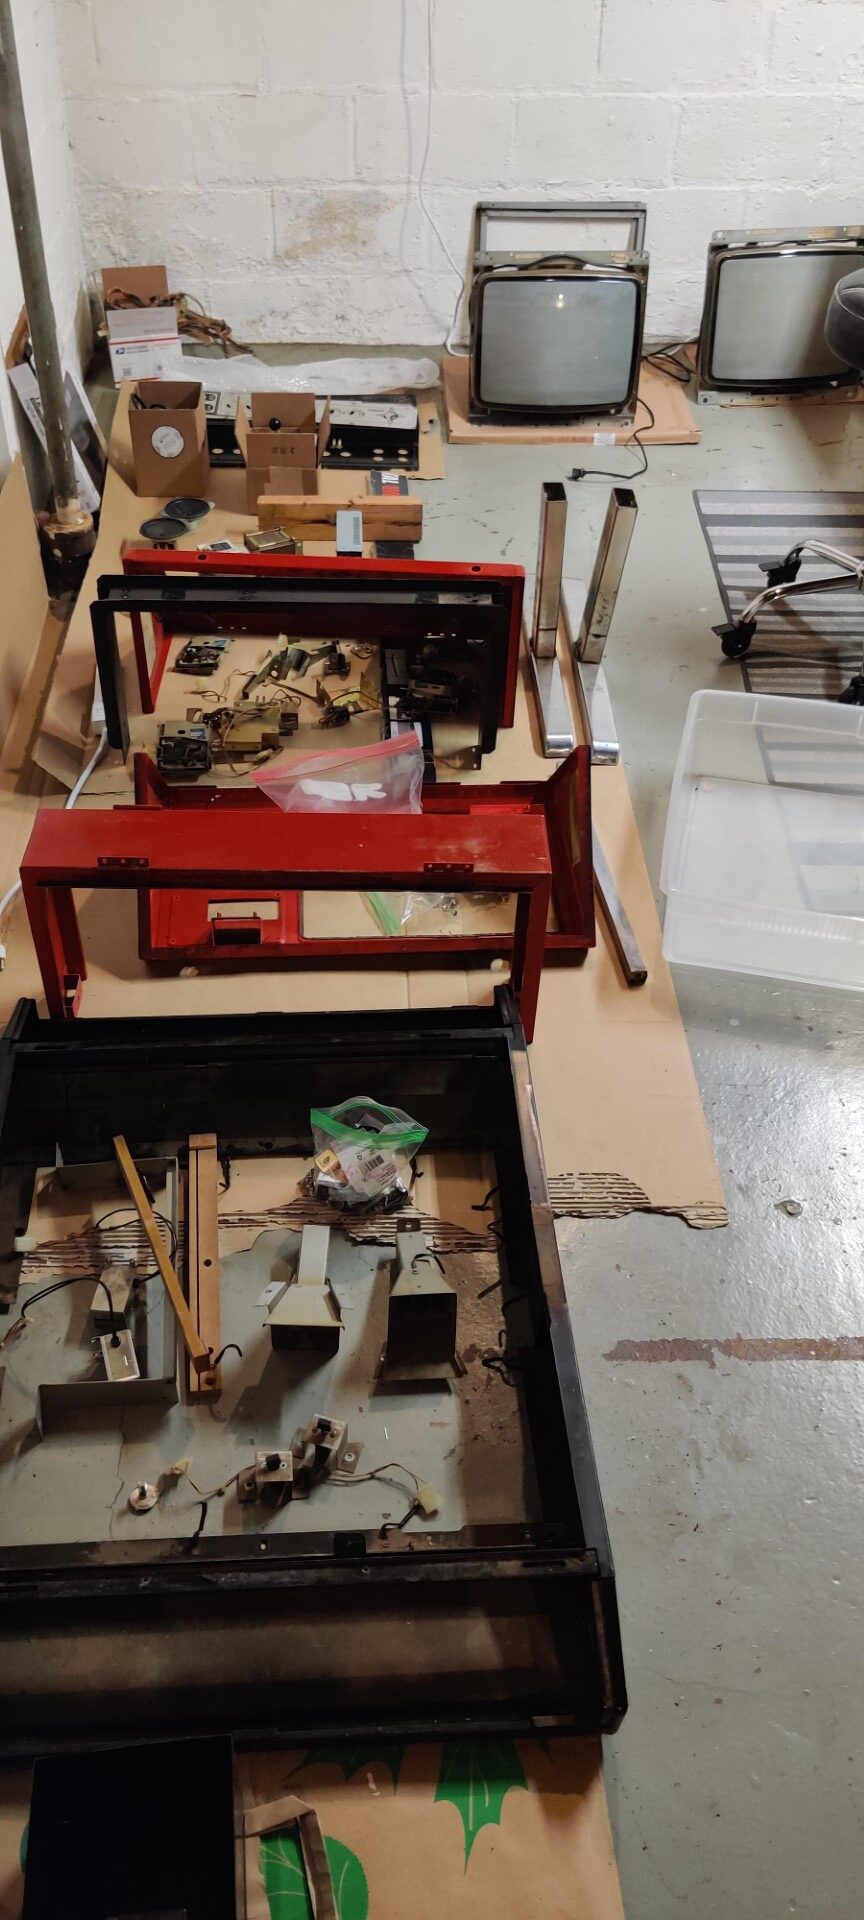
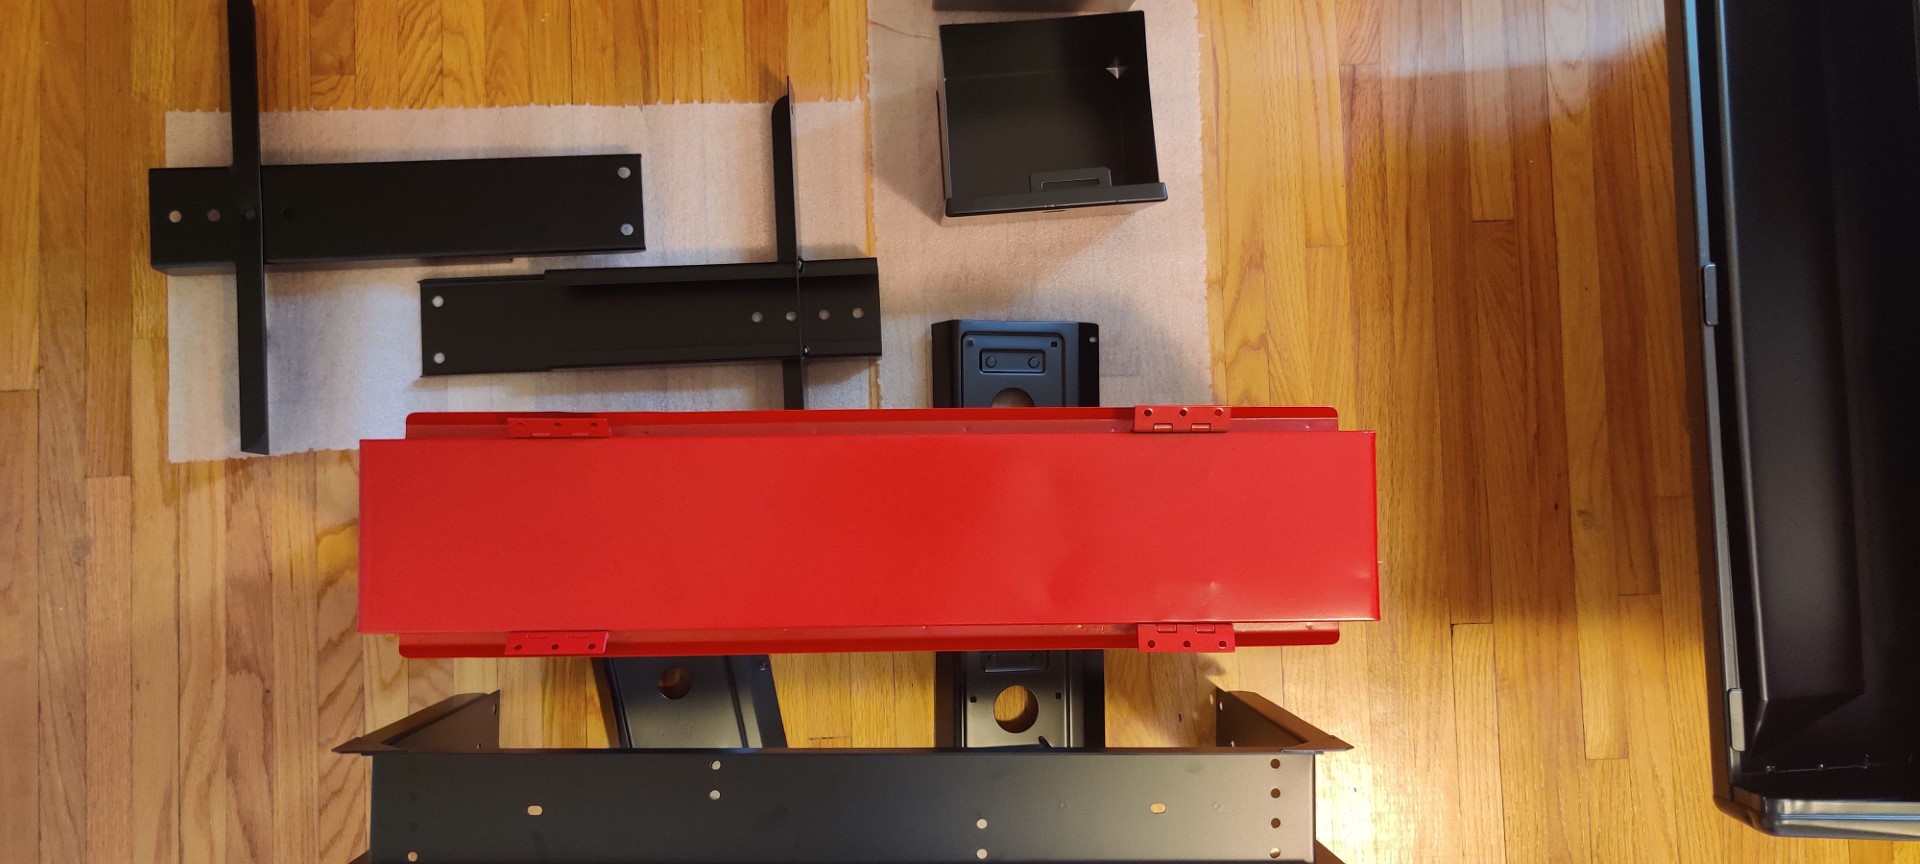
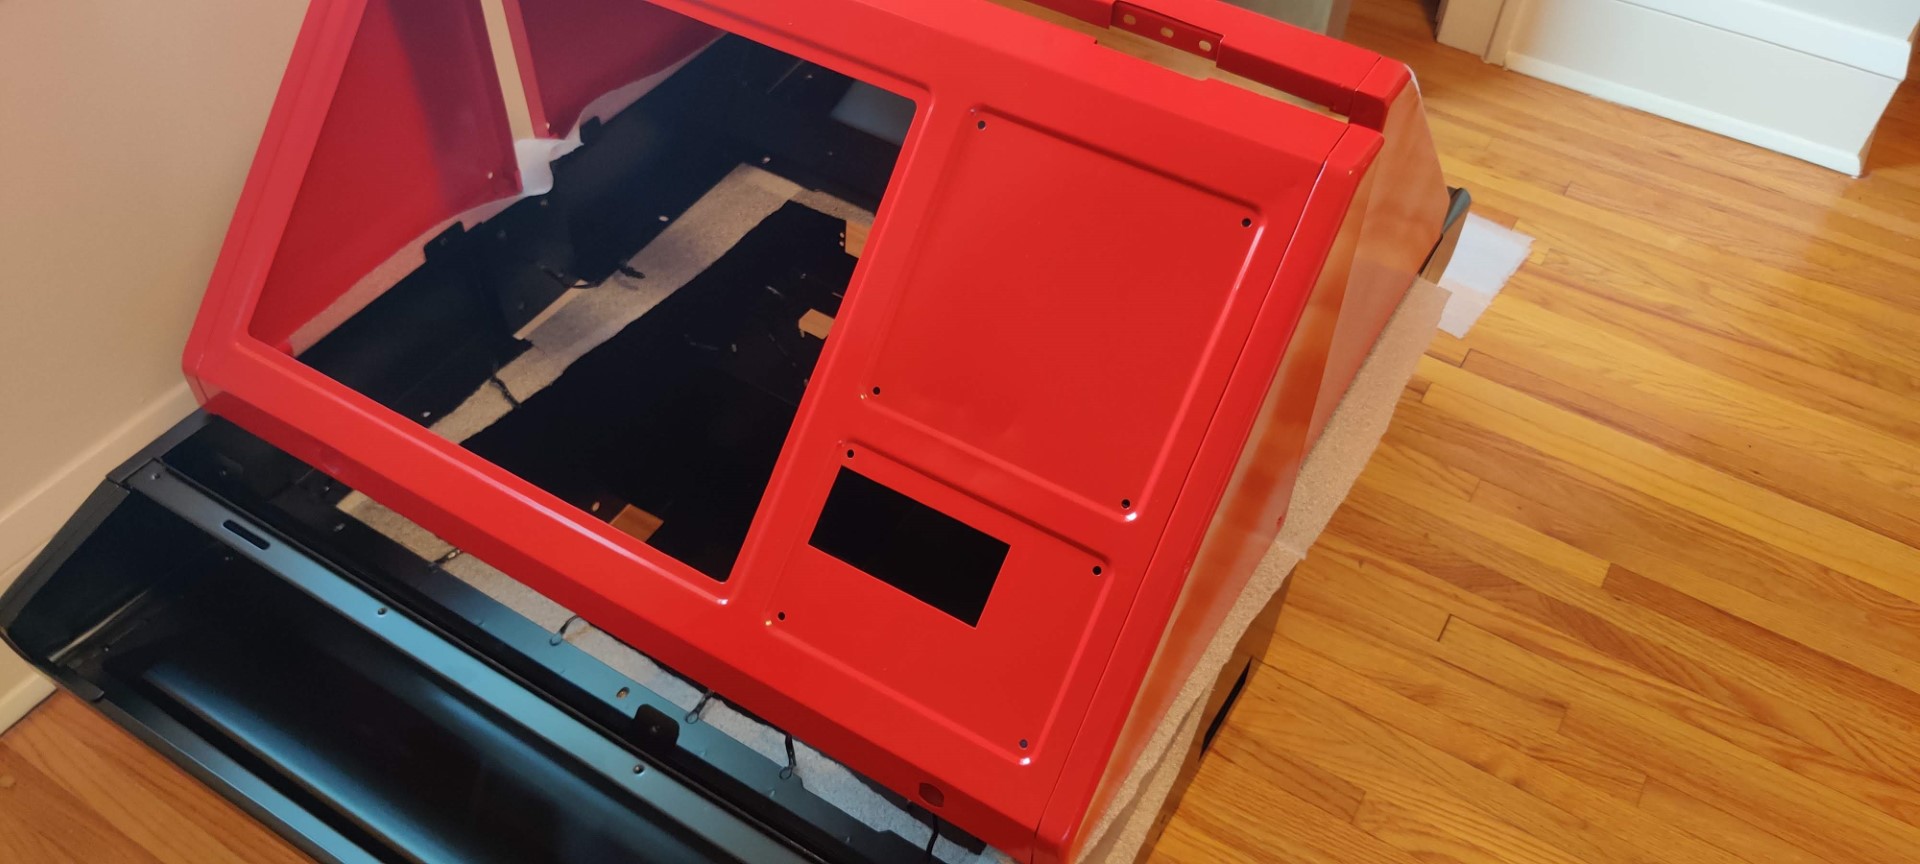
All pieces
All pieces plus monitors
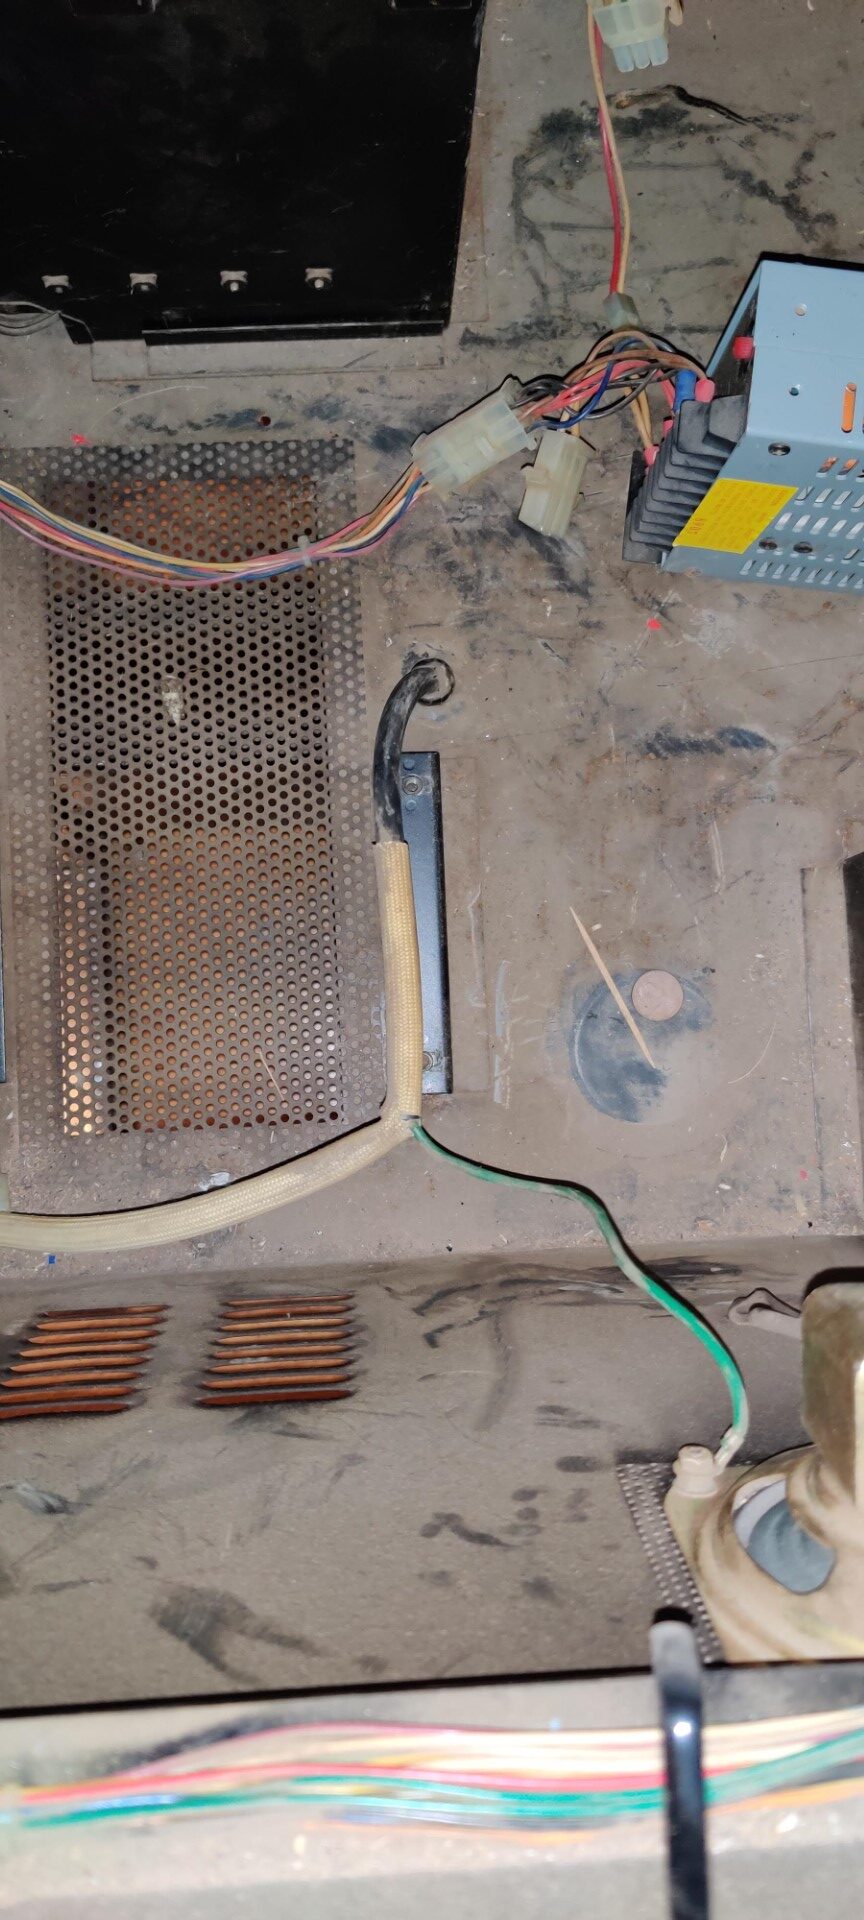
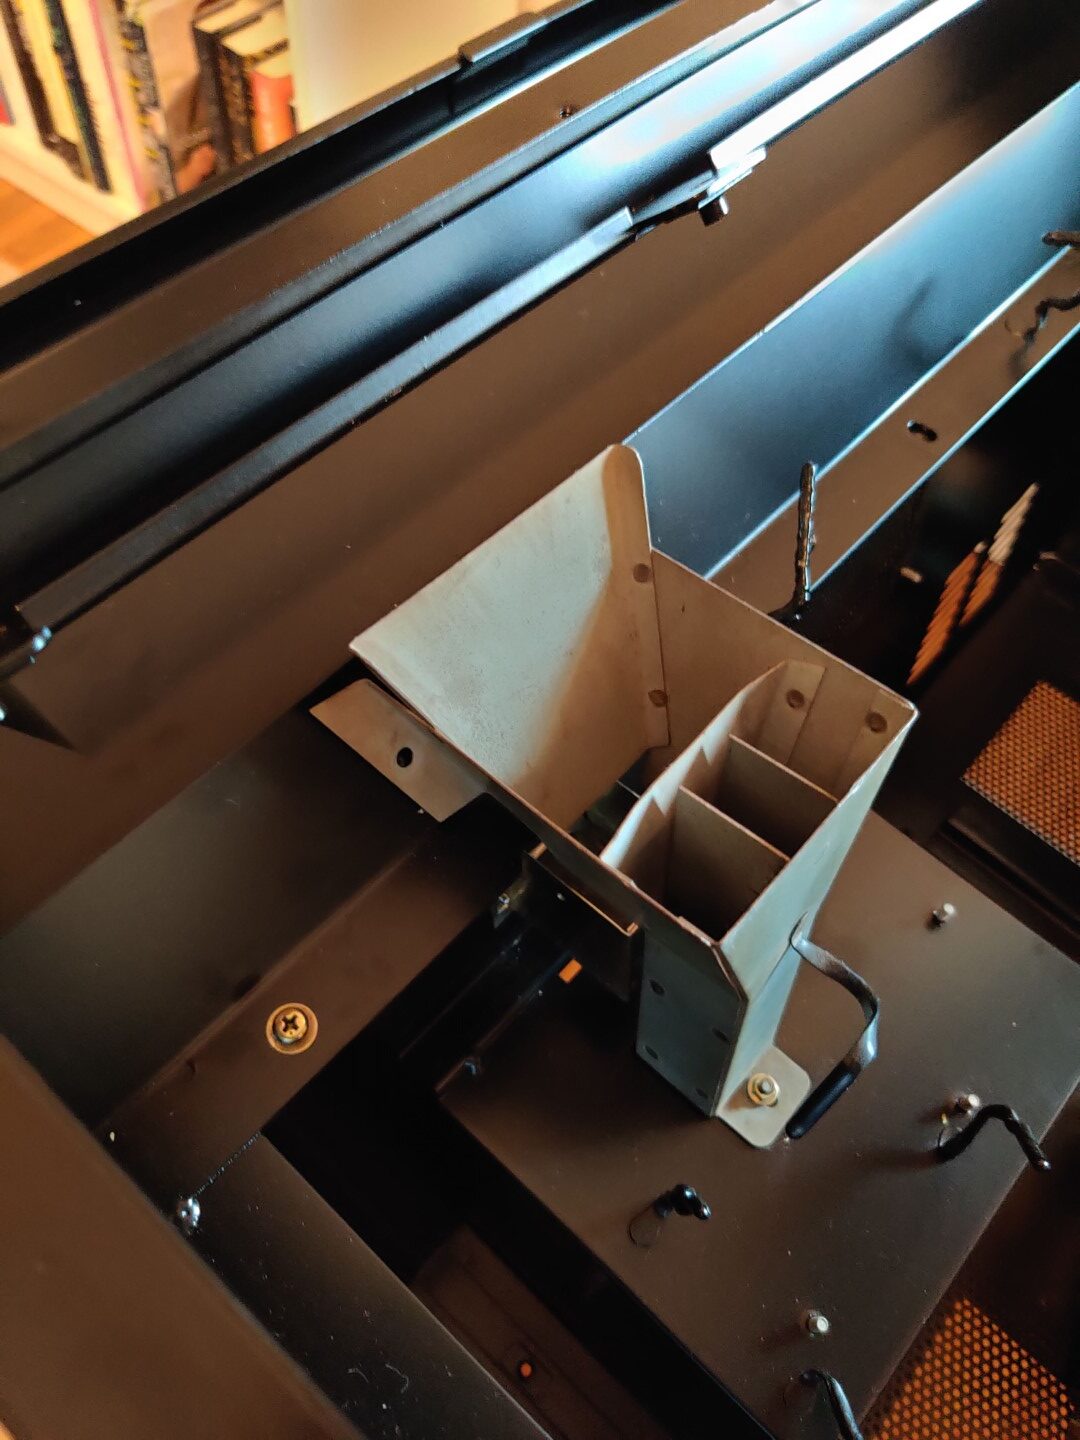
Power transformer section and cord
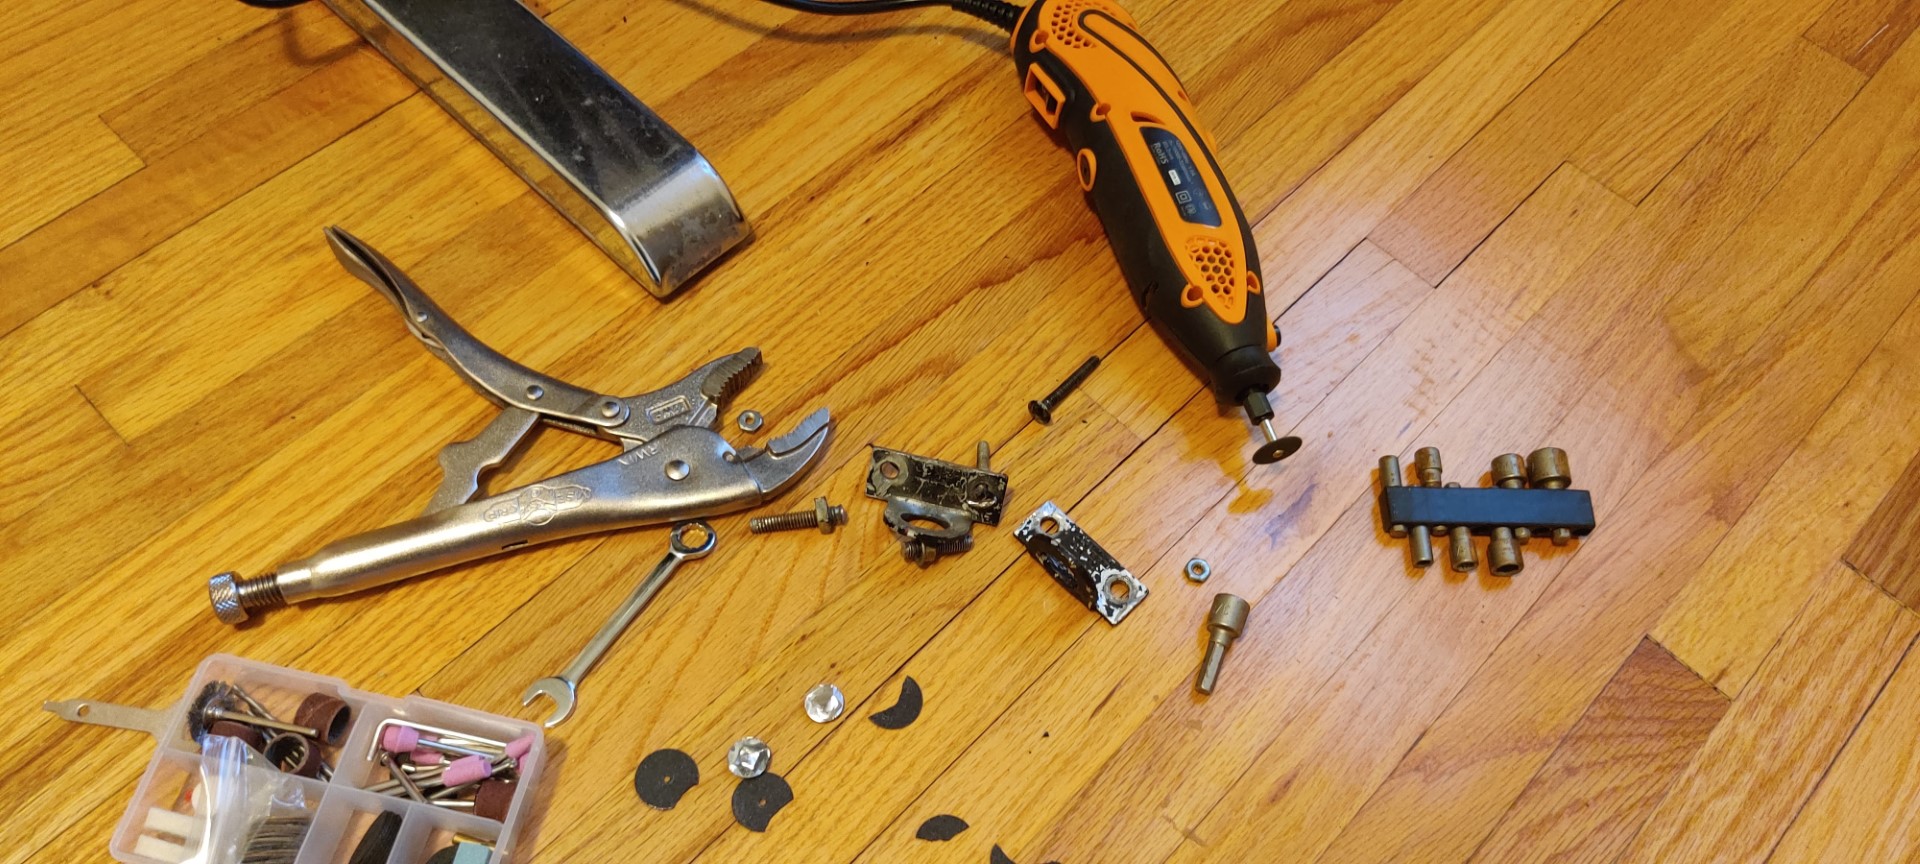
Two other sections were a real pain to deal with. First, the power cord was held in place with a special strain relief device. I’d never encountered anything quite like this. After numerous attempts to tear this bad boy out, someone on KLOV helped me identify what it was and the proper way to remove it (little tabs you squeeze in from both sides)
Second, the someone had added extra lock bars to both coin buckets. They used carriage bolts to hold these lock bars in place but the holes themselves were round. Meaning, unscrewing the nuts from the back was damn near impossible! Add on top of that, the nuts were square instead of a typical hex shaped. Long story short, I ended up grinding some of entire bolts off, others I was able to remove with a combination of a wrench and quarter turn after quarter turn.
See a before and after patching the holes
Strain relief for power cord
After the bolts were out, it was time to patch those holes which wasn’t difficult using some JB Weld. Some heavy sanding later, and I was pretty pleased with the results.
Fixing the Body Parts
Now that the game is disassembled, it’s time to make it pretty! I had two choices for this; paint or powder coating. Let’s look at the differences:
Painting
Can do on my own
Relatively cheap
Practically unlimited color choices
Hard to get perfect
Time consuming (for me)
Requires substantial sanding and prep work
Powder Coating
Professionally done
Durable finish, long lasting
Cleanest look
Expensive
Have to wait for shop to have time
Limited color selection
So, which way did I go? Since this is my first restore, I wanted it to be darn near perfect. Powder coating it is. I brought all the parts to a local powder coating and played the waiting game!
Waiting to be powder coated
Waiting to be powder coated
Waiting to be powder coated
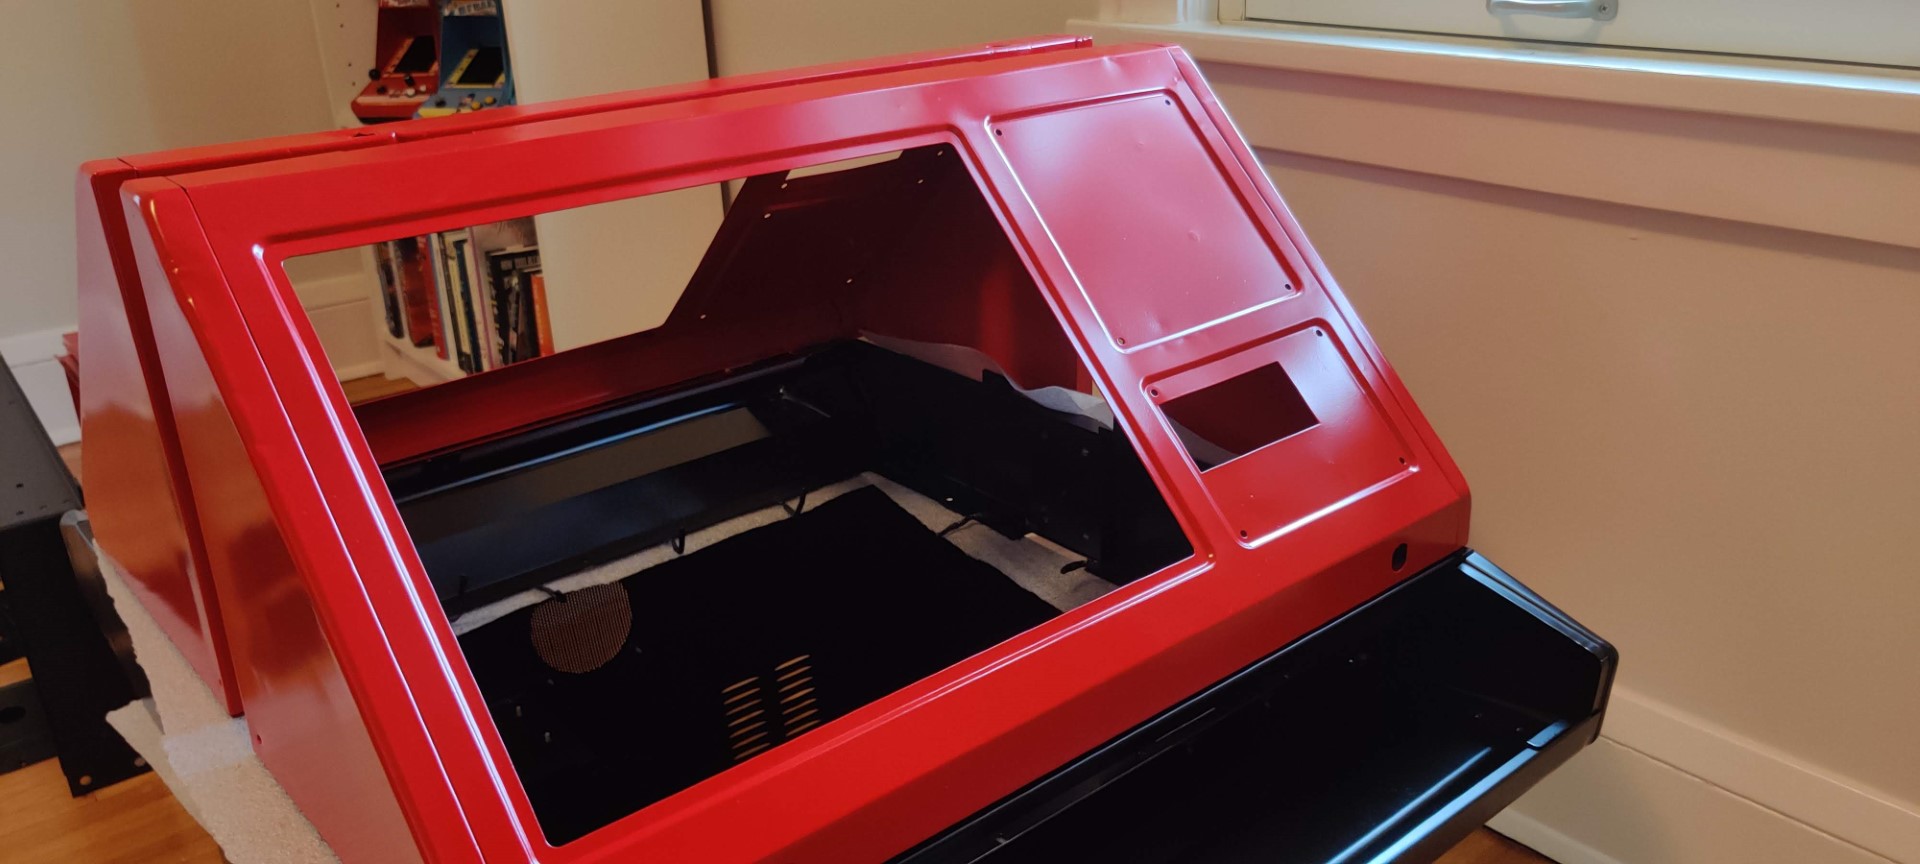
The freshly coated pieces!
The freshly coated pieces!
The freshly coated pieces!
I think the final results speak for themselves. Powder coating just IS the superior options for painting metal pieces. And their sandblasting process for cleaning the parts ensures they’re in great shape.
The only downside is, since the paint is so perfect, some dents or bumps are more easily visible. There’s no way to avoid this without many, many hours of metal work beforehand which just wasn’t worth it to me.
Cleaning The Remaining Parts
With the main body parts all set, I set my eyes on the remaining metal parts that needed to be cleaned and restored.
For the legs, I used a combination of diet coke and aluminum to clean the rust off. Then, I applied a buffing compound to finish them off. While not perfect, they’re much better.
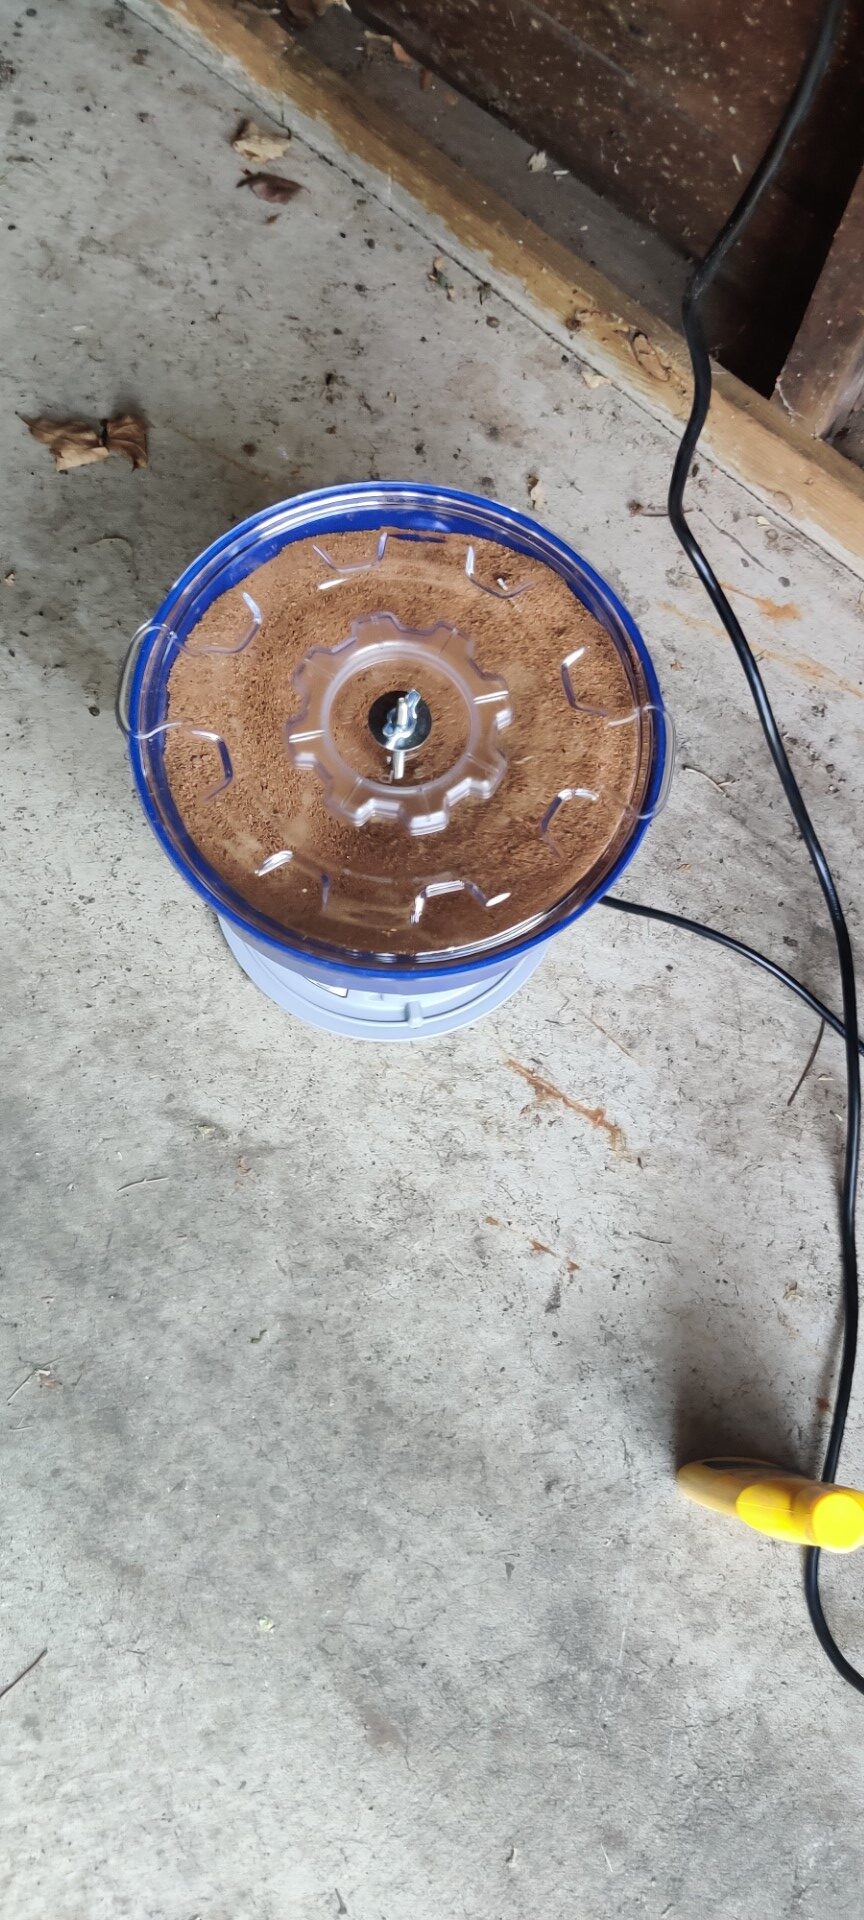
Looking at the coin acceptors and plates, I used a tumbler to bring the pieces to a great new shine. I suggest running these types of items for at least 24 hours, doing some sanding/cleaning if necessary, and then maybe even running them again.
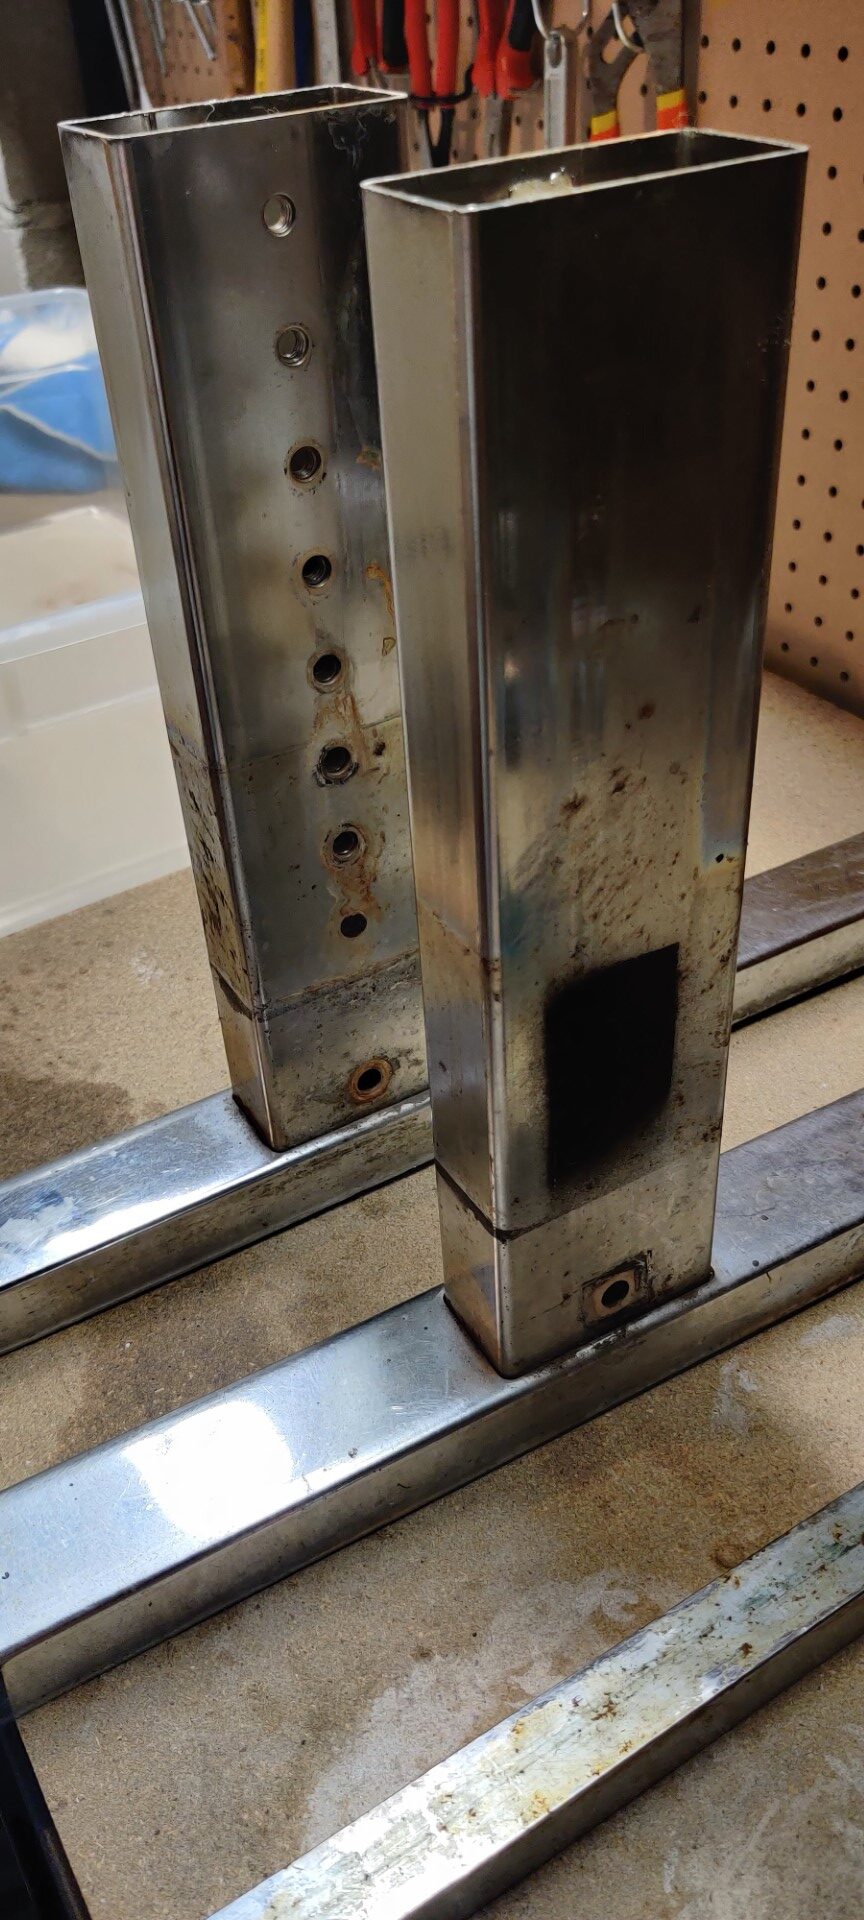
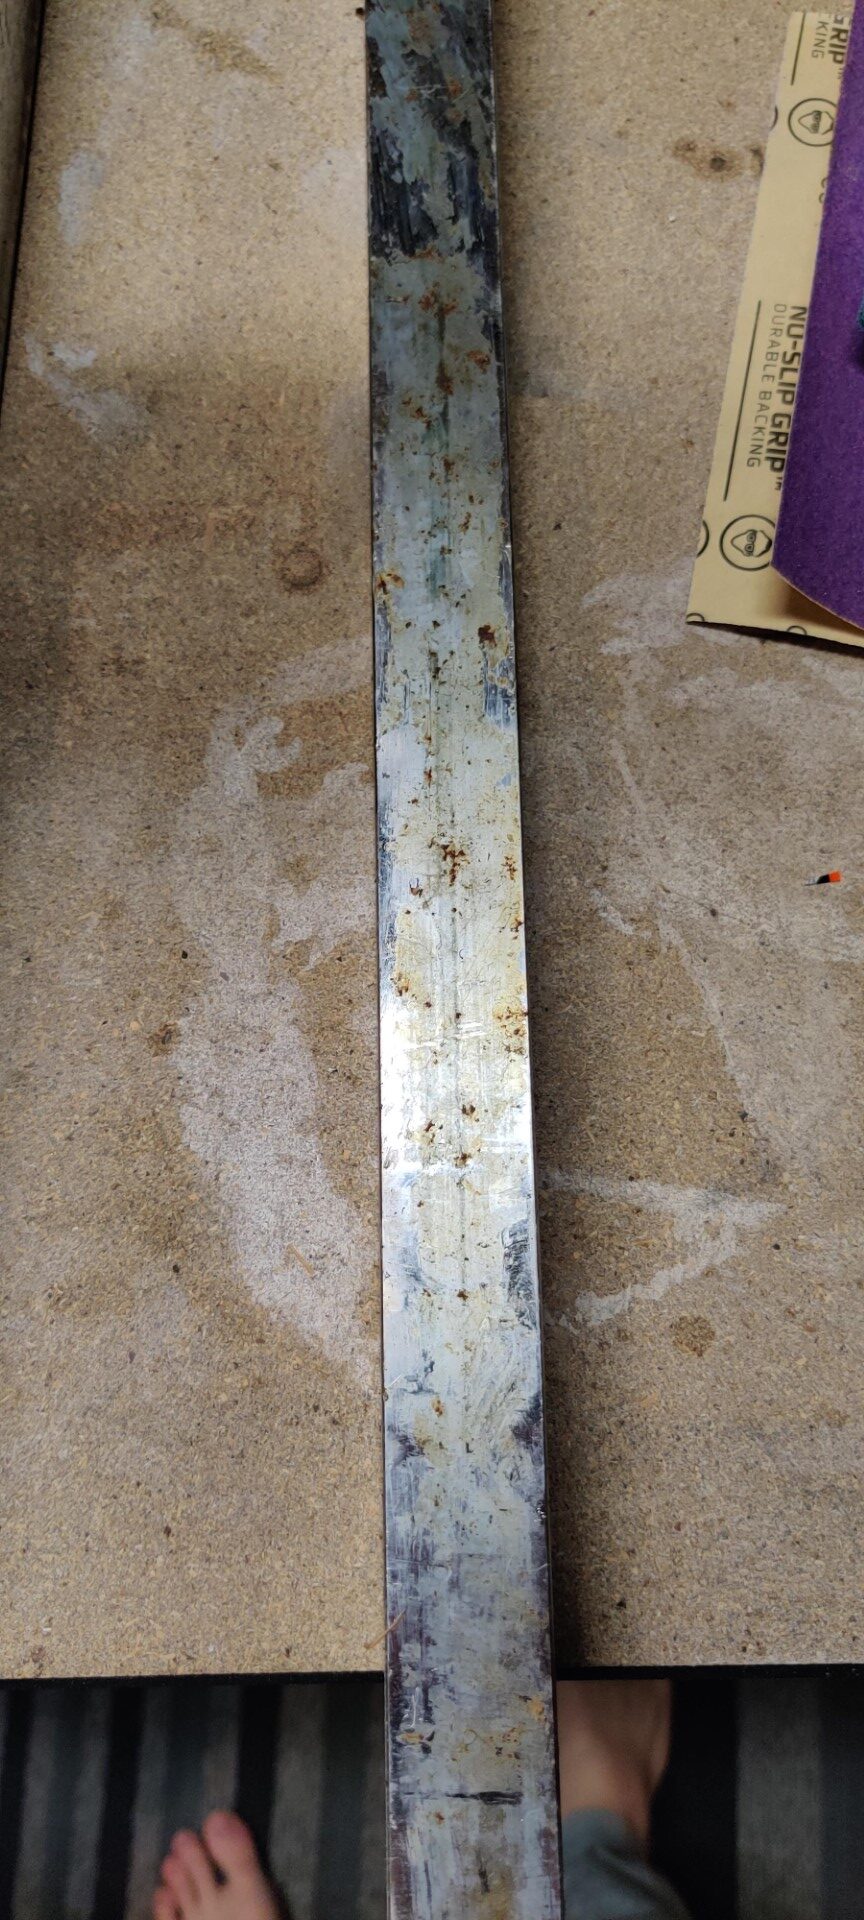
Rusted legs
Rusted legs
Nintendo Red Tent legs restored
Tumbler in action
Restored coin pieces
Restored coin pieces
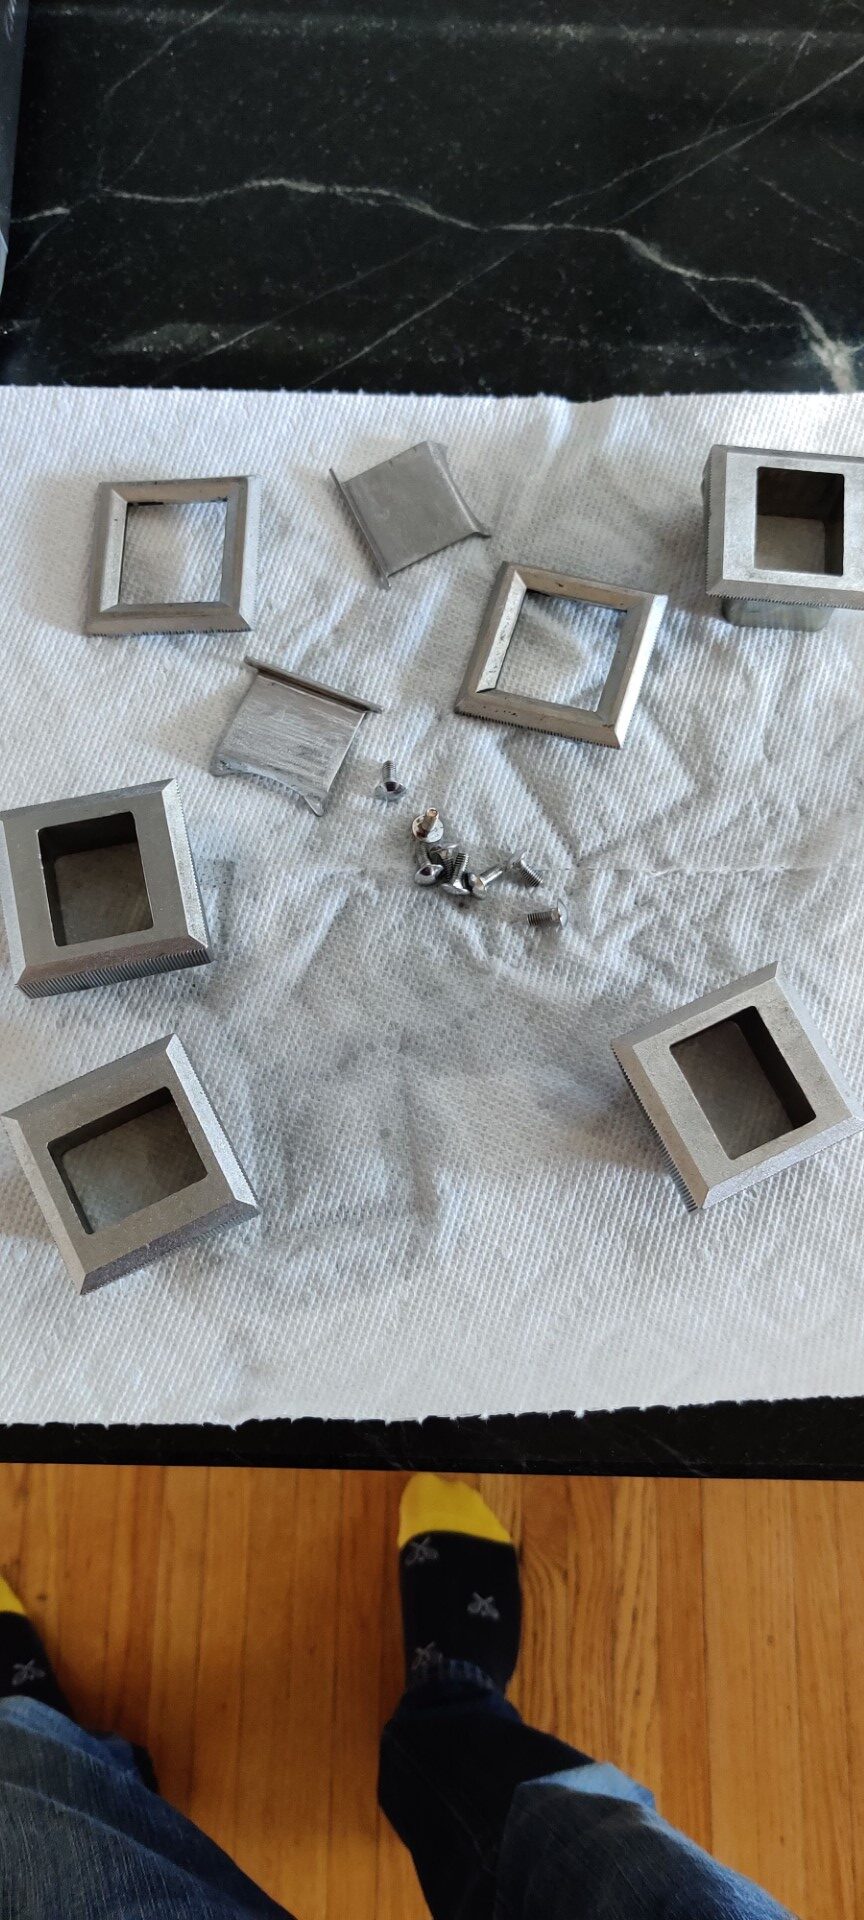
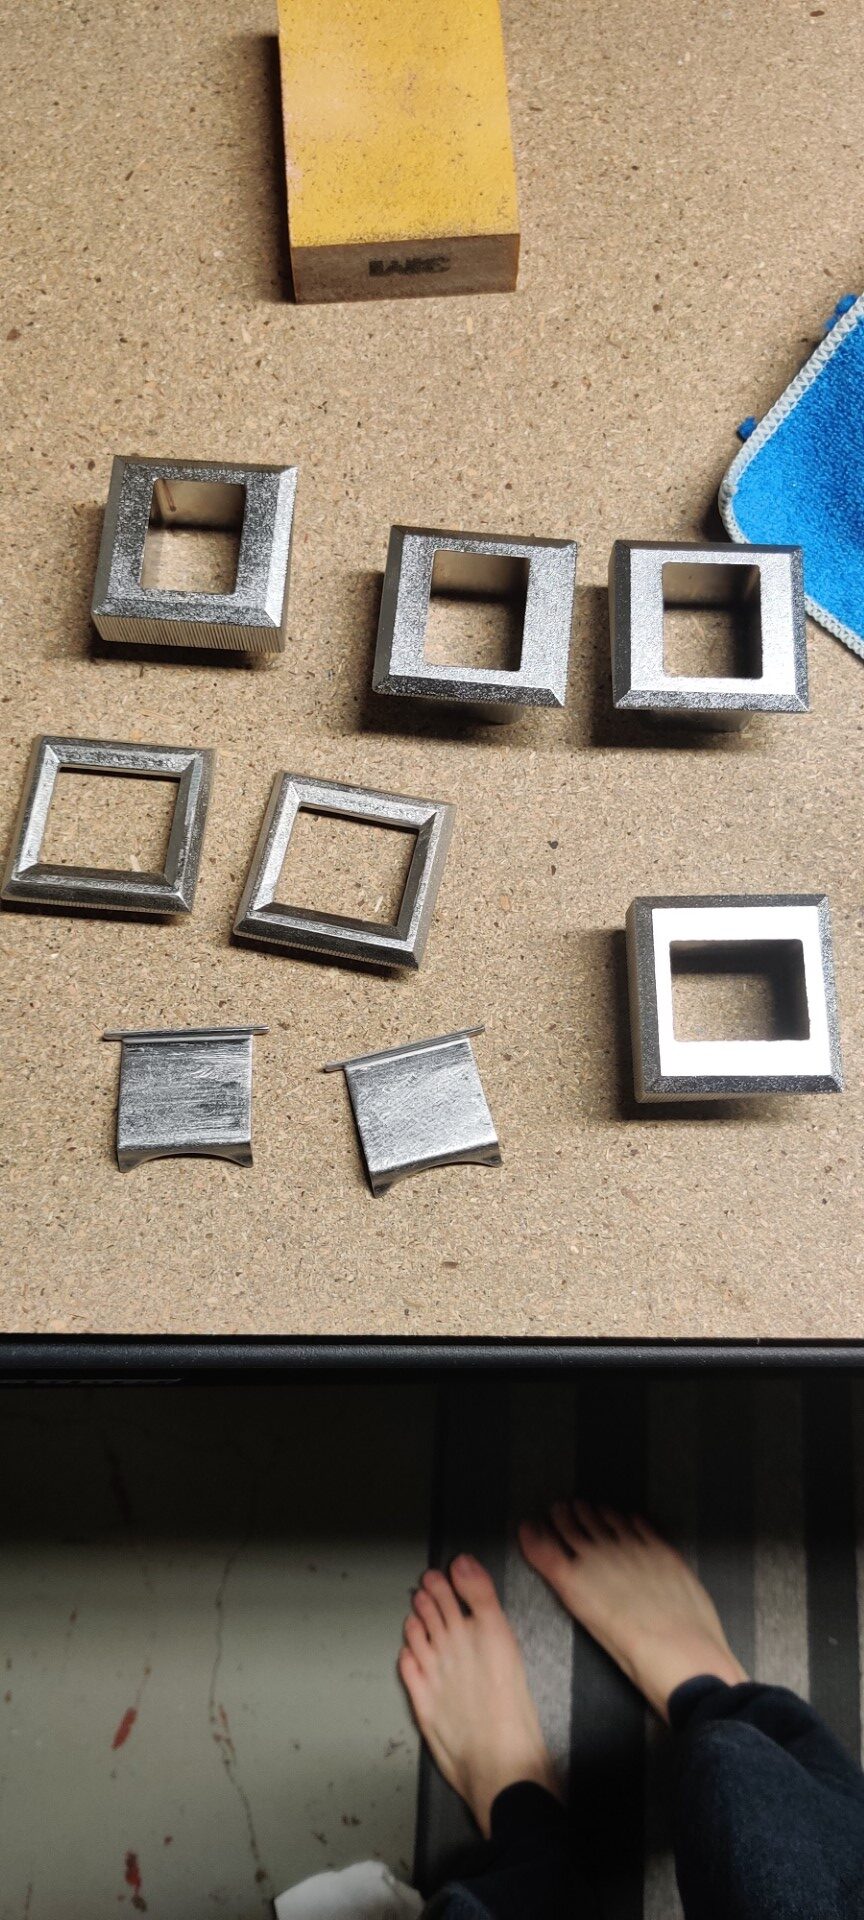
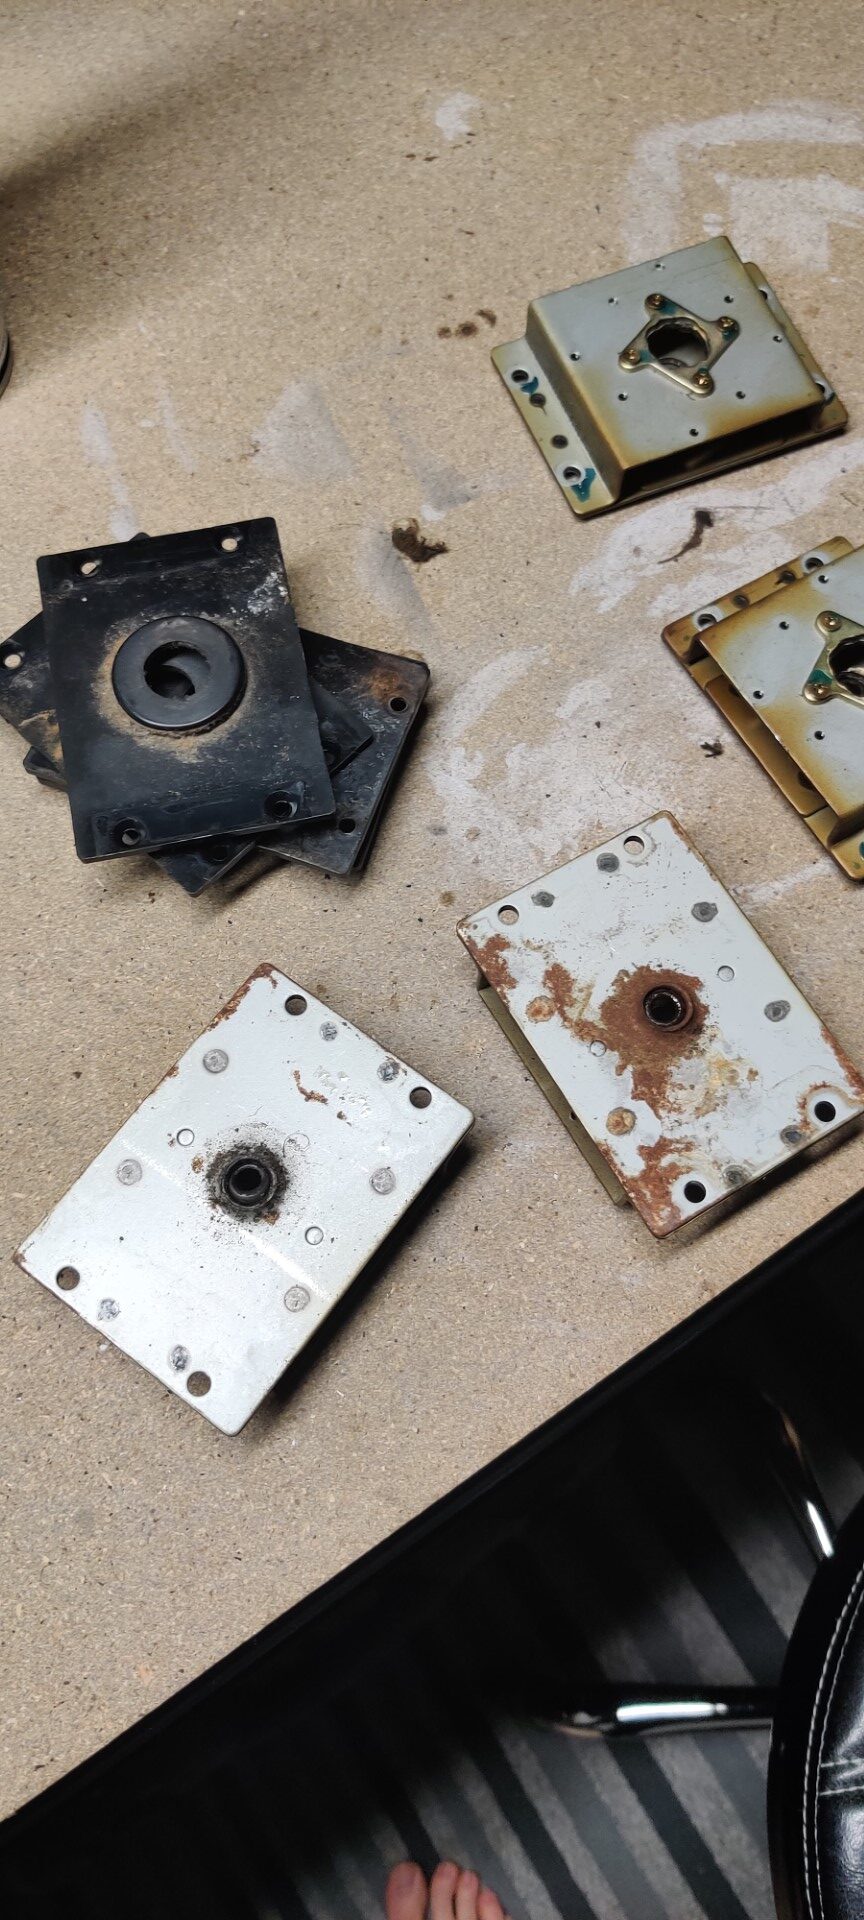
A few more metal pieces needed work, as well. The bezel retainers and PCB frame. I started with sandpaper on these and then switched over to metal rescue from Menards. This did a great job of putting them in acceptable condition.
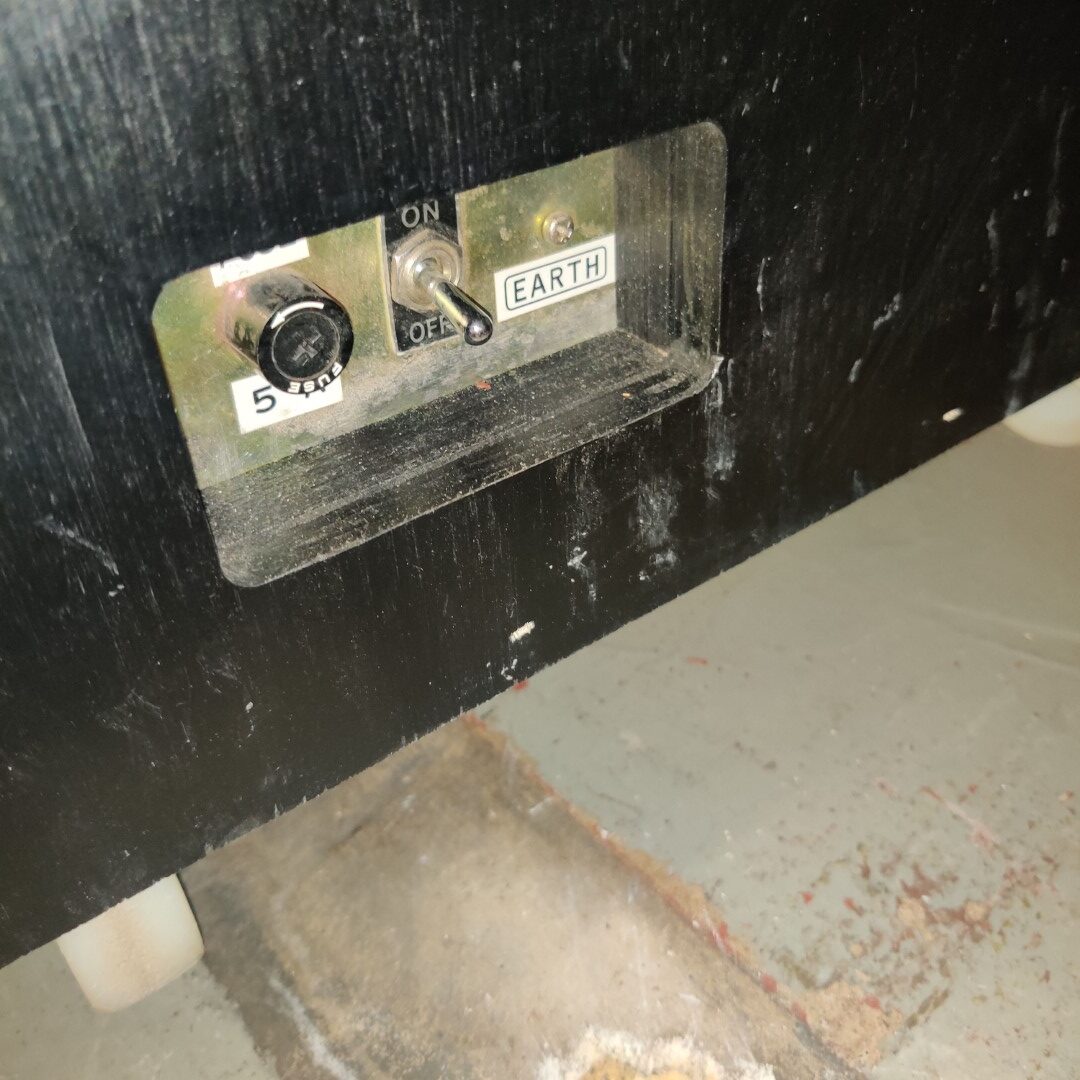
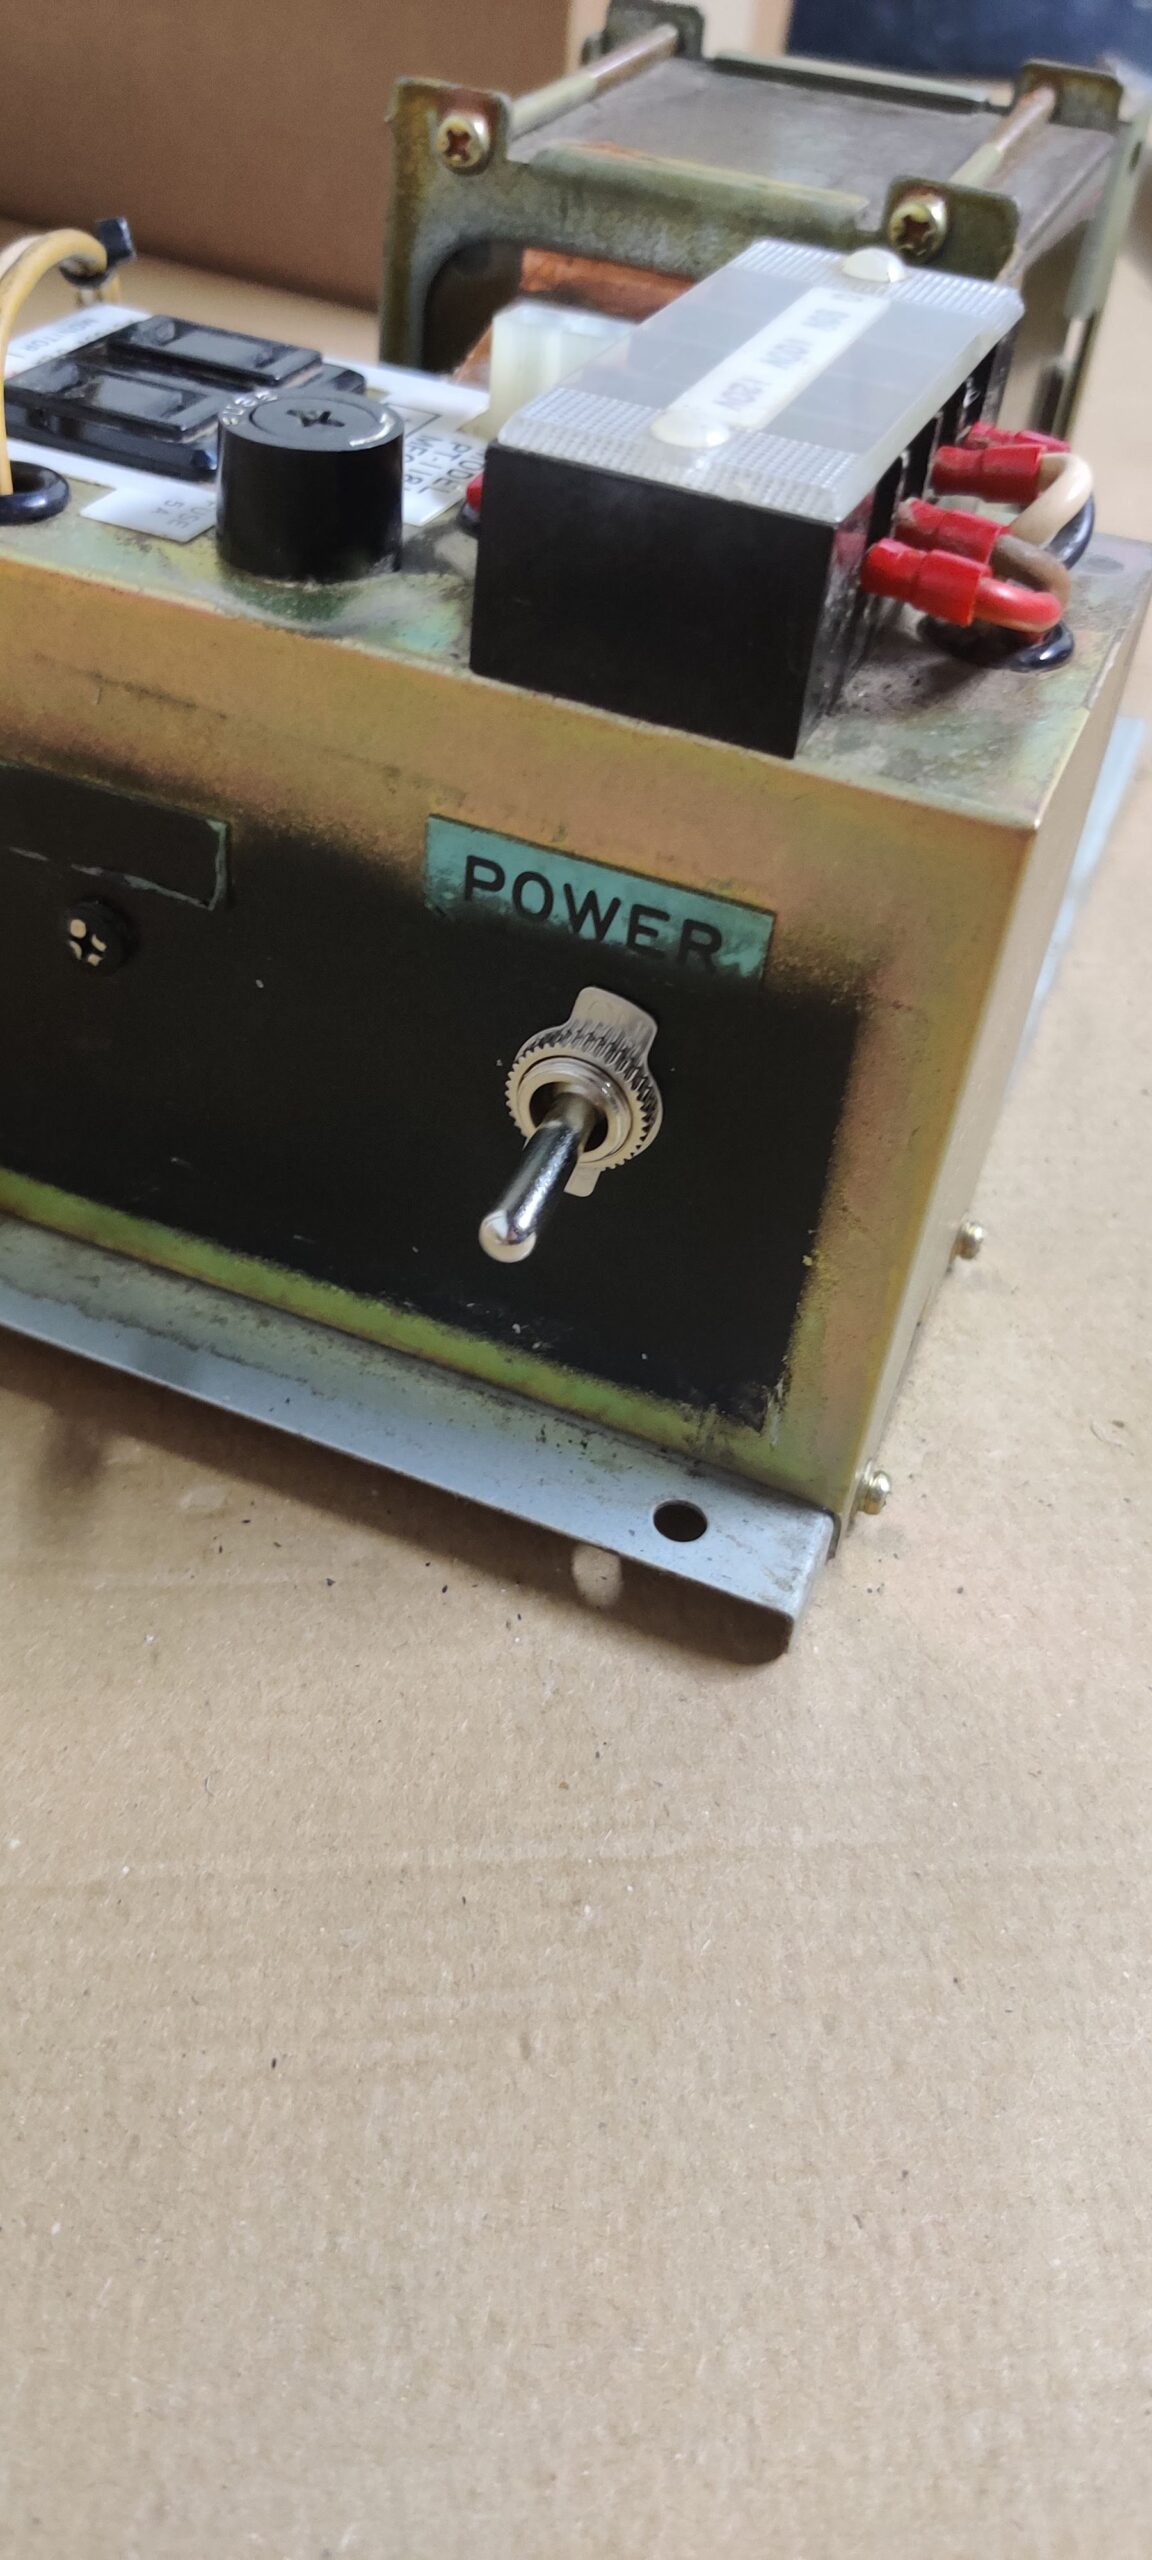
I also took this time to add a power switch back to the power transformer, which someone else had previously cut out. Wasn’t too difficult, just bought a switch at the hardware store, and spliced the cables that originally led to it back in place.
Cleaned metal parts
Power switch added to transformer
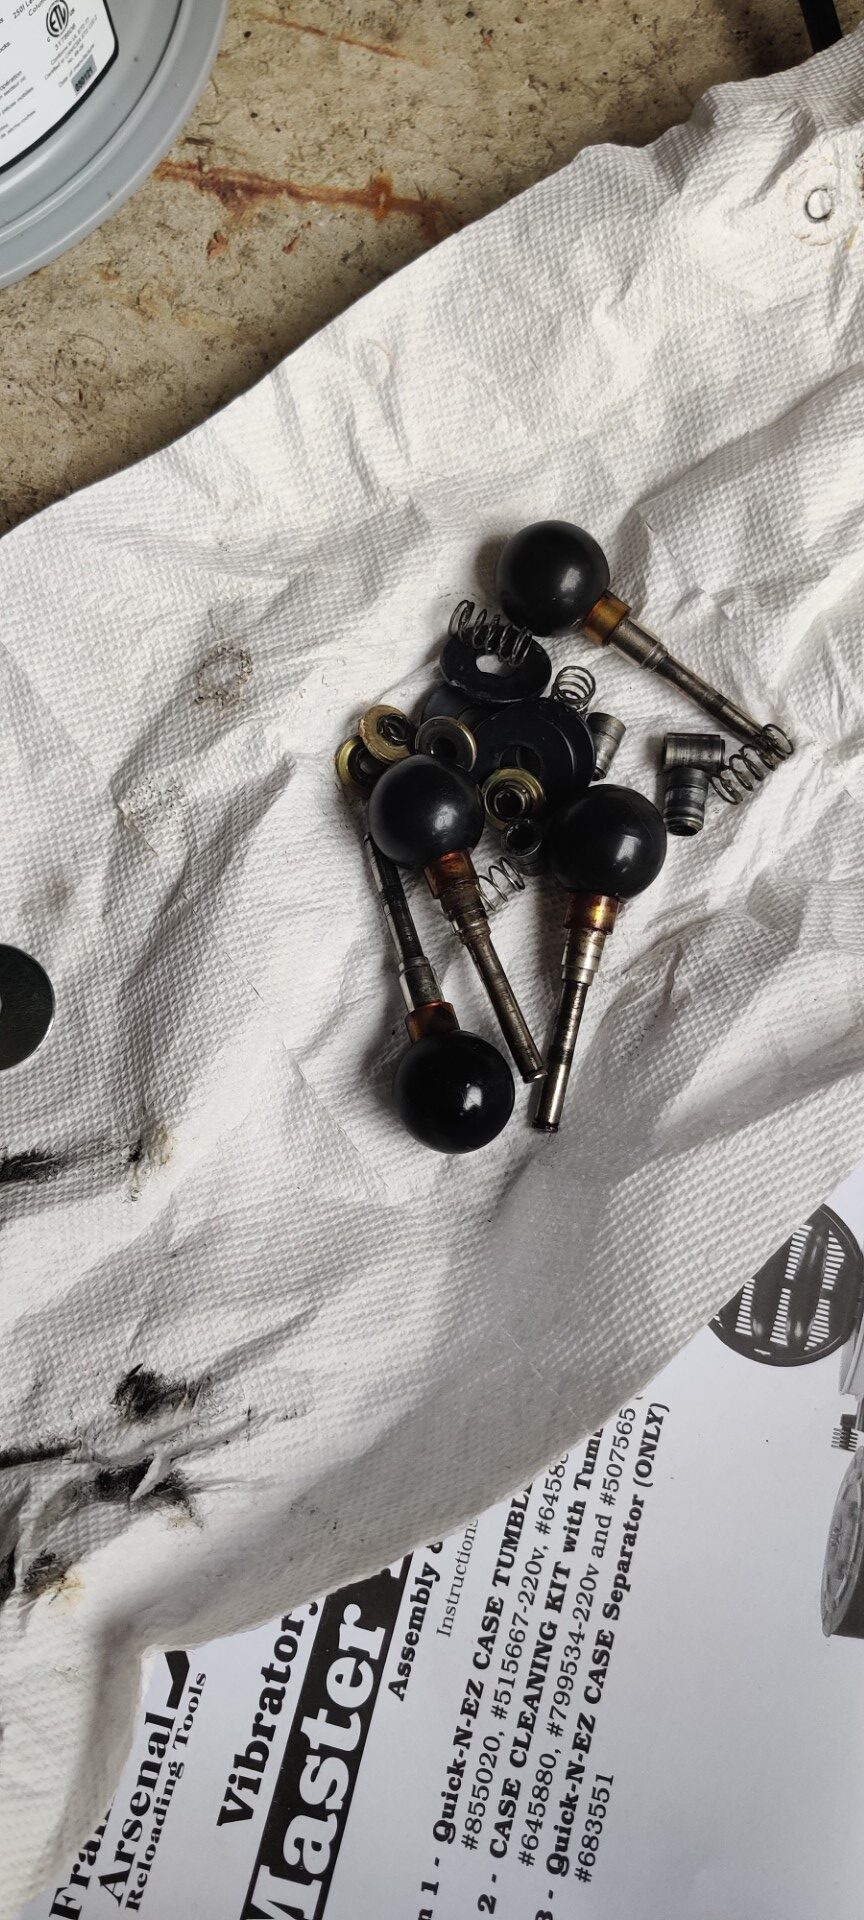
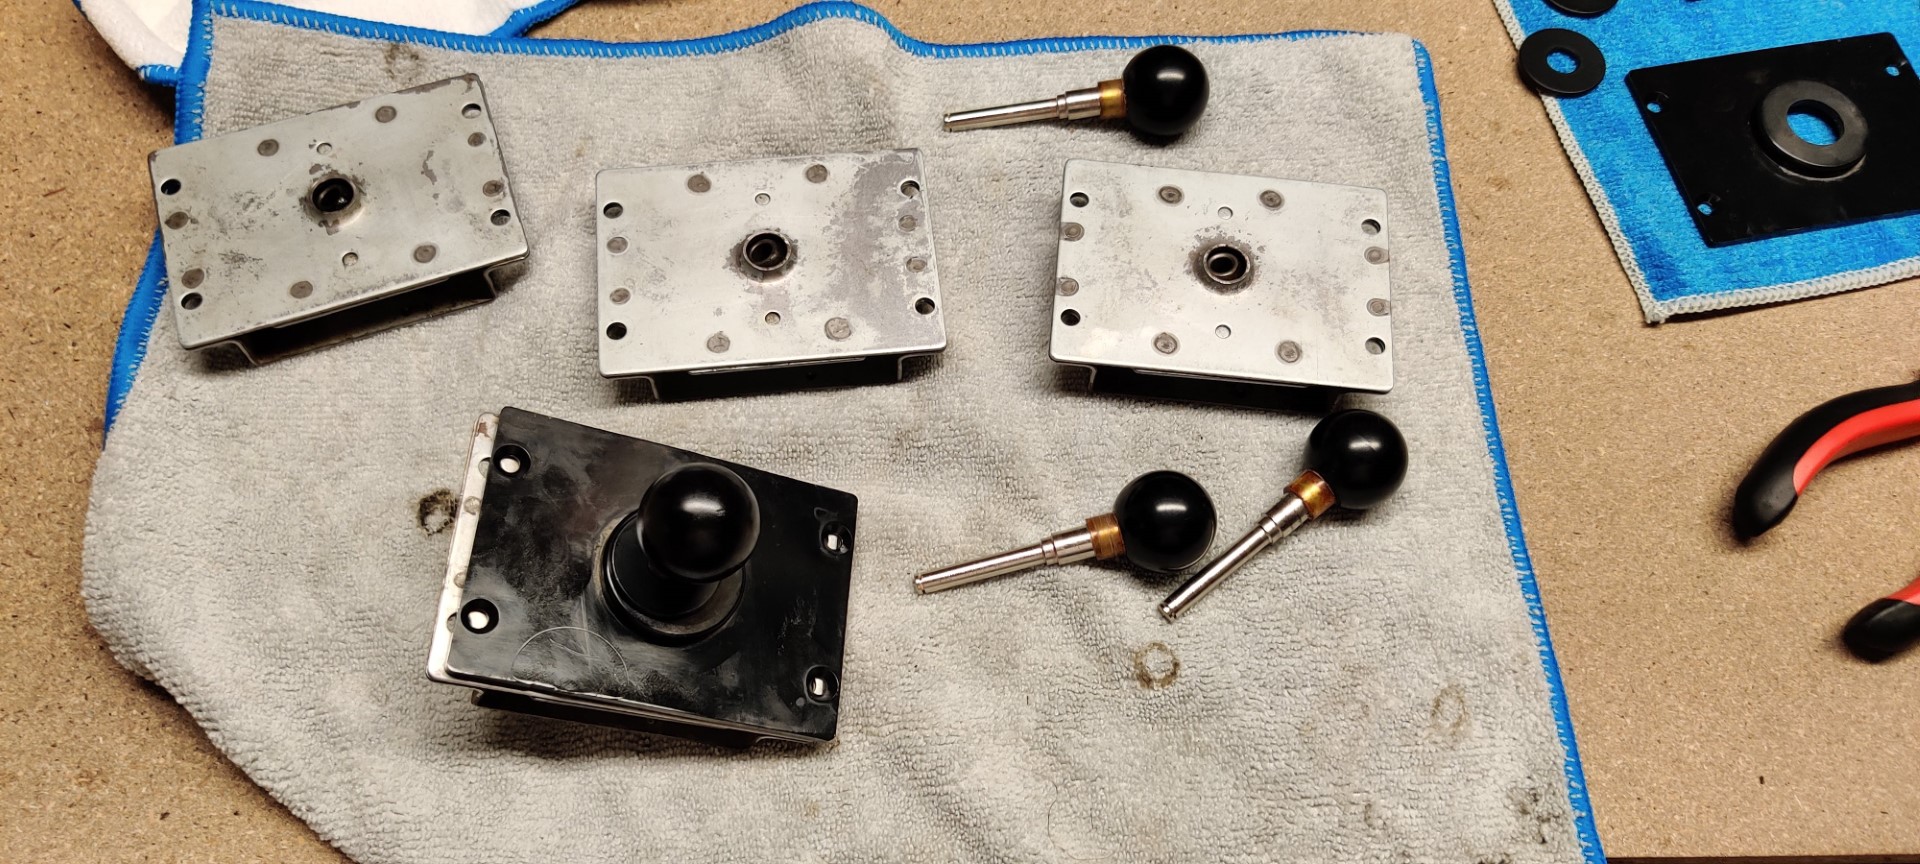
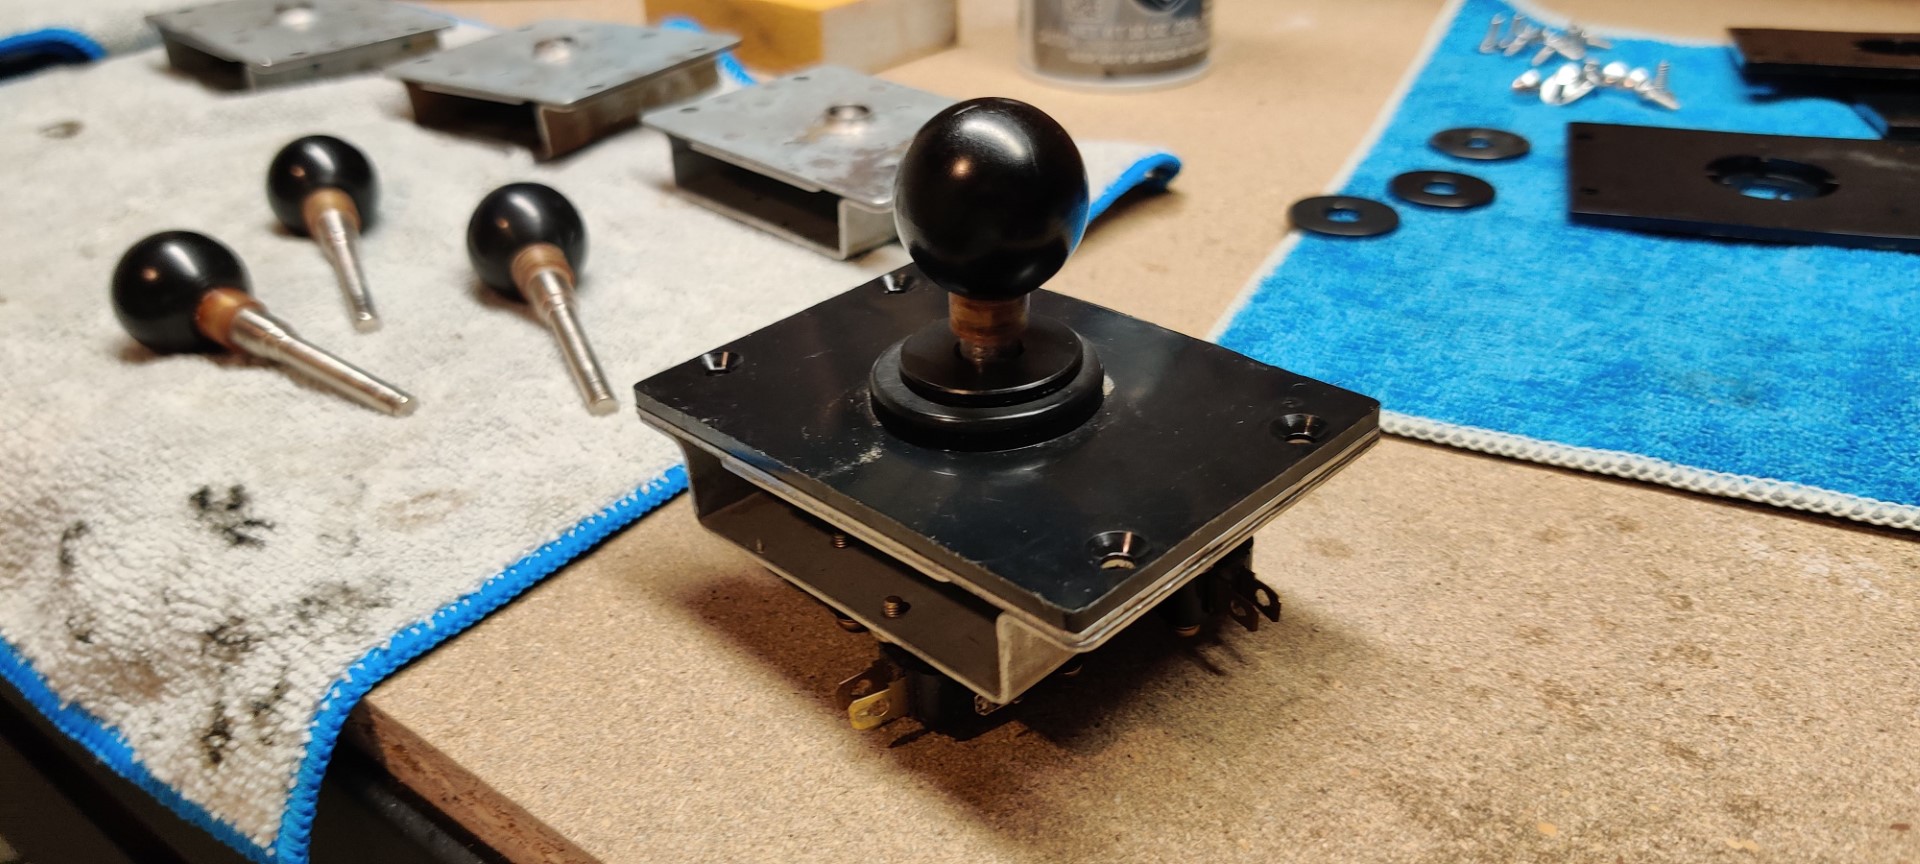
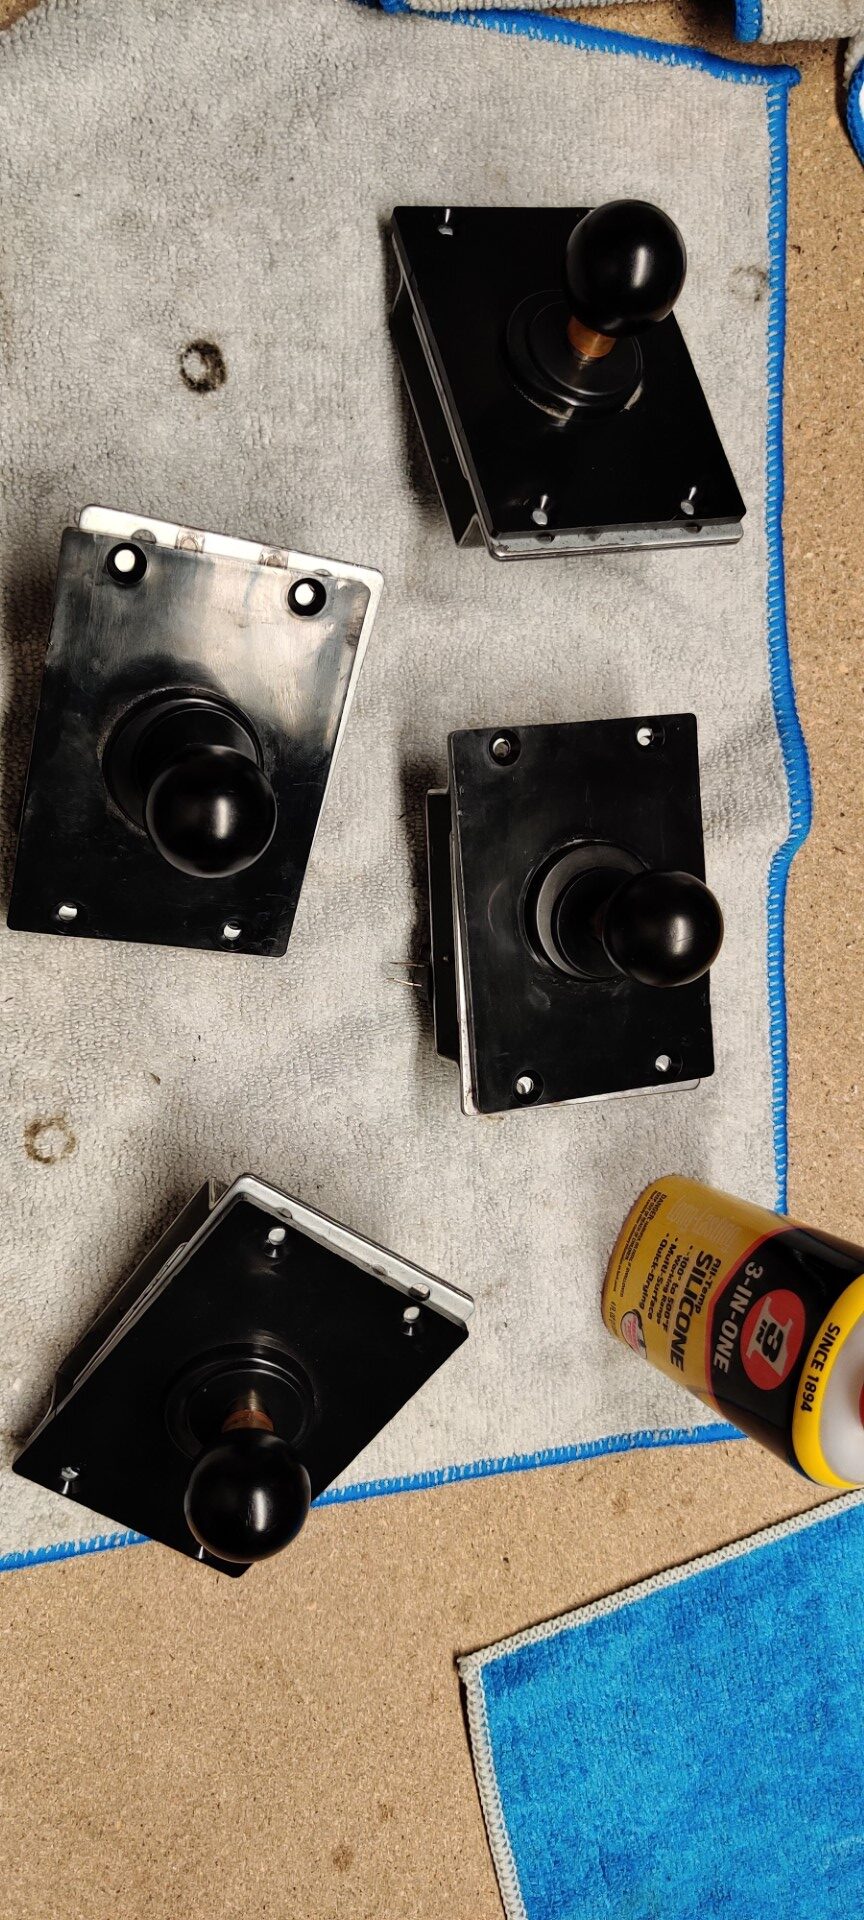
Restoring the Nintendo Arcade Joysticks
Although the joysticks looked to be in bad shape, since they’re almost entirely metal-on-metal, cleaning them up isn’t too difficult. Numerous rounds of sanding, cleaning, WD-40, and polishing brought them to like new status.
Rusted Nintendo joystick
Joystick parts
Joystick shafts
Cleaning the joysticks
Washing the plastic pieces of joystick
An almost finished joystick
Final step was adding just a couple drops of lubricant
Check out this video which I found helpful, especially the tip about using clear plastic tubing to replace the sheath on the original shafts. The video was made by Canadian Arcade who has a lot of good tips.
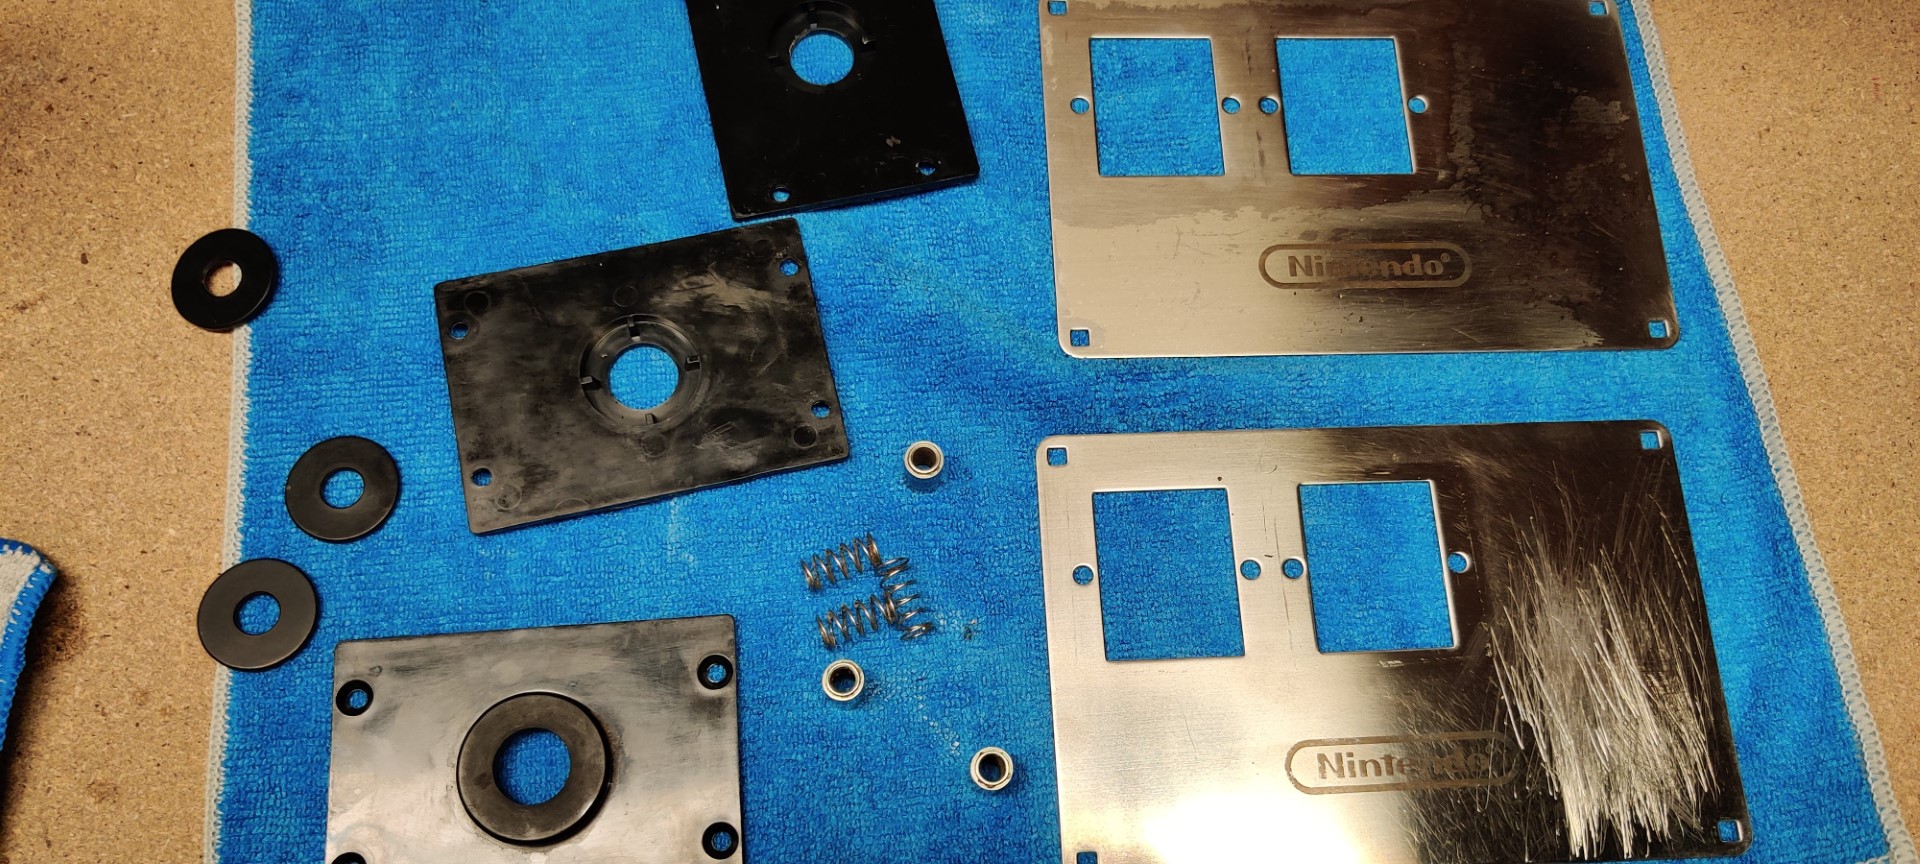
Creating Replacement Coin Plates and Plexiglass
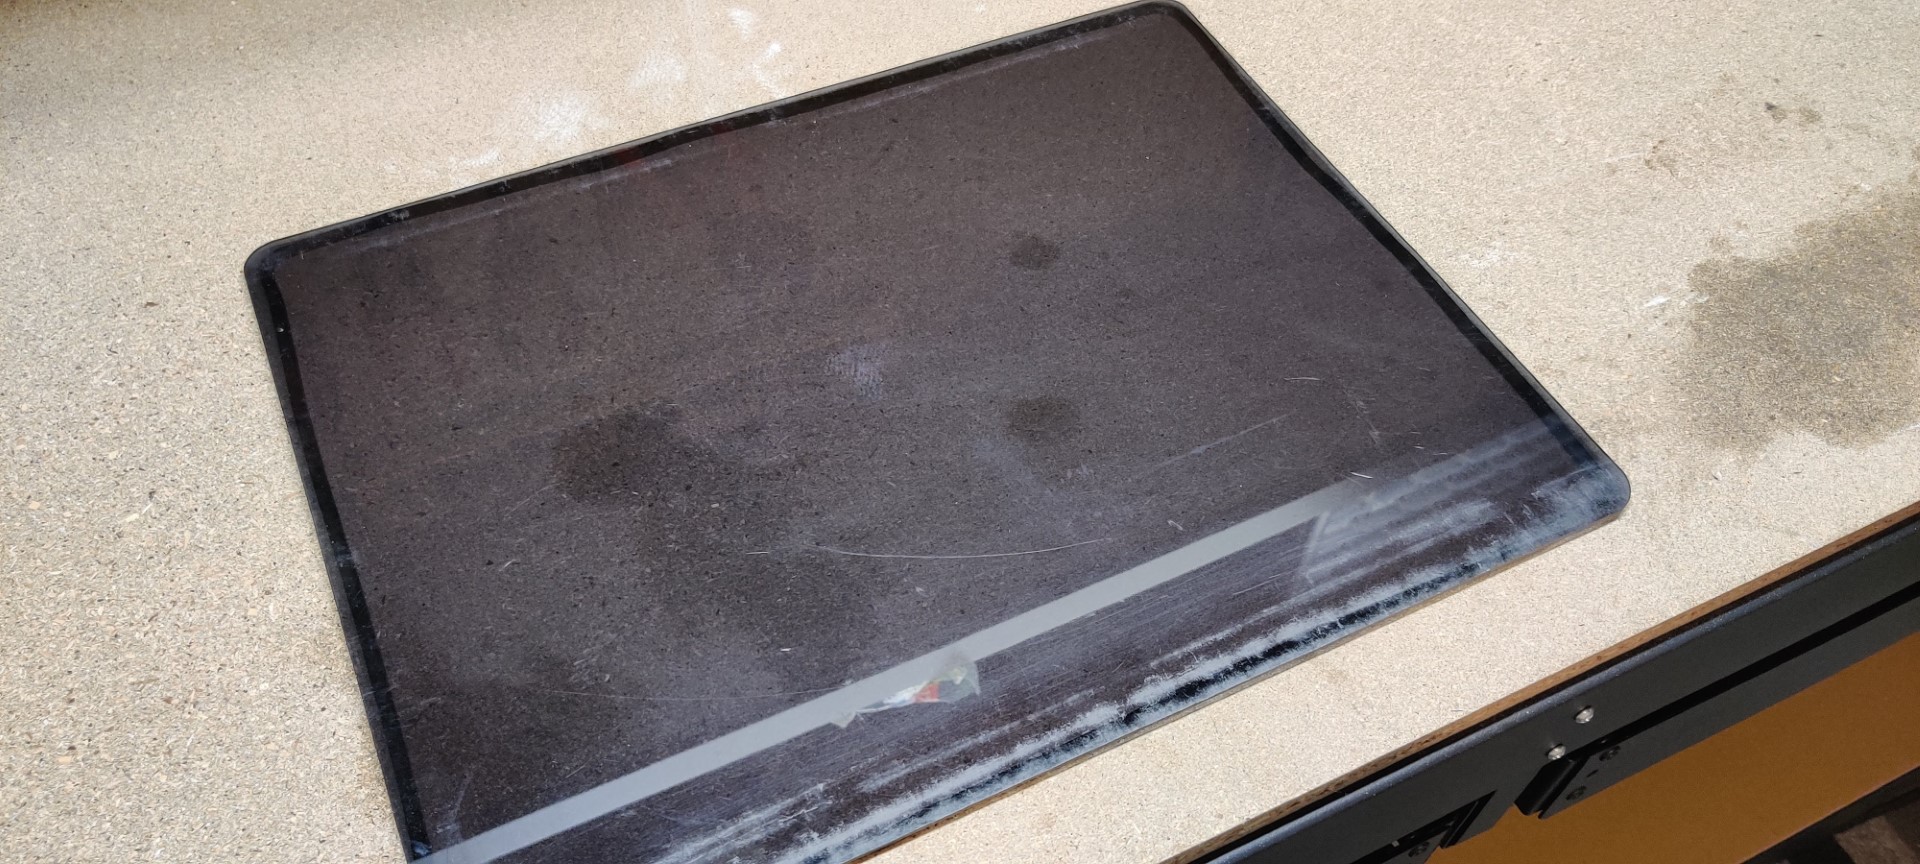
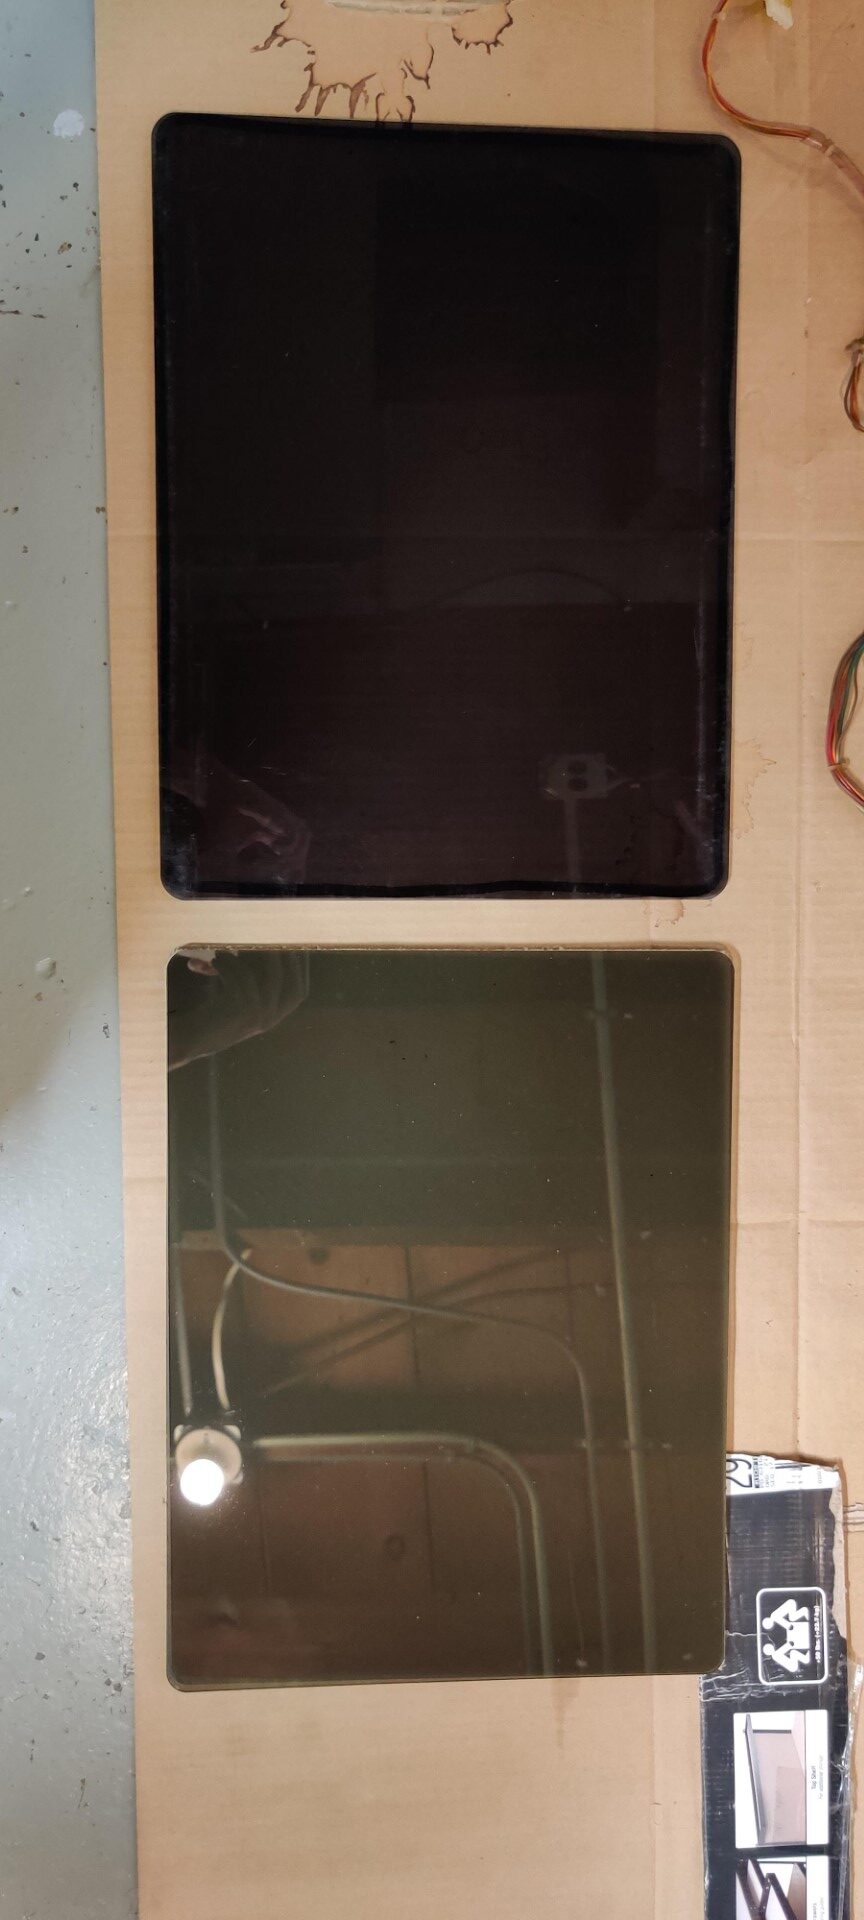
I had a couple more pieces to clean up. Tinted, plexiglass bezels are used in front of both monitors and nickel-plated metal plates are used in front of the coin reject buttons. Sadly, both of mine were not in great shape. The plexiglass had scratches all over it and no amount of cleaning would. Also, I only had one! I ended up measuring them and having brand new plexiglass cut. However, the new ones aren’t quite as dark as the originals but are very close and look beautiful.
Original plexiglass
New plexiglass next to the original
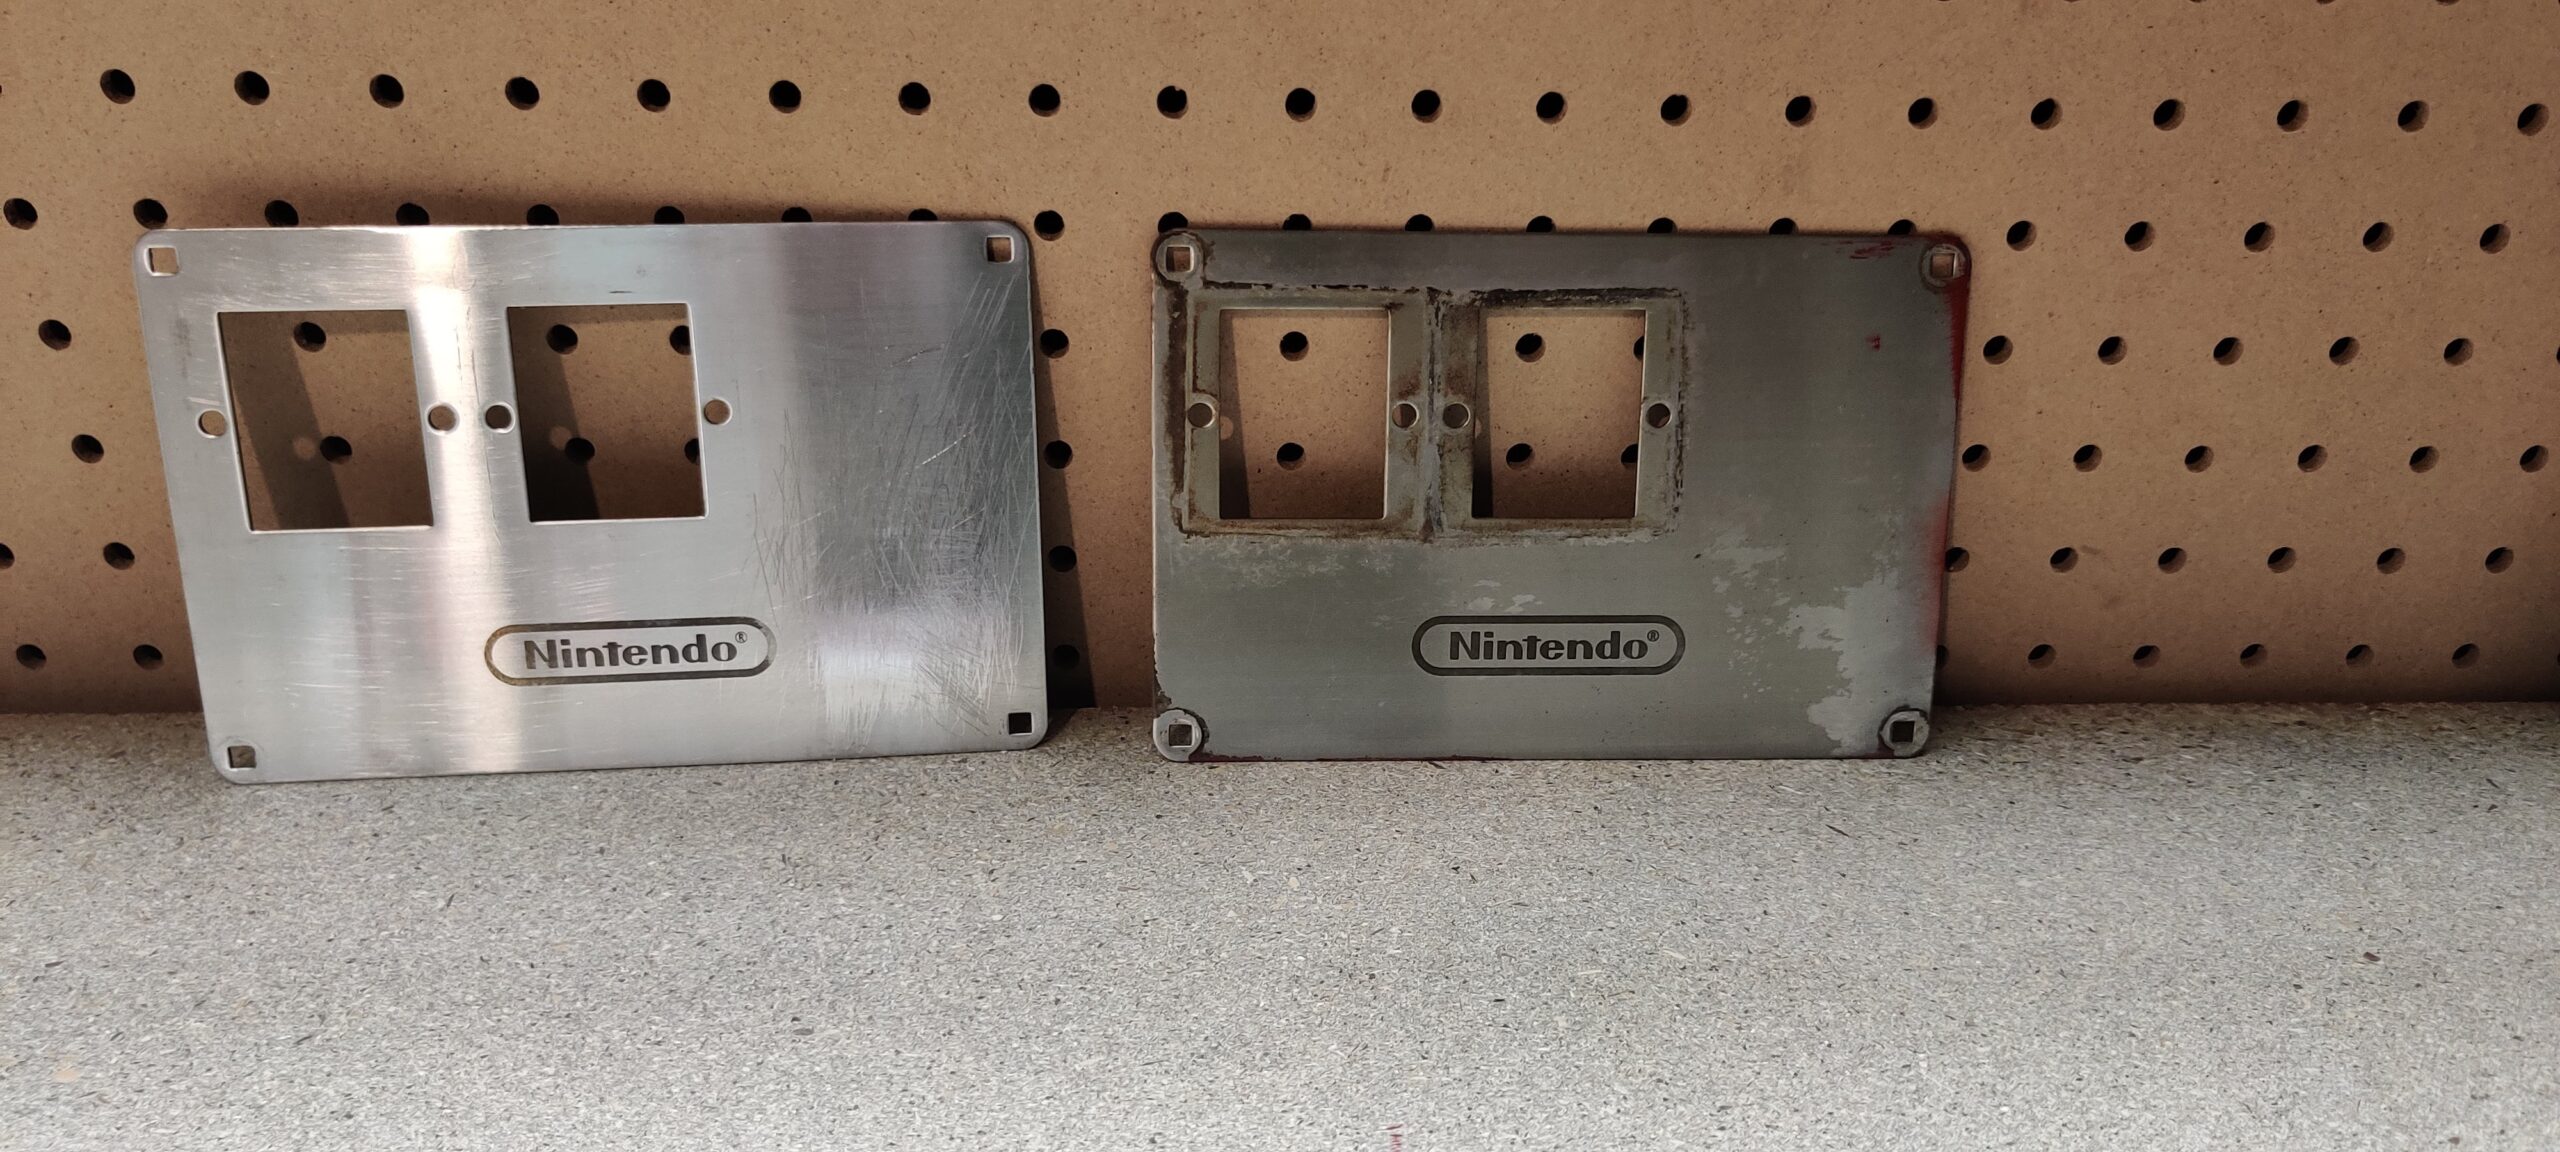
Next up was the coin plates. Mine had a lot of red paint and scratches all over them. I spent so much time trying to get these perfect and I’m actually pretty happy with the results. Ultimately though, I thought, “Why can’t I just make new ones of these too?” I scanned one up, traced it in Illustrator, and had a few different online laser cutting services send me some. I had copies made in stainless steel and aluminum. With one service, I tried carbon printing. Another, I went with etching. All of them needed buffing to get shiny, and none of the reproductions are as shiny as the originals. But they also don’t have any scratches or blemishes. You can see some examples of my work below. I’ll let you try and guess which I ended up using!
Original plates, cleaned vs not
Originals against blanks
Clockwise from top left; Aluminum with carbon printing, blank aluminum, original, stainless steel with etching
Reproduction Parts for a Nintendo Arcade Cabinet
If there are parts you just can’t replicate on your own, then look no further than Mike’s Arcade. He is the only source I know of with some very specific parts (reproduction Nintendo Red Tent button sets, perfectly matching coin reject buttons, correctly sized shiny carriage bolts, and Nintendo cocktail feet). Also, Mike also sells a variety of wiring harness parts that would otherwise be difficult for me to create. I put in an order several months ago but sadly Mike’s Arcade suffered a tragic fire and lost almost all of his inventory and building. Of course, this meant I had a longer wait than usual but it was well worth it and I’m happy to support a business like his.
Mike’s Arcade parts order
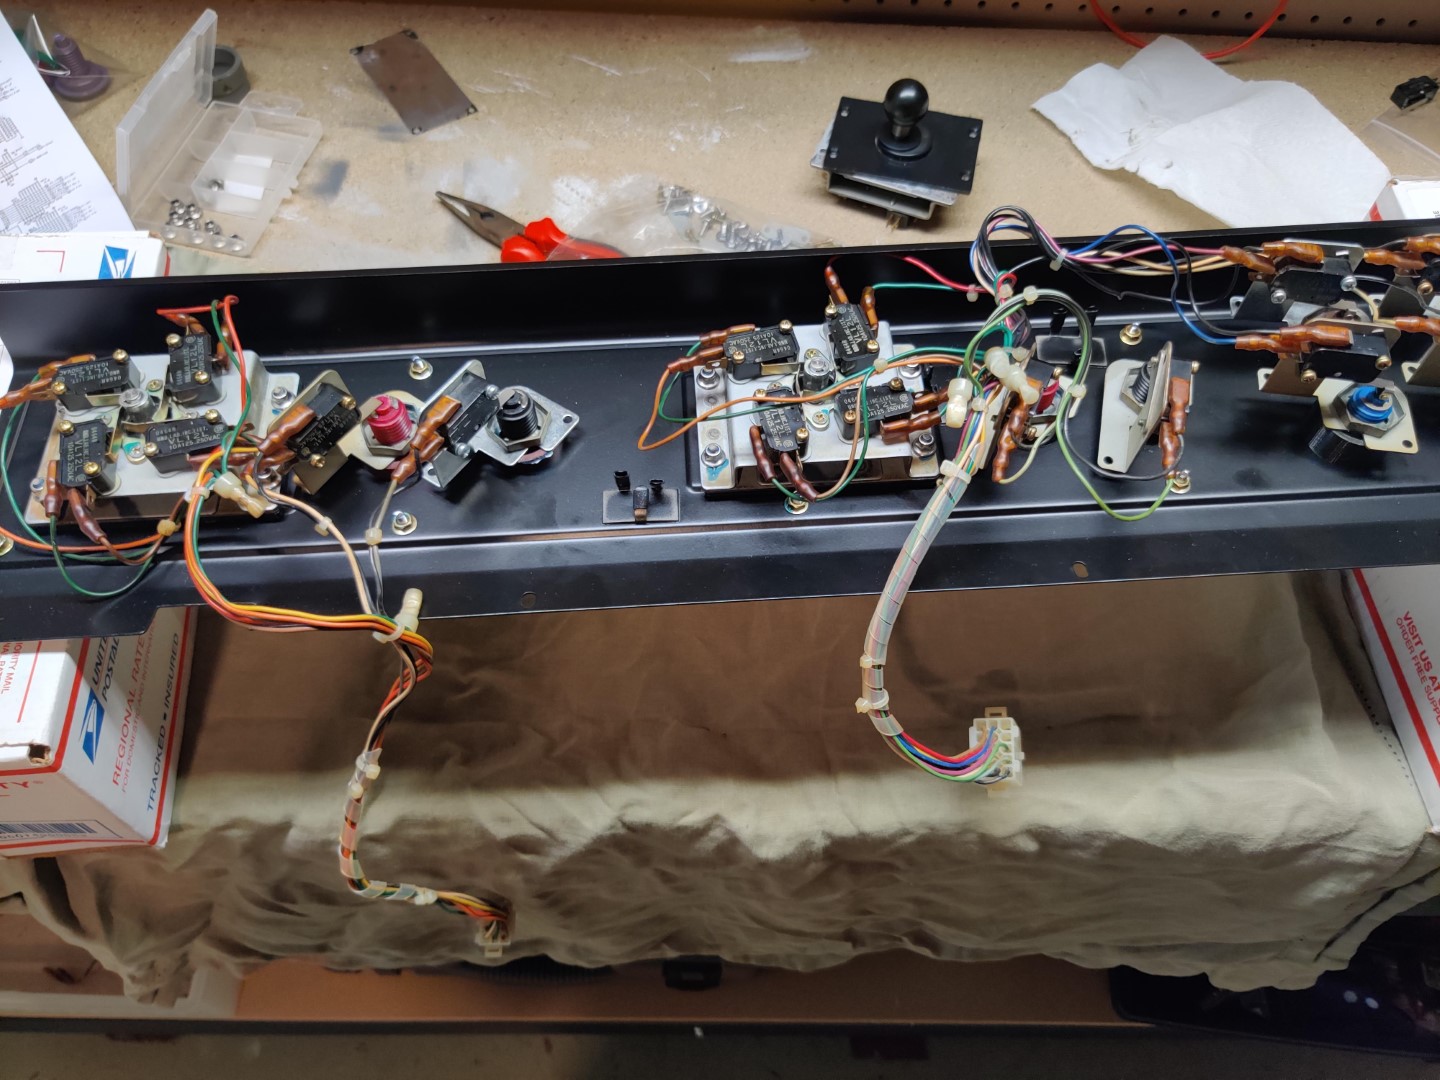
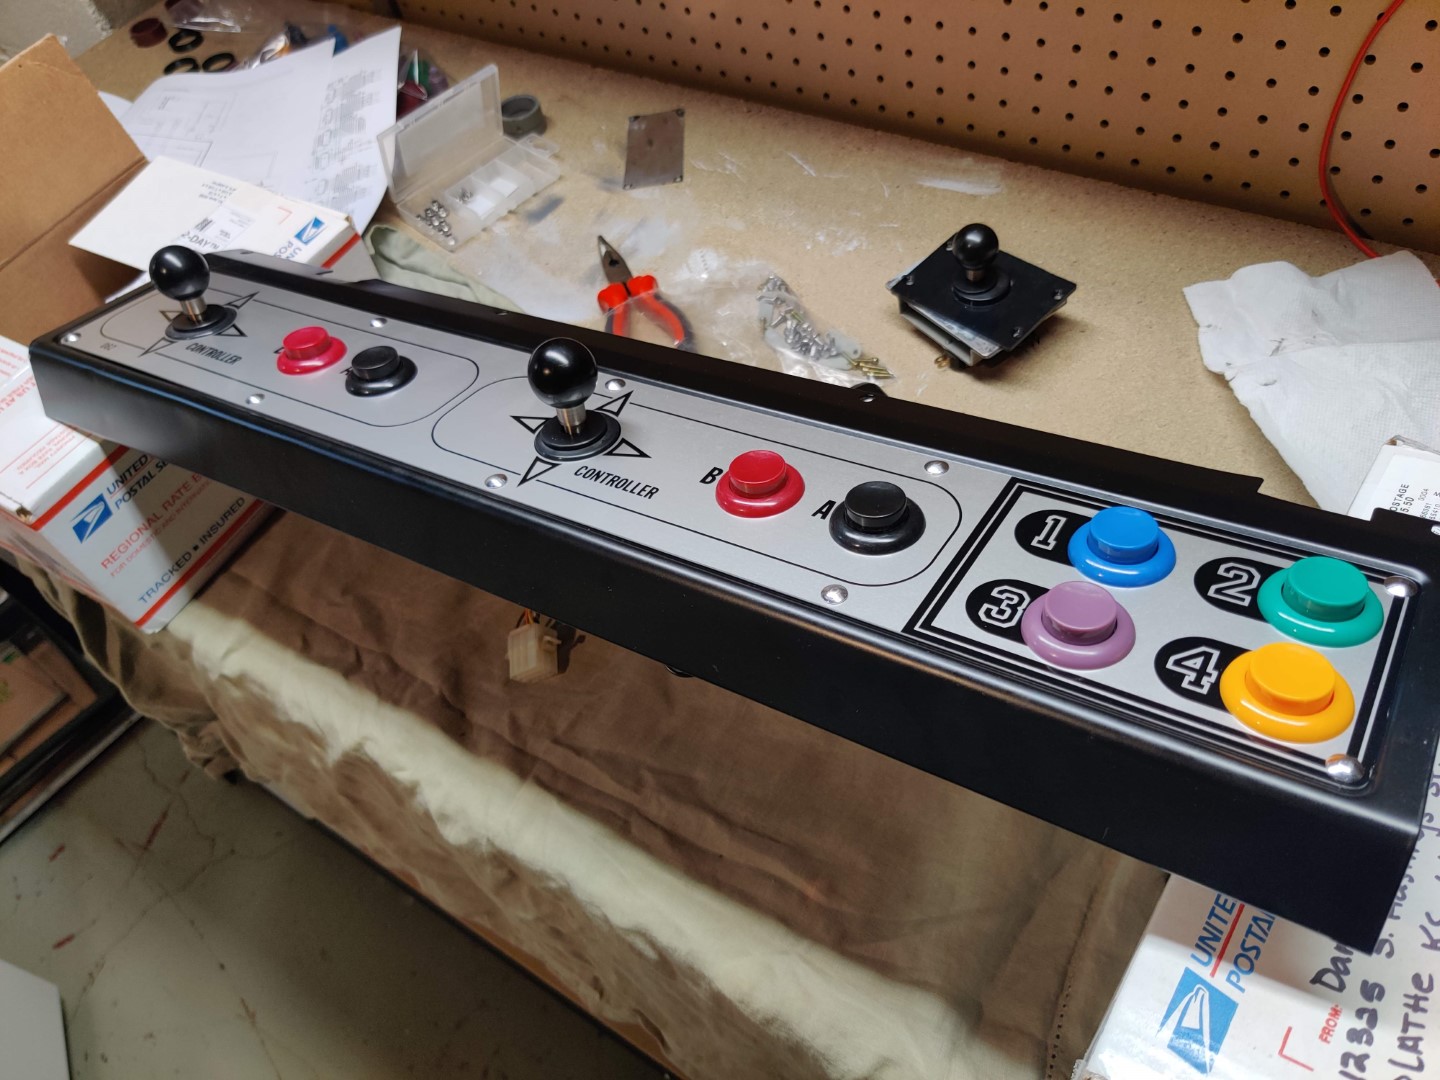
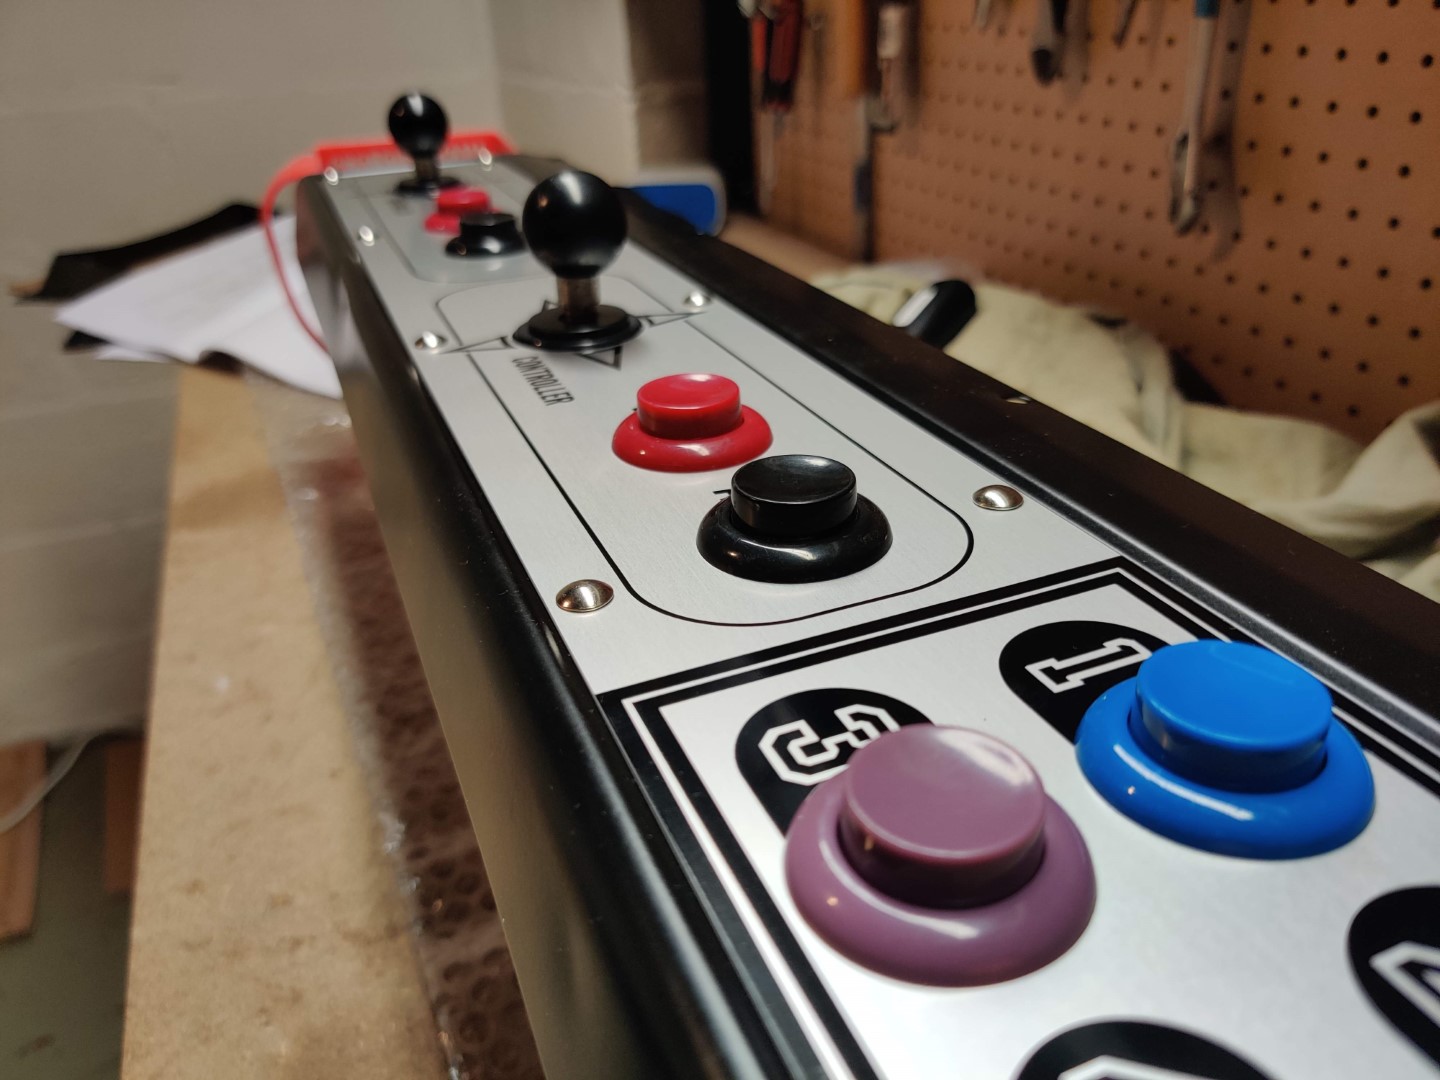
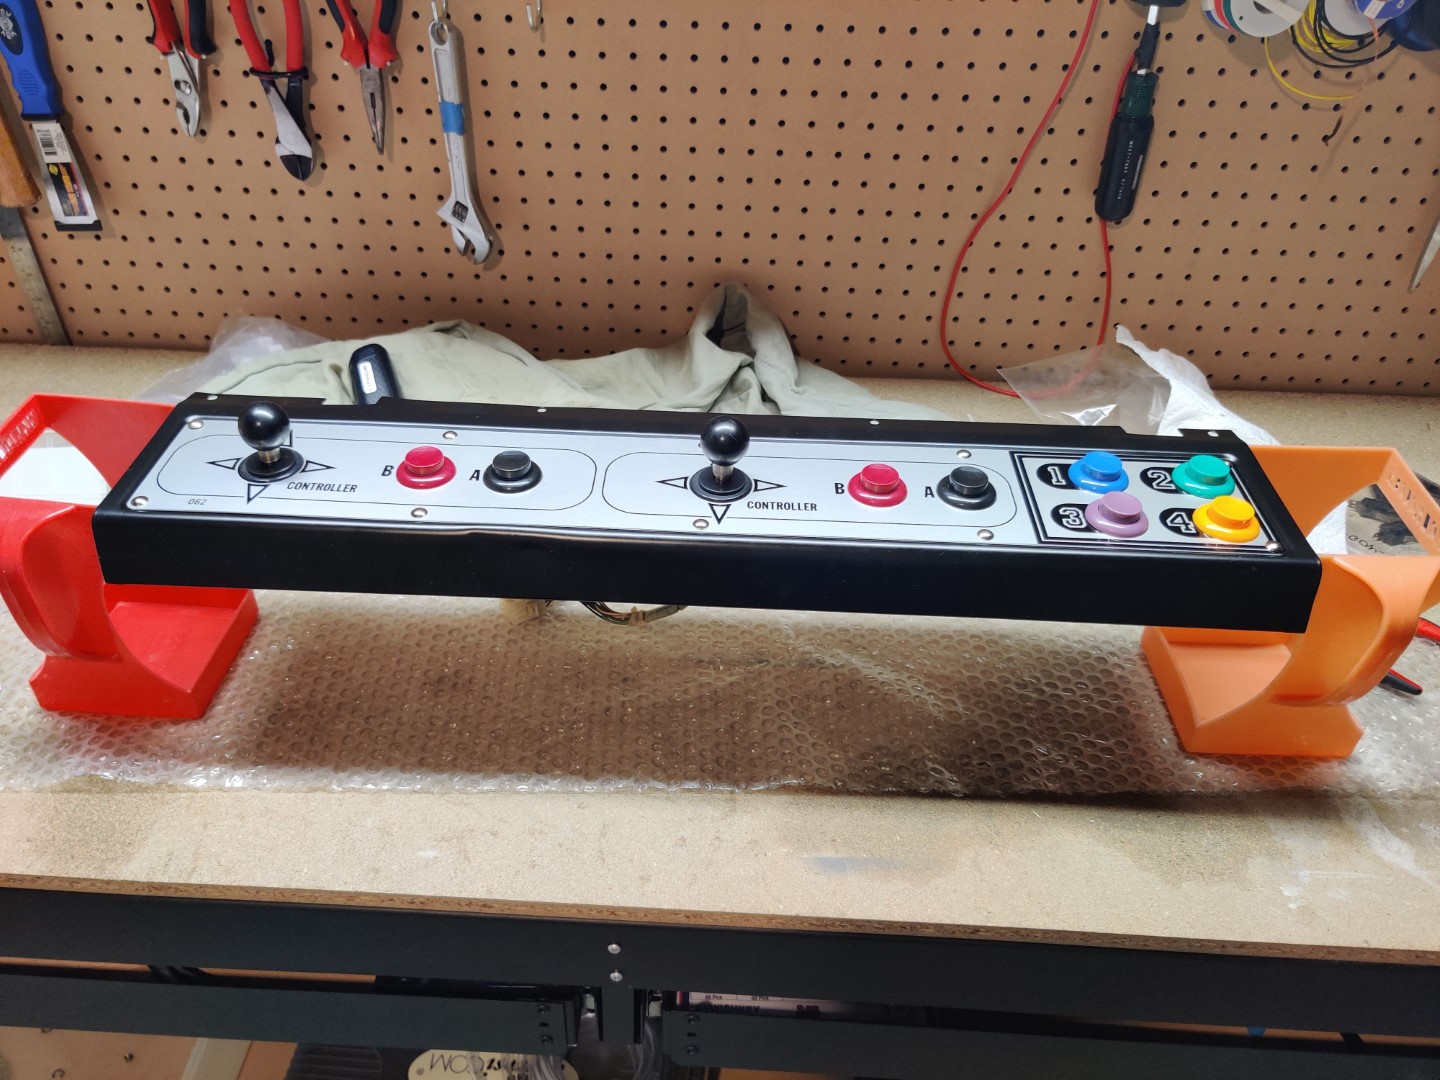
Control panel assembled
Control panel assembled
It was also a good time to see how my new powder coated control panels looked with their brand new, reproduction overlays on them! You can purchase these from user Vs City on KLOV. Don’t worry, I kept and cleaned the originals, as well. While they aren’t bad, I know that in this business it’s often best to by new items when you can, you never know when they’ll stop being made.
Assembling the Restored Nintendo Red Tent
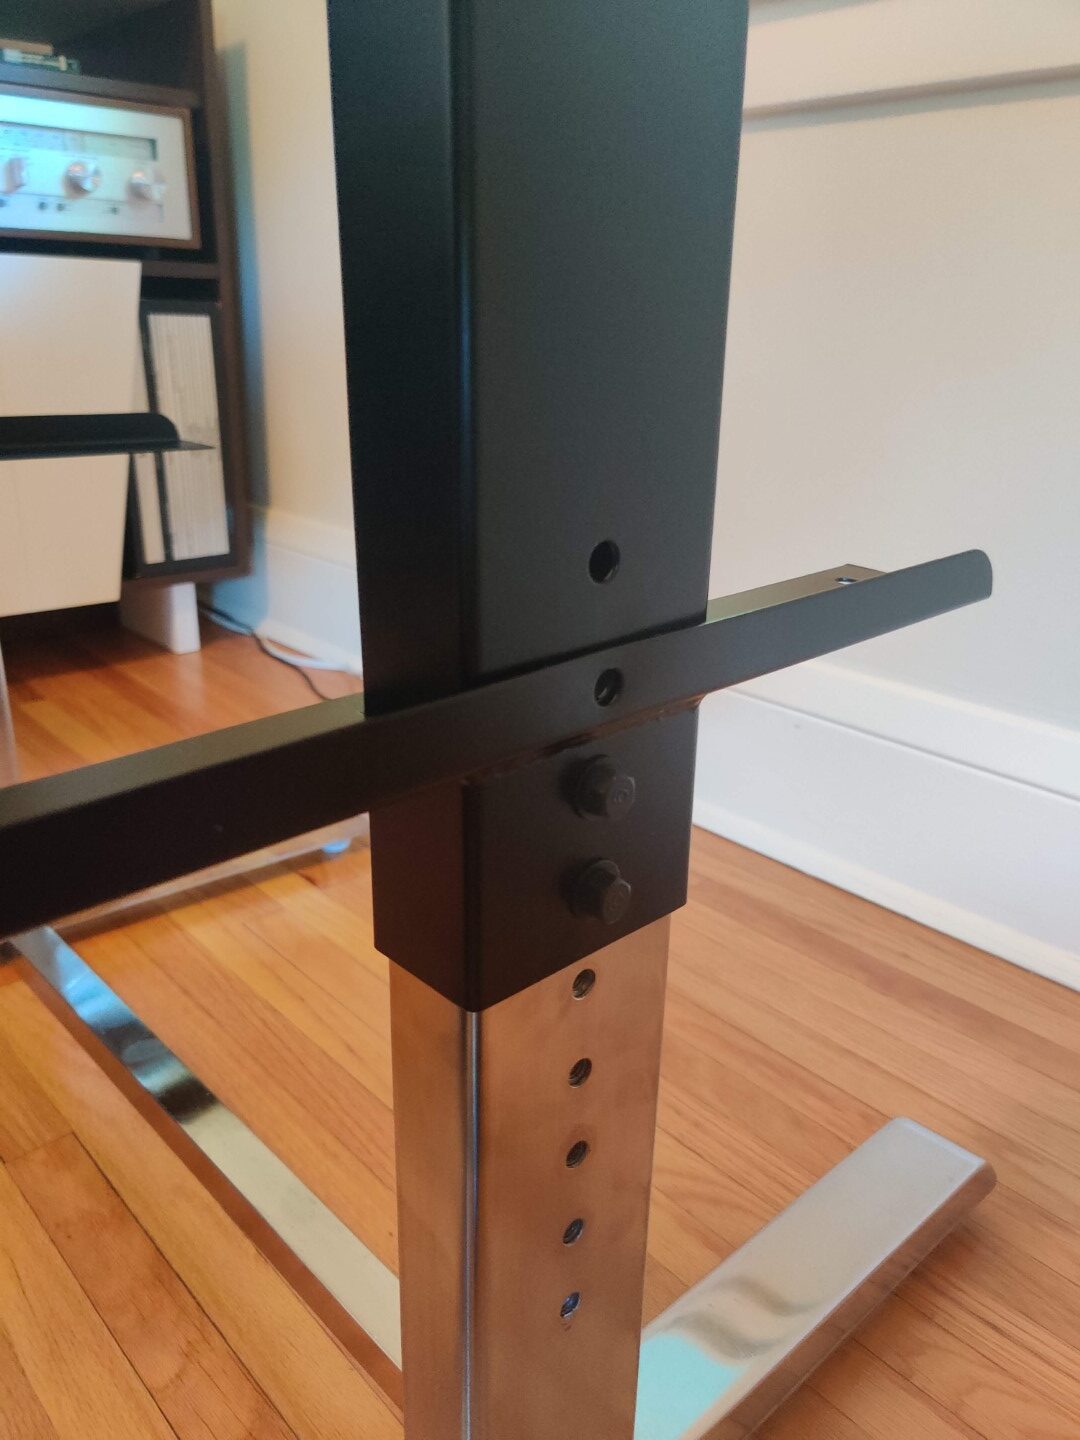
Time to put this baby back together! Certainly not much else to say here, so just enjoy some pictures of the assembly process.
Attaching legs to cabinet base
Assembling control panel 1
Assembling control panel 1
Assembling control panel 1
Main body assembled
Body with control panels
Coin return slot
Coin plate on hood
Coin acceptor holders
One hood on
One hood on
One hood on
Power cord
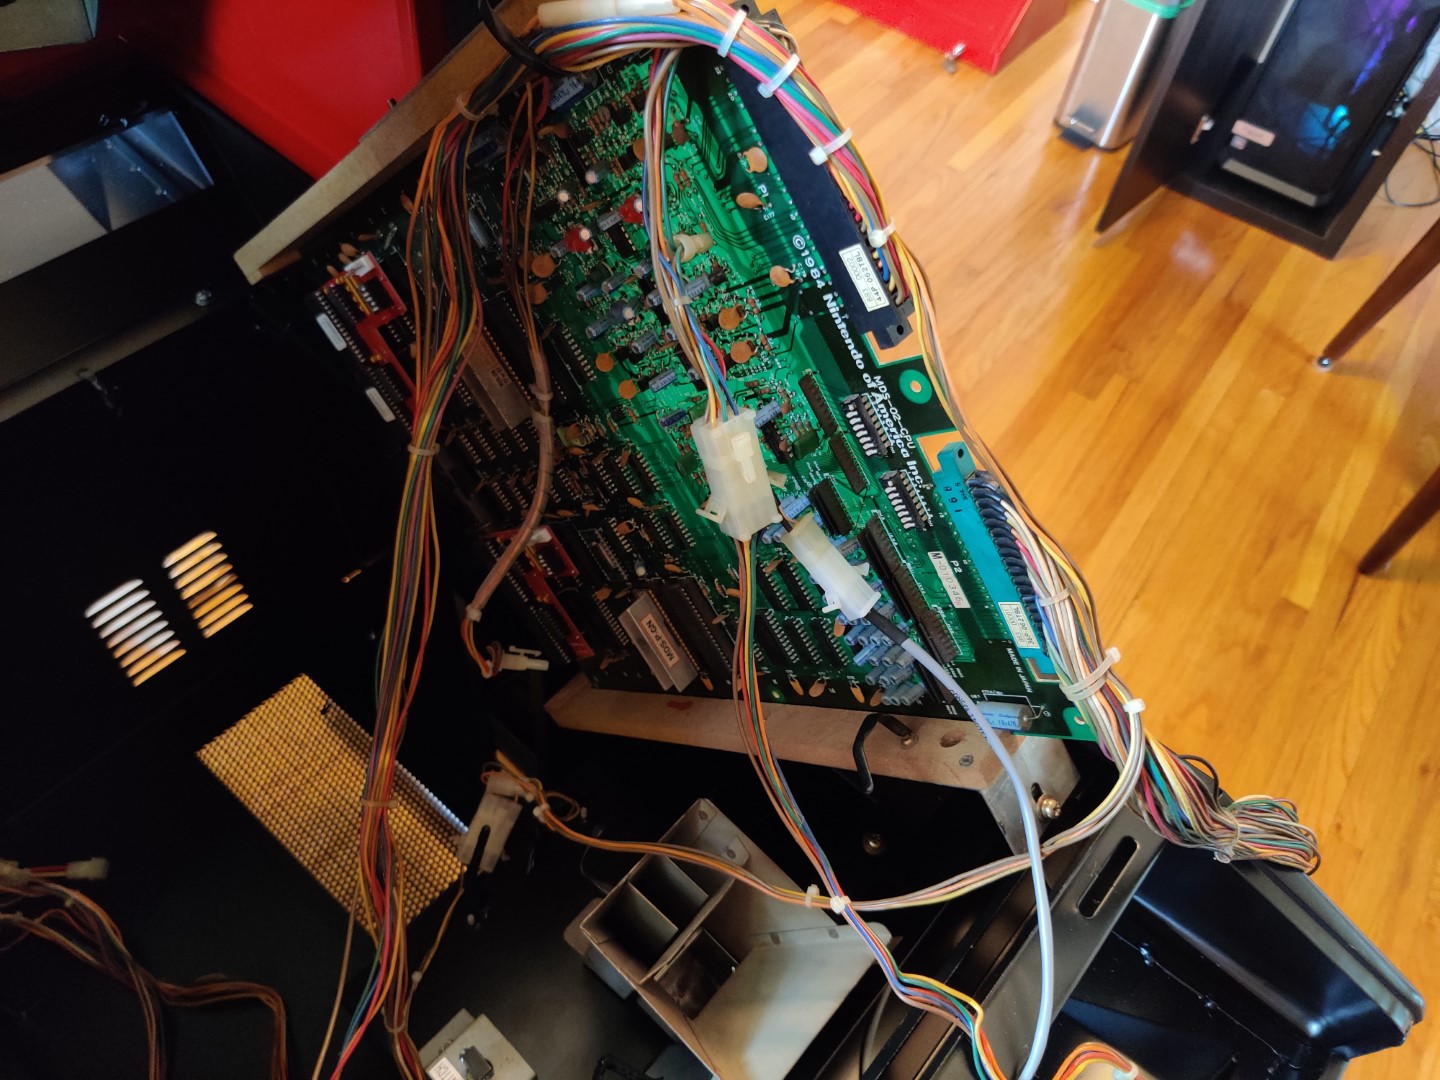
PCB Holder
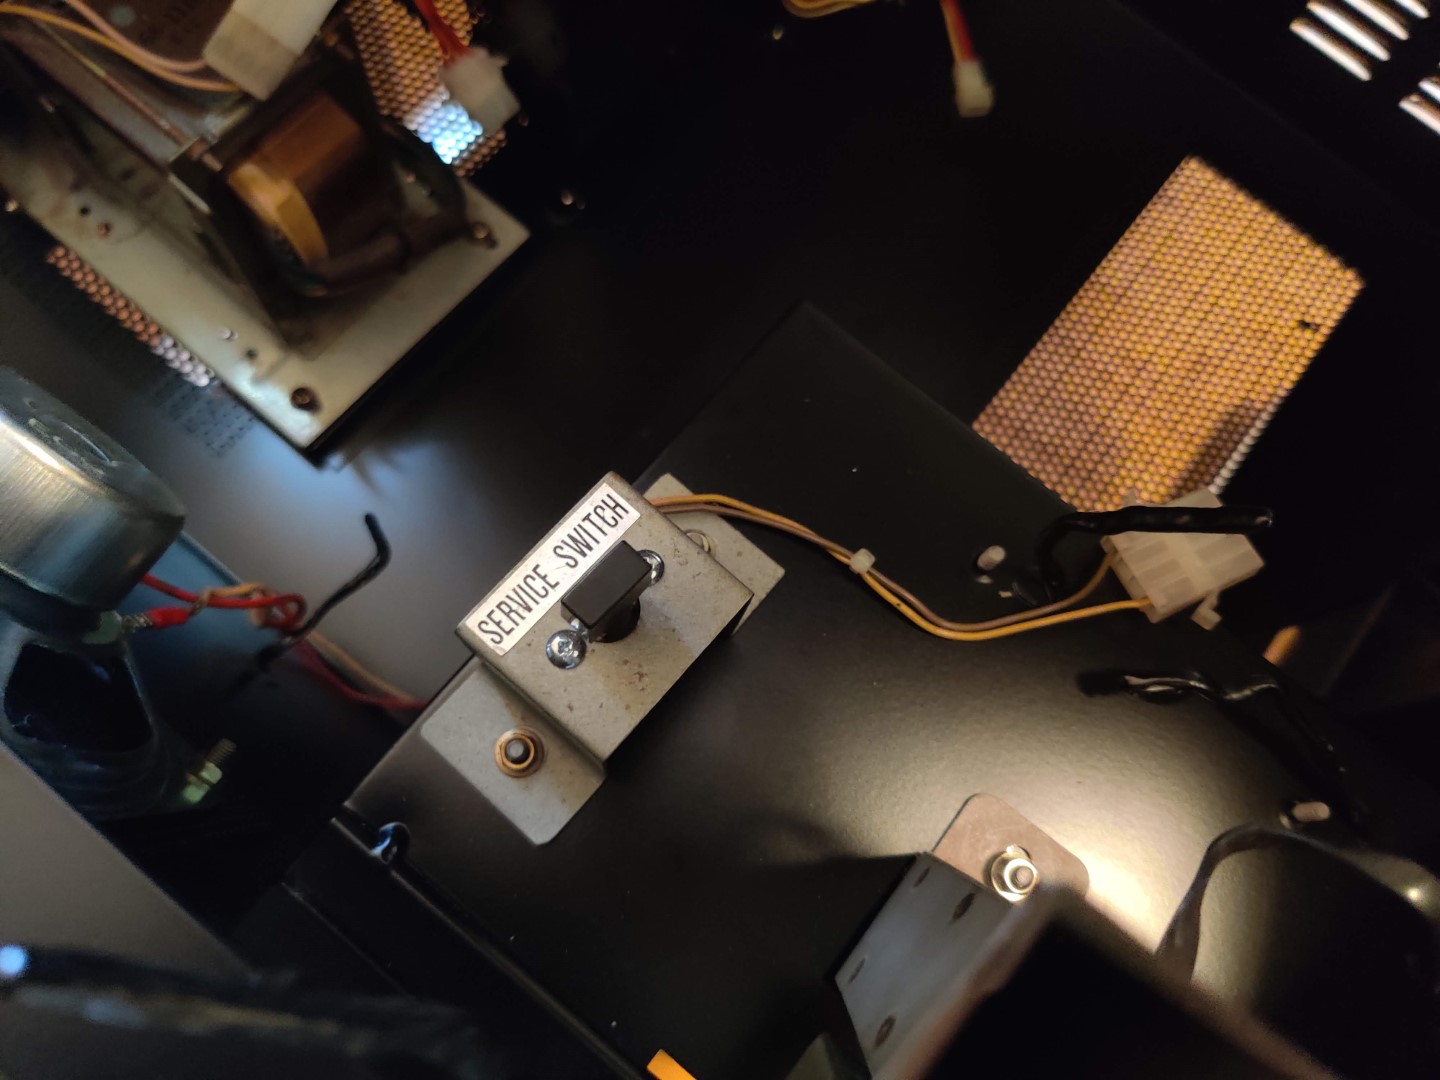
Service switch
Wiring the cabinet
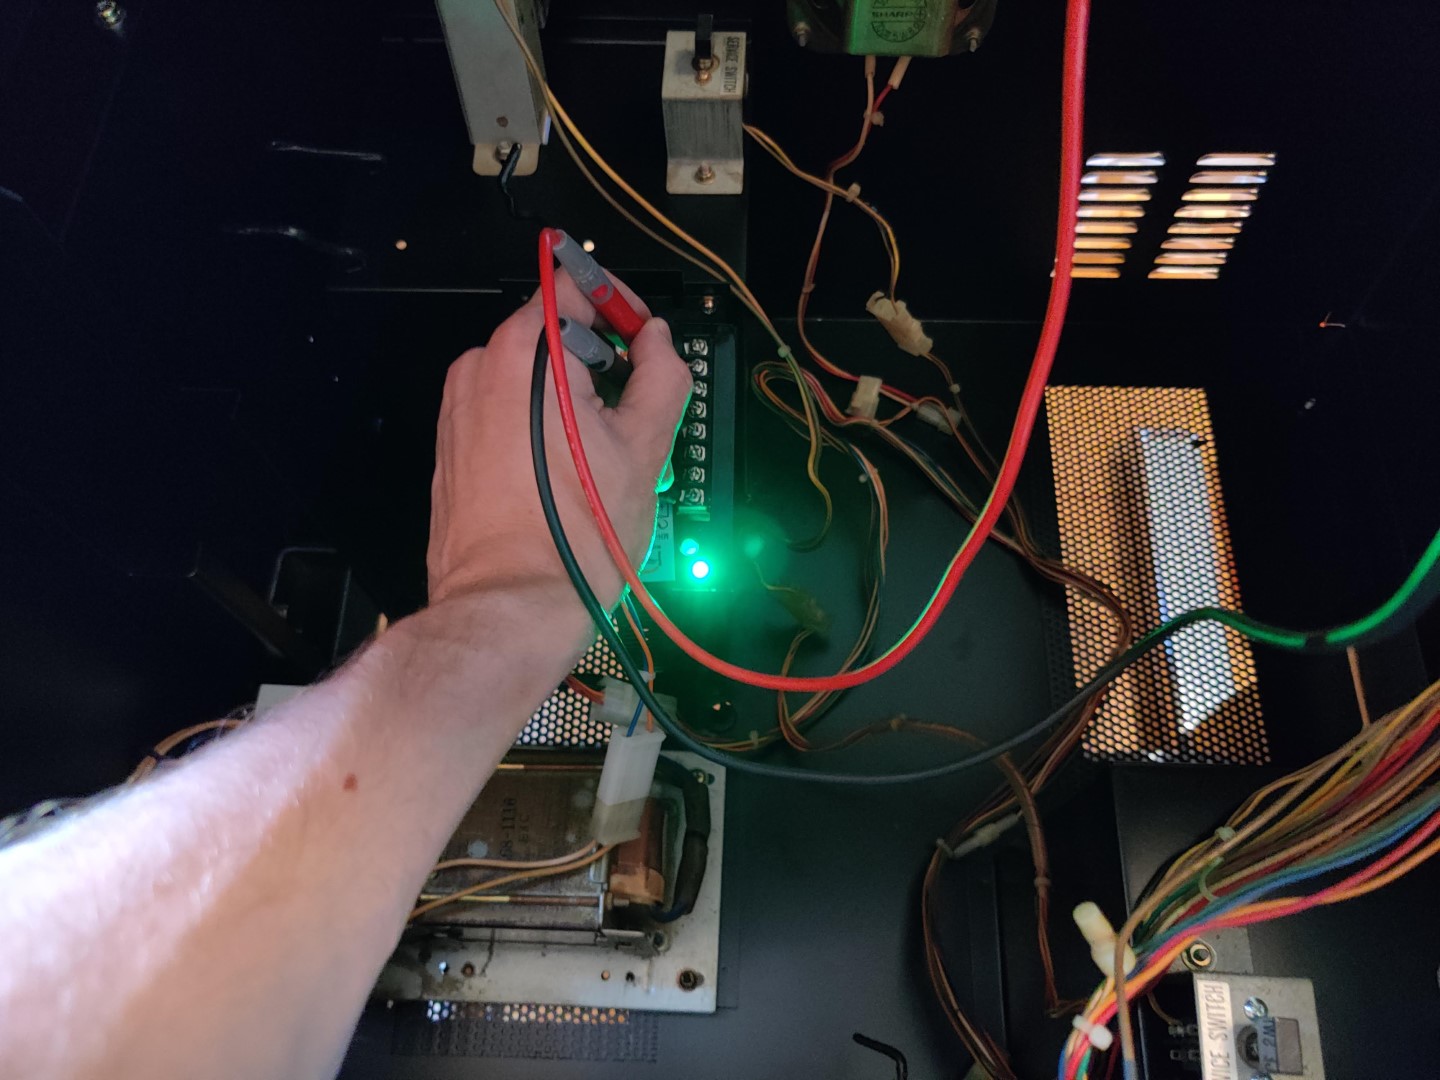
Testing voltage
5v lookin ggood
Labelling main and sub side connectors
Assembling control panel 2
Assembling control panel 2
Assembling control panel 2
Hood 2
Hood 2
Hood 2
Coin buckets with locks
Fully assembled body
Fully assembled body
Close up of the marquee area
Close up of control panel area
Restored Nintendo Red Tent Vs. DualSystem
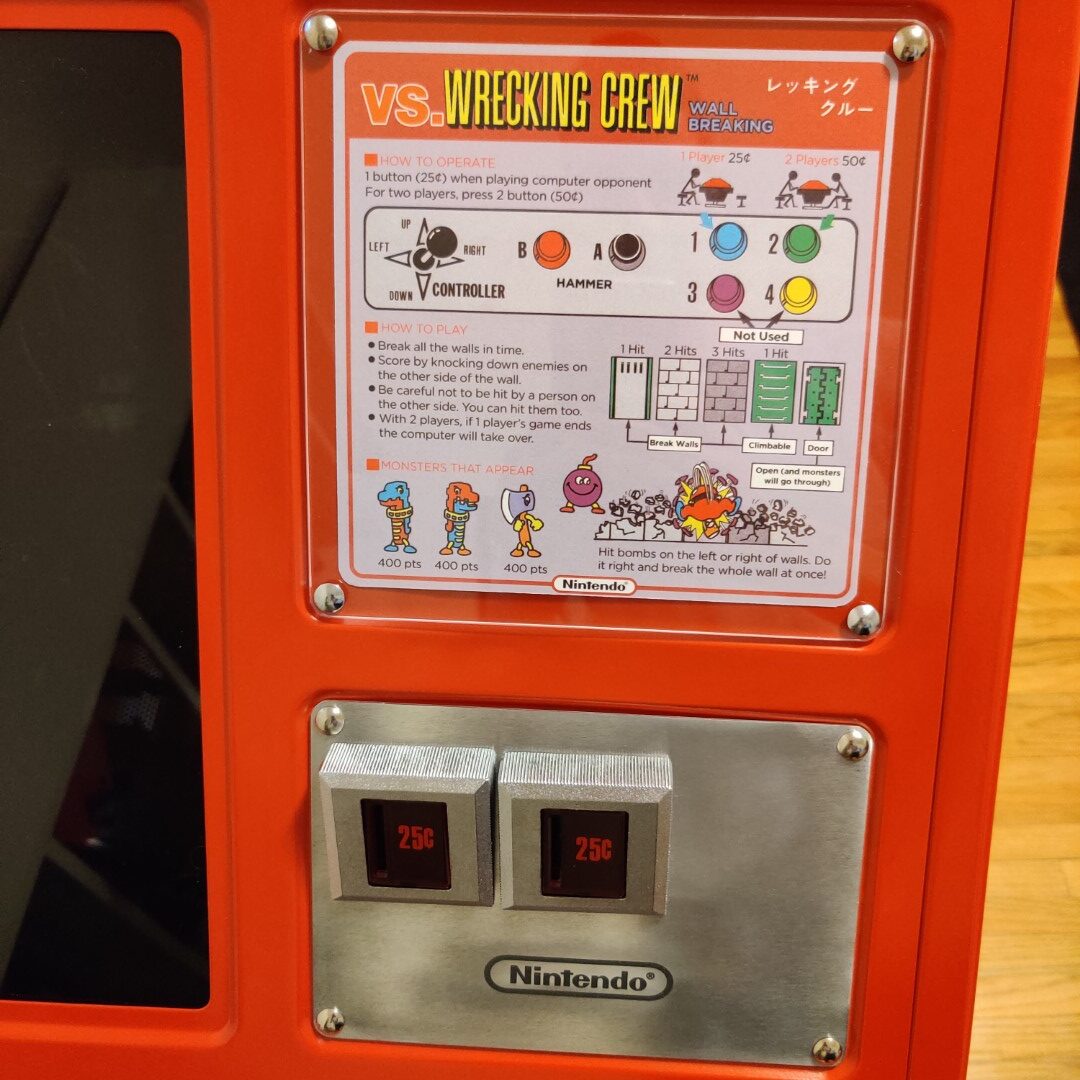
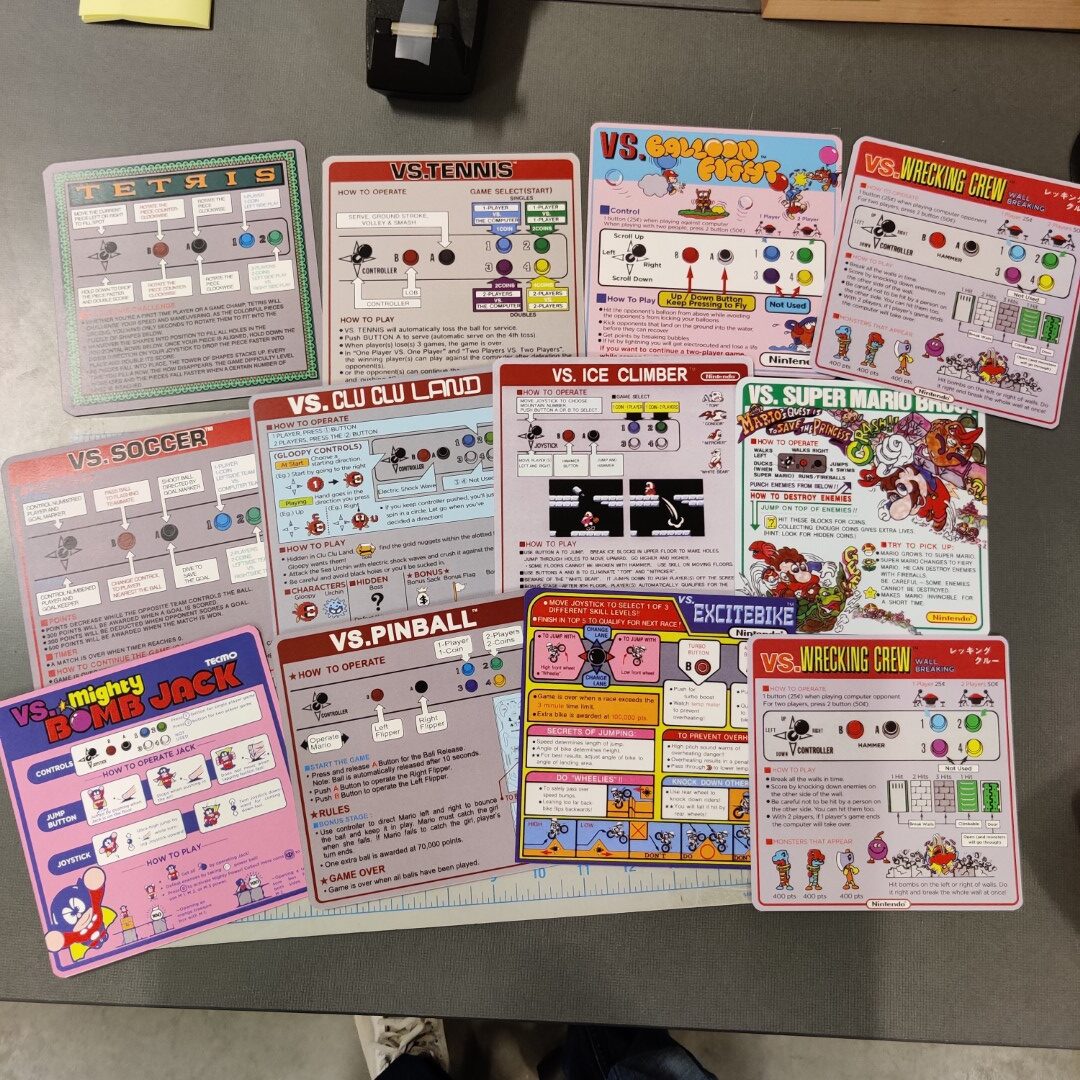
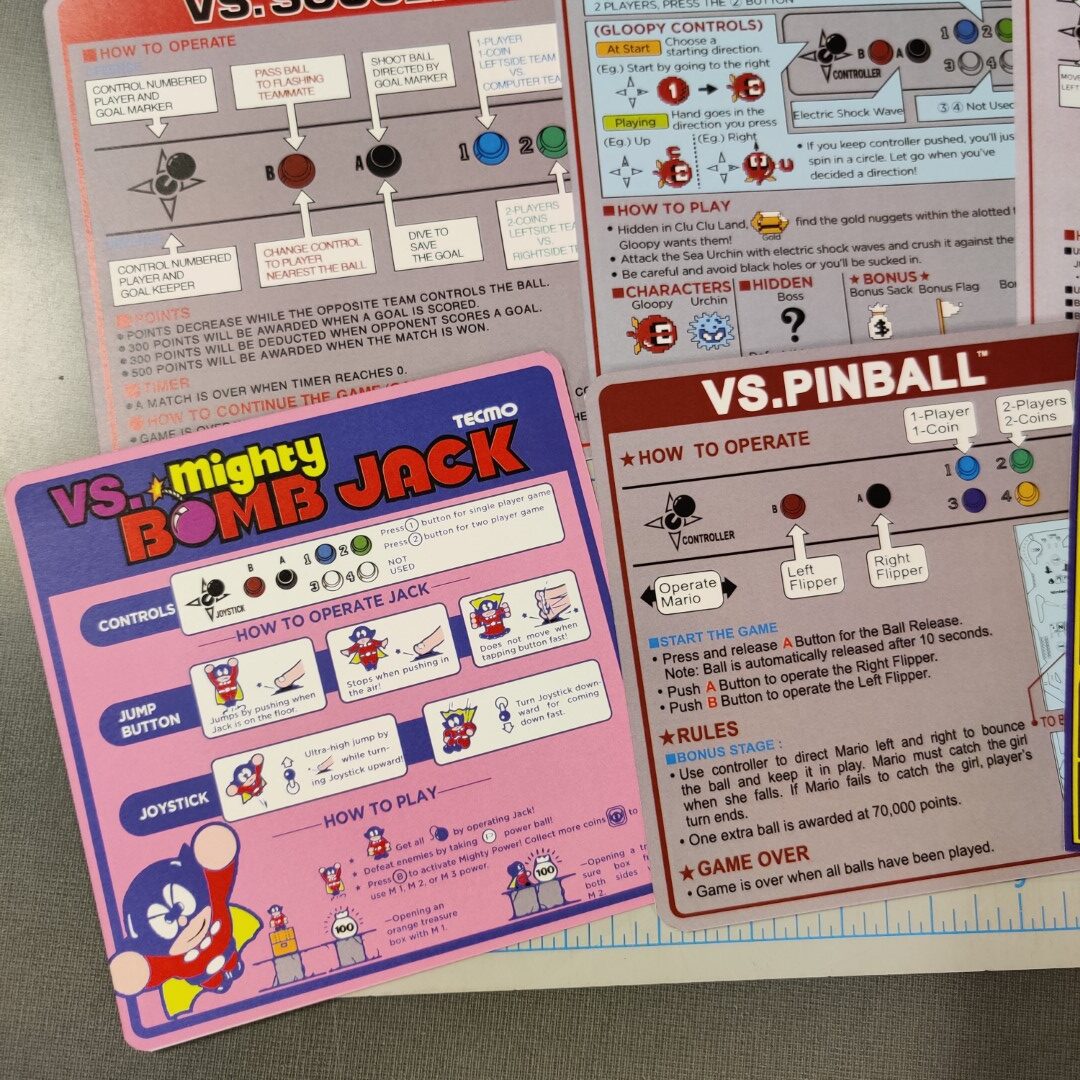
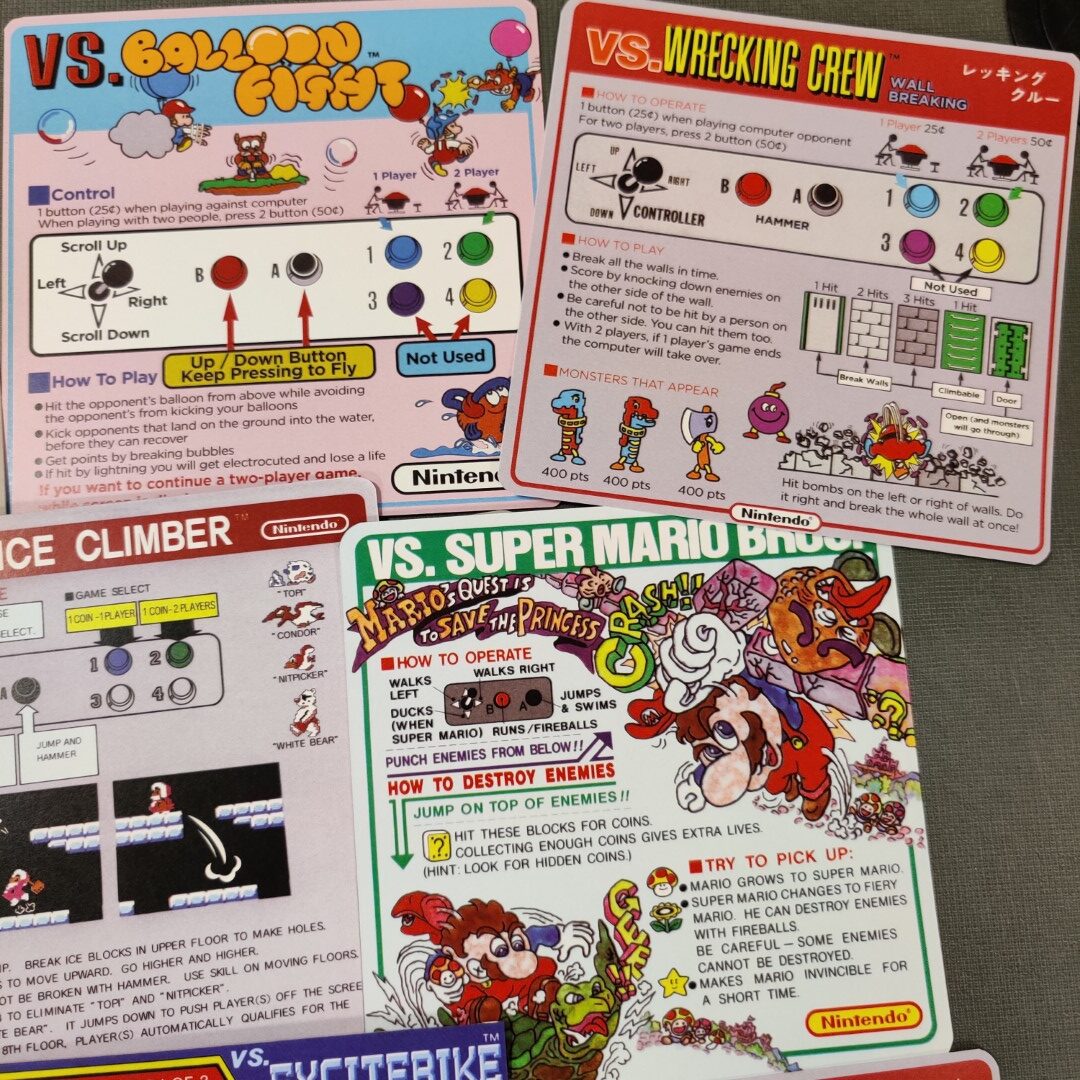
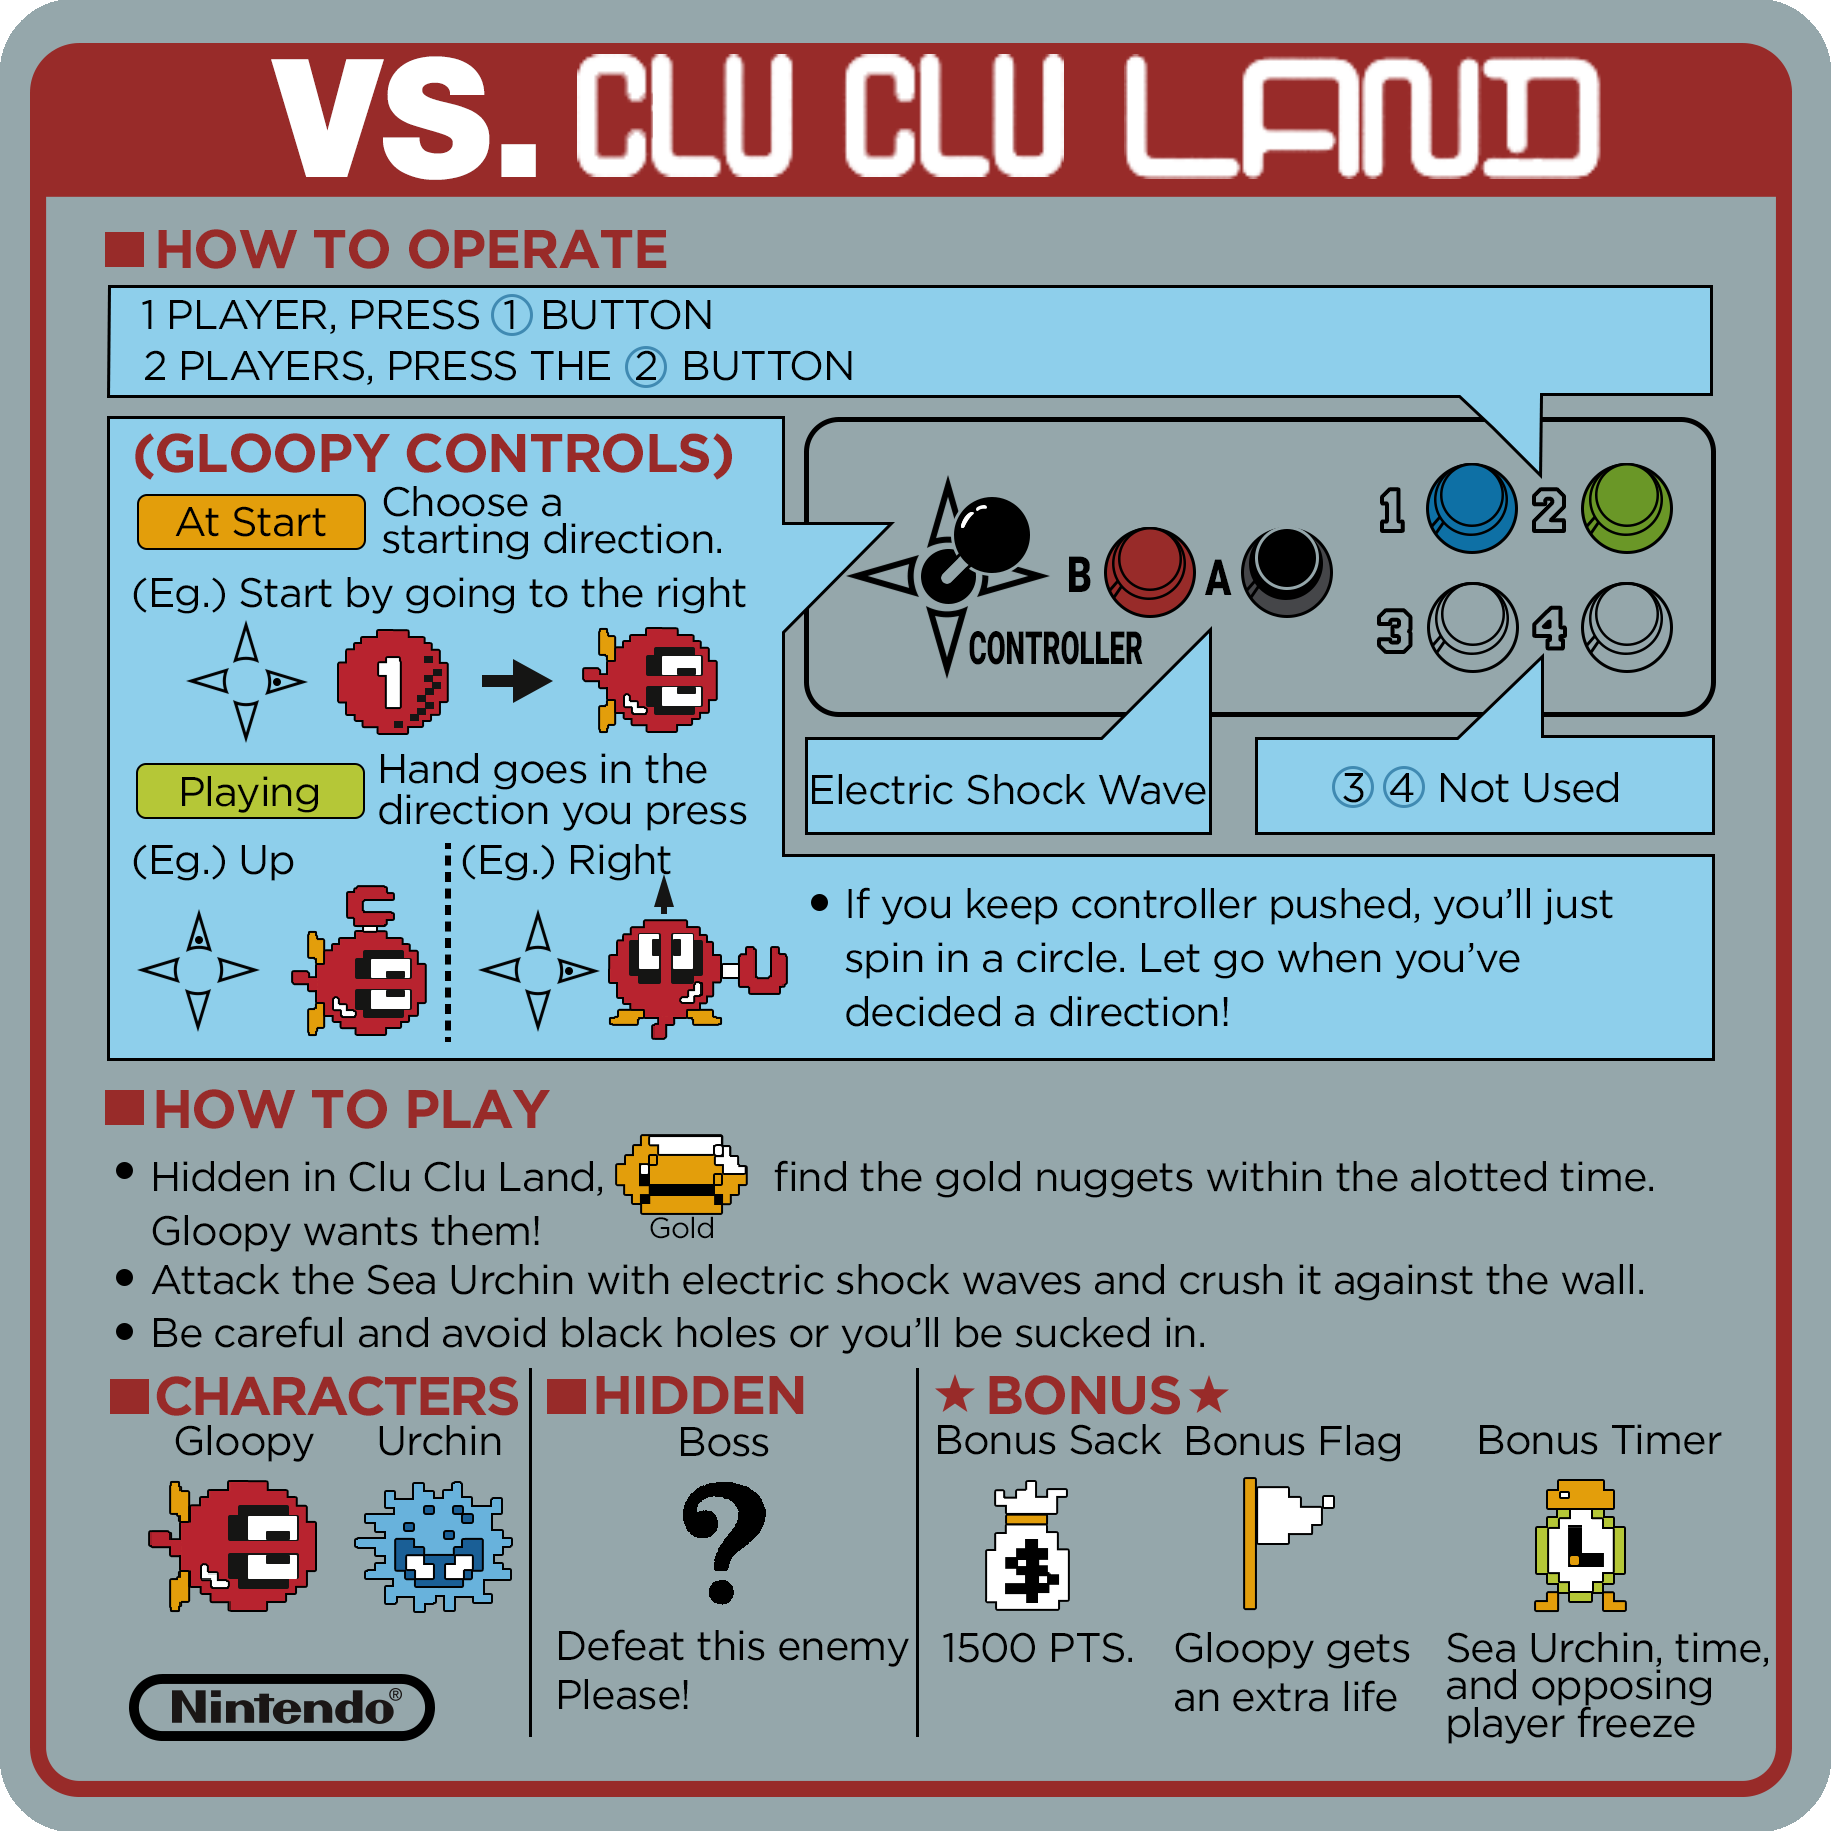
Nintendo Red Tent Instruction Cards
Anyone with an arcade cabinet knows how important the marquees are! Well, the Vs. DualSystem Cocktail cabinet doesn’t really have a marquee but what it does have are unique instruction cards with some really neat artwork. Most of these are easy enough to find but some of my favorites were never made available (at least in the United States)!
With some helpful scans from members on KLOV, I was able fix this up though.
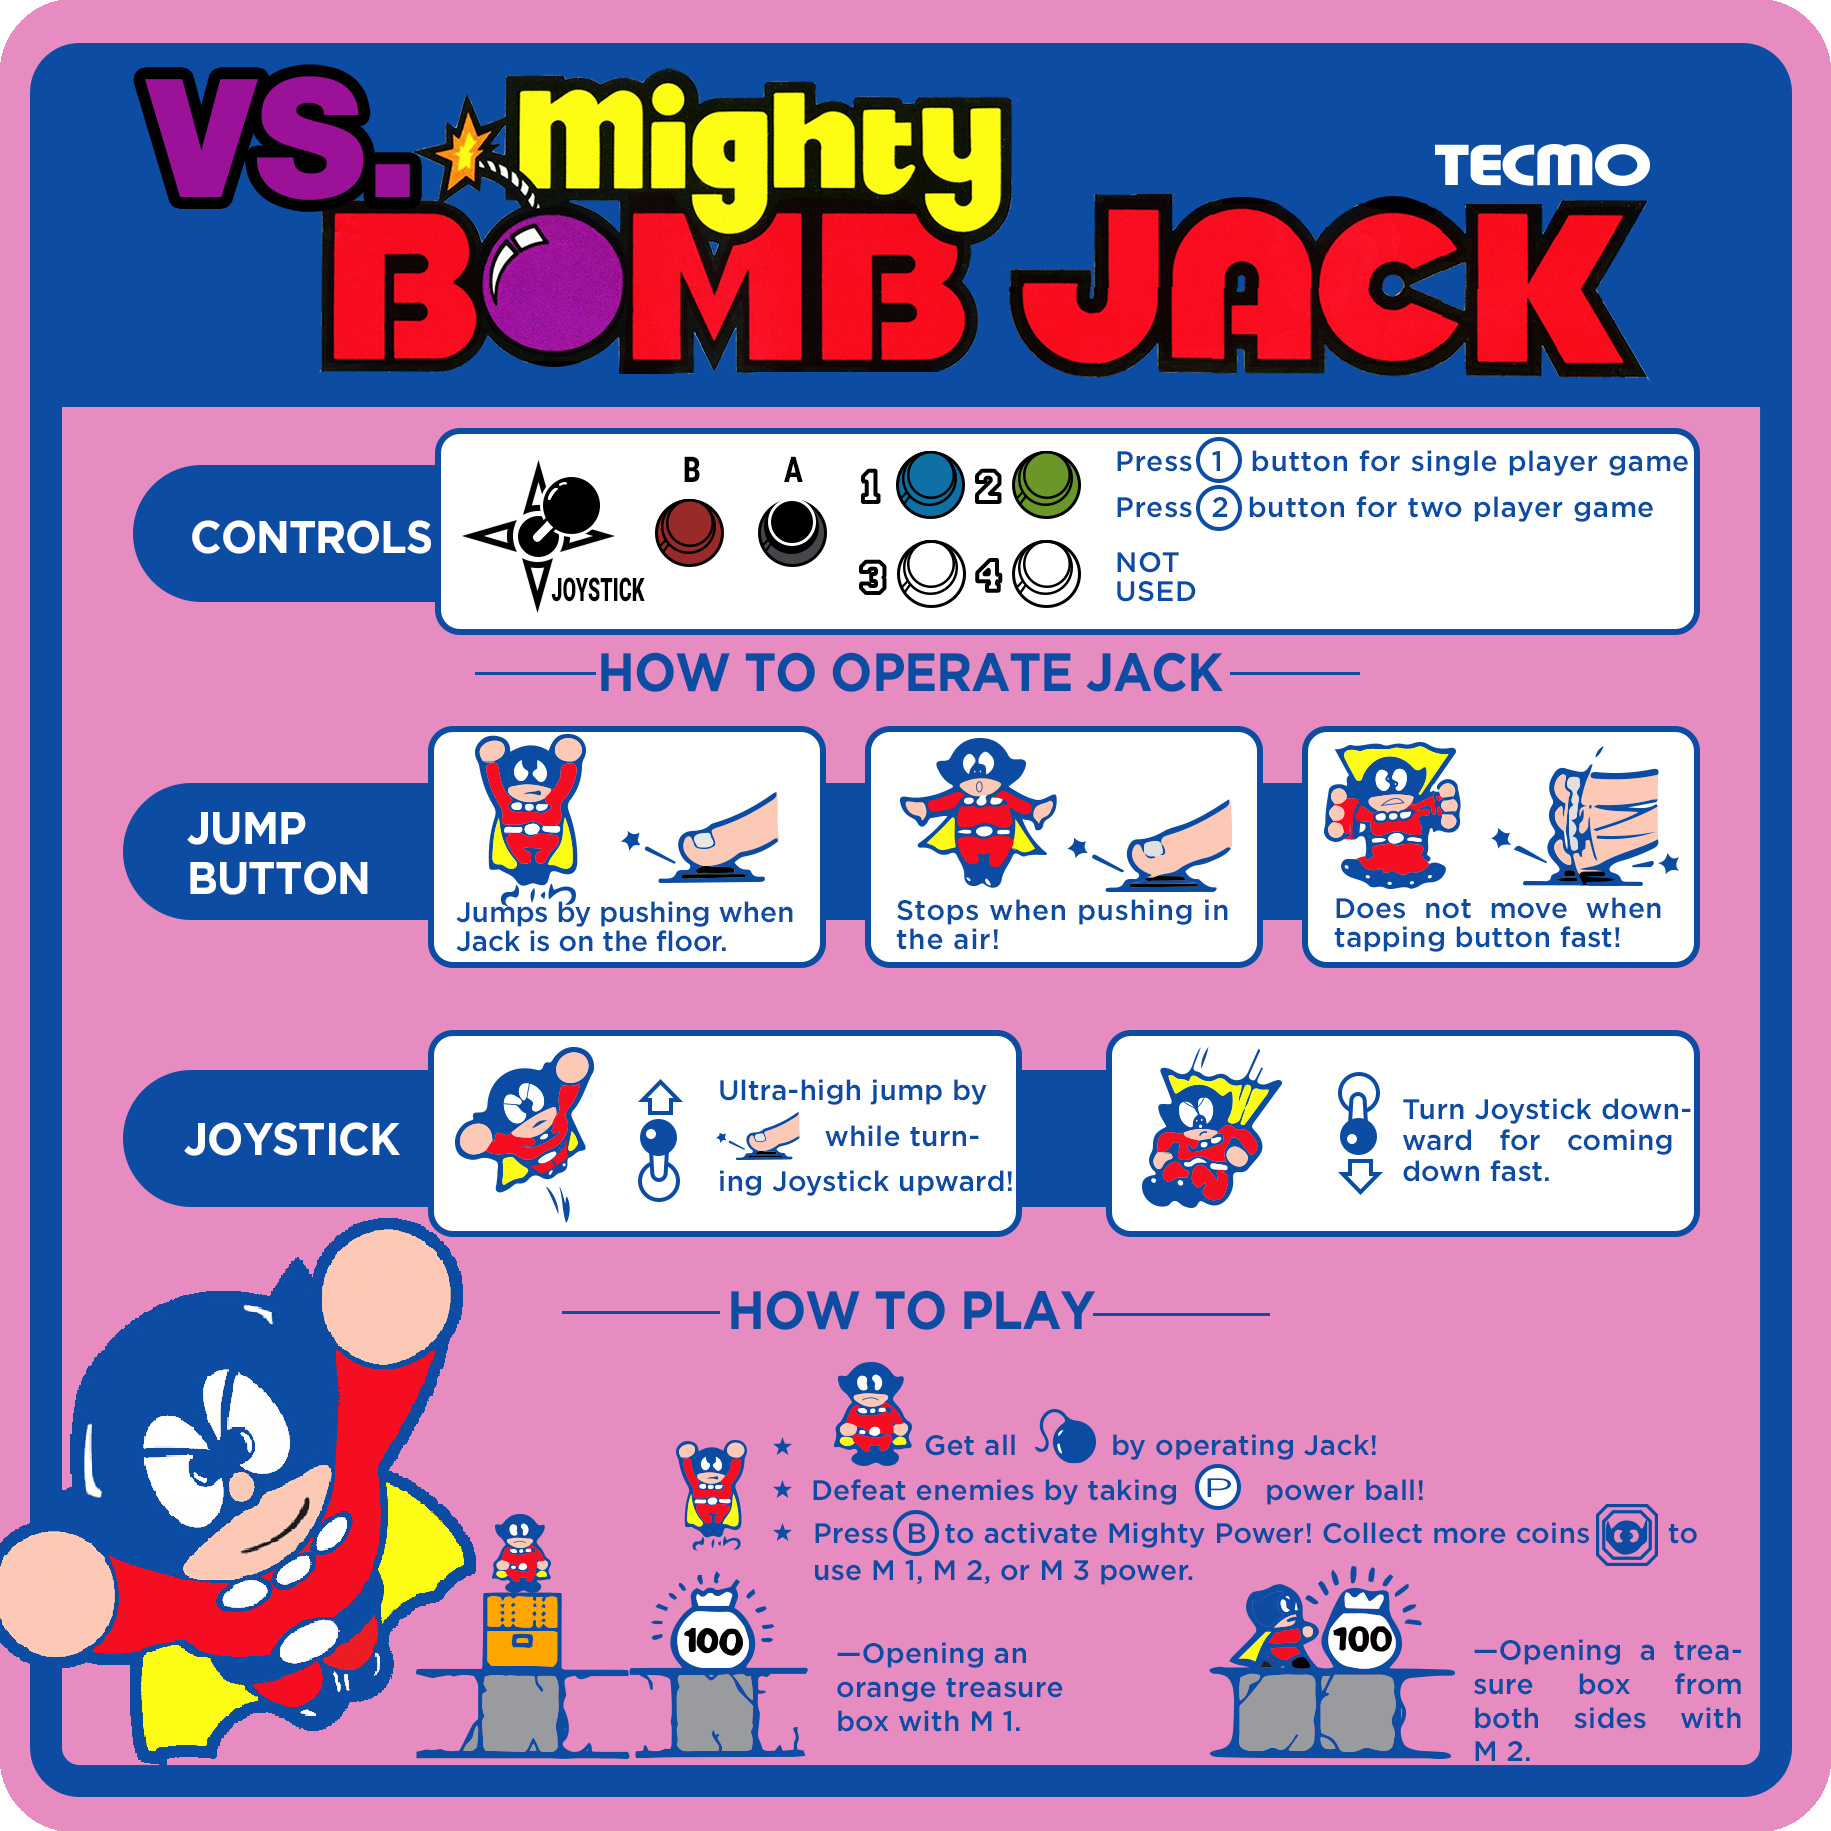
Vs. Mighty Bomb Jack: Never existed, created by me
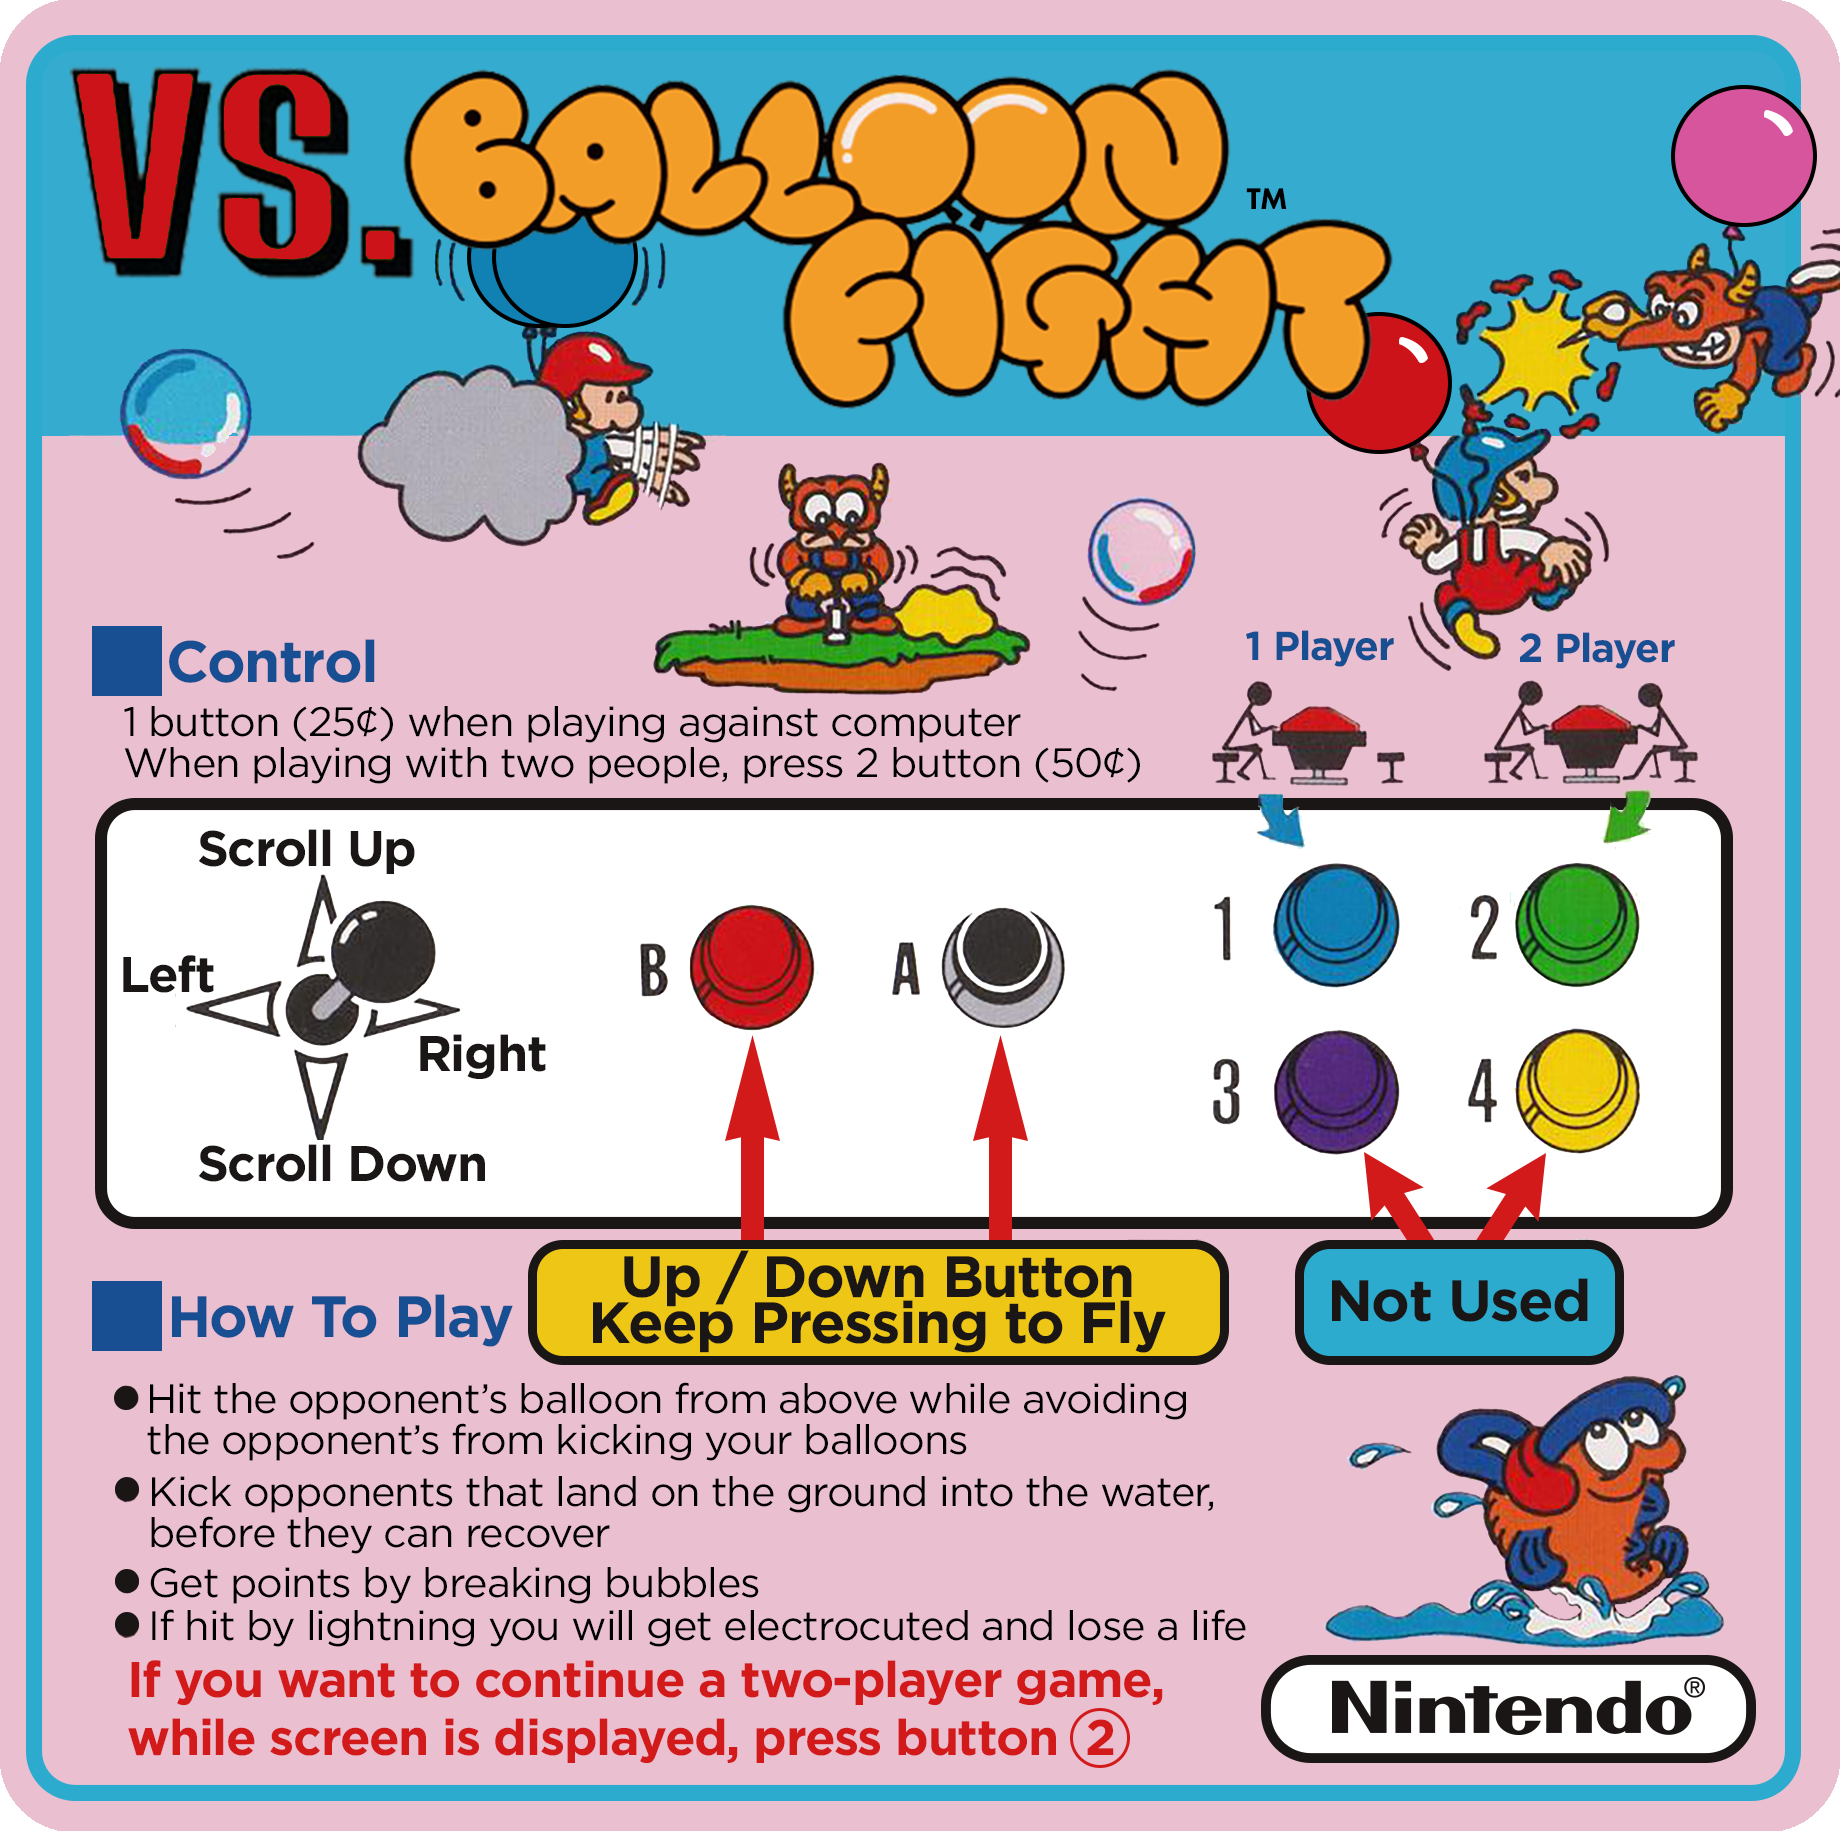
Vs. Balloon Fight: Only available in Japanese, translated and cleaned up by me
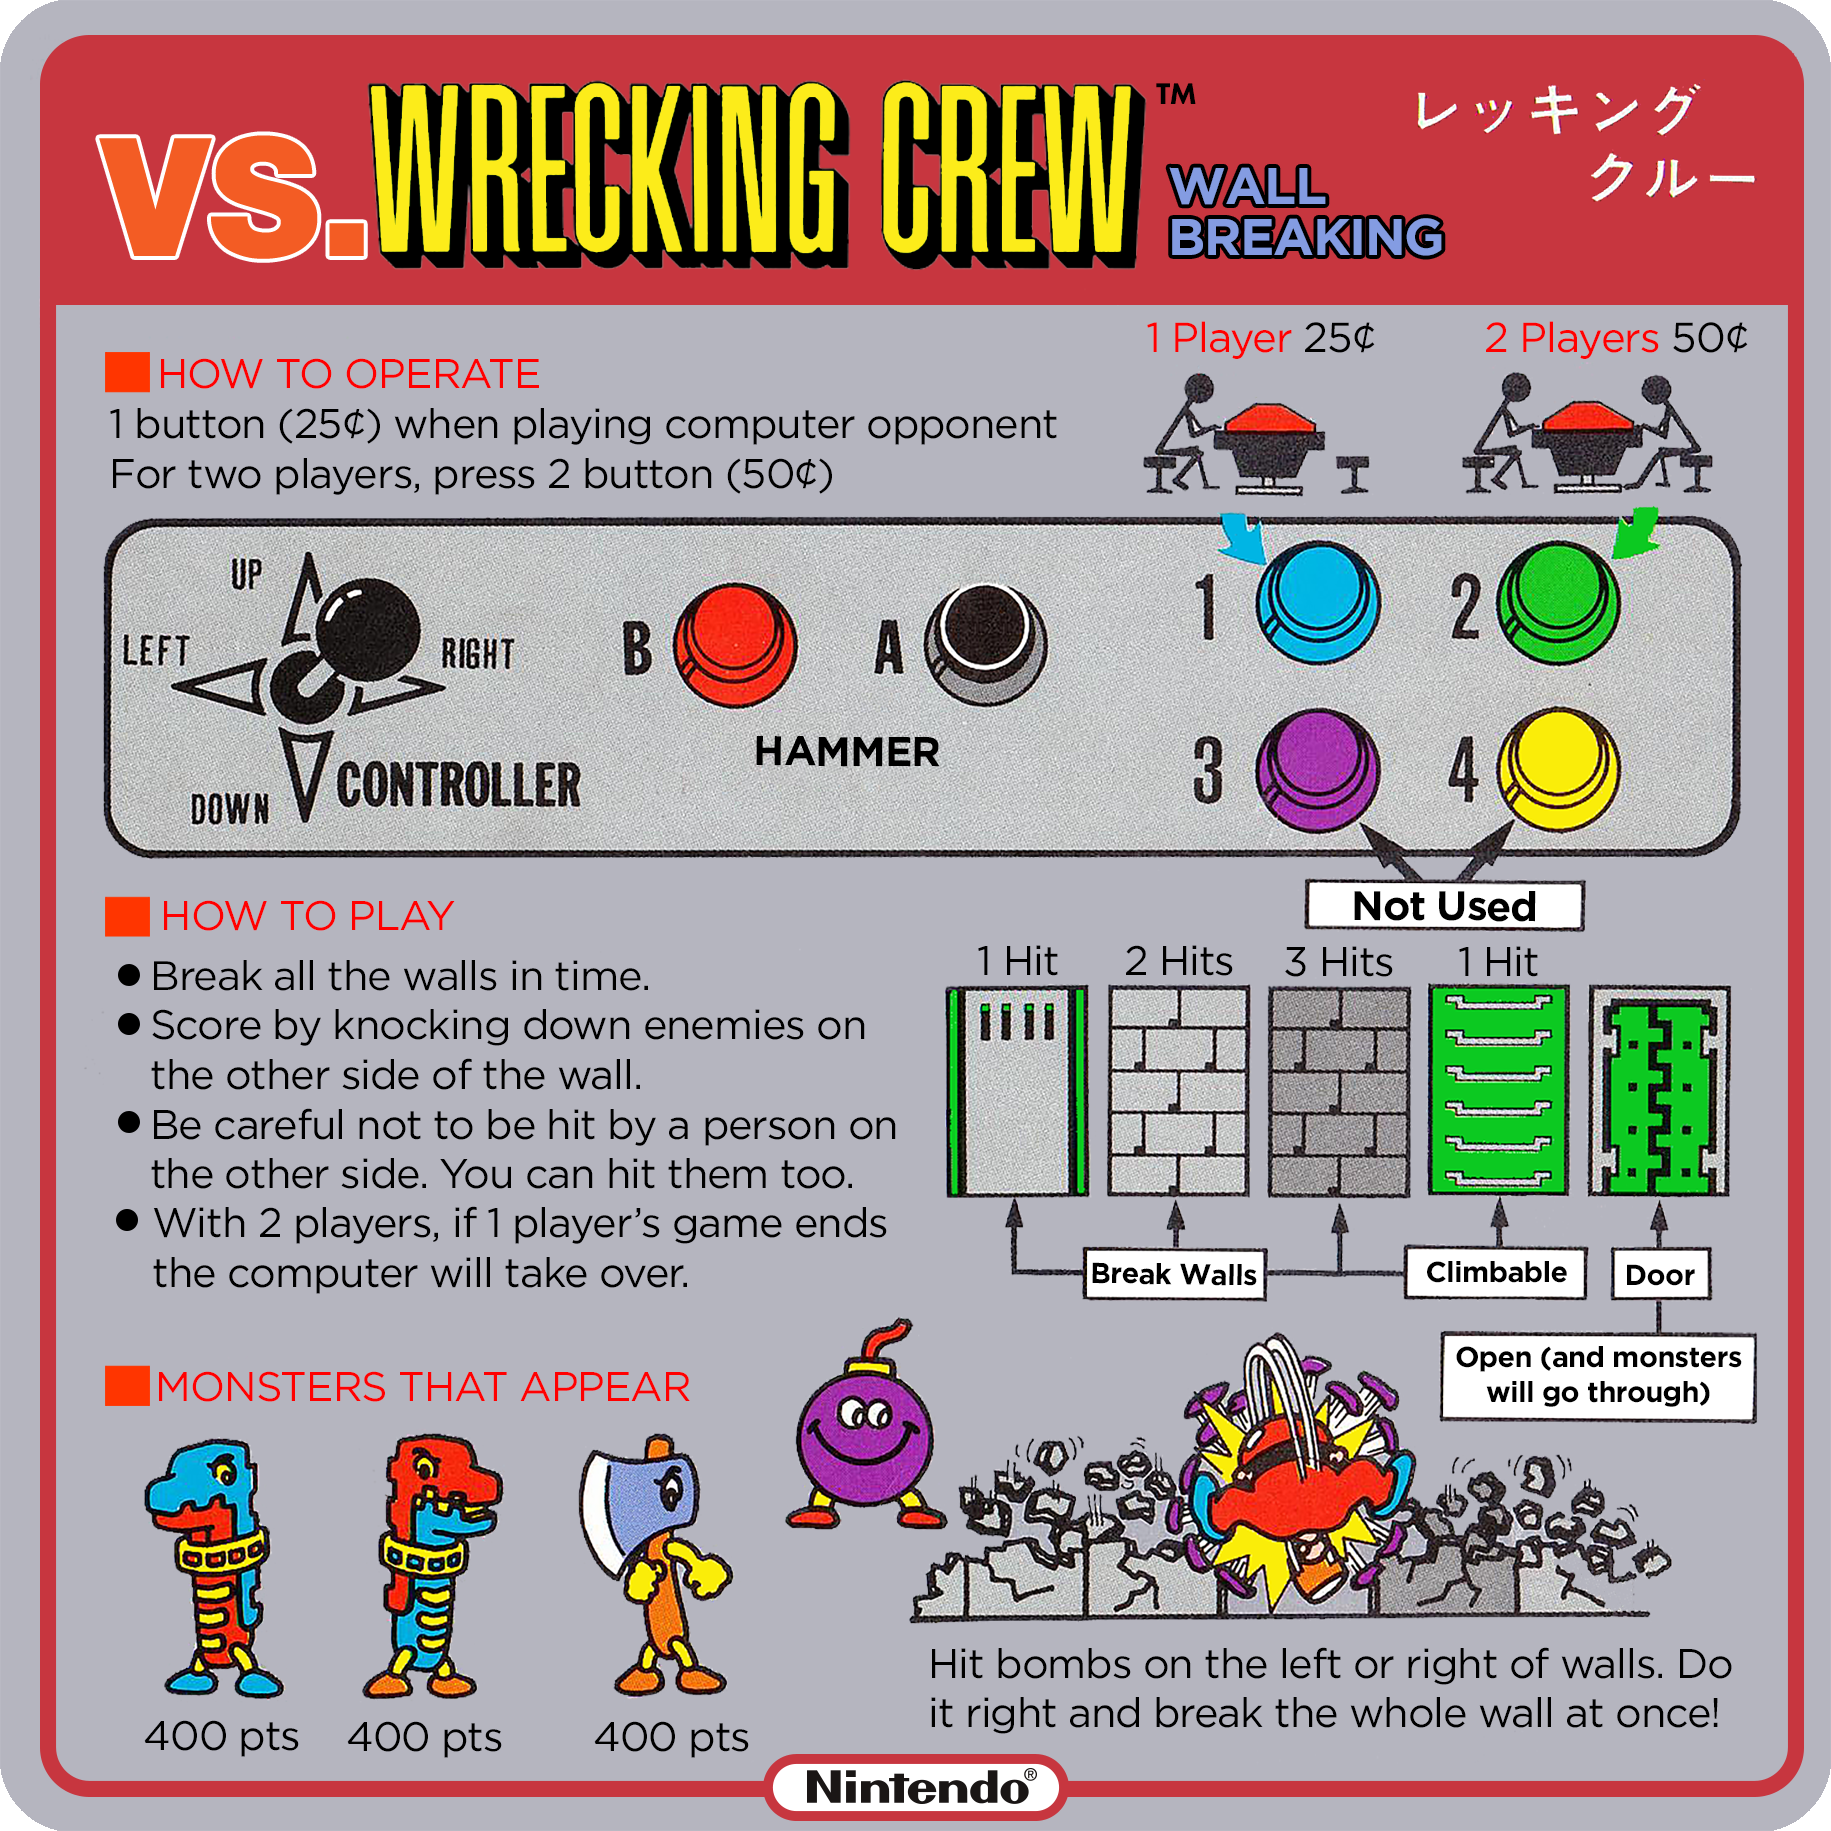
Vs. Wrecking Crew: Only available in Japanese, translated and cleaned up by me
Vs. Clu Clu Land: Only available in Japanese, translated, traced and vectorized by me
A translated, traced, and cleaned Clu Clu Land instruction card
An original creation, Vs Mighty Bomb Jack Red Tent Instruction Marquee Card
Vs Wrecking Crew translated and cleaned
Vs Balloon Fight translated and cleaned
See the Machine Working
Watch a video tour of the Nintendo Red Tent
Download Vs DualSystem Files
Many of the items I created for this restore are available to download! Find my repository on GitHub.
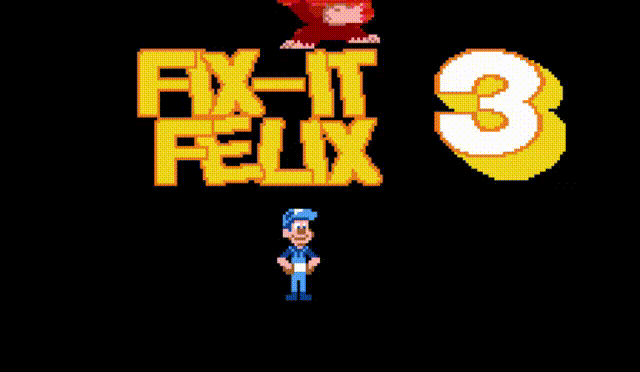
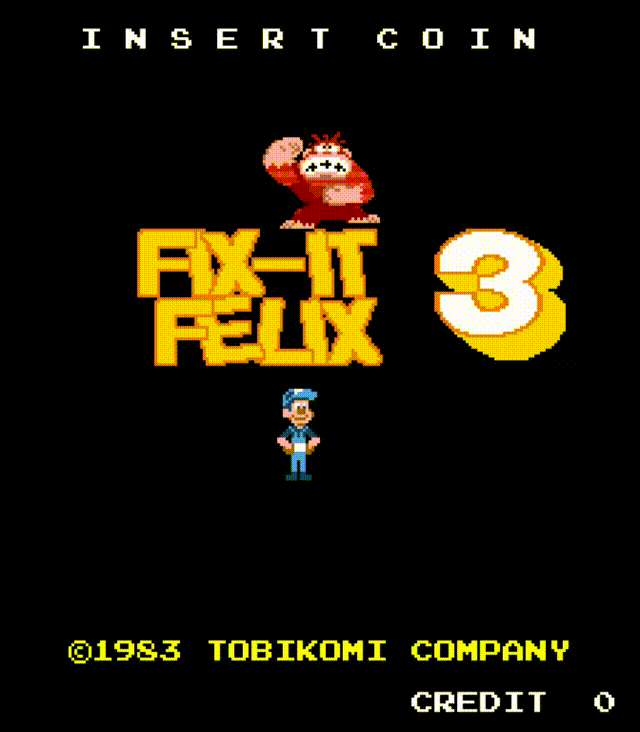
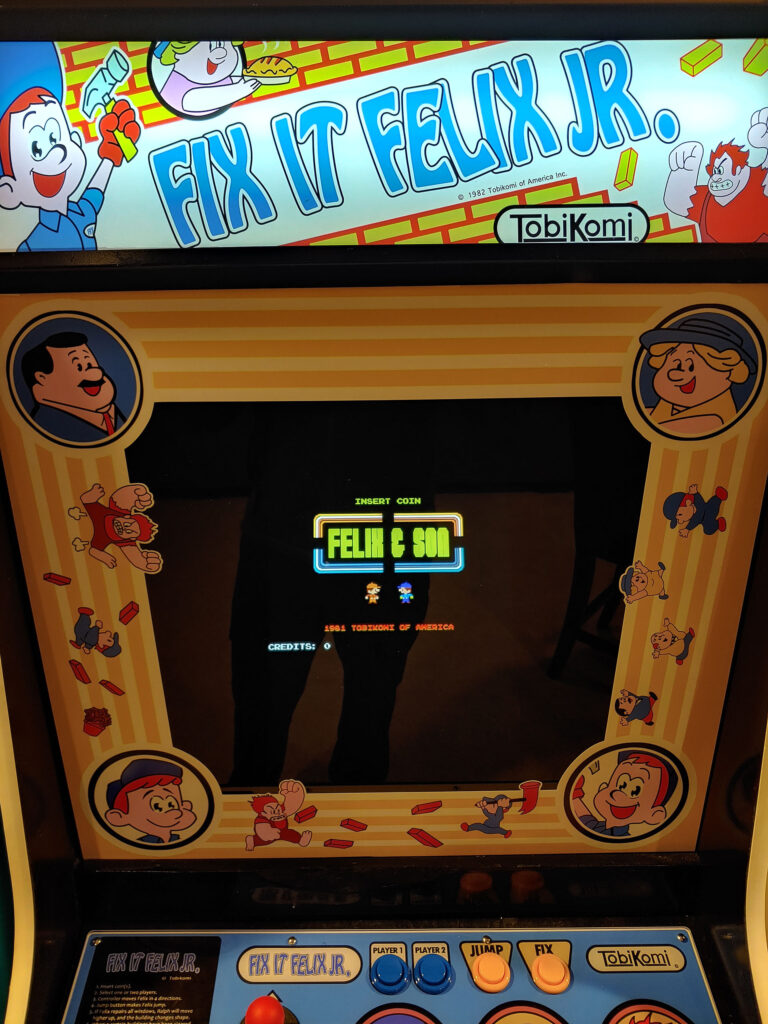
After Donkey Kong Jr. came Donkey Kong 3. So, what comes after Fix It Felix Jr? Fix It Felix 3 of course! It’s become somewhat of a hobby for me to create new 80’s style arcade games and I continue to be obsessed with Wreck It Ralph.
This time, I wanted to make a Tobikomi style sequel to Fix It Felix Jr., so it’s a lot like Donkey Kong 3 – with some twists!
Gameplay for Fix It Felix 3
This new game is very similar to Donkey Kong 3. Wreck It Ralph is messing with another building, using ropes to get around. Meanwhile, Felix uses a window-washing cart to get up and down, moving keys to the locks before the building is destroyed!
This game should work in any Nintendo style cabinet running PC type hardware – it requires at least a 4-way joystick, 2 action buttons, and 2 start buttons. It can be set on freeplay or to take credits.
Game Design and Coding
Like my other games, this was created with GameMaker Studio 2. I wanted to keep the resolution and sprites authentic to Donkey Kong 3 so it has a default resolution of 224×256 (so hypothetically should work well on a CRT) but scales up pretty well to anything. Controls can be customized.
Sound and Music
I wanted to get away from classic music this time (something I often use in my Tobikomi style games since that’s what Nintendo often did) and instead converted some old pop songs to 4 channel retro chiptune music. Beepbox.co continues to be useful for this! Watch a gameplay video on YouTube.
Can you tell what one of the songs is? Fix It Felix 3 Level 01 Music
Most of the sound effects are modified versions of the Donkey Kong 3 sounds – or simple beeps and boops I put together.
Level 04 Music (my favorite song in the game)
Project Files for Fix It Felix 3
Need the game for your cabinet? You can download the latest release from my GitHub page! Remember, this game is a a fan project – I do not own or represent Disney in any way, I just love the universe they created. Do not sell or charge for this game.
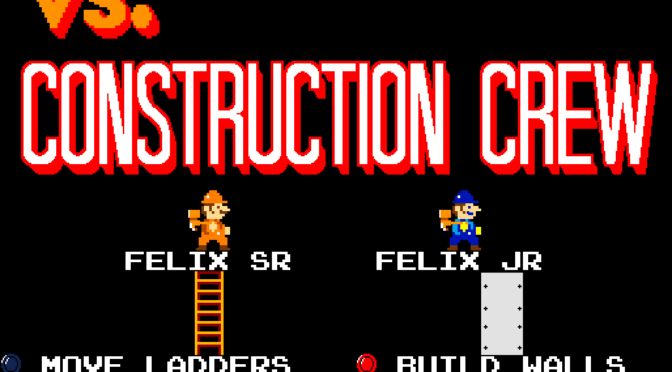
I continue to love adding to the Tobikomi world, with games like “Felix & Son Arcade” and “Wreck-It Ralph.” Today, I add to that fictional history with “Vs Construction Crew”, a game heavily inspired by Vs Wrecking Crew meant to be played on a Nintendo Vs. DualSystem (or maybe a Tobikomi Vs. DualSystem?).
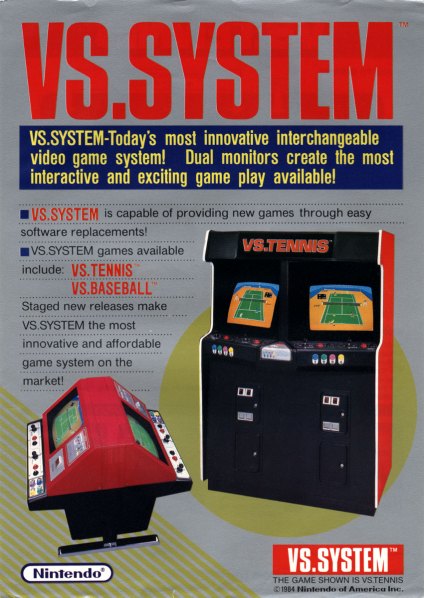
The Nintendo Red Tent (Vs. System)
To understand where I’m coming from, first you need to know about the Nintendo Vs. DualSystem. John’s Arcade YouTube channel goes over what these systems were all about. The quick summary is, these arcade cabinets were designed with two monitors and sets of controls so people could play games head-to-head. Many NES games were re-released on the Dualsystem with slight modifications (like Vs. Super Mario Bros). Other games were given more of a special treatment though. While Wrecking Crew on the NES is mainly a single-player puzzle game, Vs. Wrecking Crew on the Dualsystem is a head-to-head cooperative game that uses both screens at the same time!
A flier for the Vs. System machines
I really get a kick out of these machines. PLUS, in the fictional history where a company like Tobikomi was cloning Nintendo products (like Donkey Kong) of course they would make their own Vs System games. In the real world, companies like Konami and Namco were all making games for the system – so why not Tobikomi?
Creating Vs Construction Crew
So, the goal is to create a game similar in style to Vs. Wrecking Crew. In that game, Mario and Luigi are trying to destroy a building. So, in my game stars Fix It Felix Sr. and Fix It Felix Jr., trying to CONSTRUCT a building. Other gameplay mechanics are quite similar, too. You can knock enemies down, there’s a timer, and most importantly, there are two sides to the wall. Enemies can only hurt you if they’re on the same side.
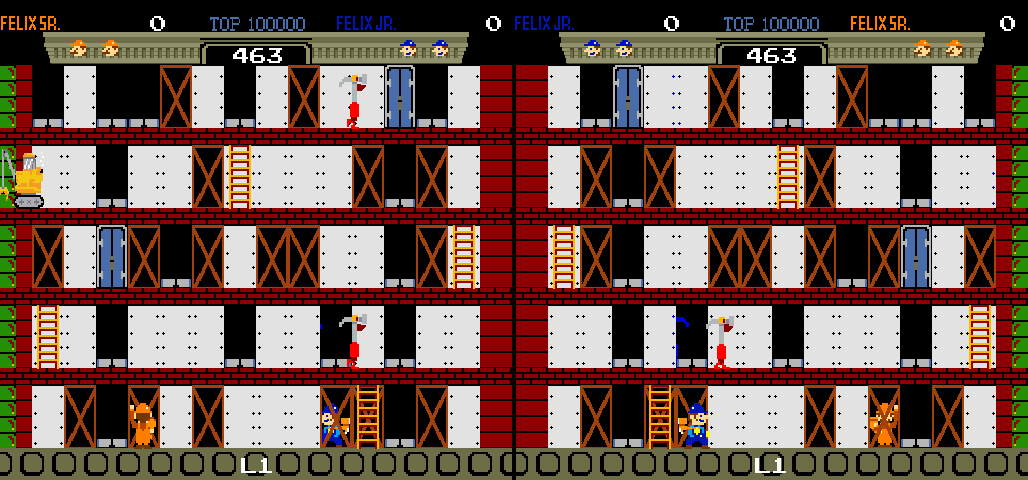
The coin insert screen for Vs Construction Crew. Two screens are shown here
Coding the Game
Once again, I’m making the game with Gamemaker Studio 2. I’ve had a lot of success making 8-bit style games and even gotten much quicker with it. I came across two real challenges this time though:
The “dual” nature of this game required some creative thinking. Essentially, there are two of everything because of the two screens. I didn’t want to just show the same thing on both monitors, I instead show a mirror image. Plus, on one side, the characters must look like they’re behind the wall and in front on the other side. You can get an idea of what I’m talking about in the picture below.
You can see the two sides of the wall on these two screens. Notice that they’re not just mirror reflections. Felix Jr. is behind the wall on one side and in front on another.
The second challenge is having the game appear on two monitors (if your computer has two). This lets you play Vs Construction Crew on a real Nintendo Red Tent or Vs. Dualsystem, assuming you have a PC inside. I went through lots of hoops to get this to work. The solution I found was this:
Users input their computer monitor resolution
Users tell the game whether they’re using 1 or 2 monitors
The game then calculates how large the game should be and expands the game across both monitors – properly centering the game window for each.
This works better than trying to find a way to generate two separate game Windows for each monitor, something Gamemaker Studio 2 can’t do natively.
Graphics
Once again, this is meant to be a clone of a specific Nintendo game, so started with wrecking crew sprites and went from there. The characters are designed a bit differently (colors and the famous felix hammer) while the enemies are completely different.
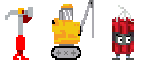
The Vs Construction Crew enemies
Game Music and Sound
For music, I am using a remixed version of the songs from Marriage of Figaro. I use pieces of this song for gameplay, coin sounds, death, and plenty of others. Here’s just one section, for instance.
Beginning of Marriage of Figaro in an 8-bit style.
Vs Construction Crew Gameplay
Check out the gameplay below! I’m really proud of how this turned out and looking forward to putting it in a proper arcade cabinet someday.
Gameplay of Vs. Construction Crew, single screen single player.
gameplay for dual screen, dual player.
That’s it for Vs Construction Crew! I’m quite proud of how it turned out. If you think this kind of stuff is interesting or fun, check out the BYOAC Forum which is full of people making their own arcade cabinets.
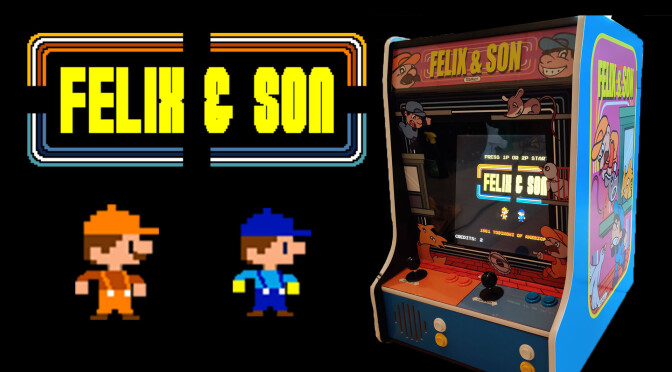
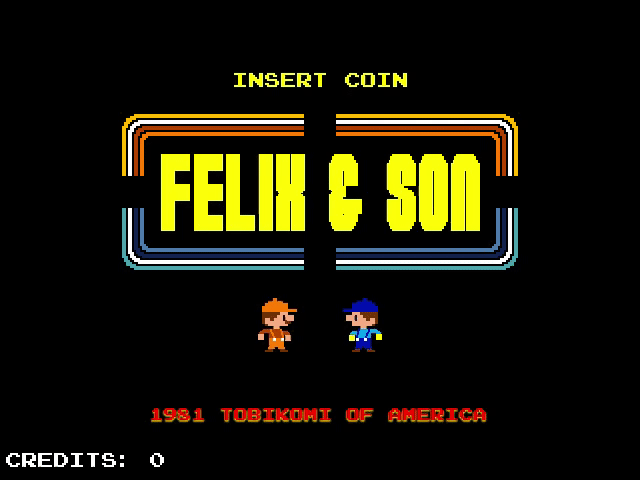
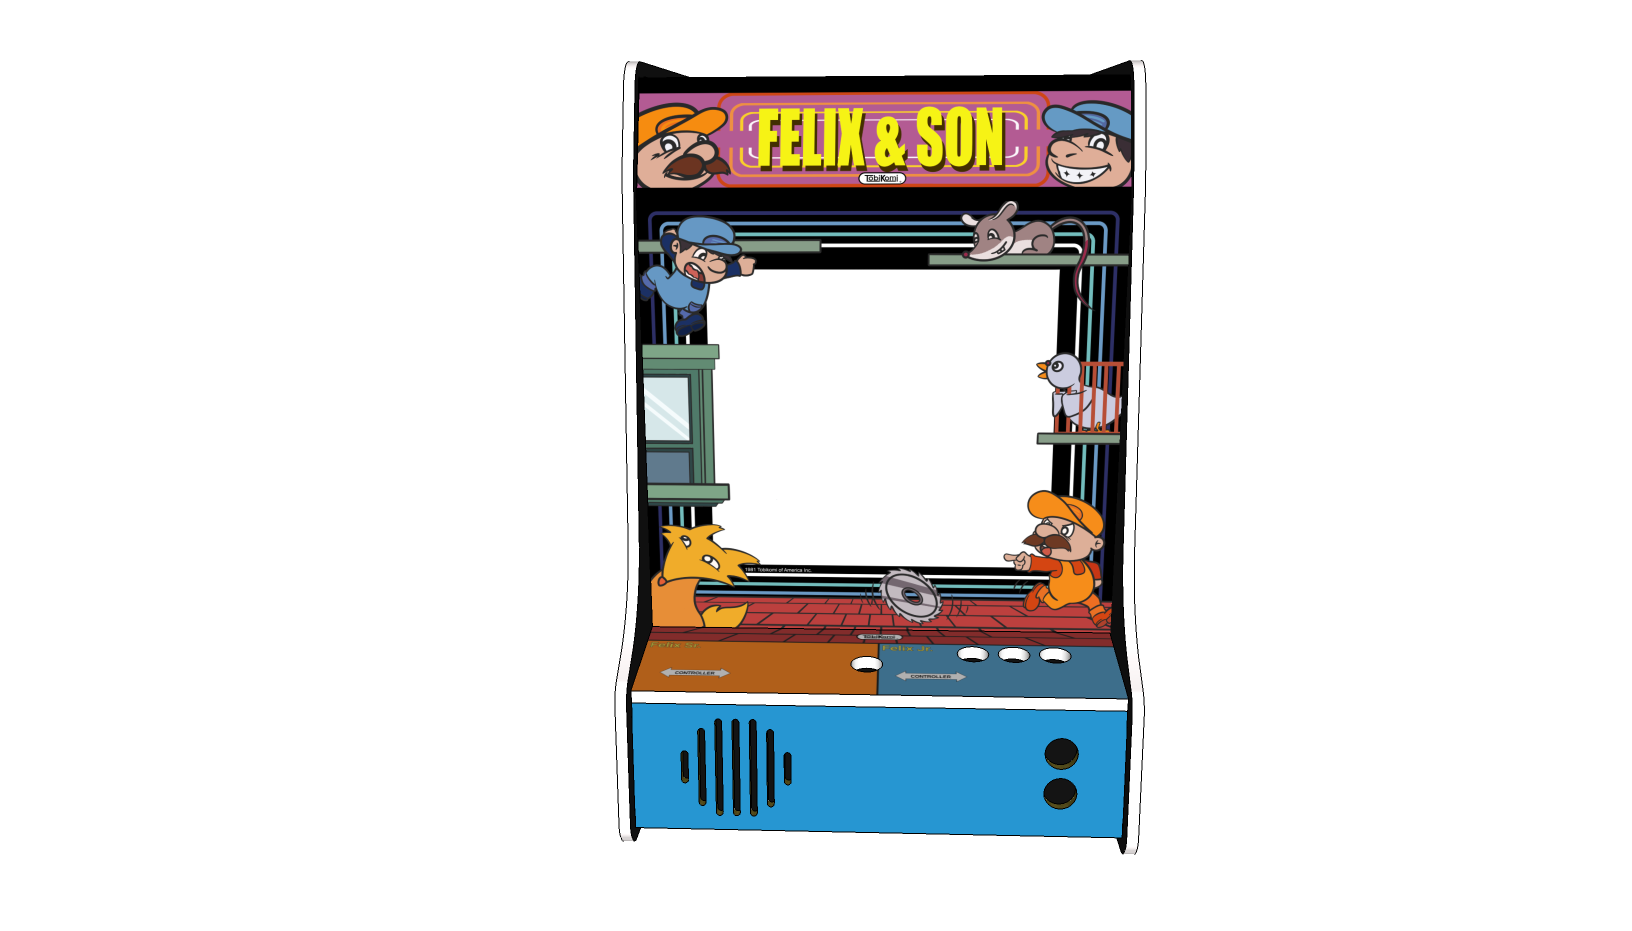
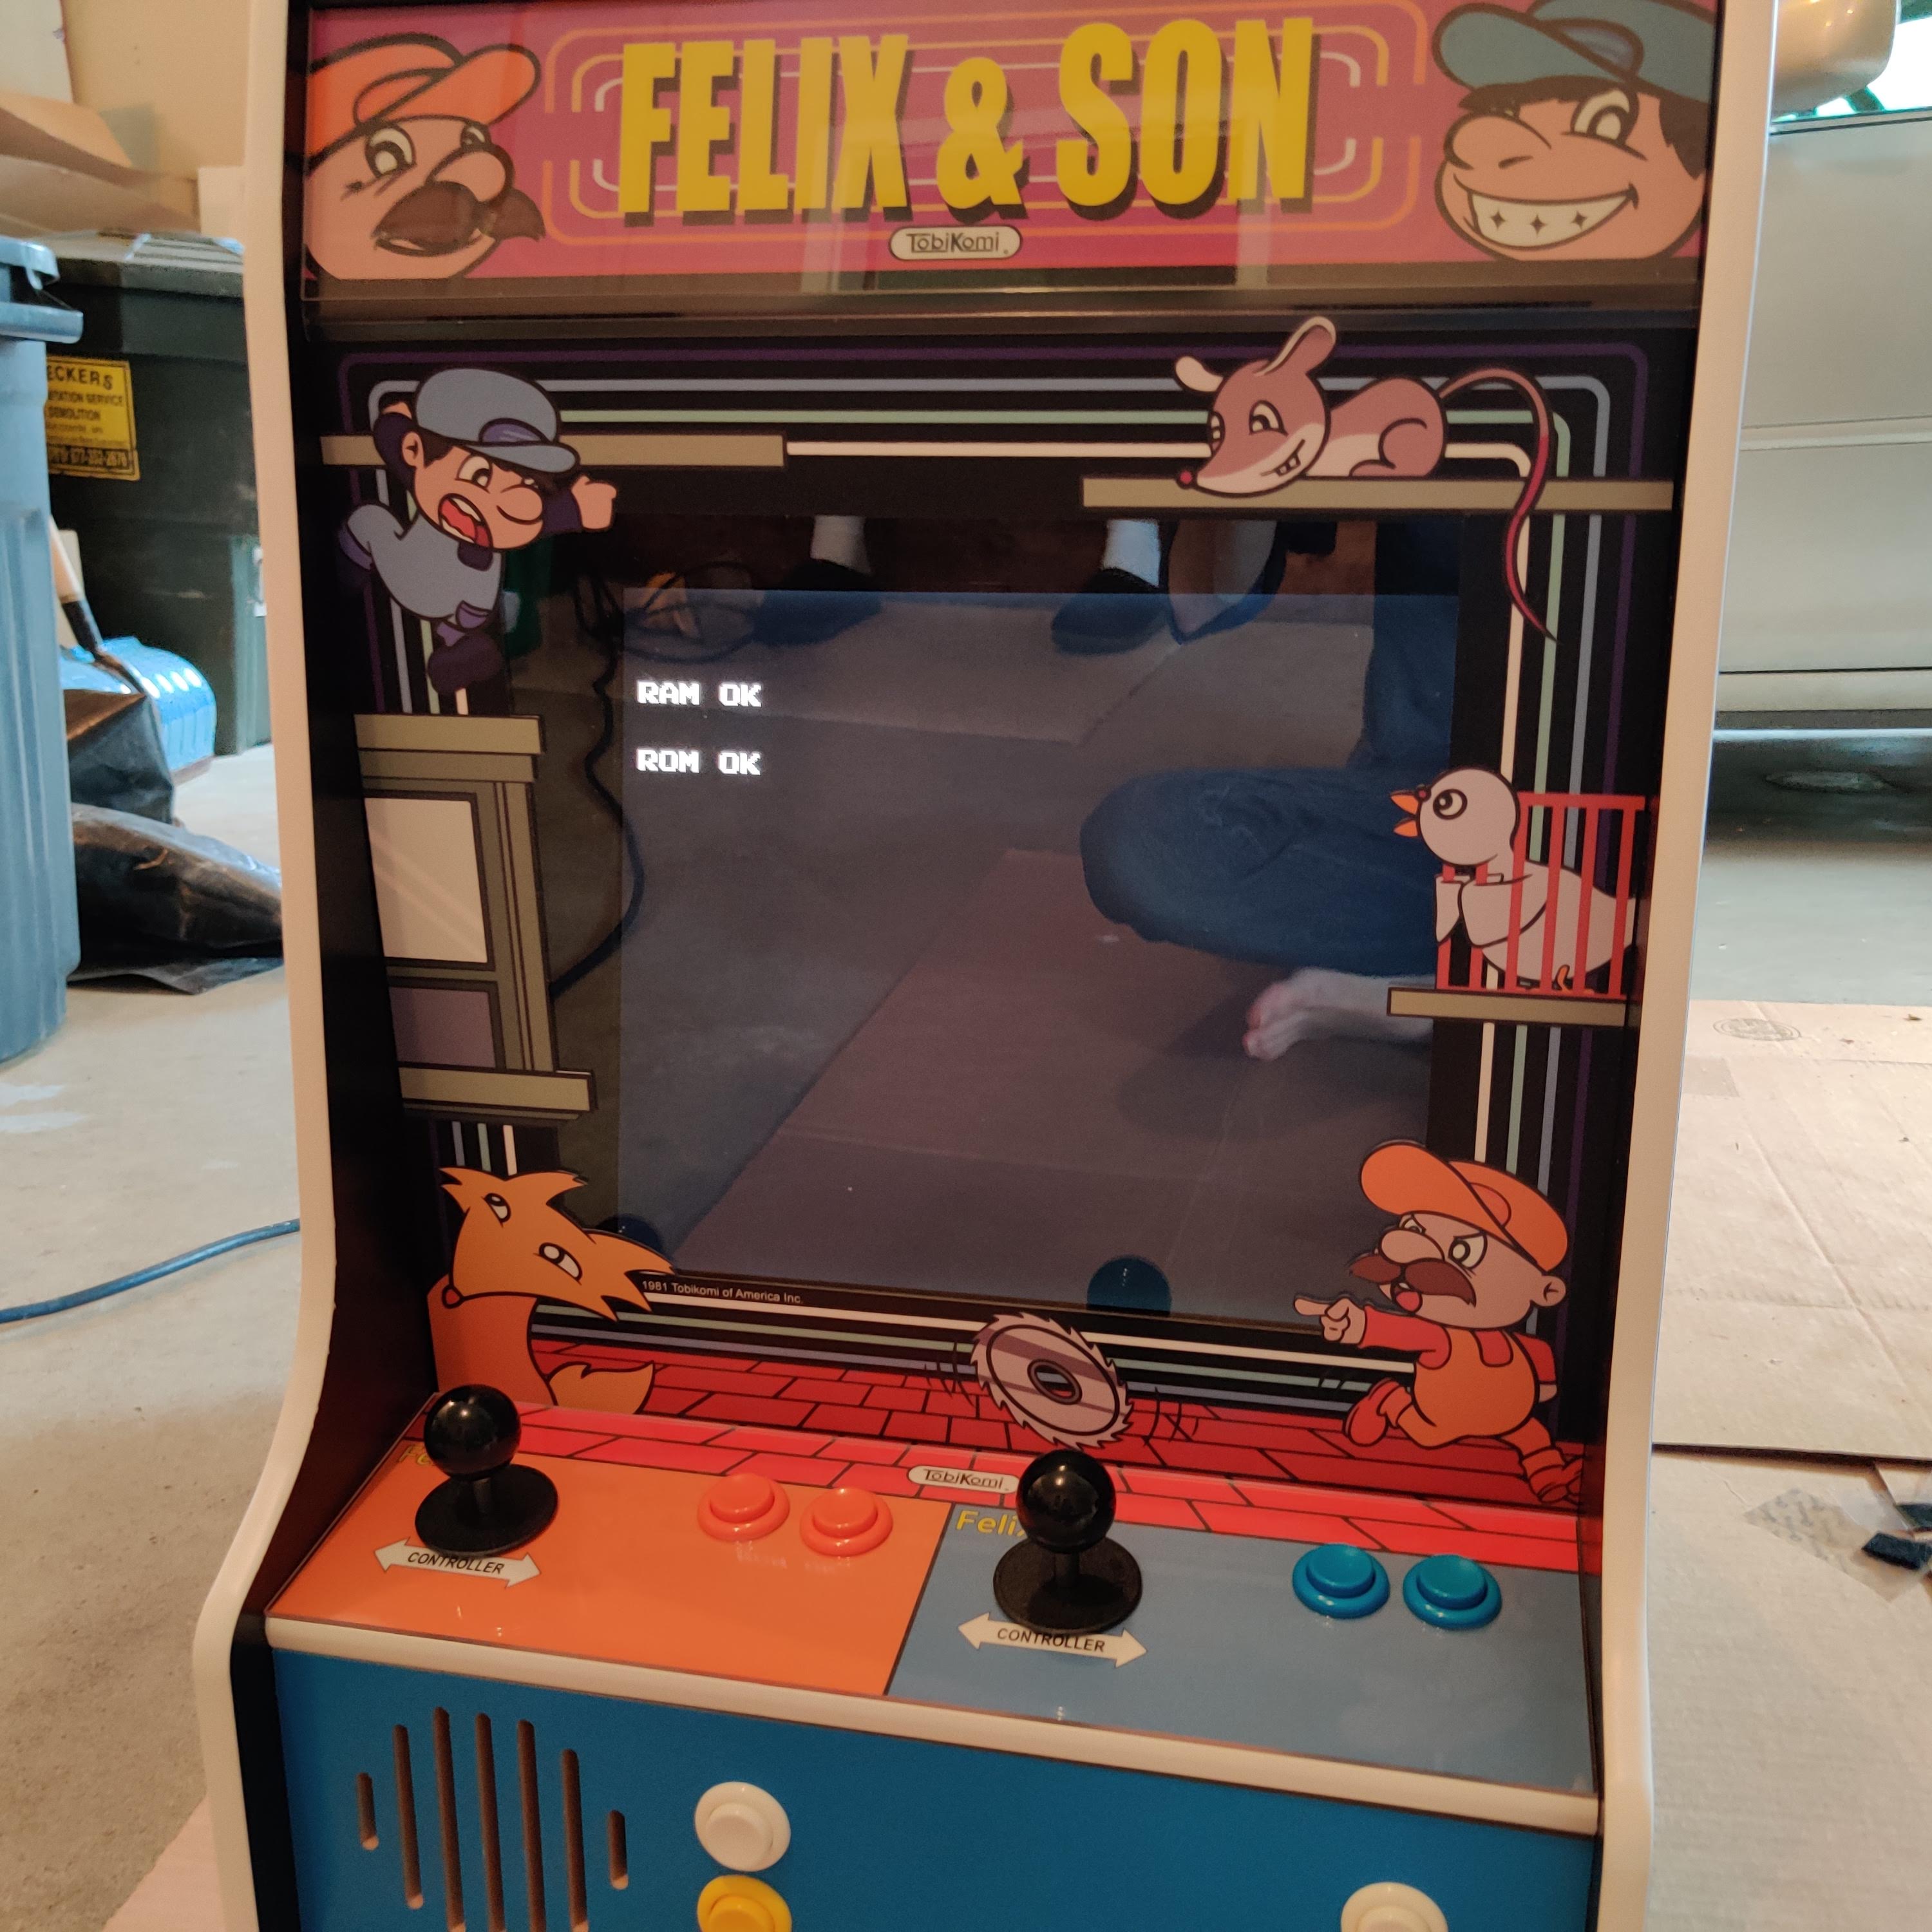
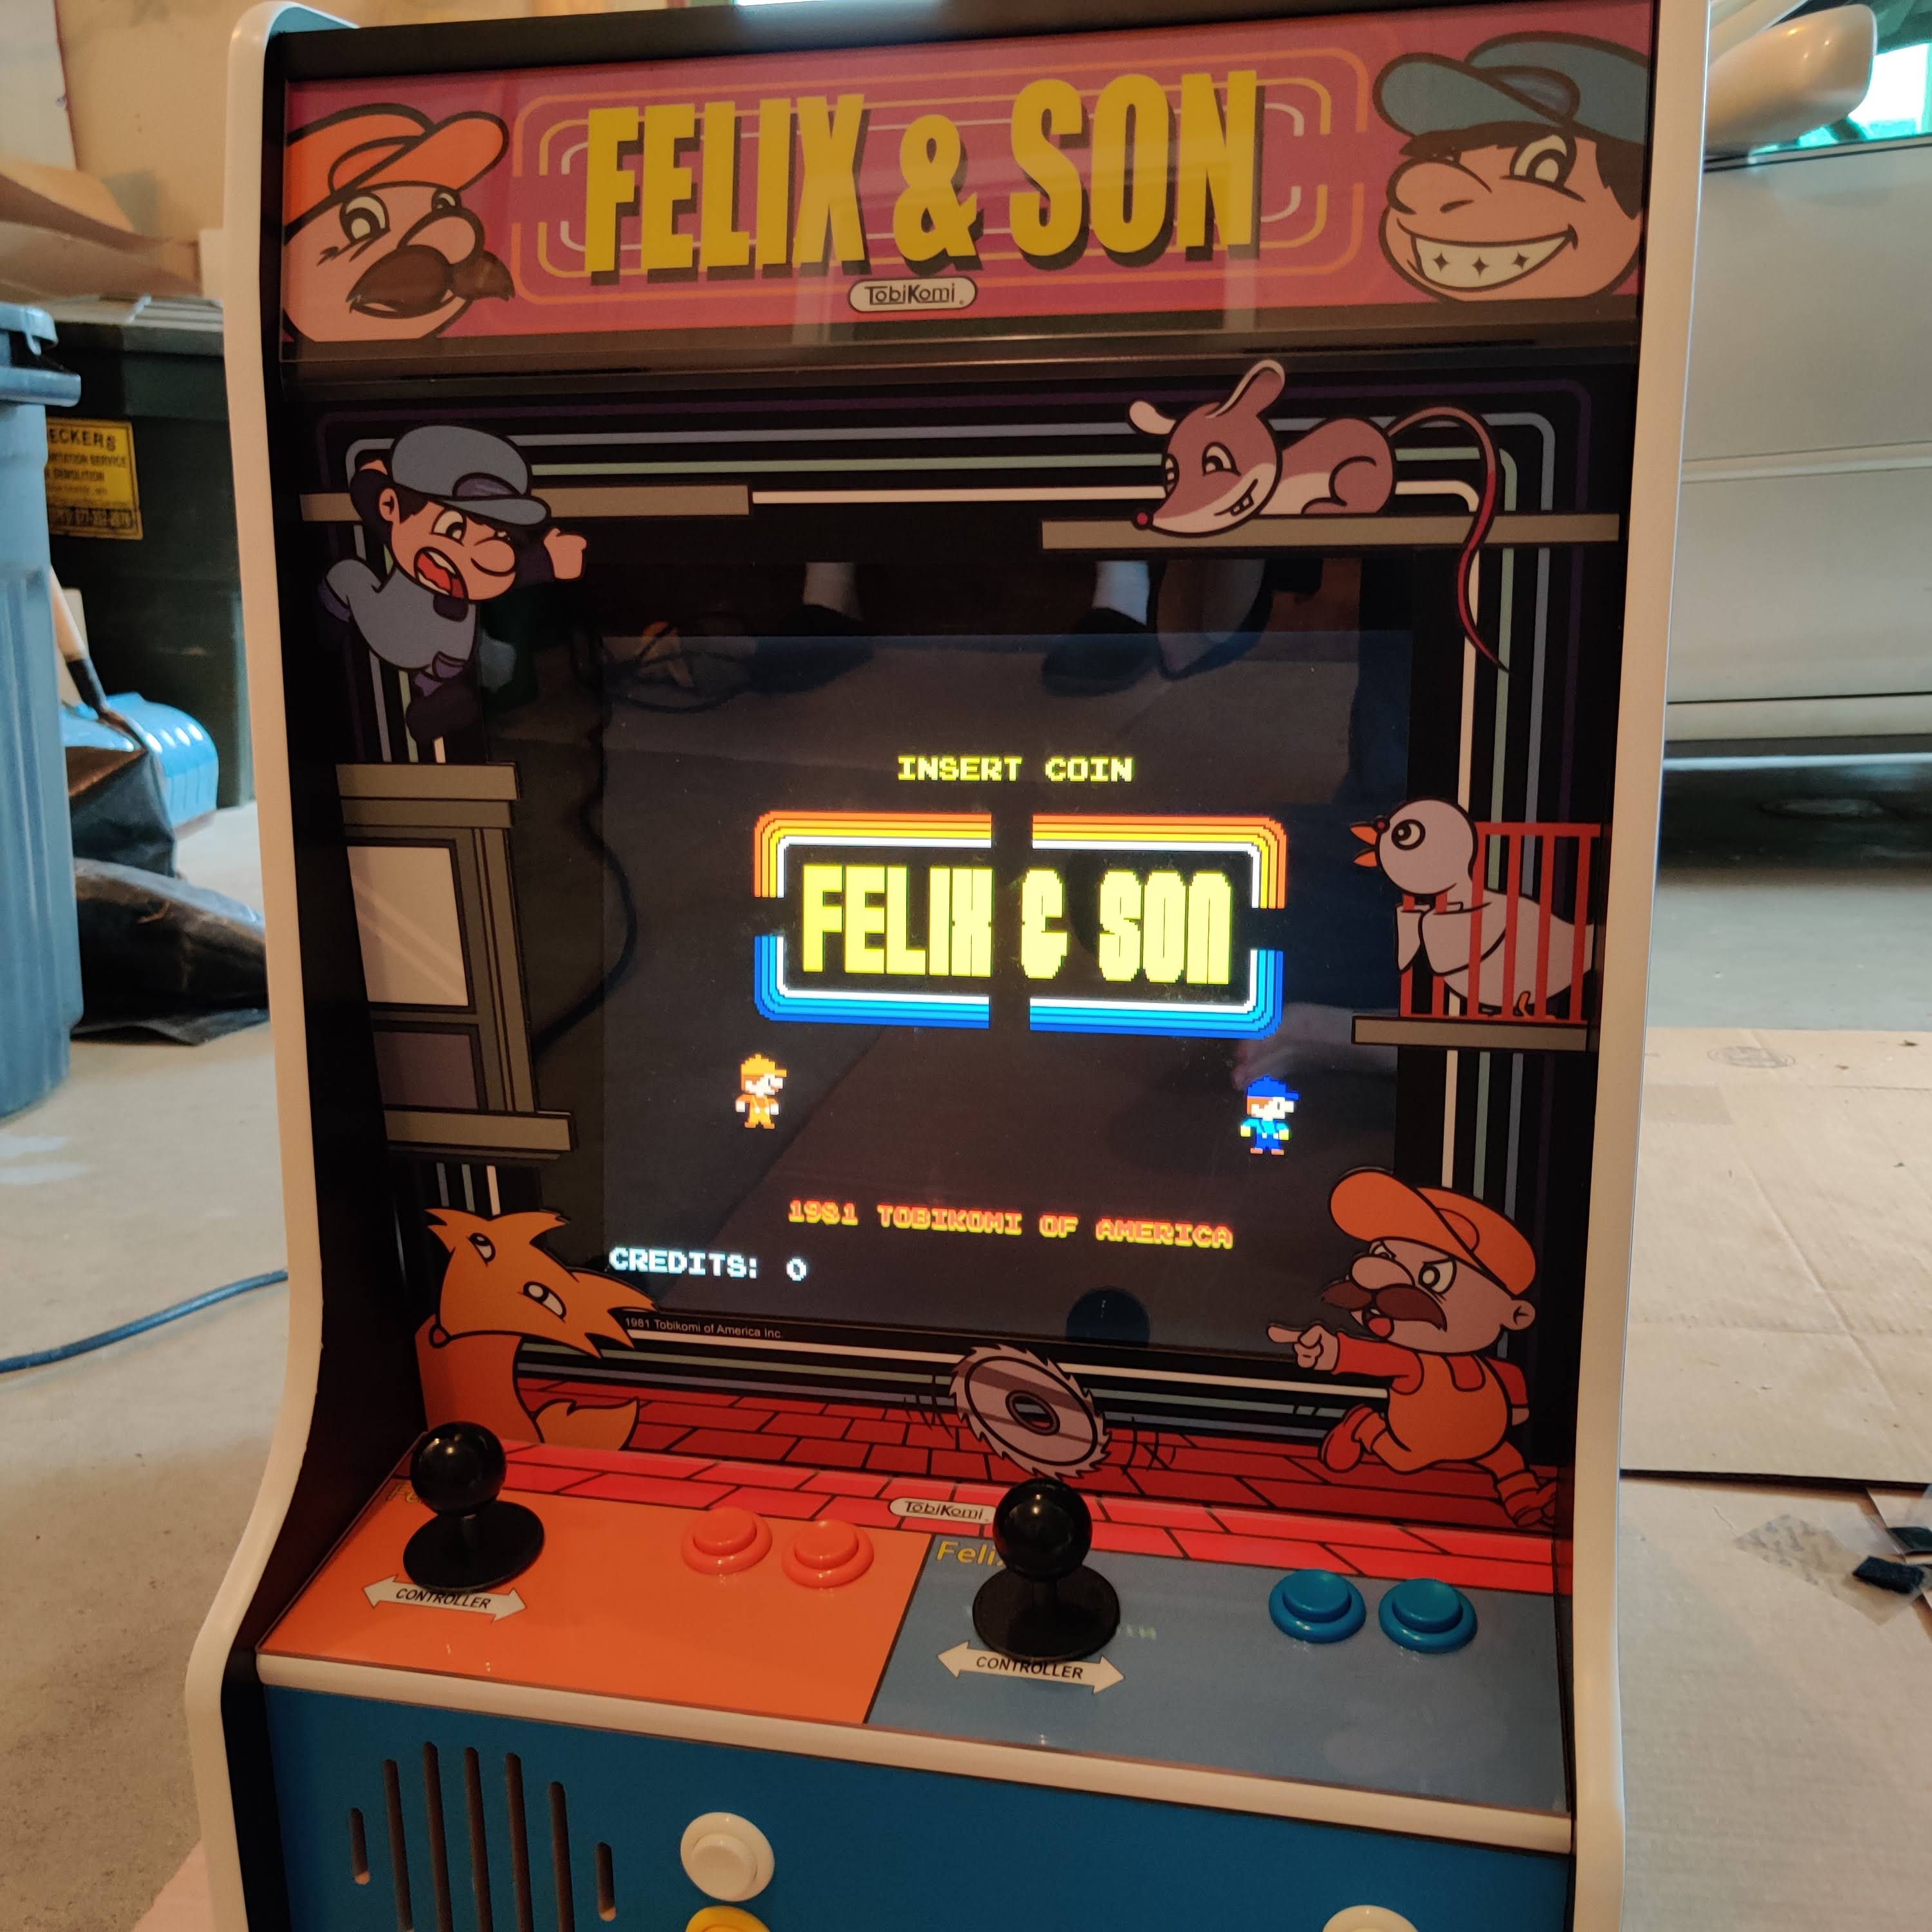
Did you know that in 1981, before Fix It Felix Jr. came out, there was a game starring Felix and Son? That’s right! Felix’s first appearance was actually with his father!
The first movie mentions that Fix-It Felix Jr. got his magic hammer from his father – implying a Felix Sr., who likely had his own game(s). Makes sense! Again, Fix It Felix Jr. is very much a reference to Donkey Kong, Mario, and Nintendo. So, let’s play this out:
See? It all lines up! If we think of Fix It Felix Jr. as an analog to DK Jr., and Wreck It Ralph arcade game as an analog to Donkey Kong, then we’re just missing an analog to Mario Bros. That’s where Felix and Son comes in.
An animation showing gameplay of Felix and Son arcade
Creating the Felix and Son Arcade Game
Once again, I’ll be using Gamemaker Studio 2 for this work. I really want it to feel like Mario Bros. the arcade game. So, some qualifications:
Two player co-op gameplay
MAME style controls
Single screen, different enemy types
Enemies should take multiple hits to kill
So, in Felix & Son you jump on enemies (little animals) to put them in cages and stun them. Then, another hit to push them away. You can push those cages into other enemies to instantly destroy those enemies, and gain a score multiplier for doing so!
Graphic Style
This game is designed to be a precursor to Fix It Felix Jr. so the graphics should be a little less advanced. In that regard, I’m keeping most sprites to 3 or 4 colors maximum.
Sound and Music
Most of the sounds are simple beeps and bloops. I did need some musical elements though, and I didn’t want to reuse songs from the Disney arcade game (since it wouldn’t have come out yet). Mario Bros. (like many Nintendo games) used classical music for its transitions. So, I decided to go with Mozart’s Piano Sonata No. 7 in C, K. 309. Honestly, I just picked something and grabbed sections I thought fit well. I did have to mix it down to just 3 channels with simple square and triangle waves so it’d sound authentic. Here’s what plays during the enemy demos.
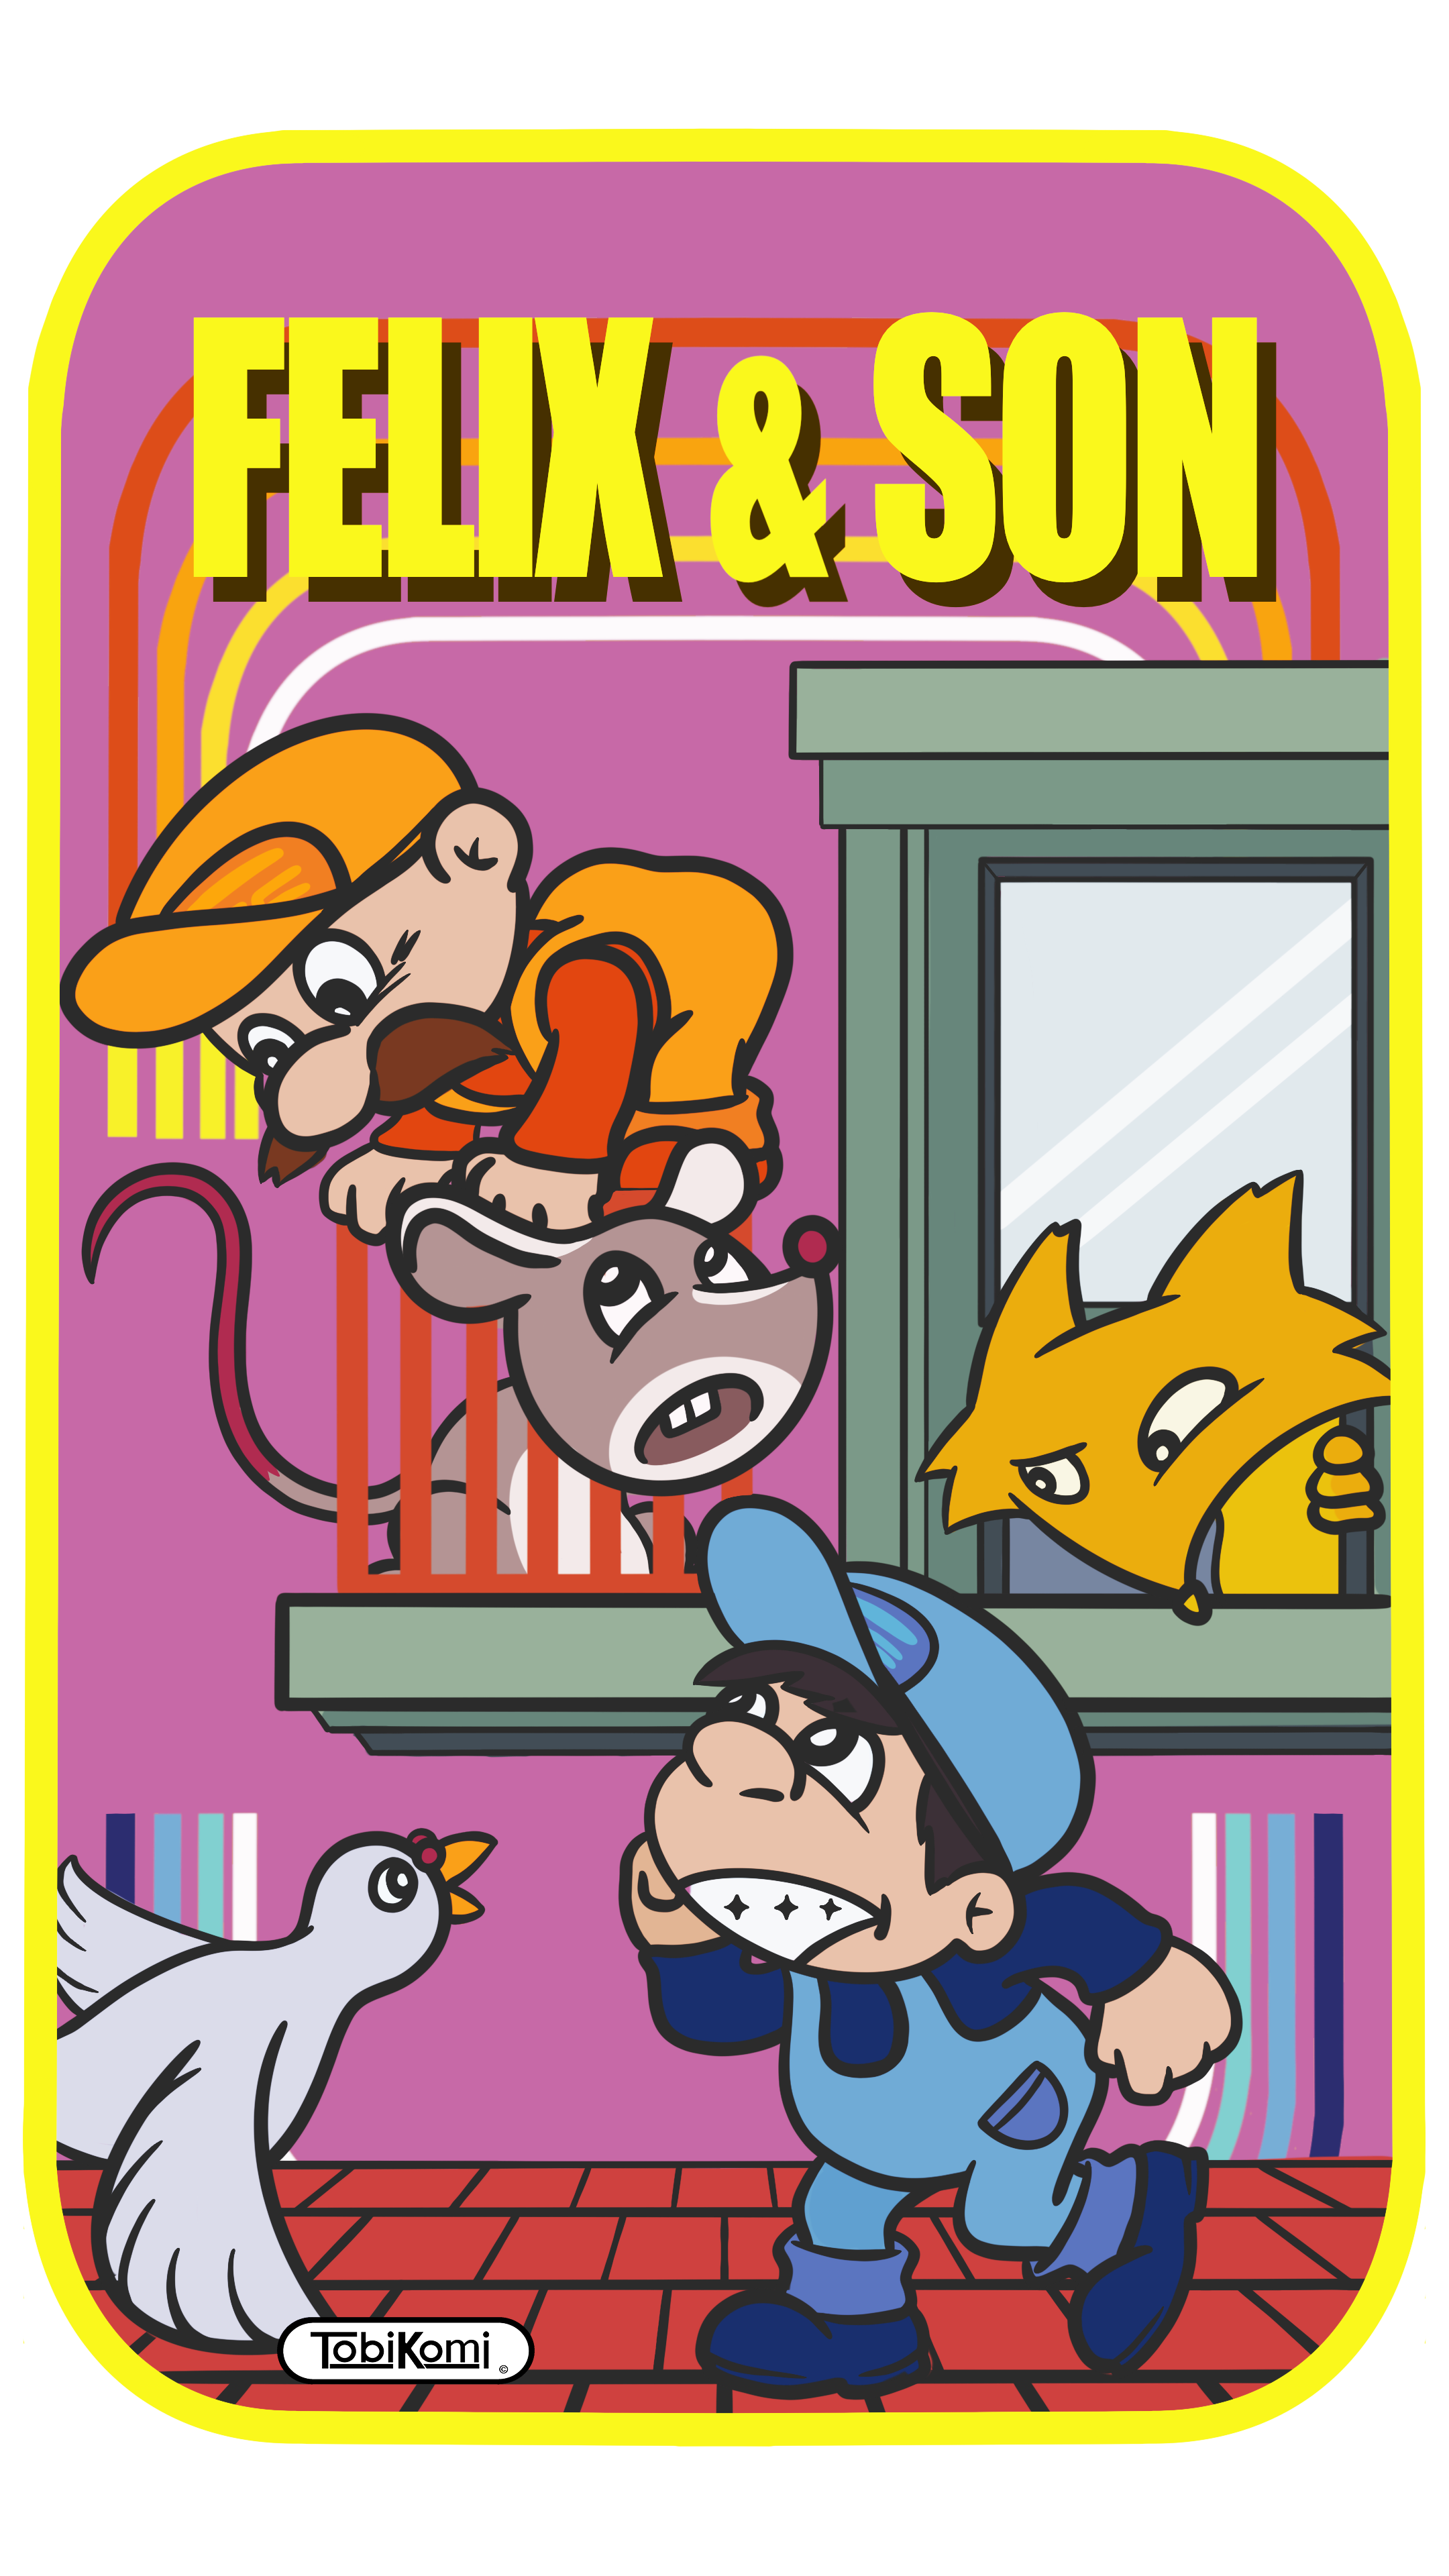
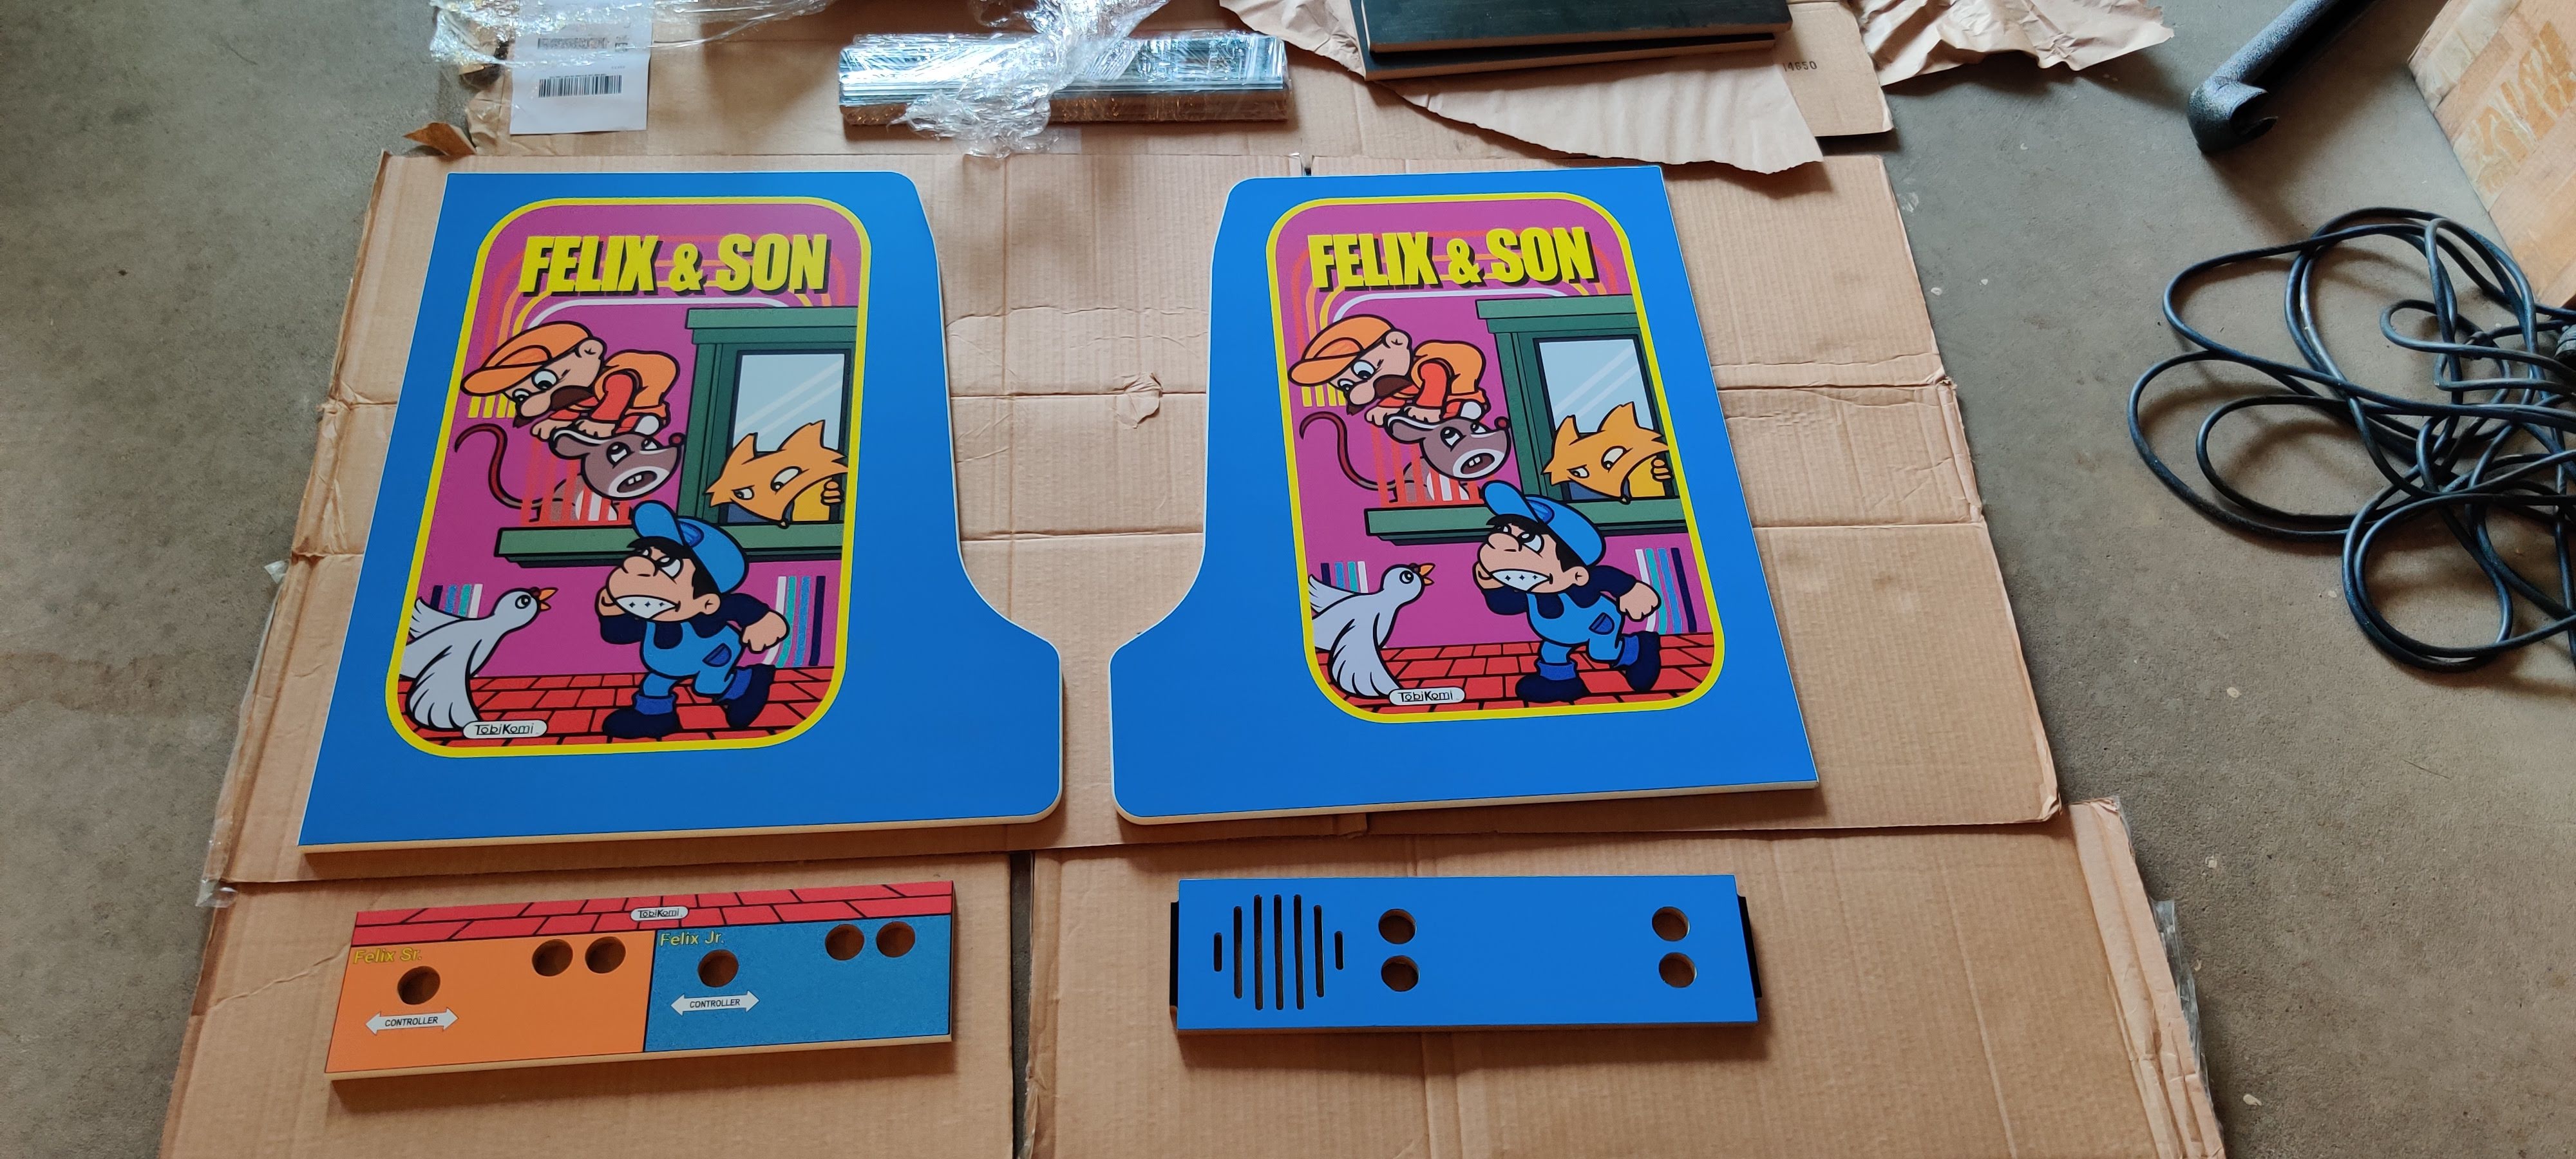
Artwork
The artwork should also reflect Mario Bros. Sadly, I cannot draw. I’m pretty decent with the Adobe Suite doing layout and simple photo editing, but I felt the ‘cartoon’ style of Mario Bros. was far beyond anything I could emulate on my own. Luckily, I was able to get the services of a fantastic artist to help me out – who knocked it out of the park. I wanted something that paid homage to Mario Bros. but still felt like it was made for my game. Compare the side art below!
Felix and Son Sideart
Mario Bros Sideart
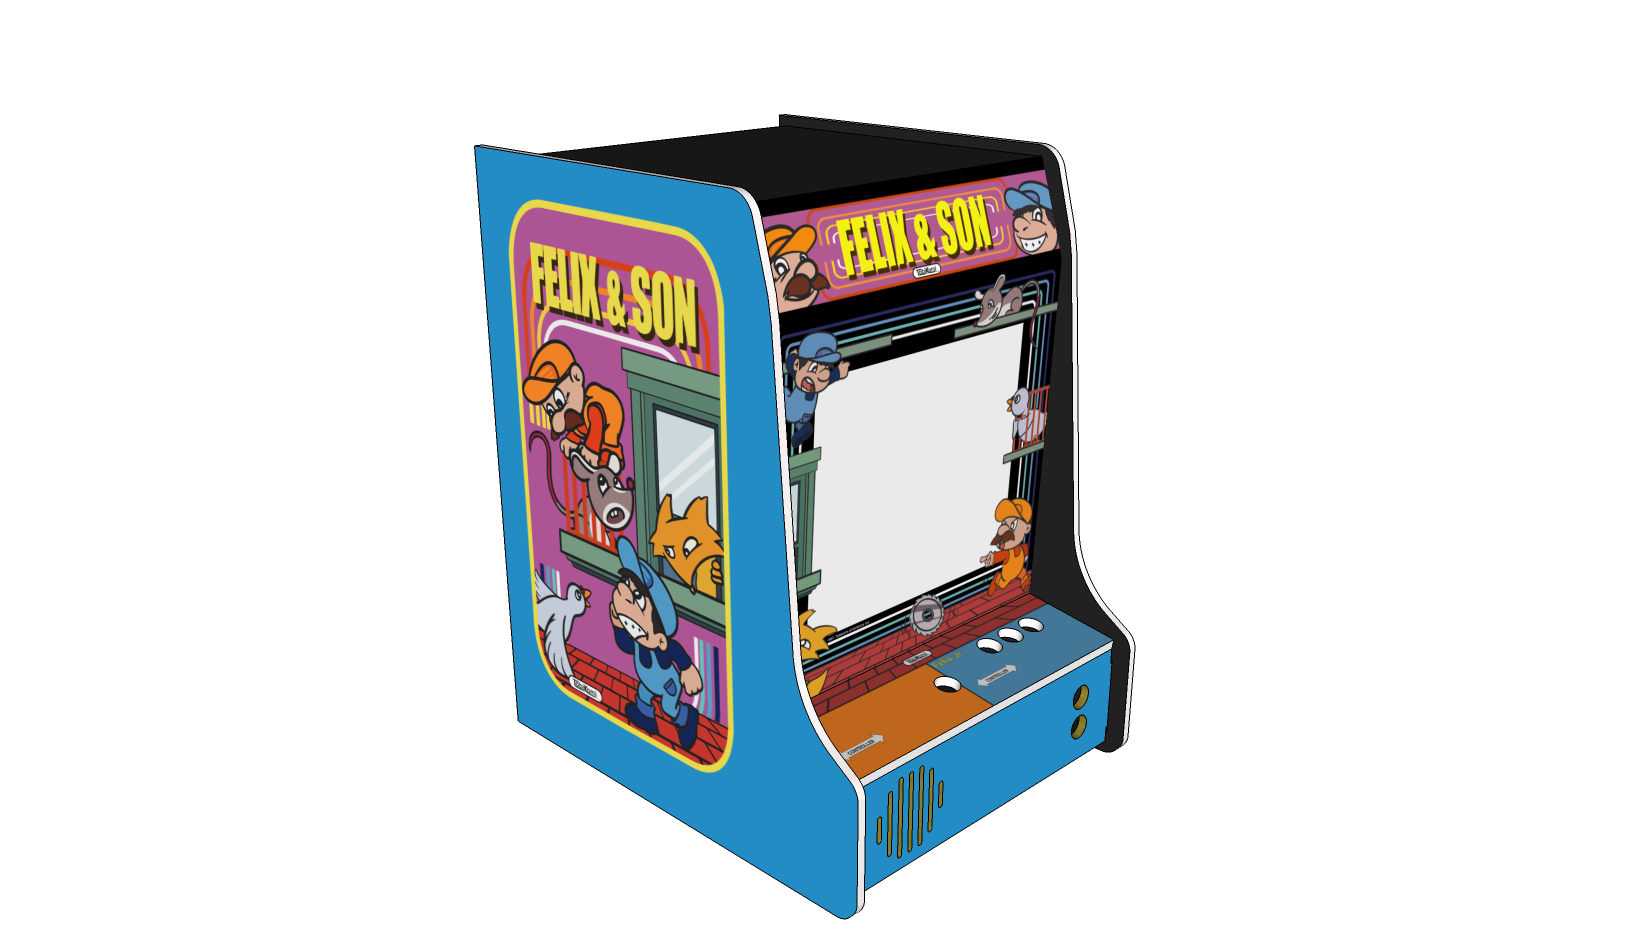
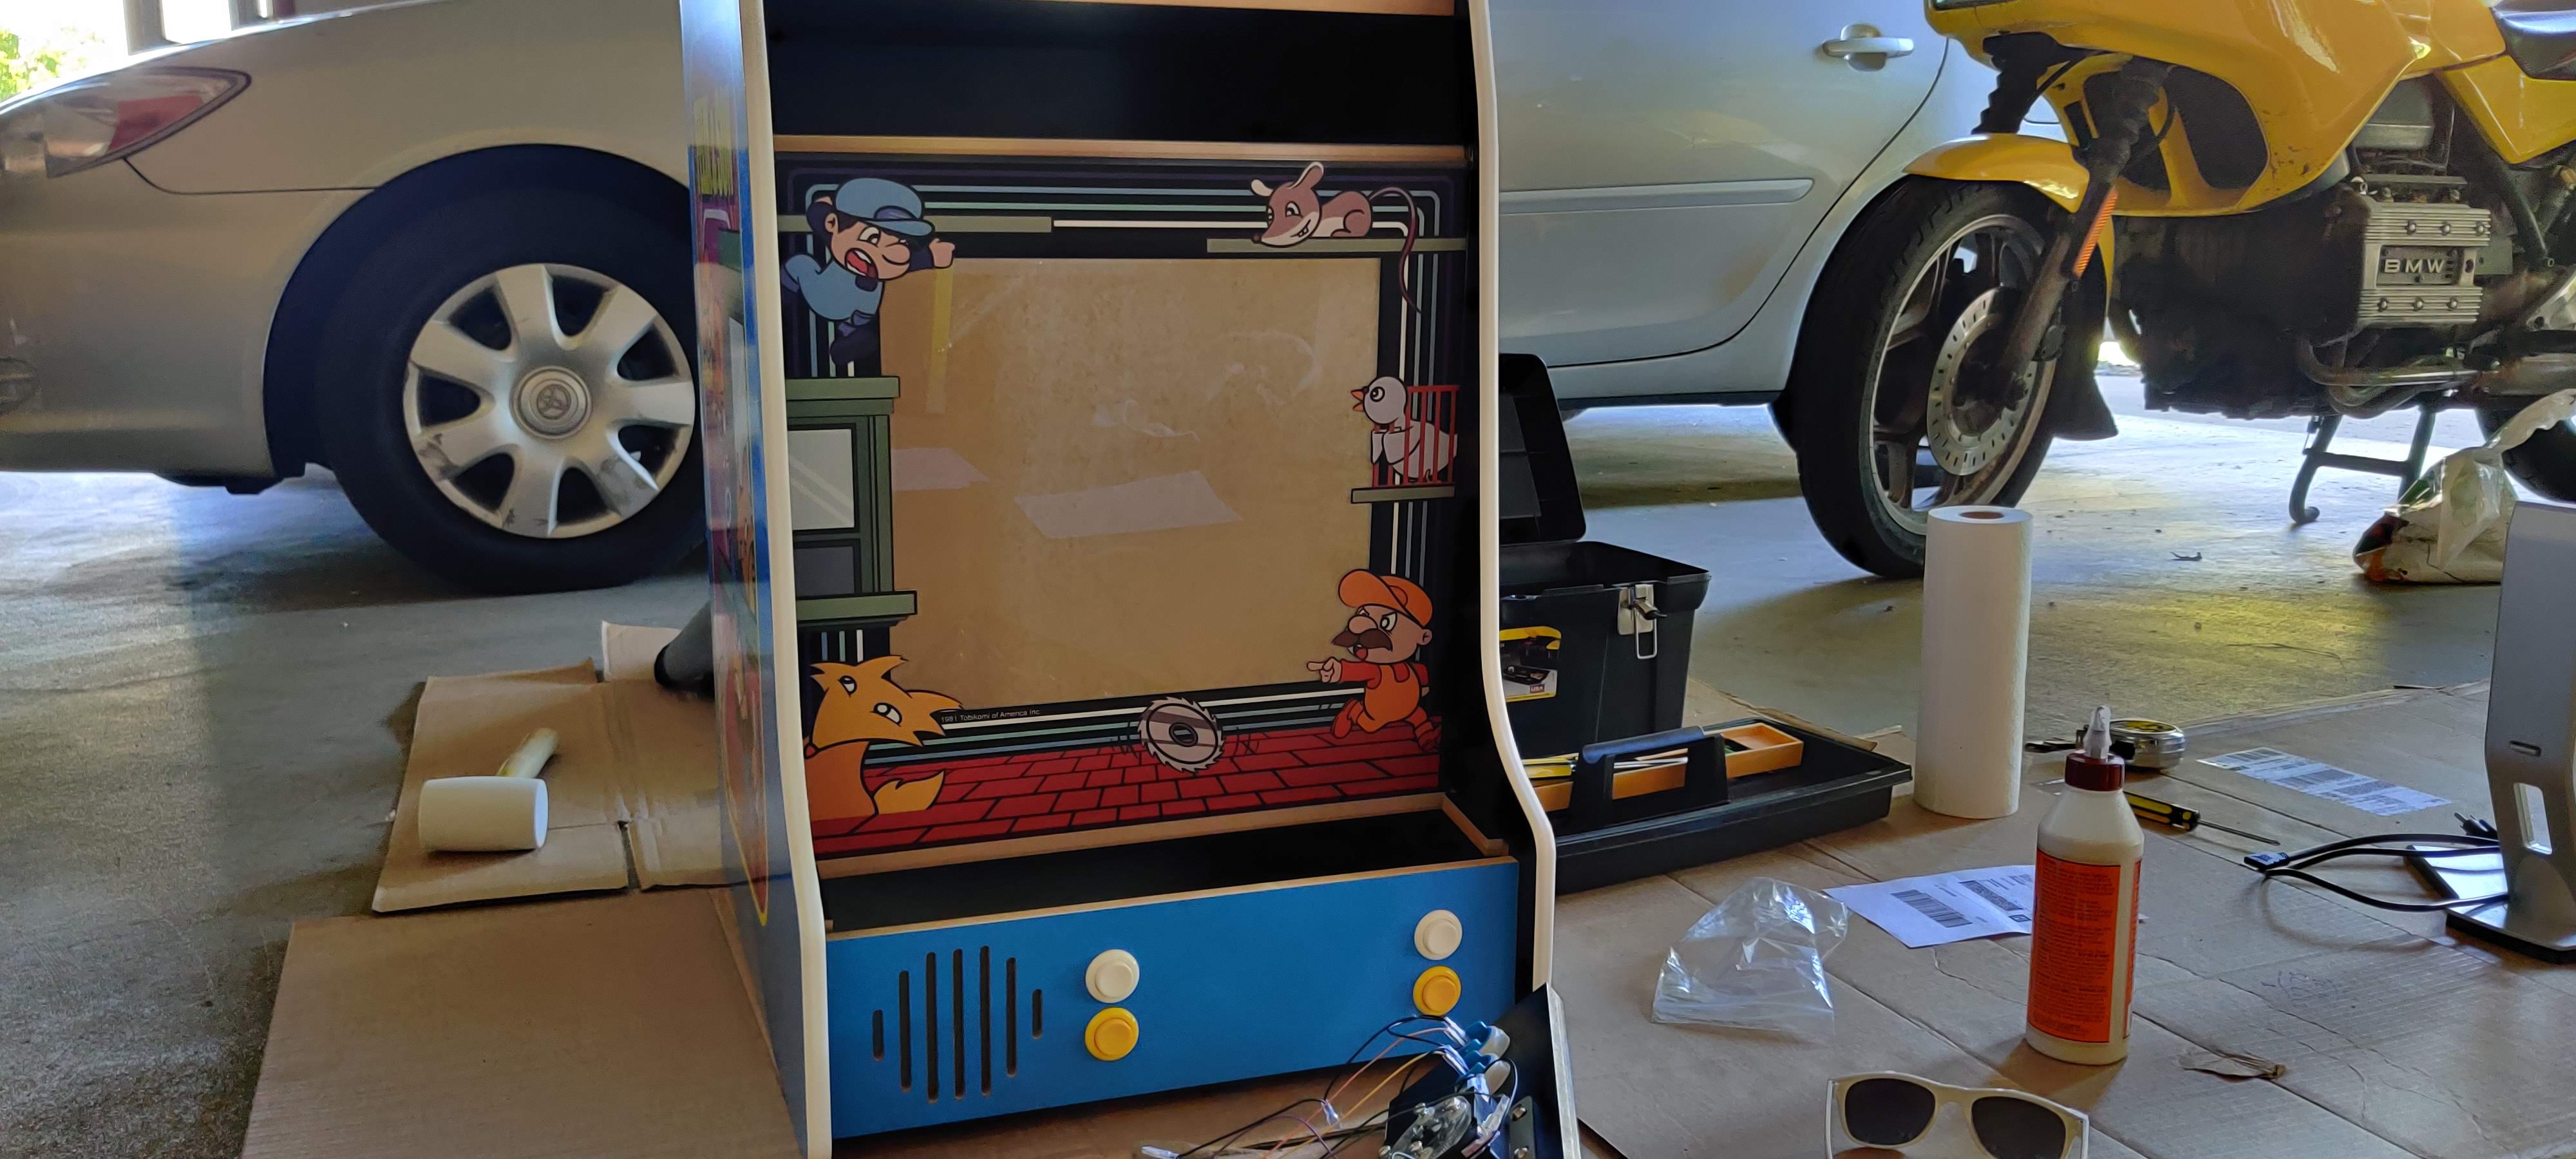
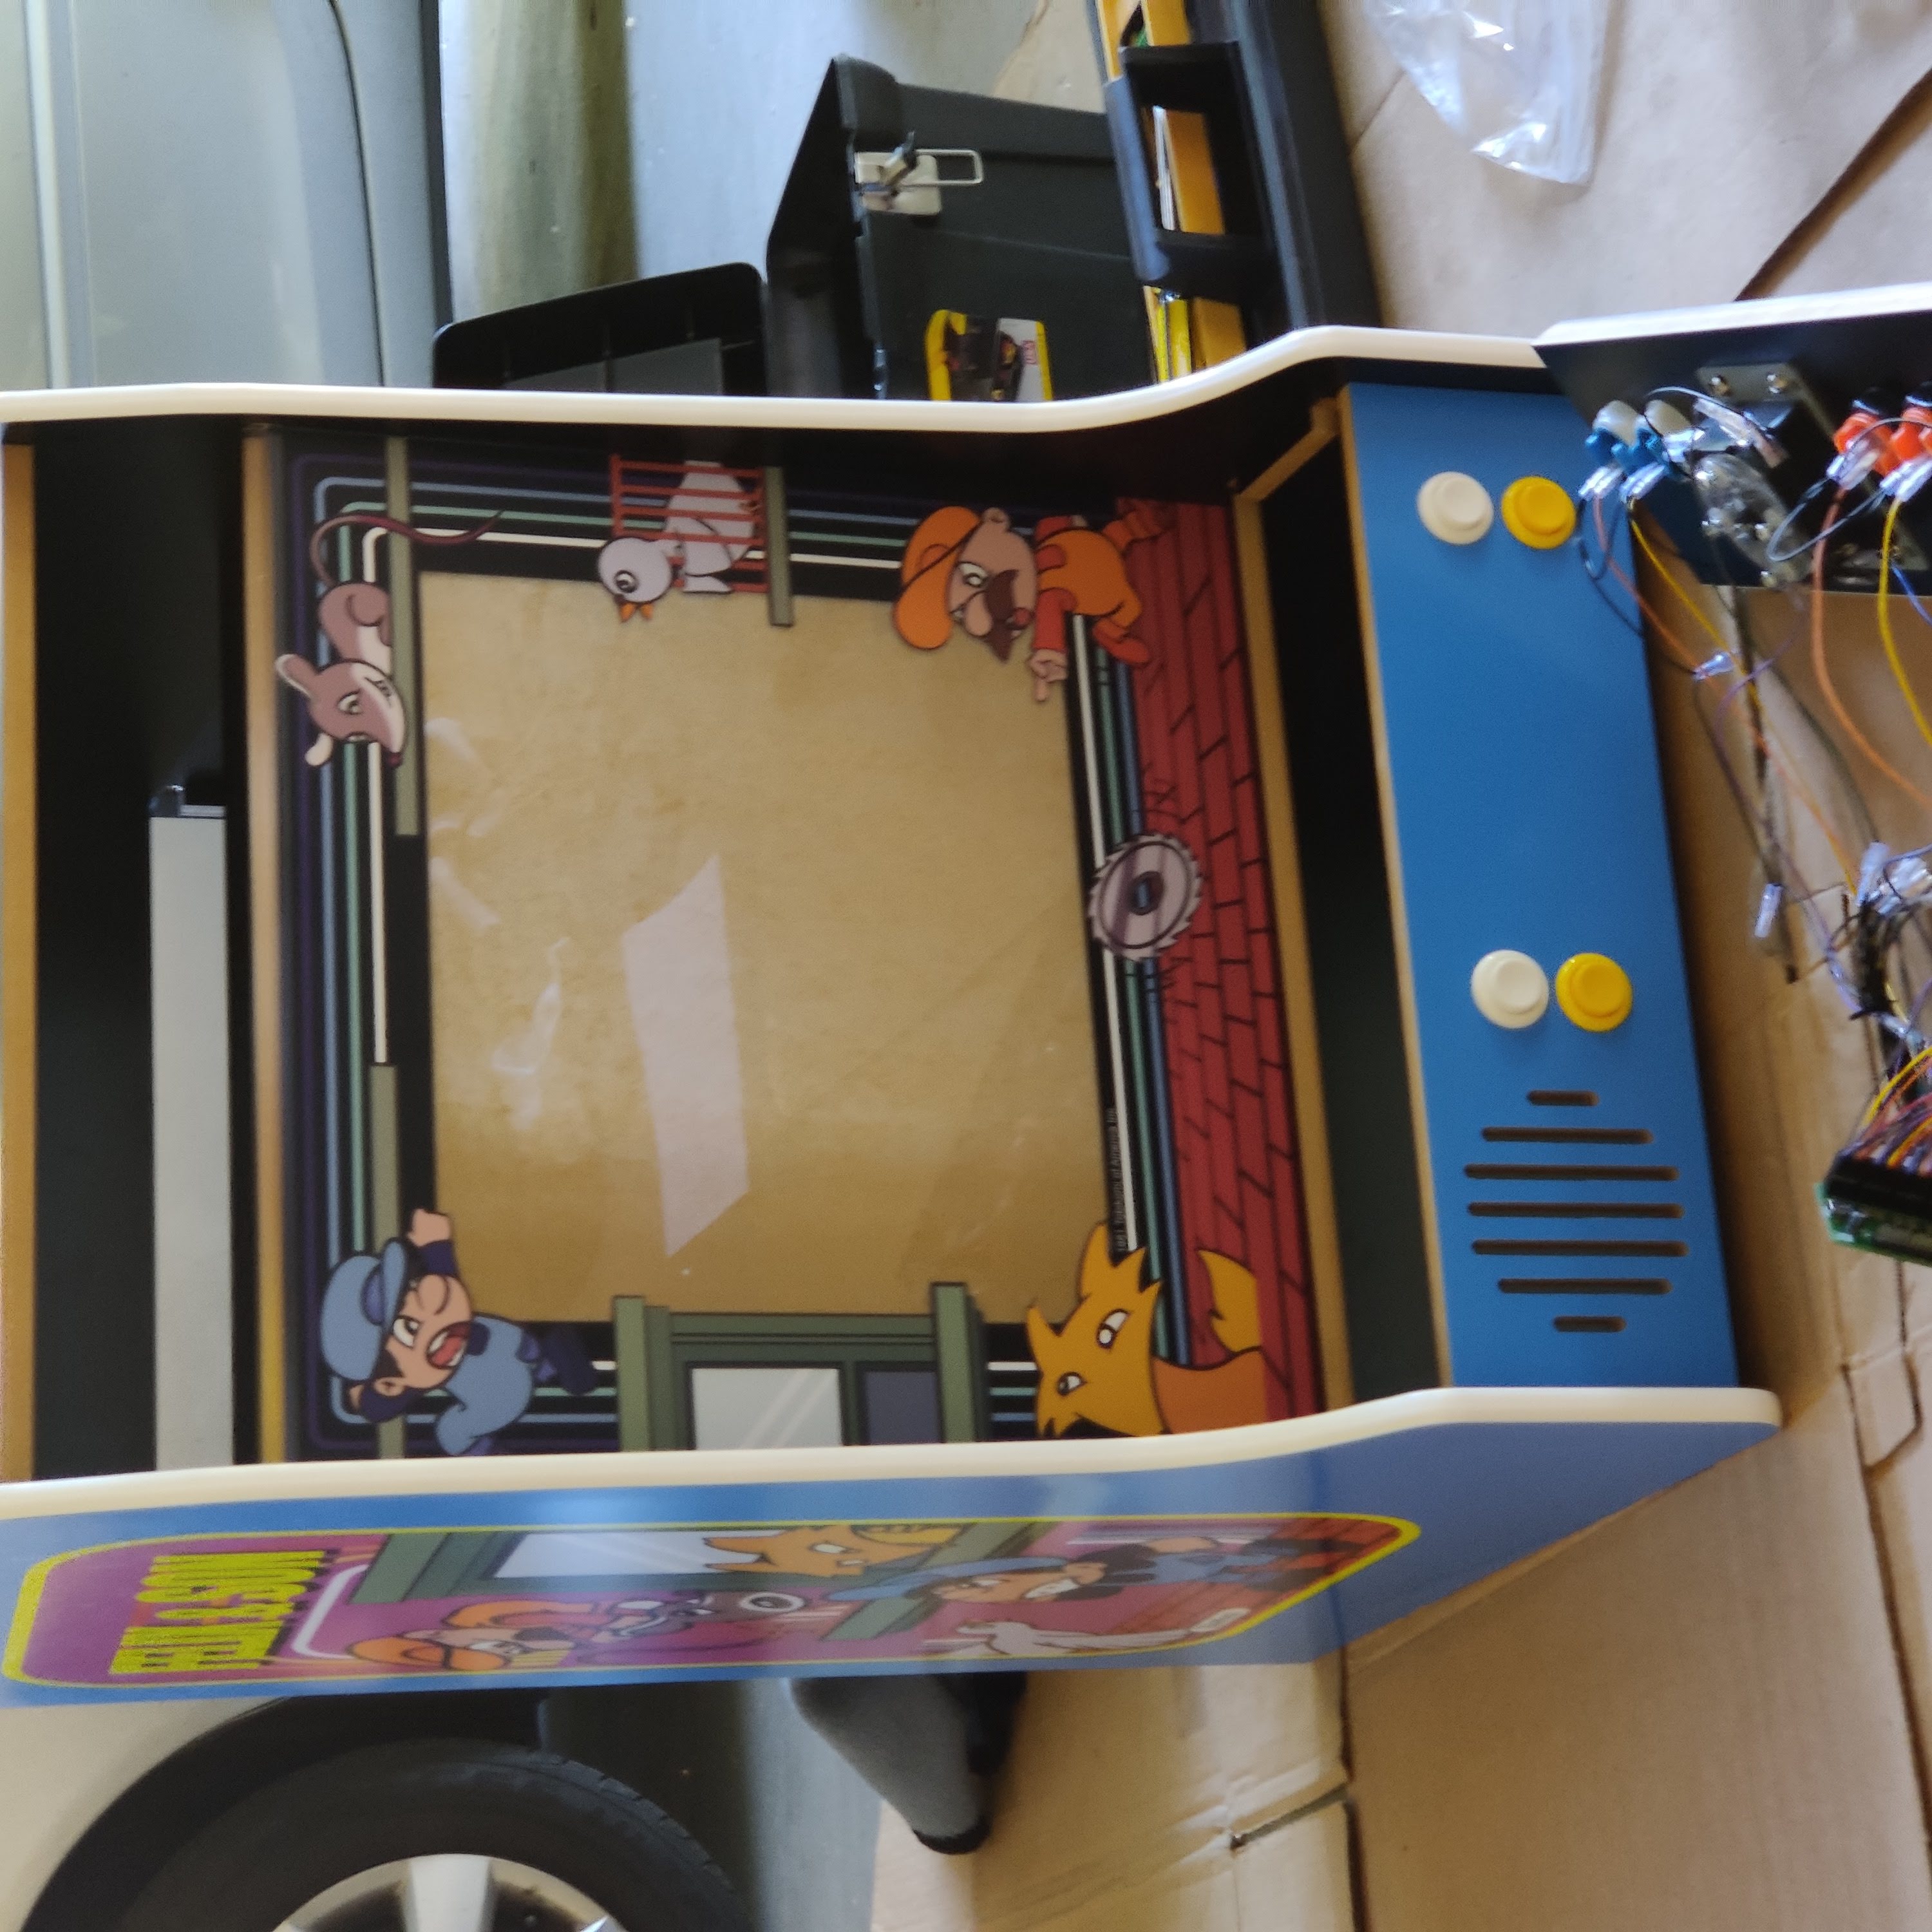
The Cabinet
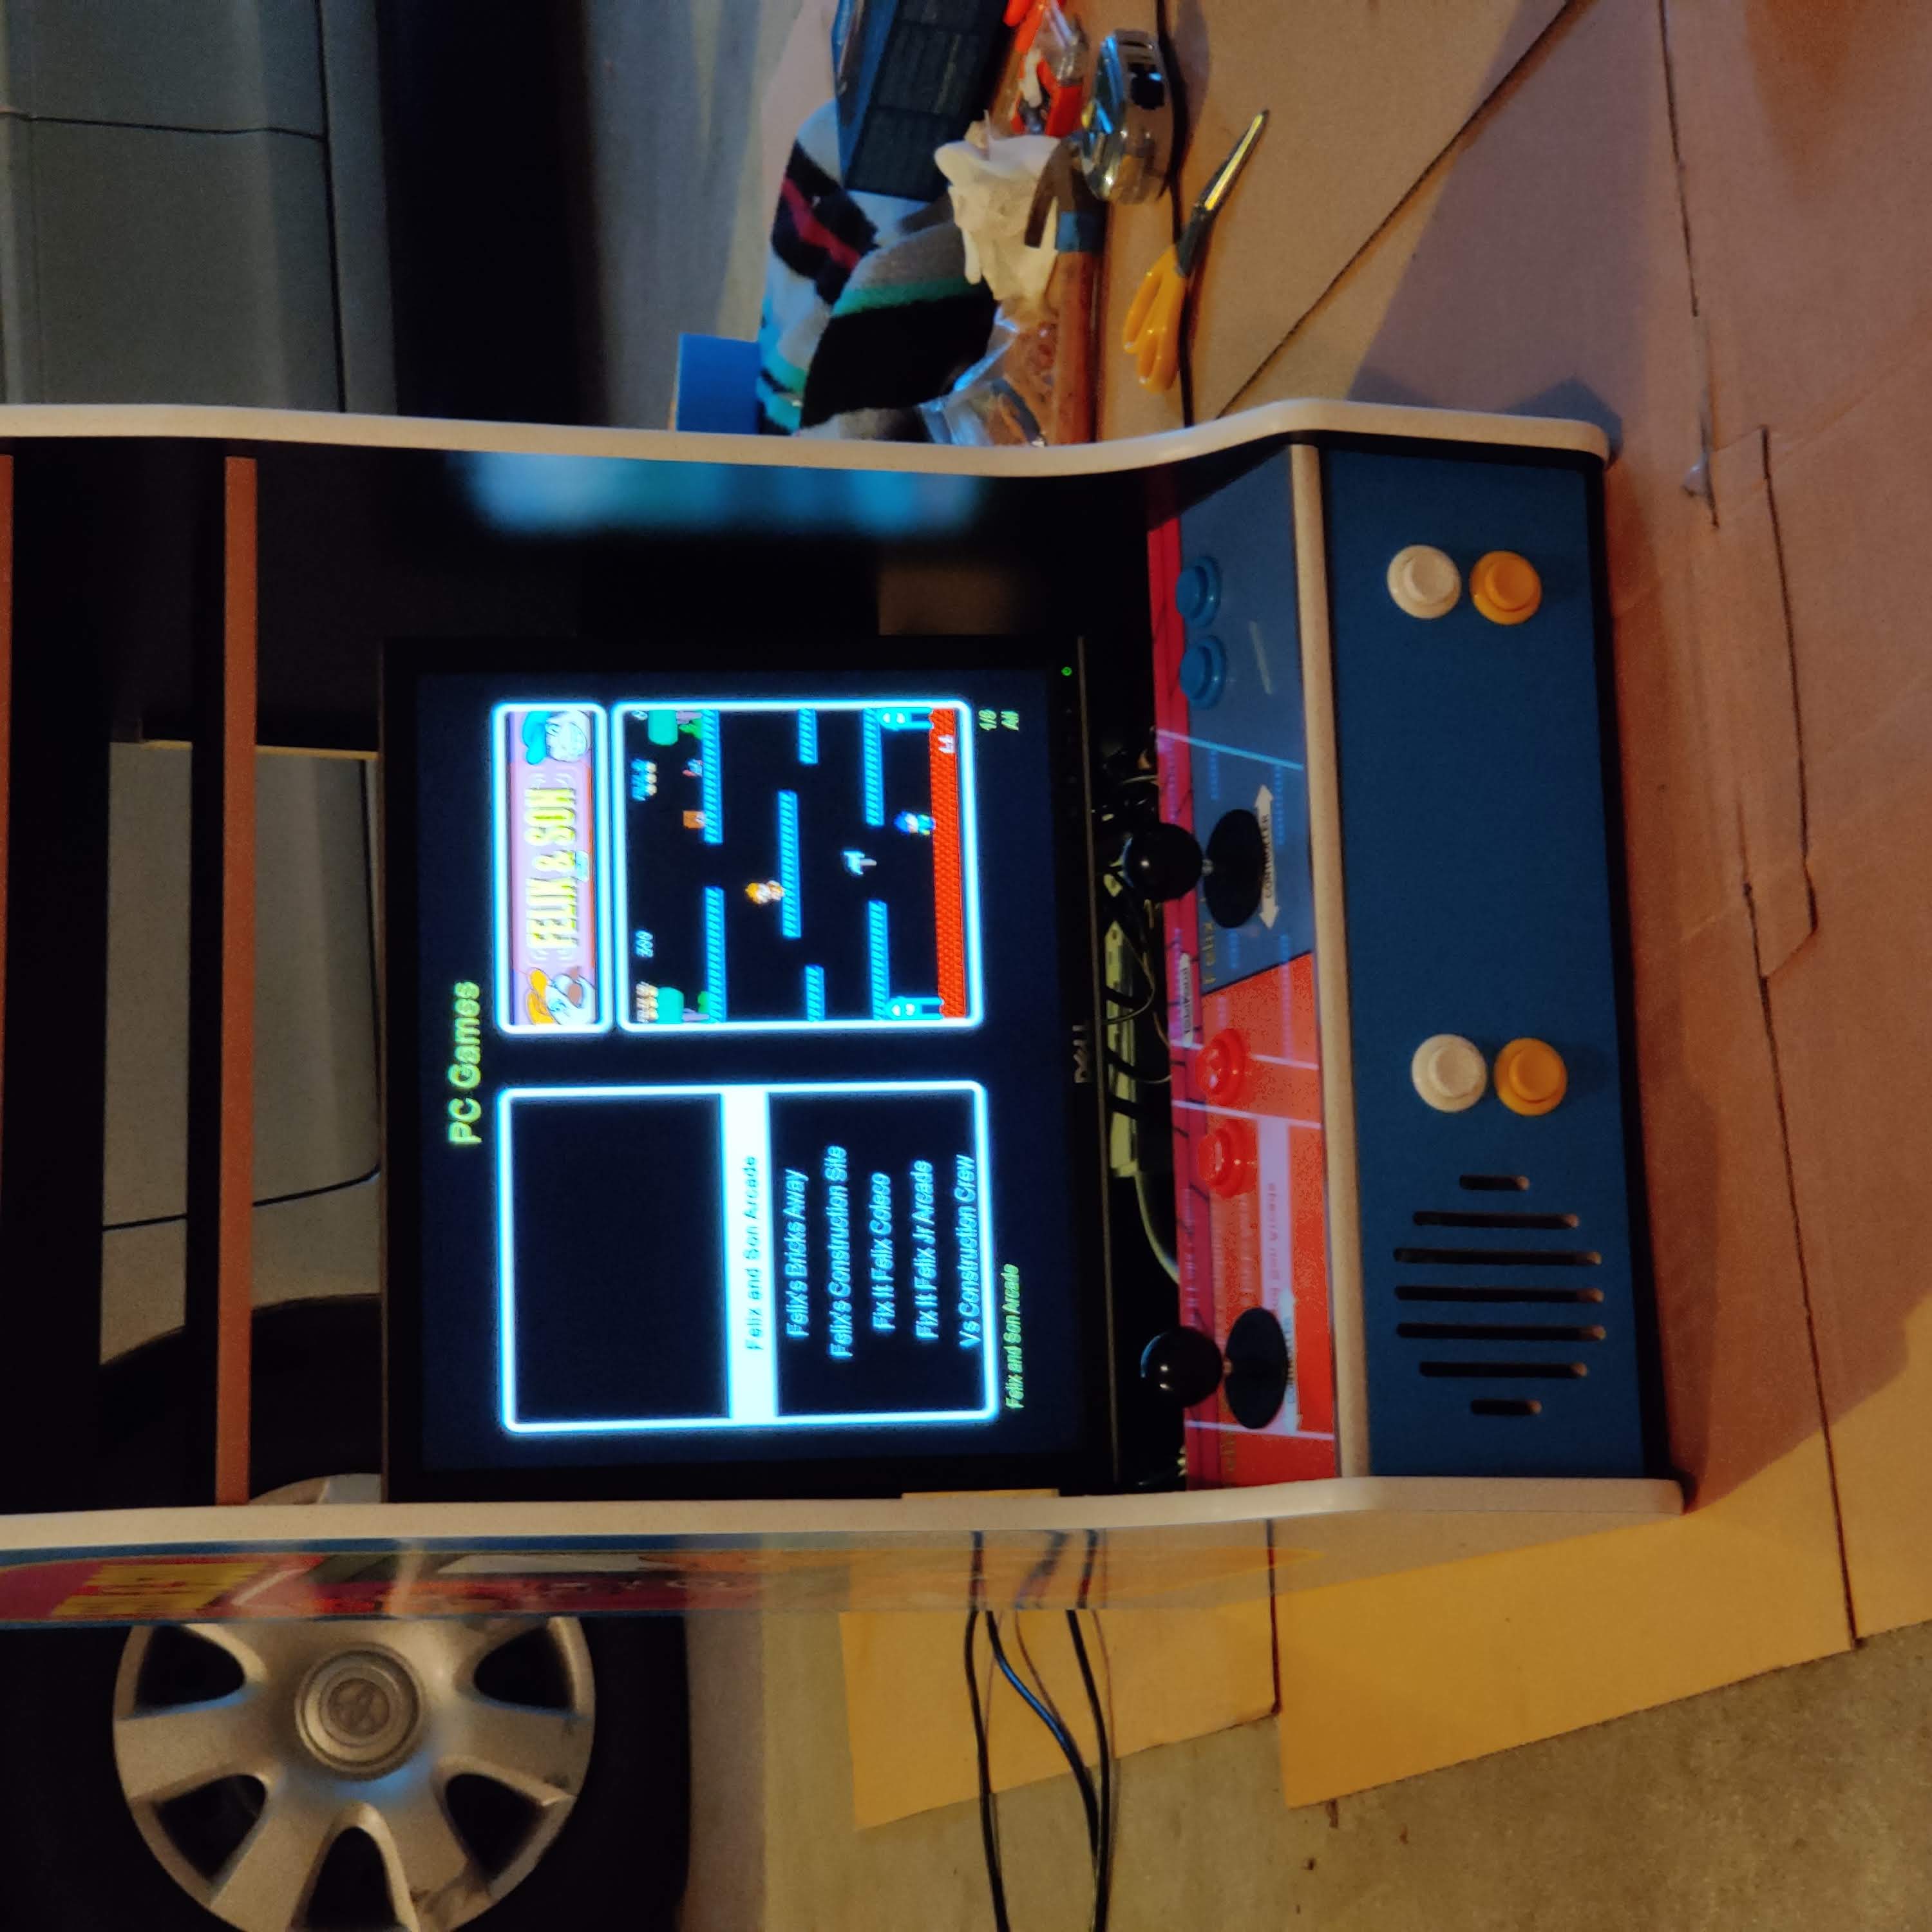
Sadly, I don’t have the space or need for another full-sized cabinet build. So, I’m going with one of Haruman’s Pretendo cabinets. This will save me a lot of time on the cutting and also make it much more likely to fit in my place. Haruman has been great to work with so far. It’s still got that iconic Nintendo shape at like half the size. Haruman was even kind enough to send me a mockup!
I love seeing it all together, it’s really cool.
The Computer
For the computer, I’m using an Intel NUC from 2014. Got it for free, so can’t complain. It can’t do all the HLSL effects, but it can play the 80s and 90s classics, but the games I’ve coded. I’m using the AttractMode frontend.
The Build
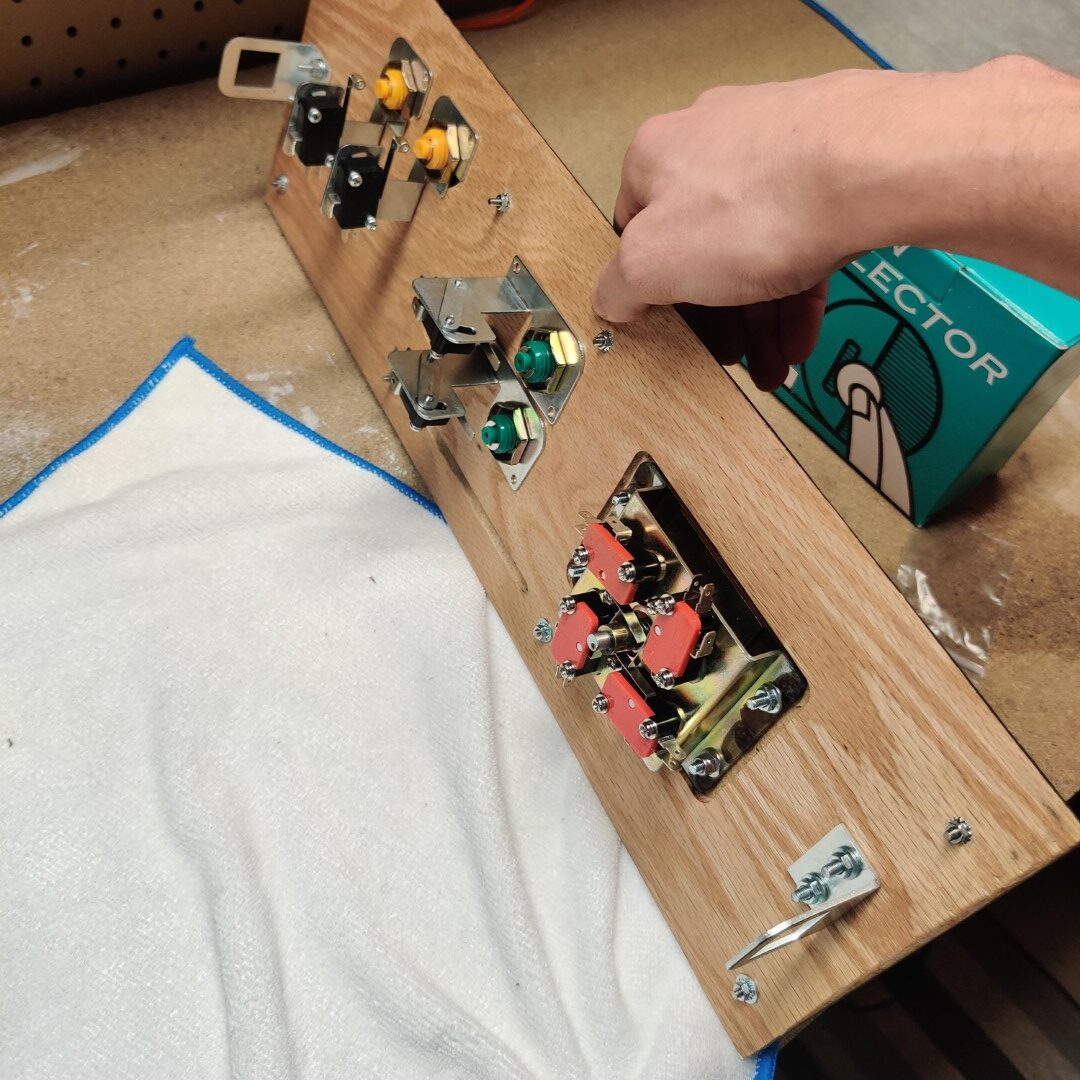
After gathering all the parts, I assembled this thing in one long weekend! I don’t have the space to work on this where I live, so set up shop in my parent’s garage for a weekend. This meant I wanted to finish it all in one sitting. Careful planning of parts was the key to that. And other than a power switch arriving broken, it all worked out. For those curious, I used Ultimarc J-Stiks, their goldleaf buttons, and a minipac for control interface,
It was really fun finally playing Felix & Son with a joystick and proper buttons. Now, I just need to get a friend to play it with!
Running On Cabinets
See the game running on some other people’s cabinet below. It’s a pleasure having someone else enjoy a game I made.
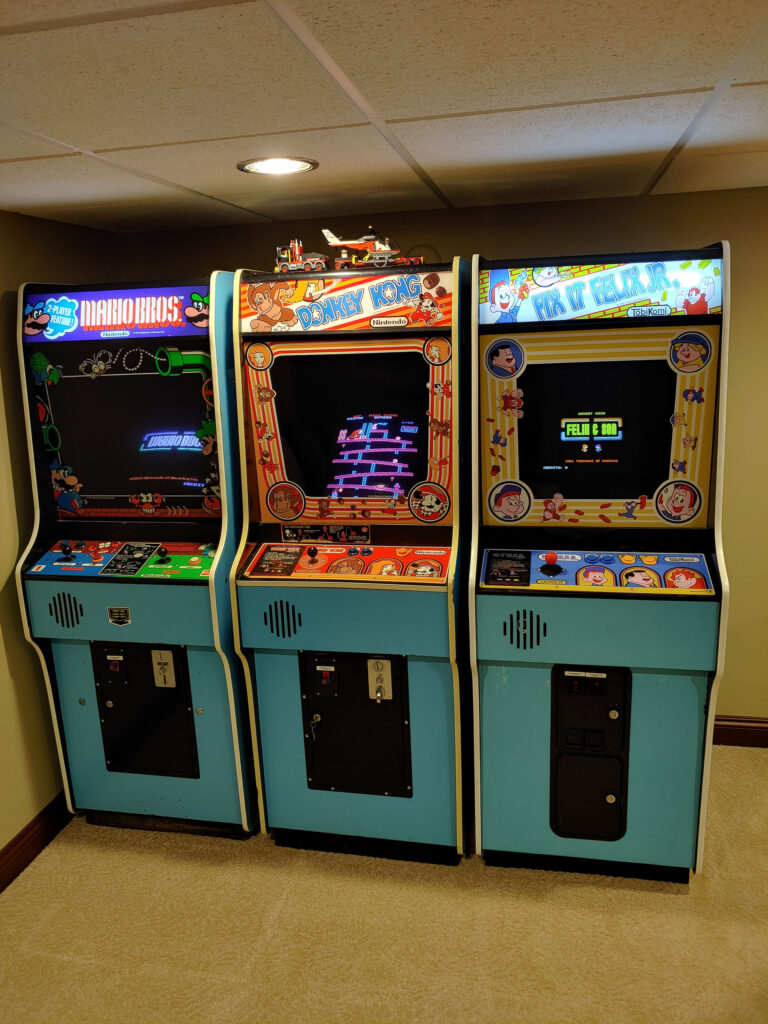
Felix and Son on a Fix It Felix cab sitting next to some of its cousins!
Closeup running on a cabinet
Felix and Son running on Justin’s Arcade Nintendo Red Tent!
If you’re curious about coding of this project, check out it’s GitHub page.
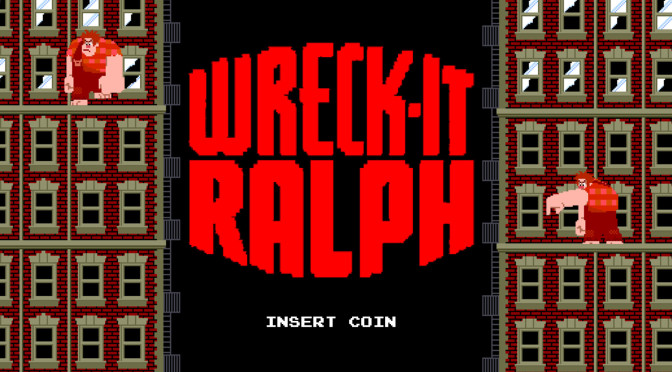
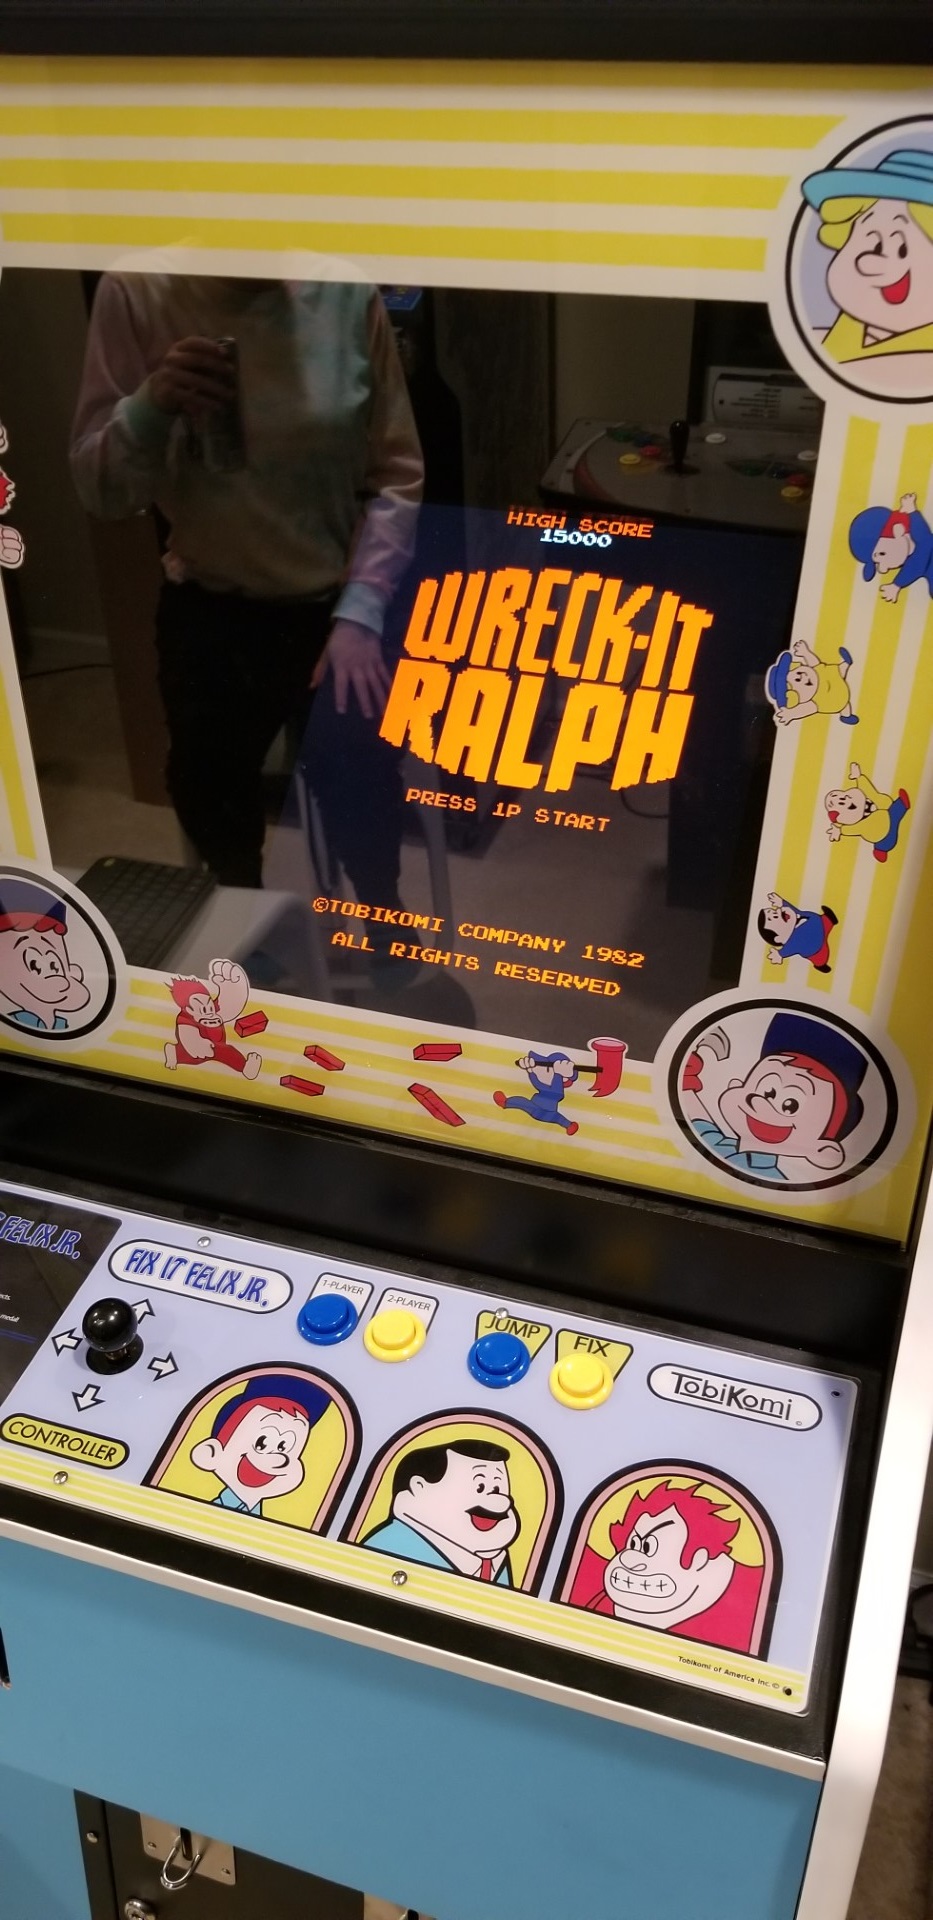
Wreck-It Ralph Arcade game? What’s this all about, such a thing never existed… A member on the BYOAC forums started a fresh Nintendo build, which is always fun to see, but even more exciting when he revealed his theme. He decided to make it a “Wreck-it Ralph” theme machine. That’s something new. We all know about the Fix-it Felix cabinets (heck I’ve built one) but nobody has given Ralph his own machine before. It makes some sense though, it’s a little like making a Donkey Kong cabinet (the bad guy is the name of the game, for example).
His woodwork looks fantastic but he was going to settle on the software side by just replacing a single sprite in the loading screen to say Wreck-It Ralph. A completely custom themed arcade cabinet needs a matching game, in my opinion. So, I might as well make it myself!
Gameplay of the Ralph arcade game
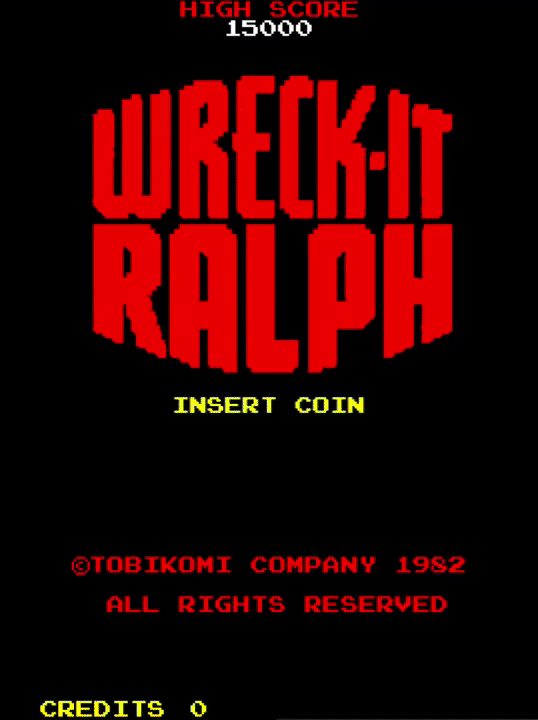
Goals and Specs for Wreck-It Ralph Arcade Game
I had some specifications and goals for this software.
Same graphic style and feel as Fix-It Felix (it should look and play like it was made by the same company)
MAME controls
Game perspective is from Ralph’s point of view. I want it to feel like a reverse Fix-It Felix
Include a few new gameplay elements
Customized settings and a saveable high score table.
The game will be made in Gamemaker Studio 2, primarily using their Drag N Drop tools but also straight code to accomplish things the DnD tools can’t.
I’m also very much taking inspiration by the community contributed, Sjaak made, Fix It Felix arcade software. Mine won’t be nearly as well-built as his (I’m new to this stuff) but I do want it to be authentic as a potentially “real” arcade game. I won’t be widely distributing this game for obvious reasons.
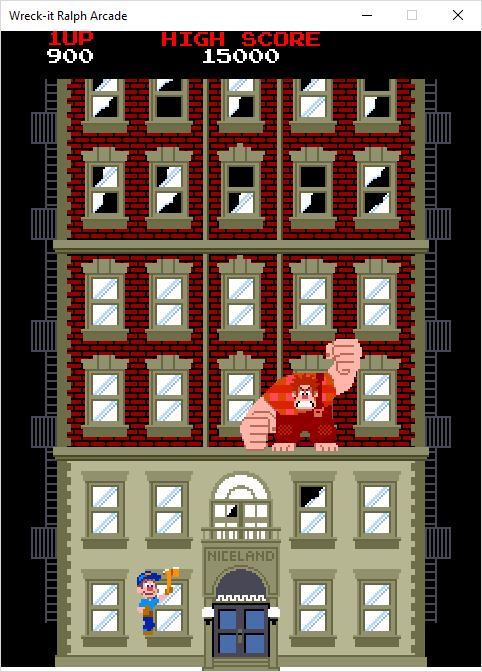
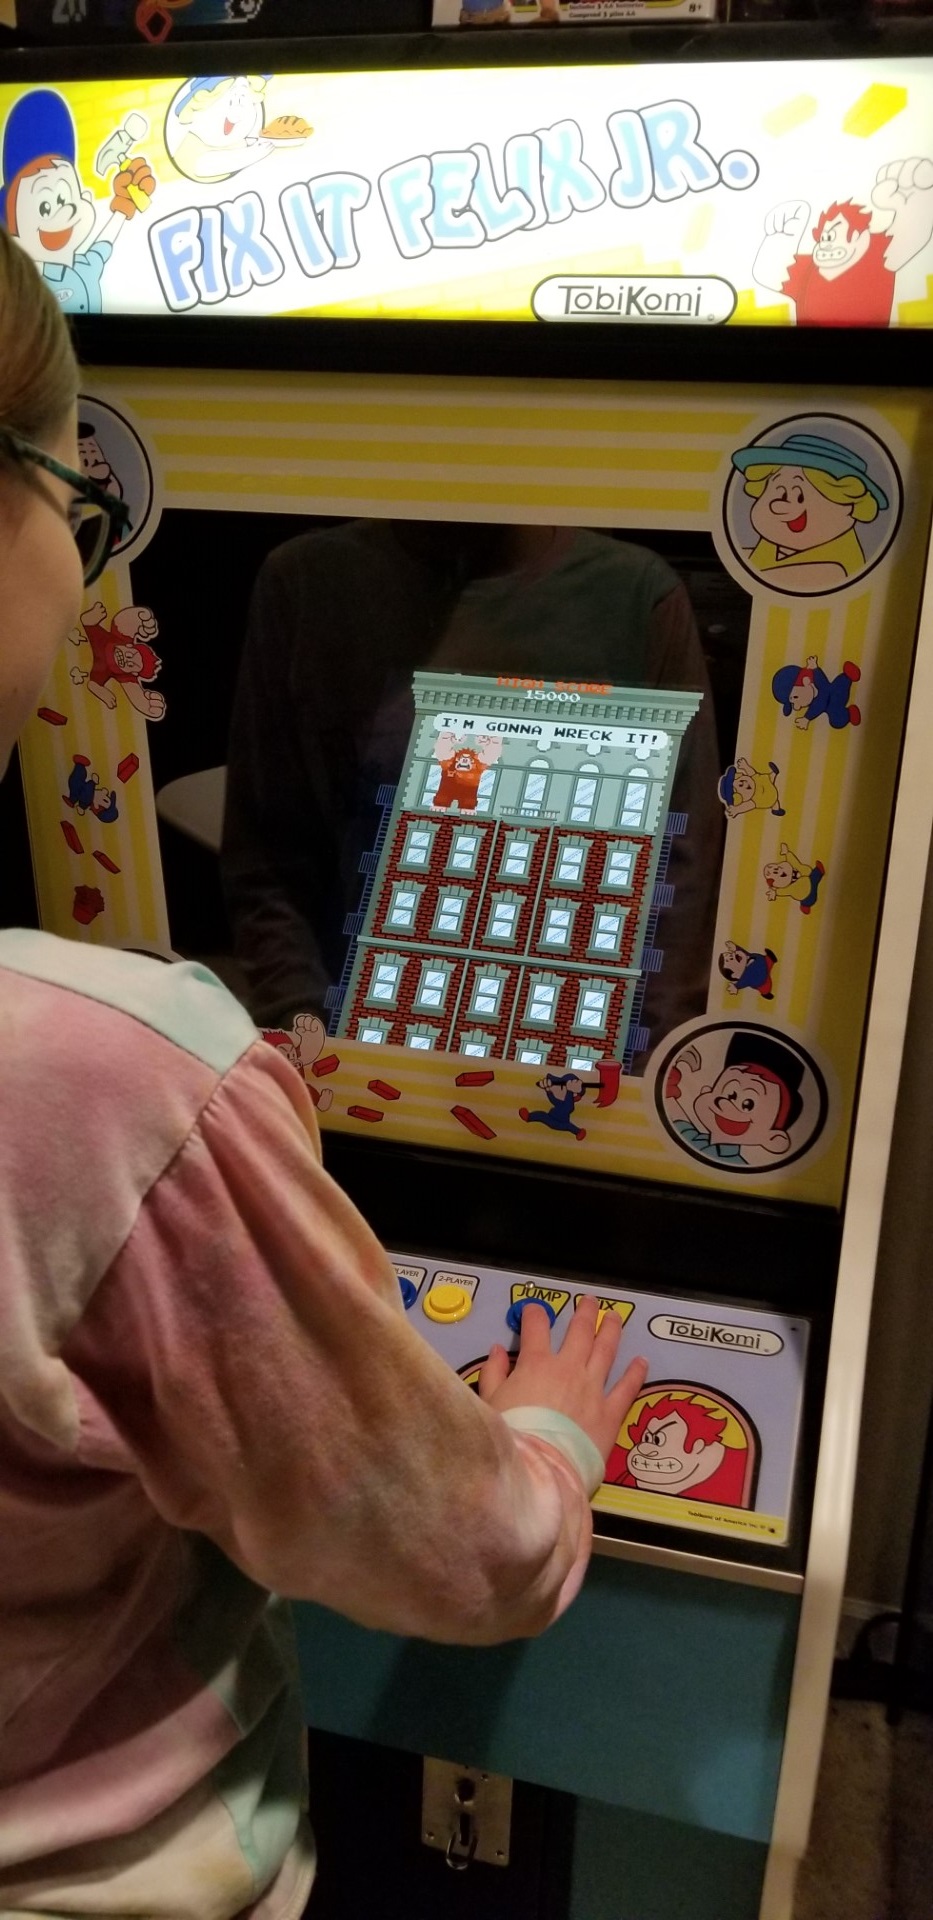
Gameplay
Ralph Attacks Felix
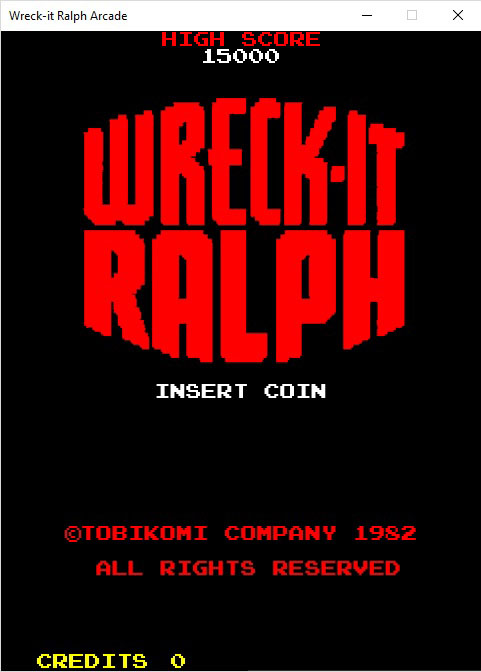
Wreck It Ralph Main Menu
Ralph Avoids cranes
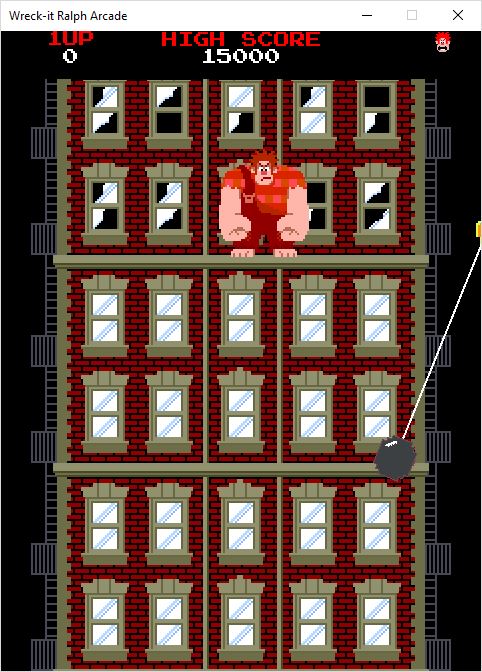
Ralph Bottom Floor
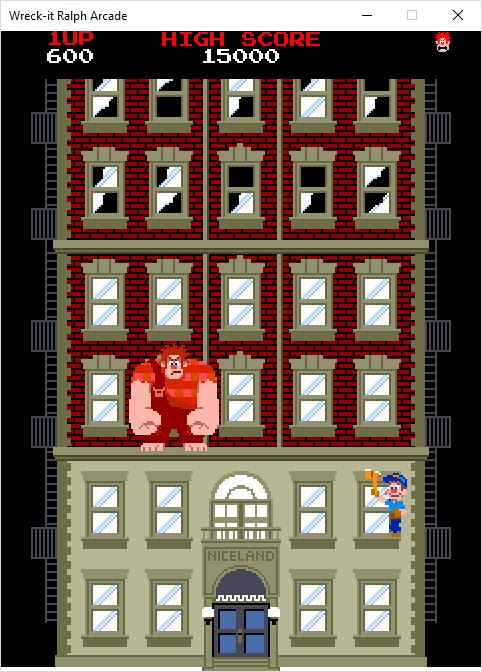
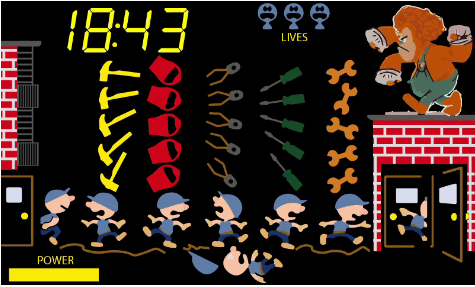
In this game, you play as Wreck-It Ralph attempting to destroy the building. You start on top, making your way to the bottom, breaking windows along the way. Eventually, you come across Fix-It Felix and have to stop him too! Slowing you down are cranes swinging and dropping wrecking balls, nicelanders attacking, and bulldozers. After reaching the bottom, the level completes, and you start all over again (the building gets taller and more difficult though).
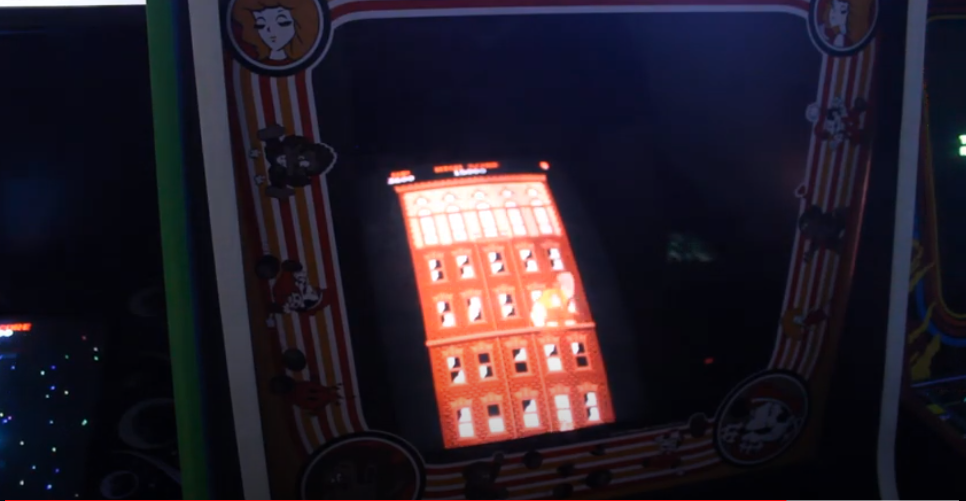
Wreck It Ralph running on a Donkey Kong arcade cabinet (with CRT!)
Wreck It Ralph running on a Donkey Kong arcade cabinet (with CRT!)
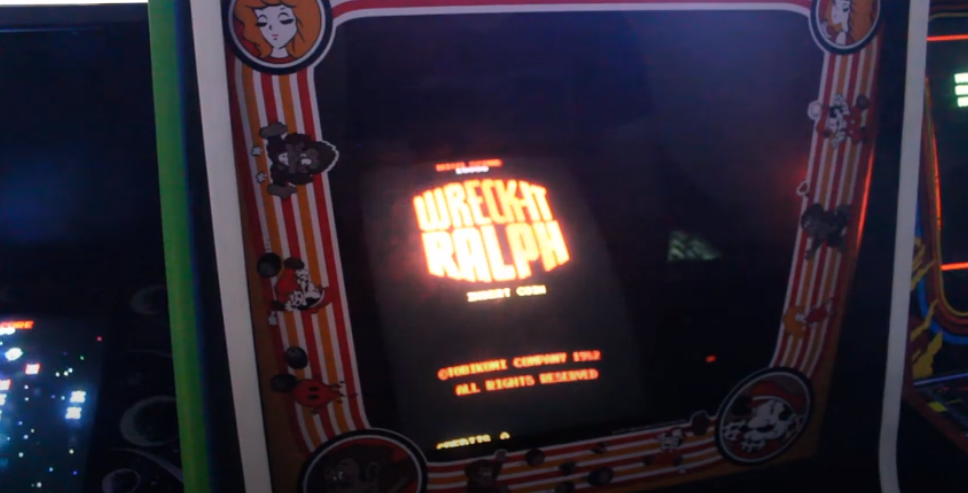
Wreck It Ralph running on a Fix It Felix cabinet
Wreck It Ralph running on a Fix It Felix cabinet
Video of the Finished Arcade Software
The game is now in a late finished. I finished it up with a way to customize controls and save scores. You can see a video of it in action below. A few fellow forum members helped me test it out so I’ve been lucky enough to have this thing run on other Felix cabinets and even an original Donkey Kong cabinet with CRT!
If you enjoy stuff like this, I encourage you to visit or join the BYOAC forums. It’s filled with people who enjoy the arcade hobby and specifically like to build their own controls, software, or cabinets.
If you’re curious about the code for the game, it’s available on GitHub
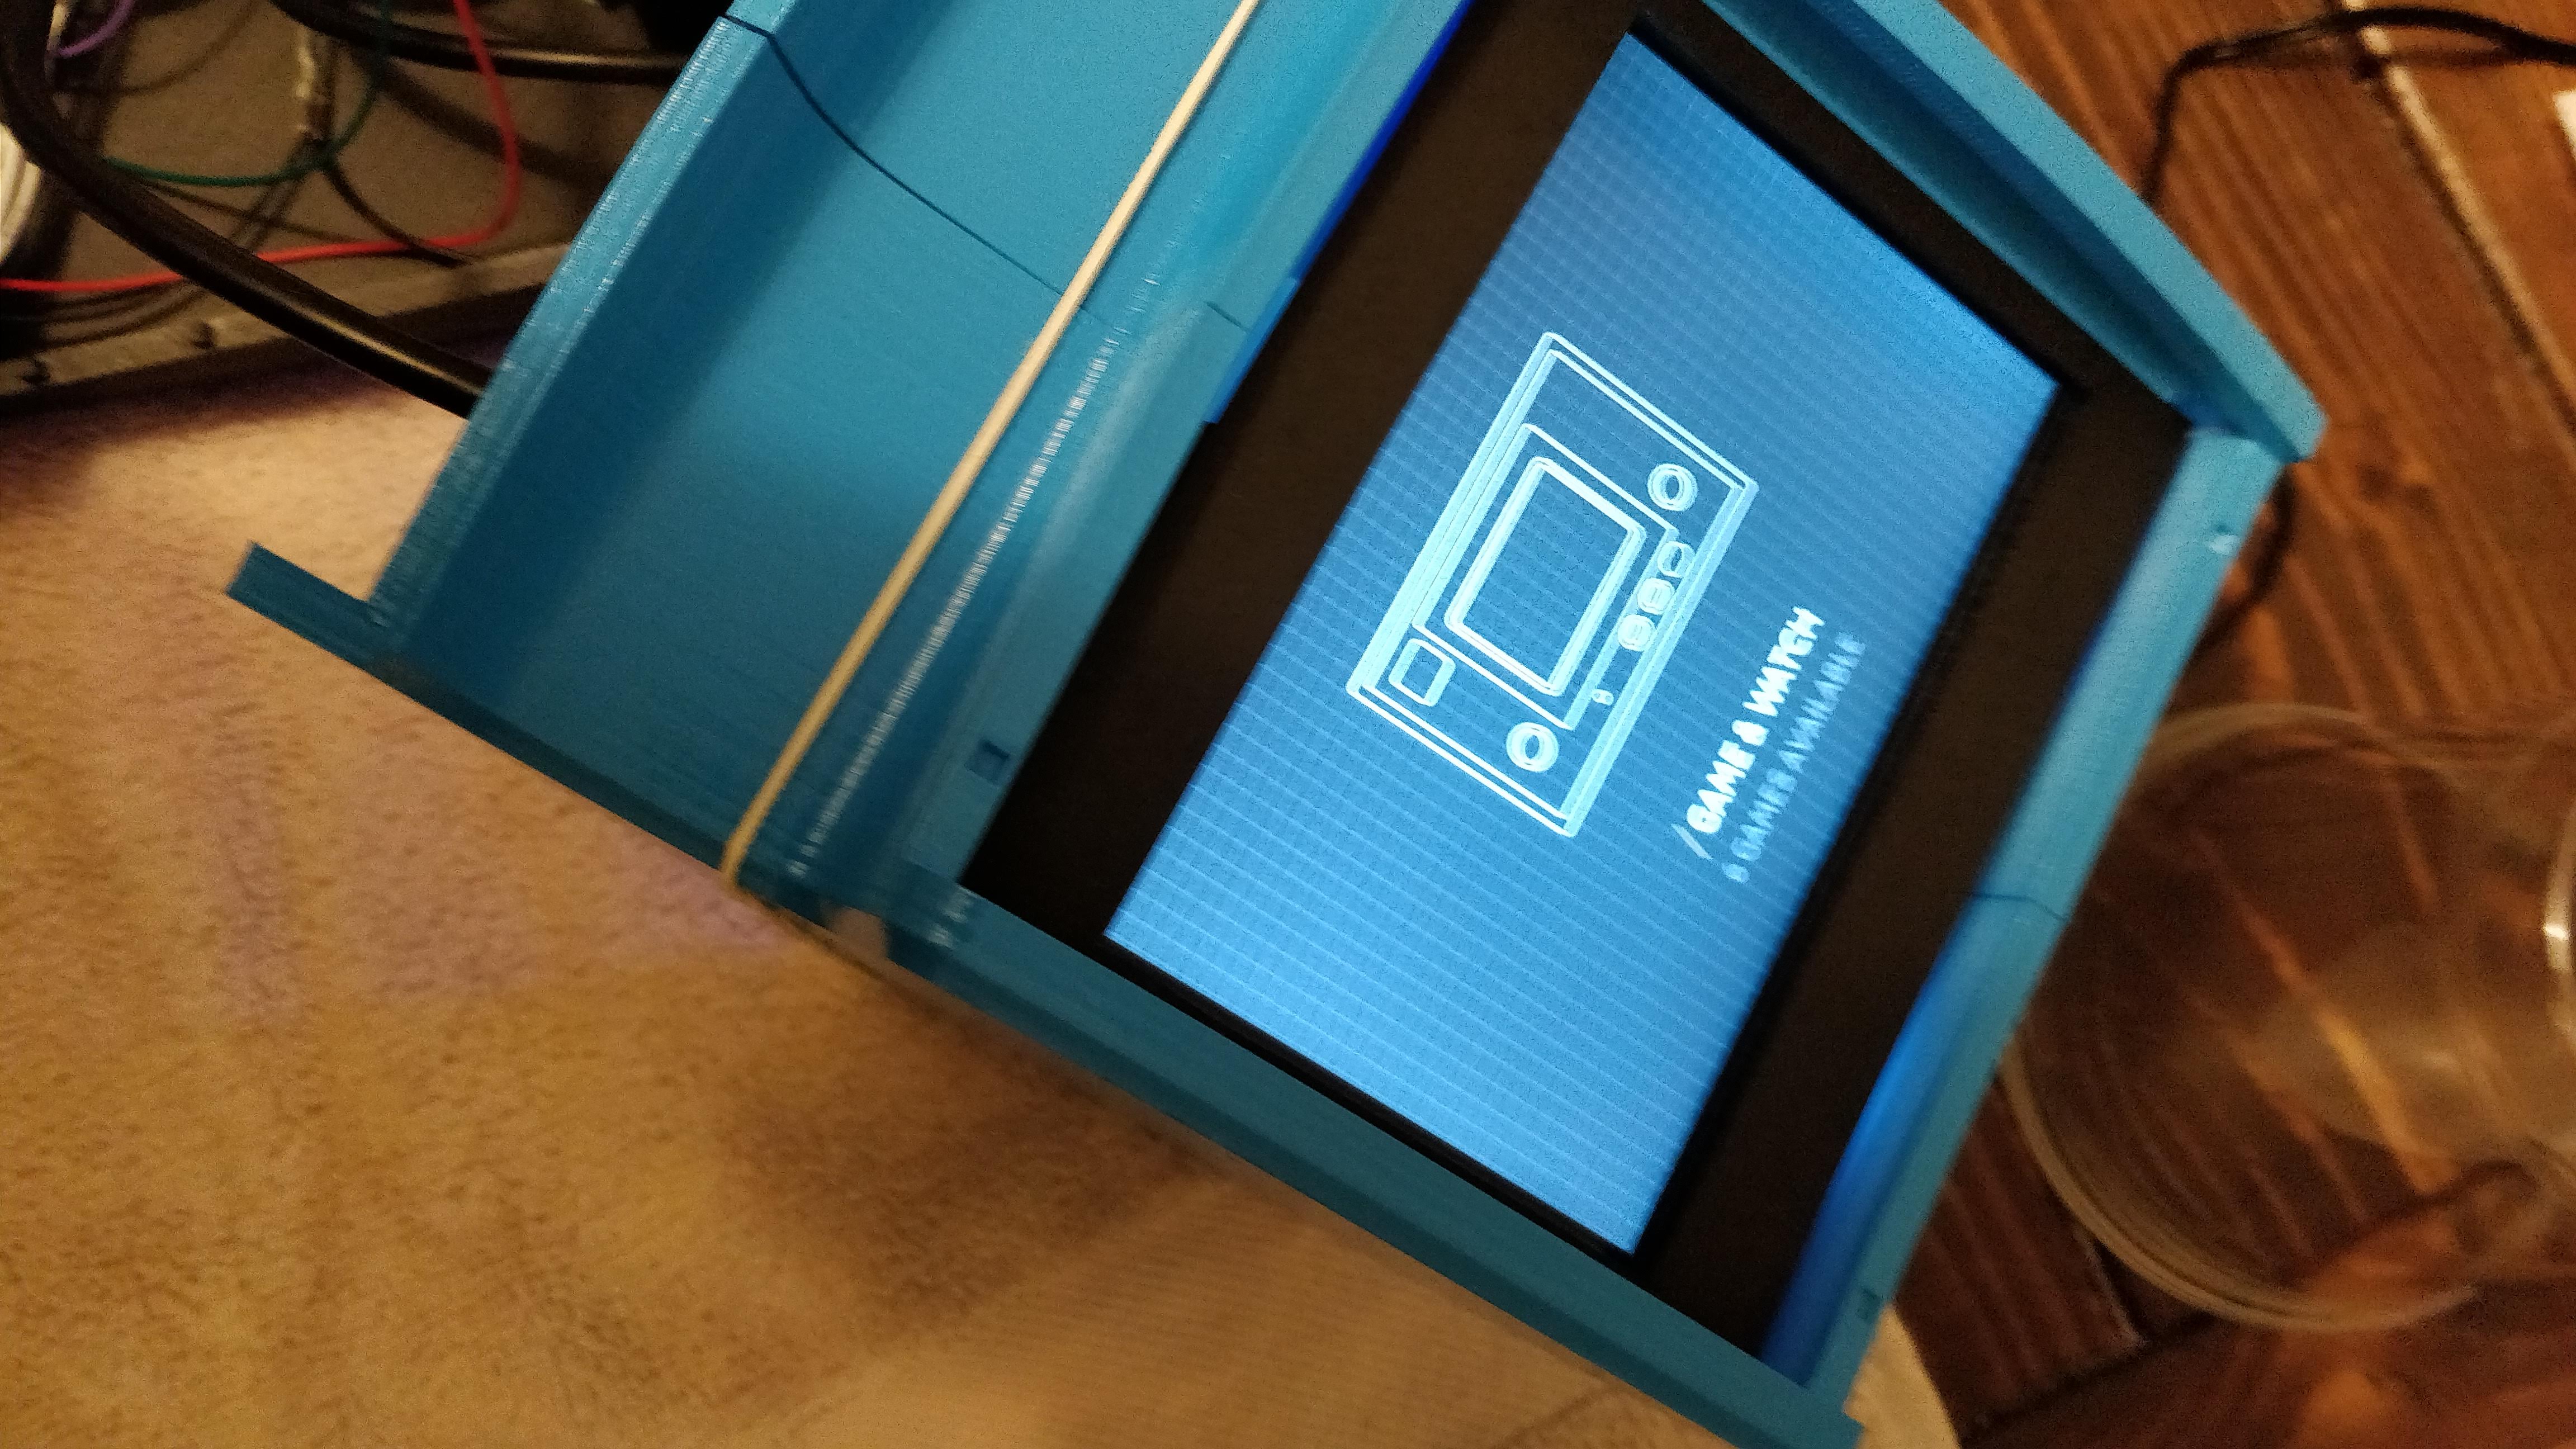
I think this will be my last handheld arcade game for a while, but it’s going to combine ALL of my knowledge from previous builds. You can download all the files for this project at the Play & Clock GitHub Download Page
3D printed shell, recreated to look like the Game and Watch Tabletop games
Two original games, created to emulate Game and Watch type games – starring Fix it Felix
New artwork
Running a full Windows 10 pc, with full versions of MAME
Interface with an Arduino for controls and LED light effects
Shared files so you can build your own
The cabinet and game will be called, “Play & Clock: Felix’s Construction Site”. A play on “Game & Watch: Mario’s Cement Factory”. In another one of my false histories, we’ll pretend Tobikomi came out with their own LCD based games, after a brief partnership with Coleco, and called them Play & Clocks. Poor Tobikimo, always emulating Nintendo but never quite as popular!
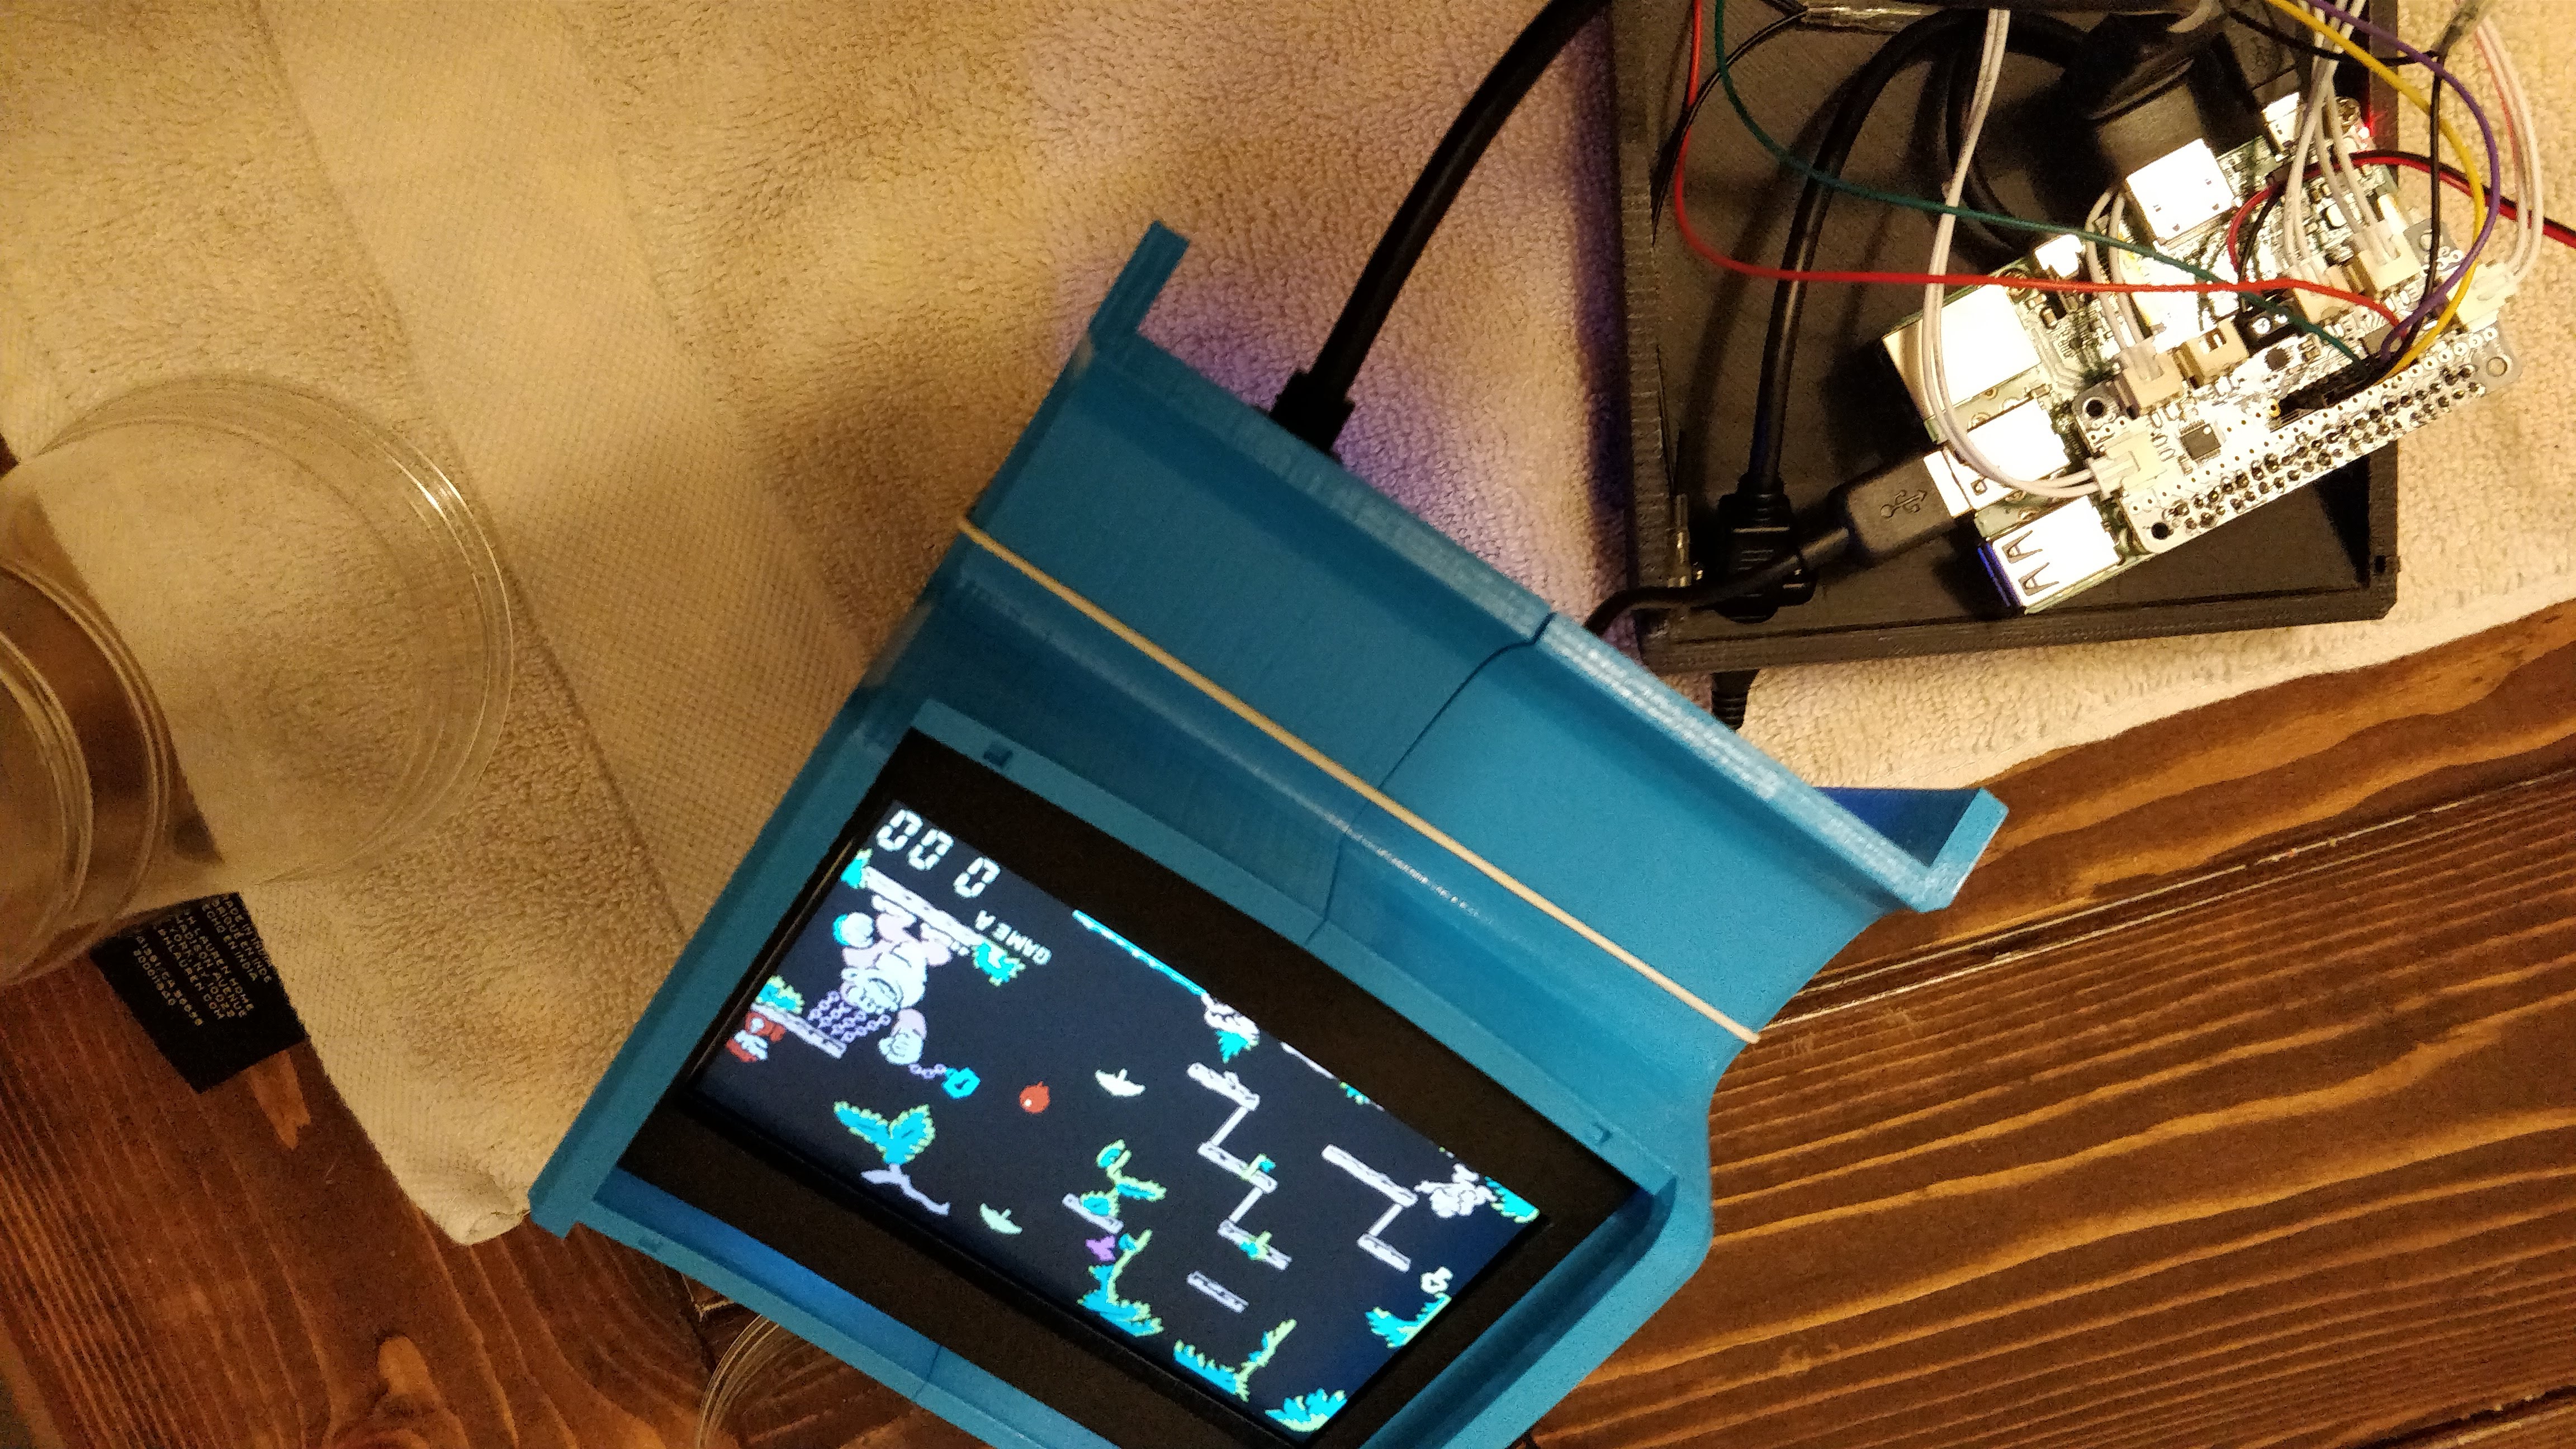
Felix’s Construction Site Game
Like any Game and Watch title, this Play & Clock game has to tell the time. Well, the game does that and so much more. This game is very similar to the Game and Watch title, Helmet. You run across a field trying to avoid tools being tossed at you by Wreck It Ralph. I my head, this game actually stars Felix Sr., and the rumor is, this is where he got his magic hammer from to give to his son! You can see a gif below with some early gameplay.
Additionally, I created all new sounds similar to other Game and Watch titles. Many Nintendo arcade games would play some classic piece of music so I went with a portion of “Marriage of Figaro” by Mozart, recreated in a 2-bit sound style using BeepBox.co The other sounds are simple beeps and boops.
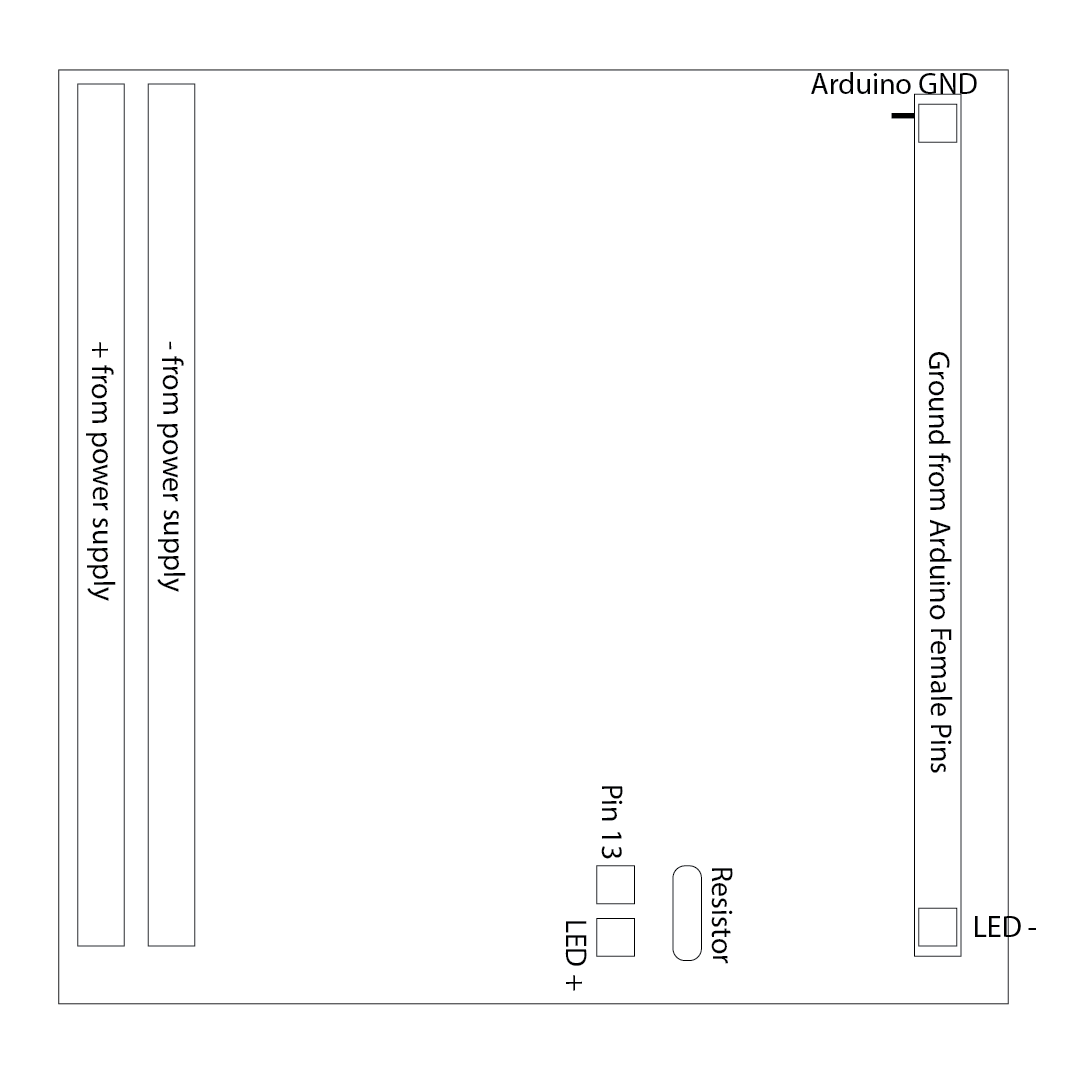
Arduino Interaction
Additionally, the game has some extra cool features! It can send data to an Arduino to light up an LED based on game play. I’ve designed the game to use an Arduino Leonardo for controls, but you can use any keyboard input.
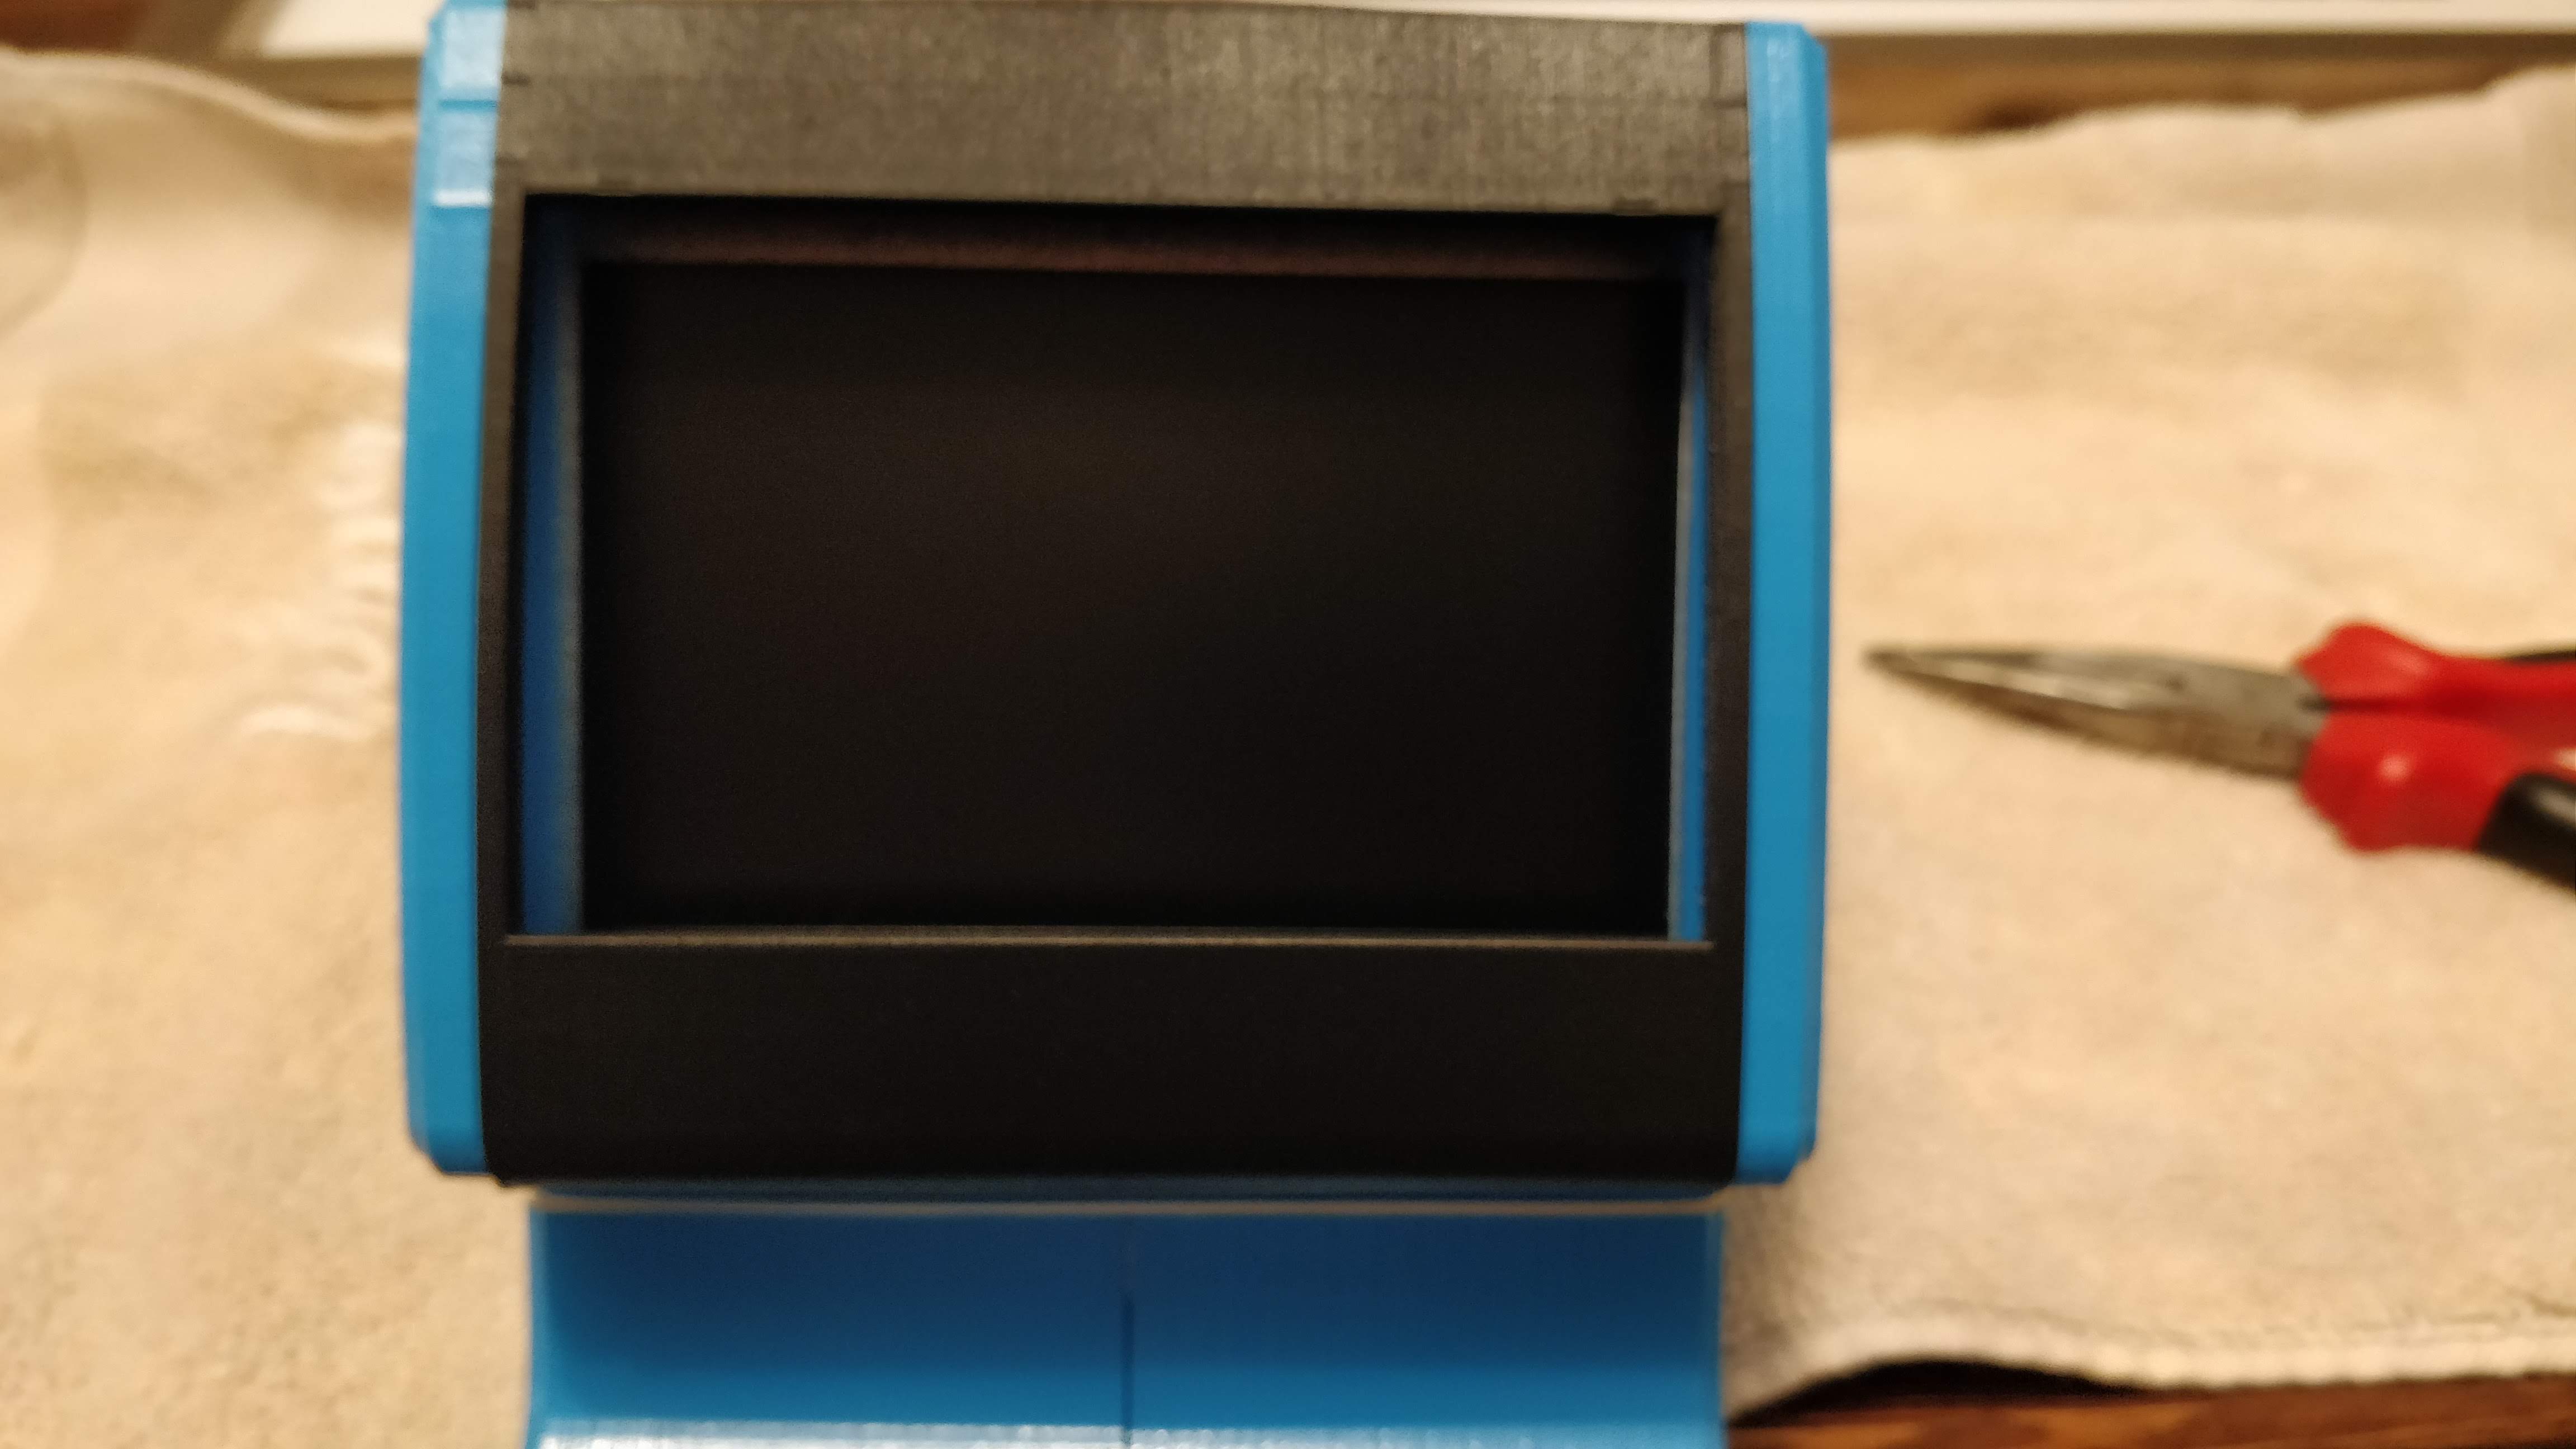
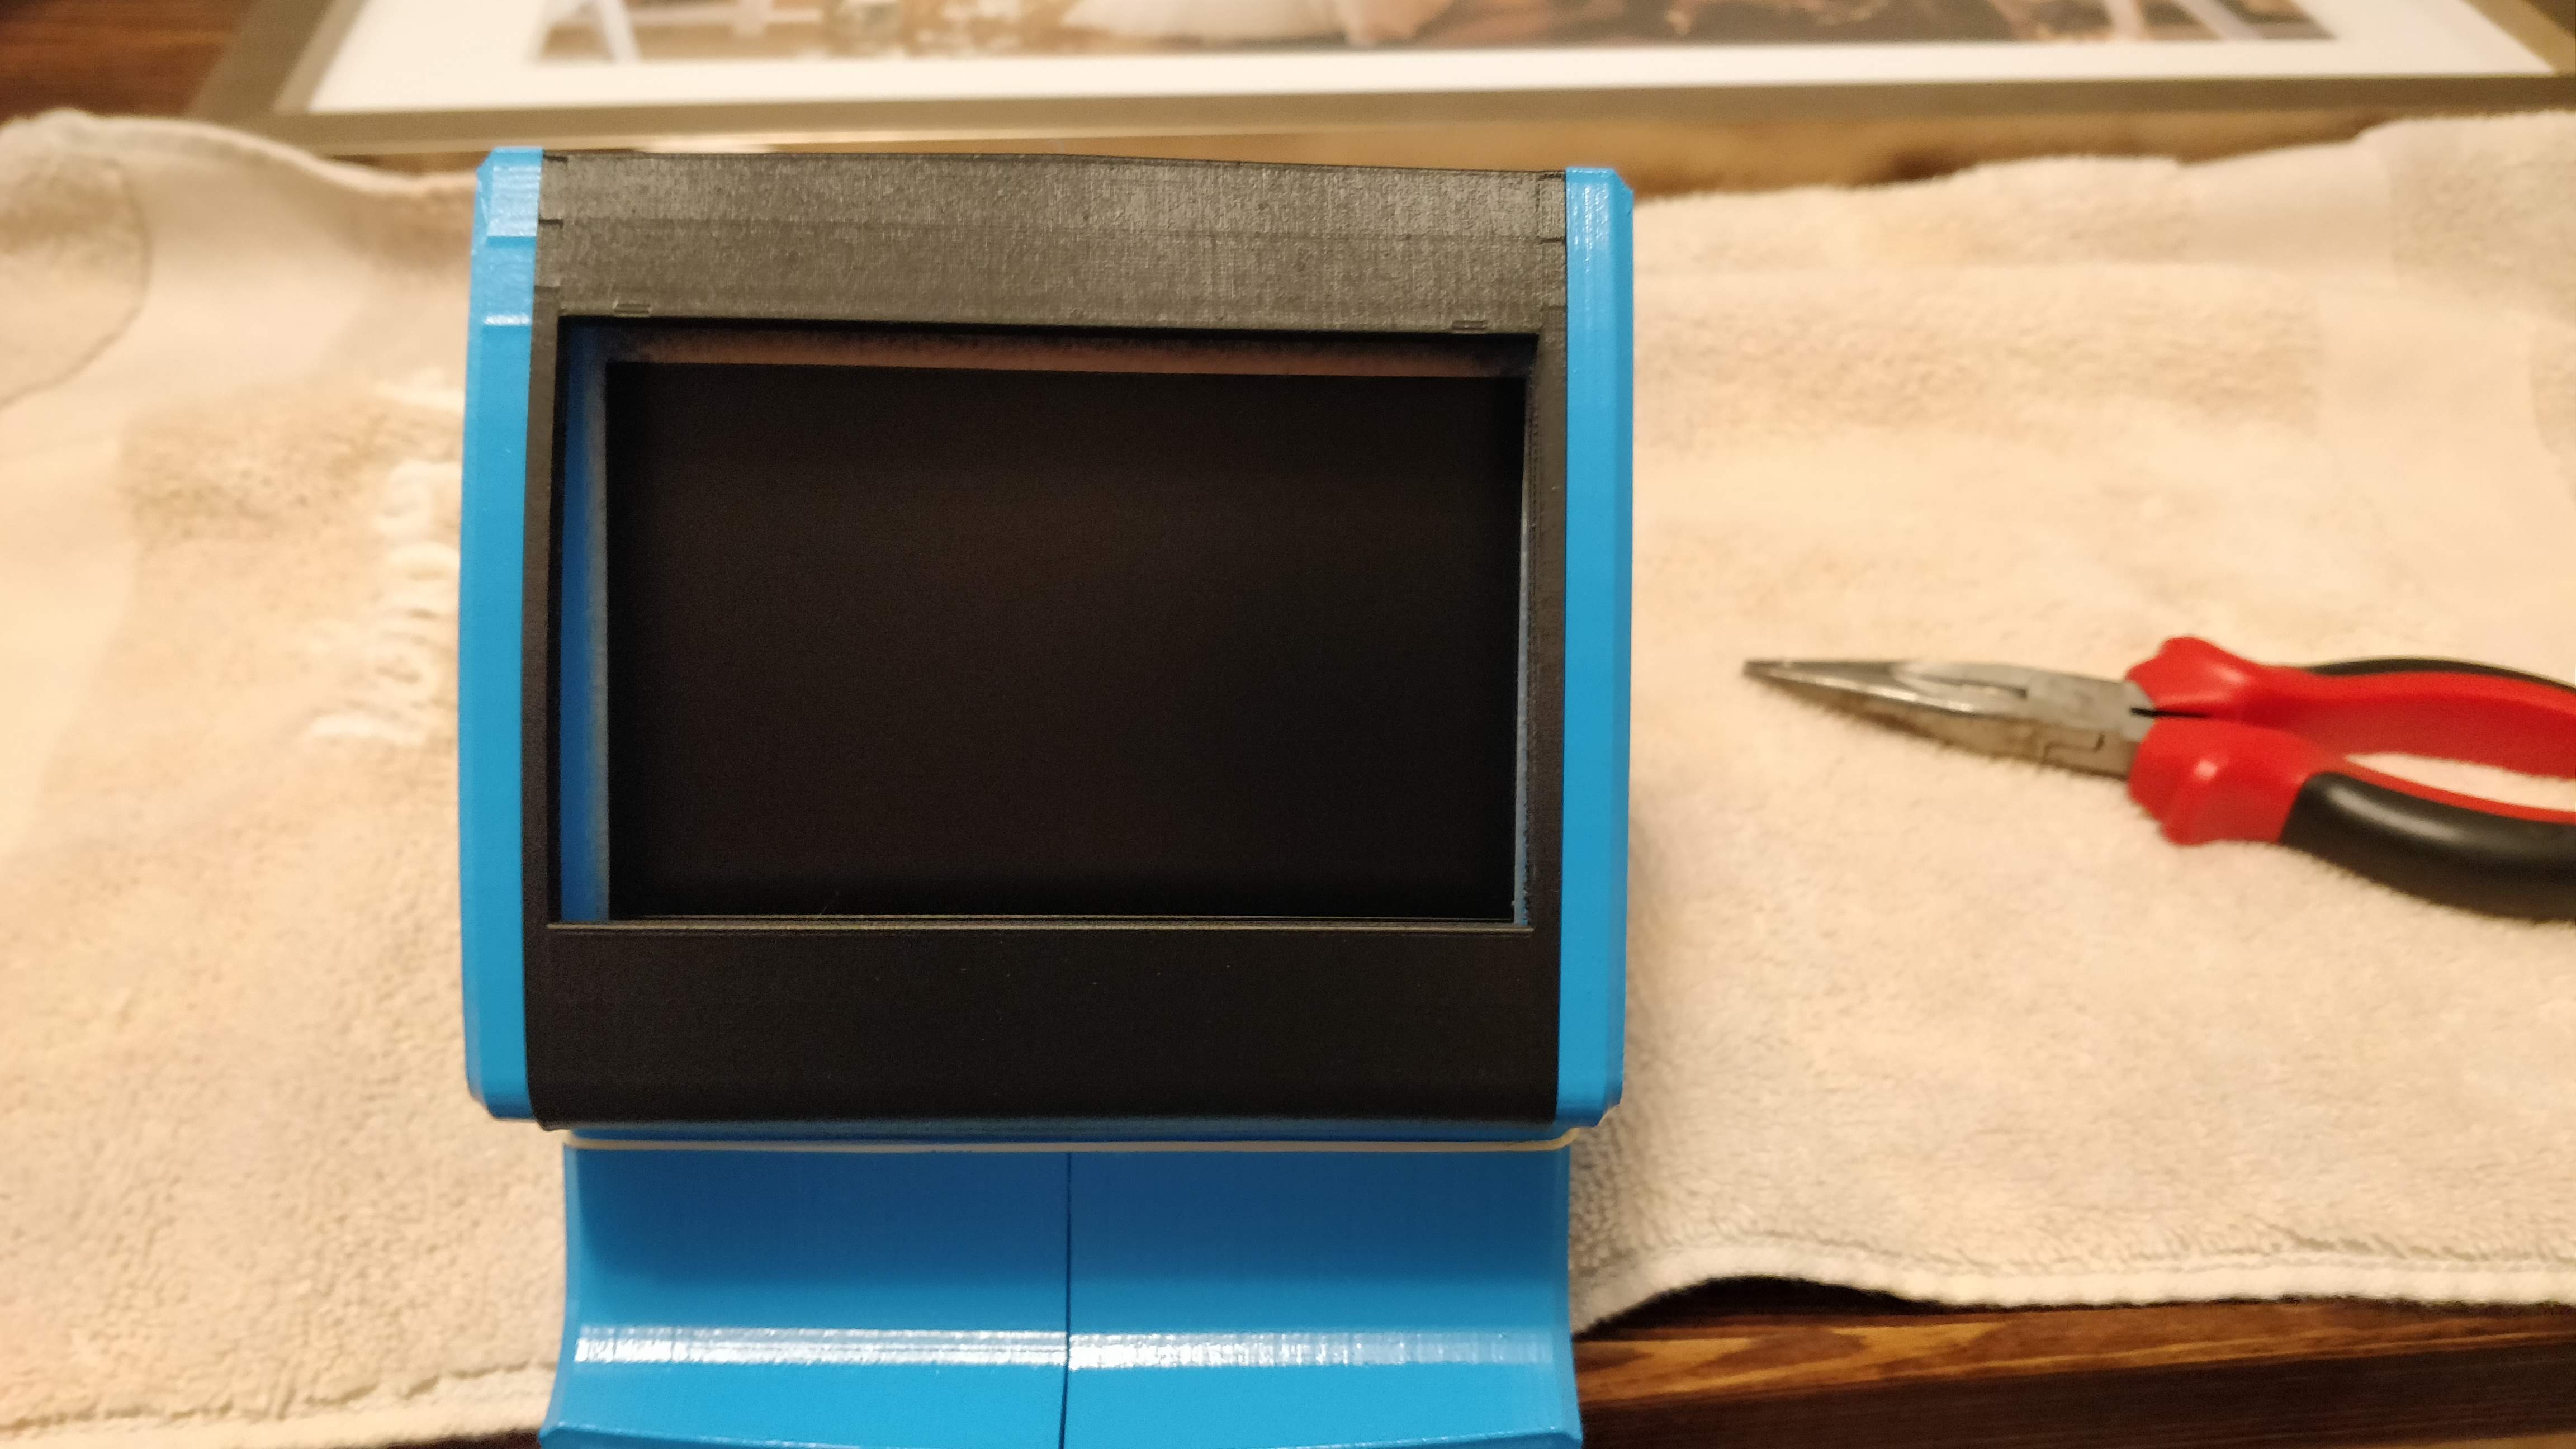
Play & Clock Shell
The case of the game is a replica of the Game & Watch tabletop games. It can be 3D printed easily enough, just drill out some holes for controls. It’s the single, and exclusive, Play & Clock Tabletop game (until someone out there downloads the files and makes their own that is)! Technically, this is sort of a lie. I made a bonus game for my unit – but that will remain just for me, I won’t be sharing the files for that game. Gotta have something unique. See it in the final video.
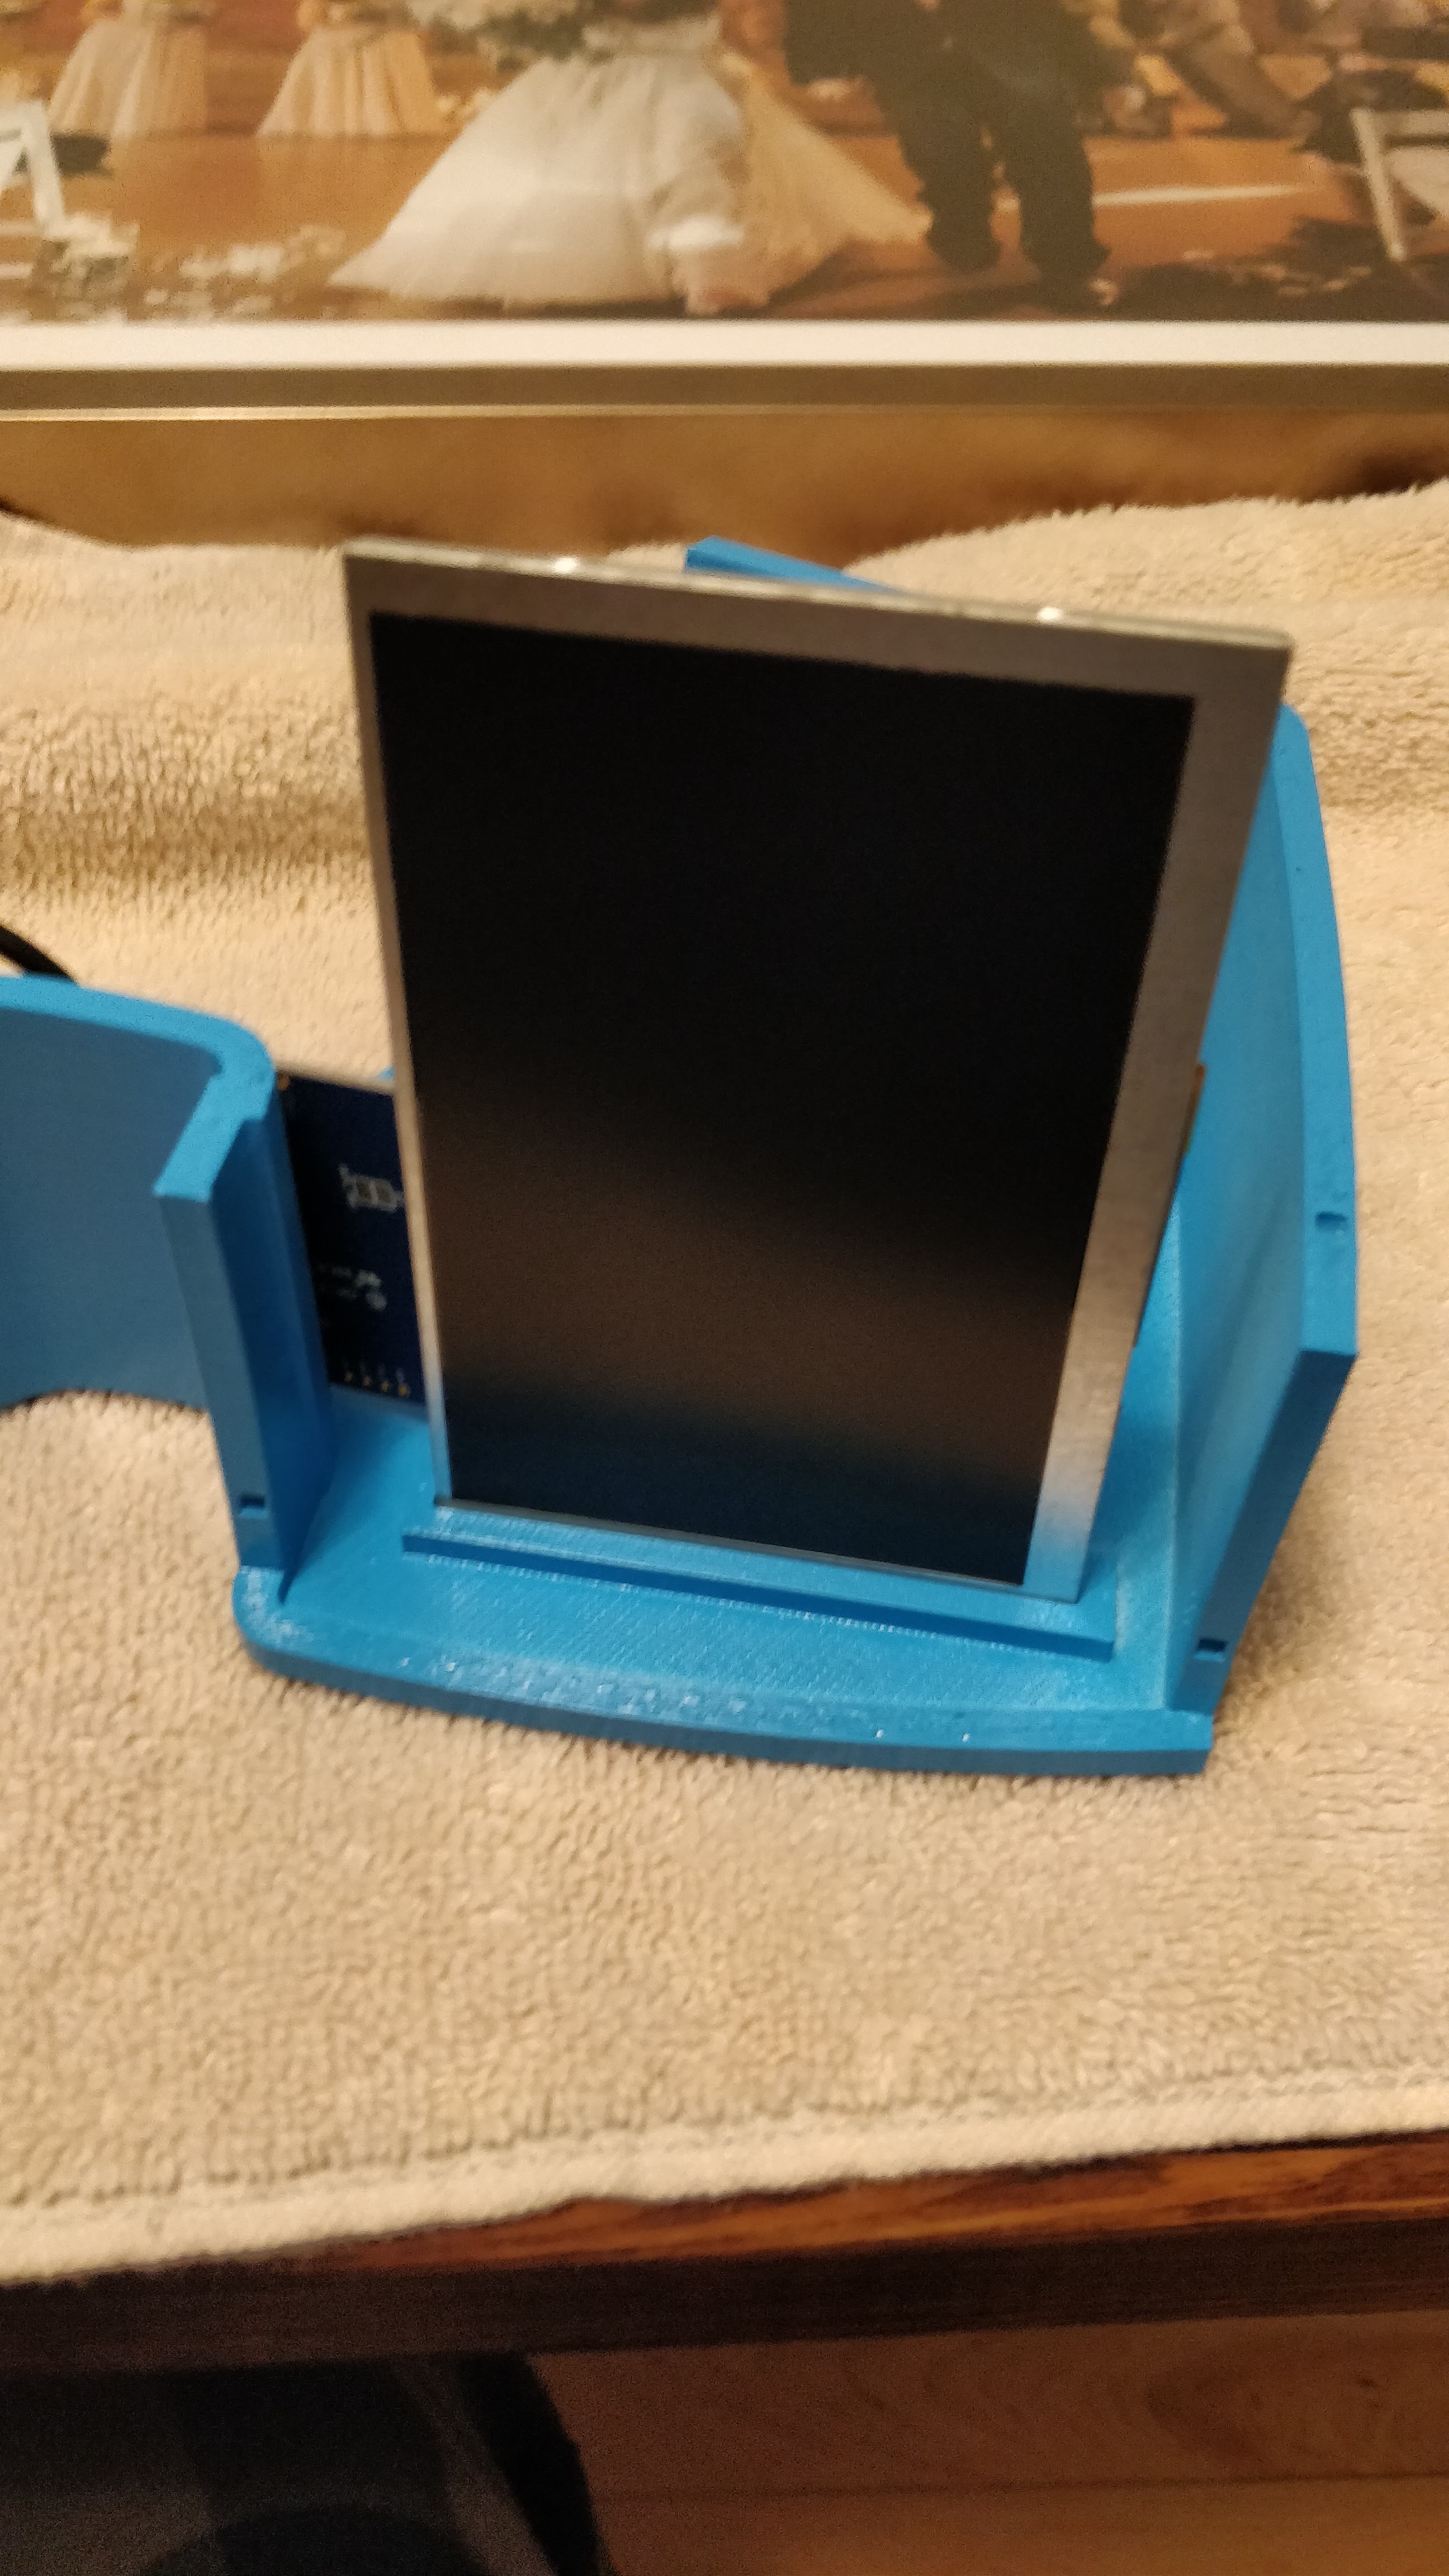
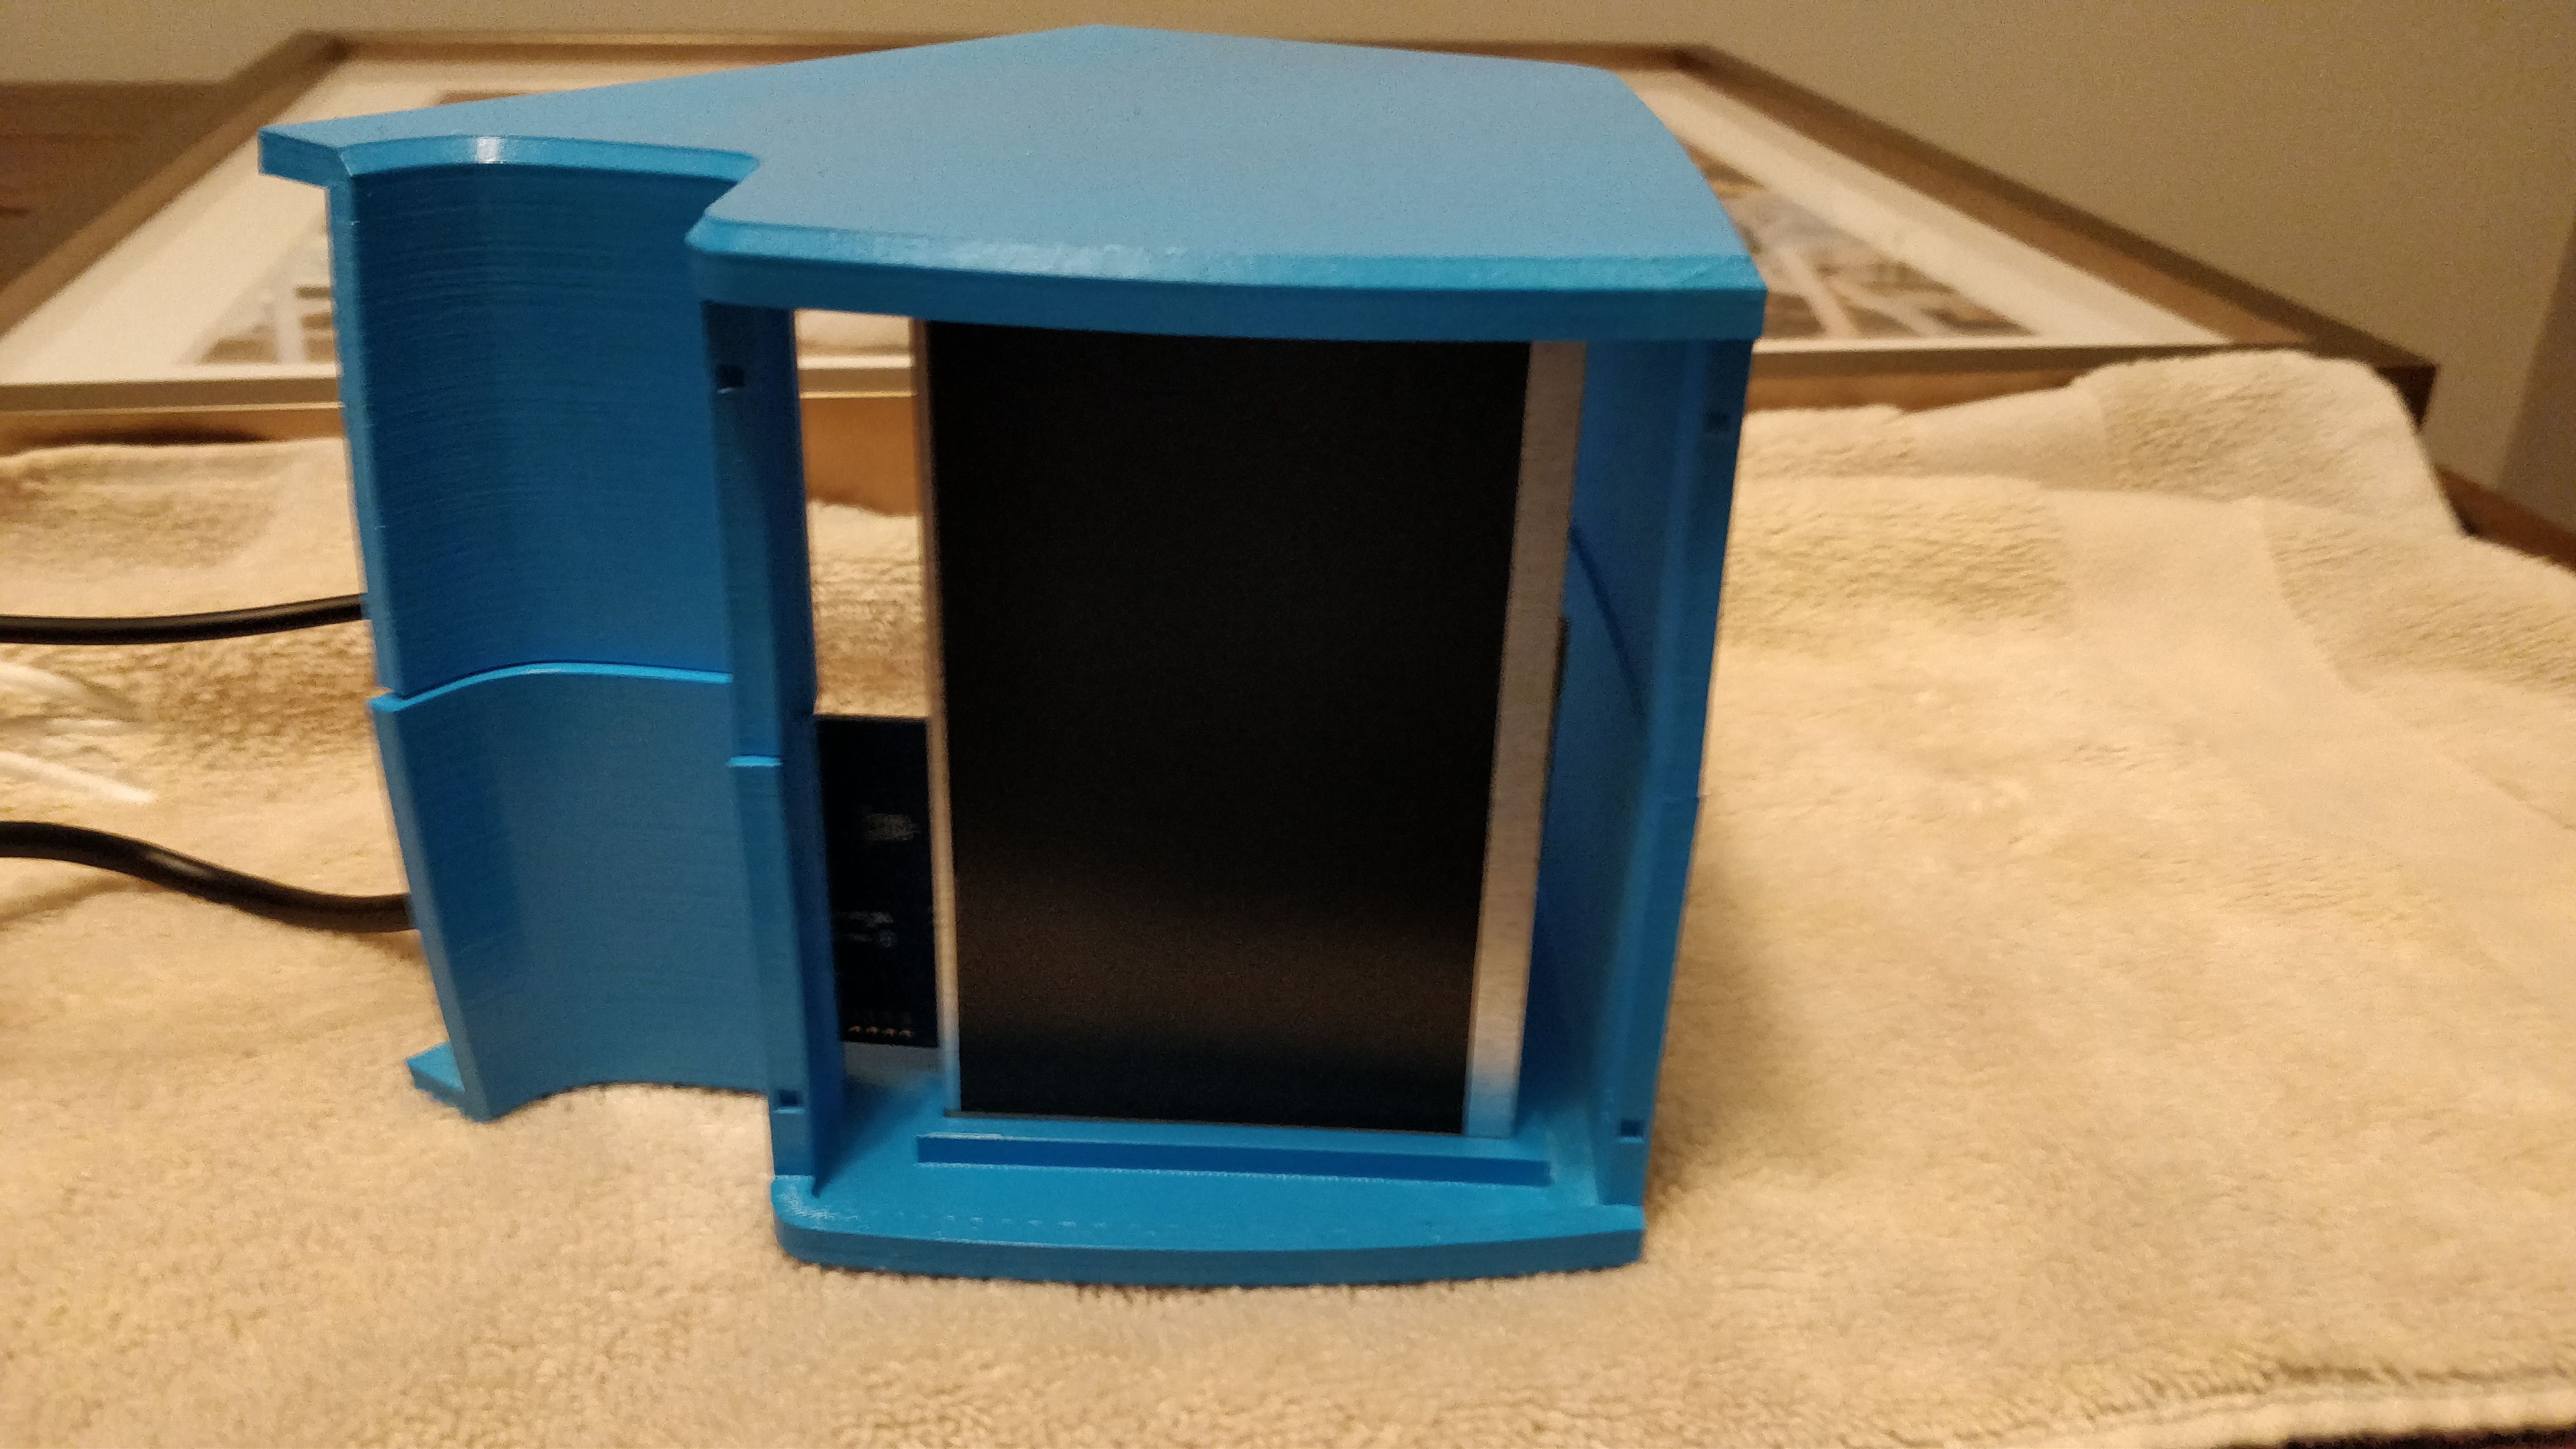
The shell comes in 5 parts and snaps together with small friction pins. It’s designed to hold a specific screen, a 5″ LCD from adafruit. That connects with an interface board, which uses HDMI to connect to the computer.
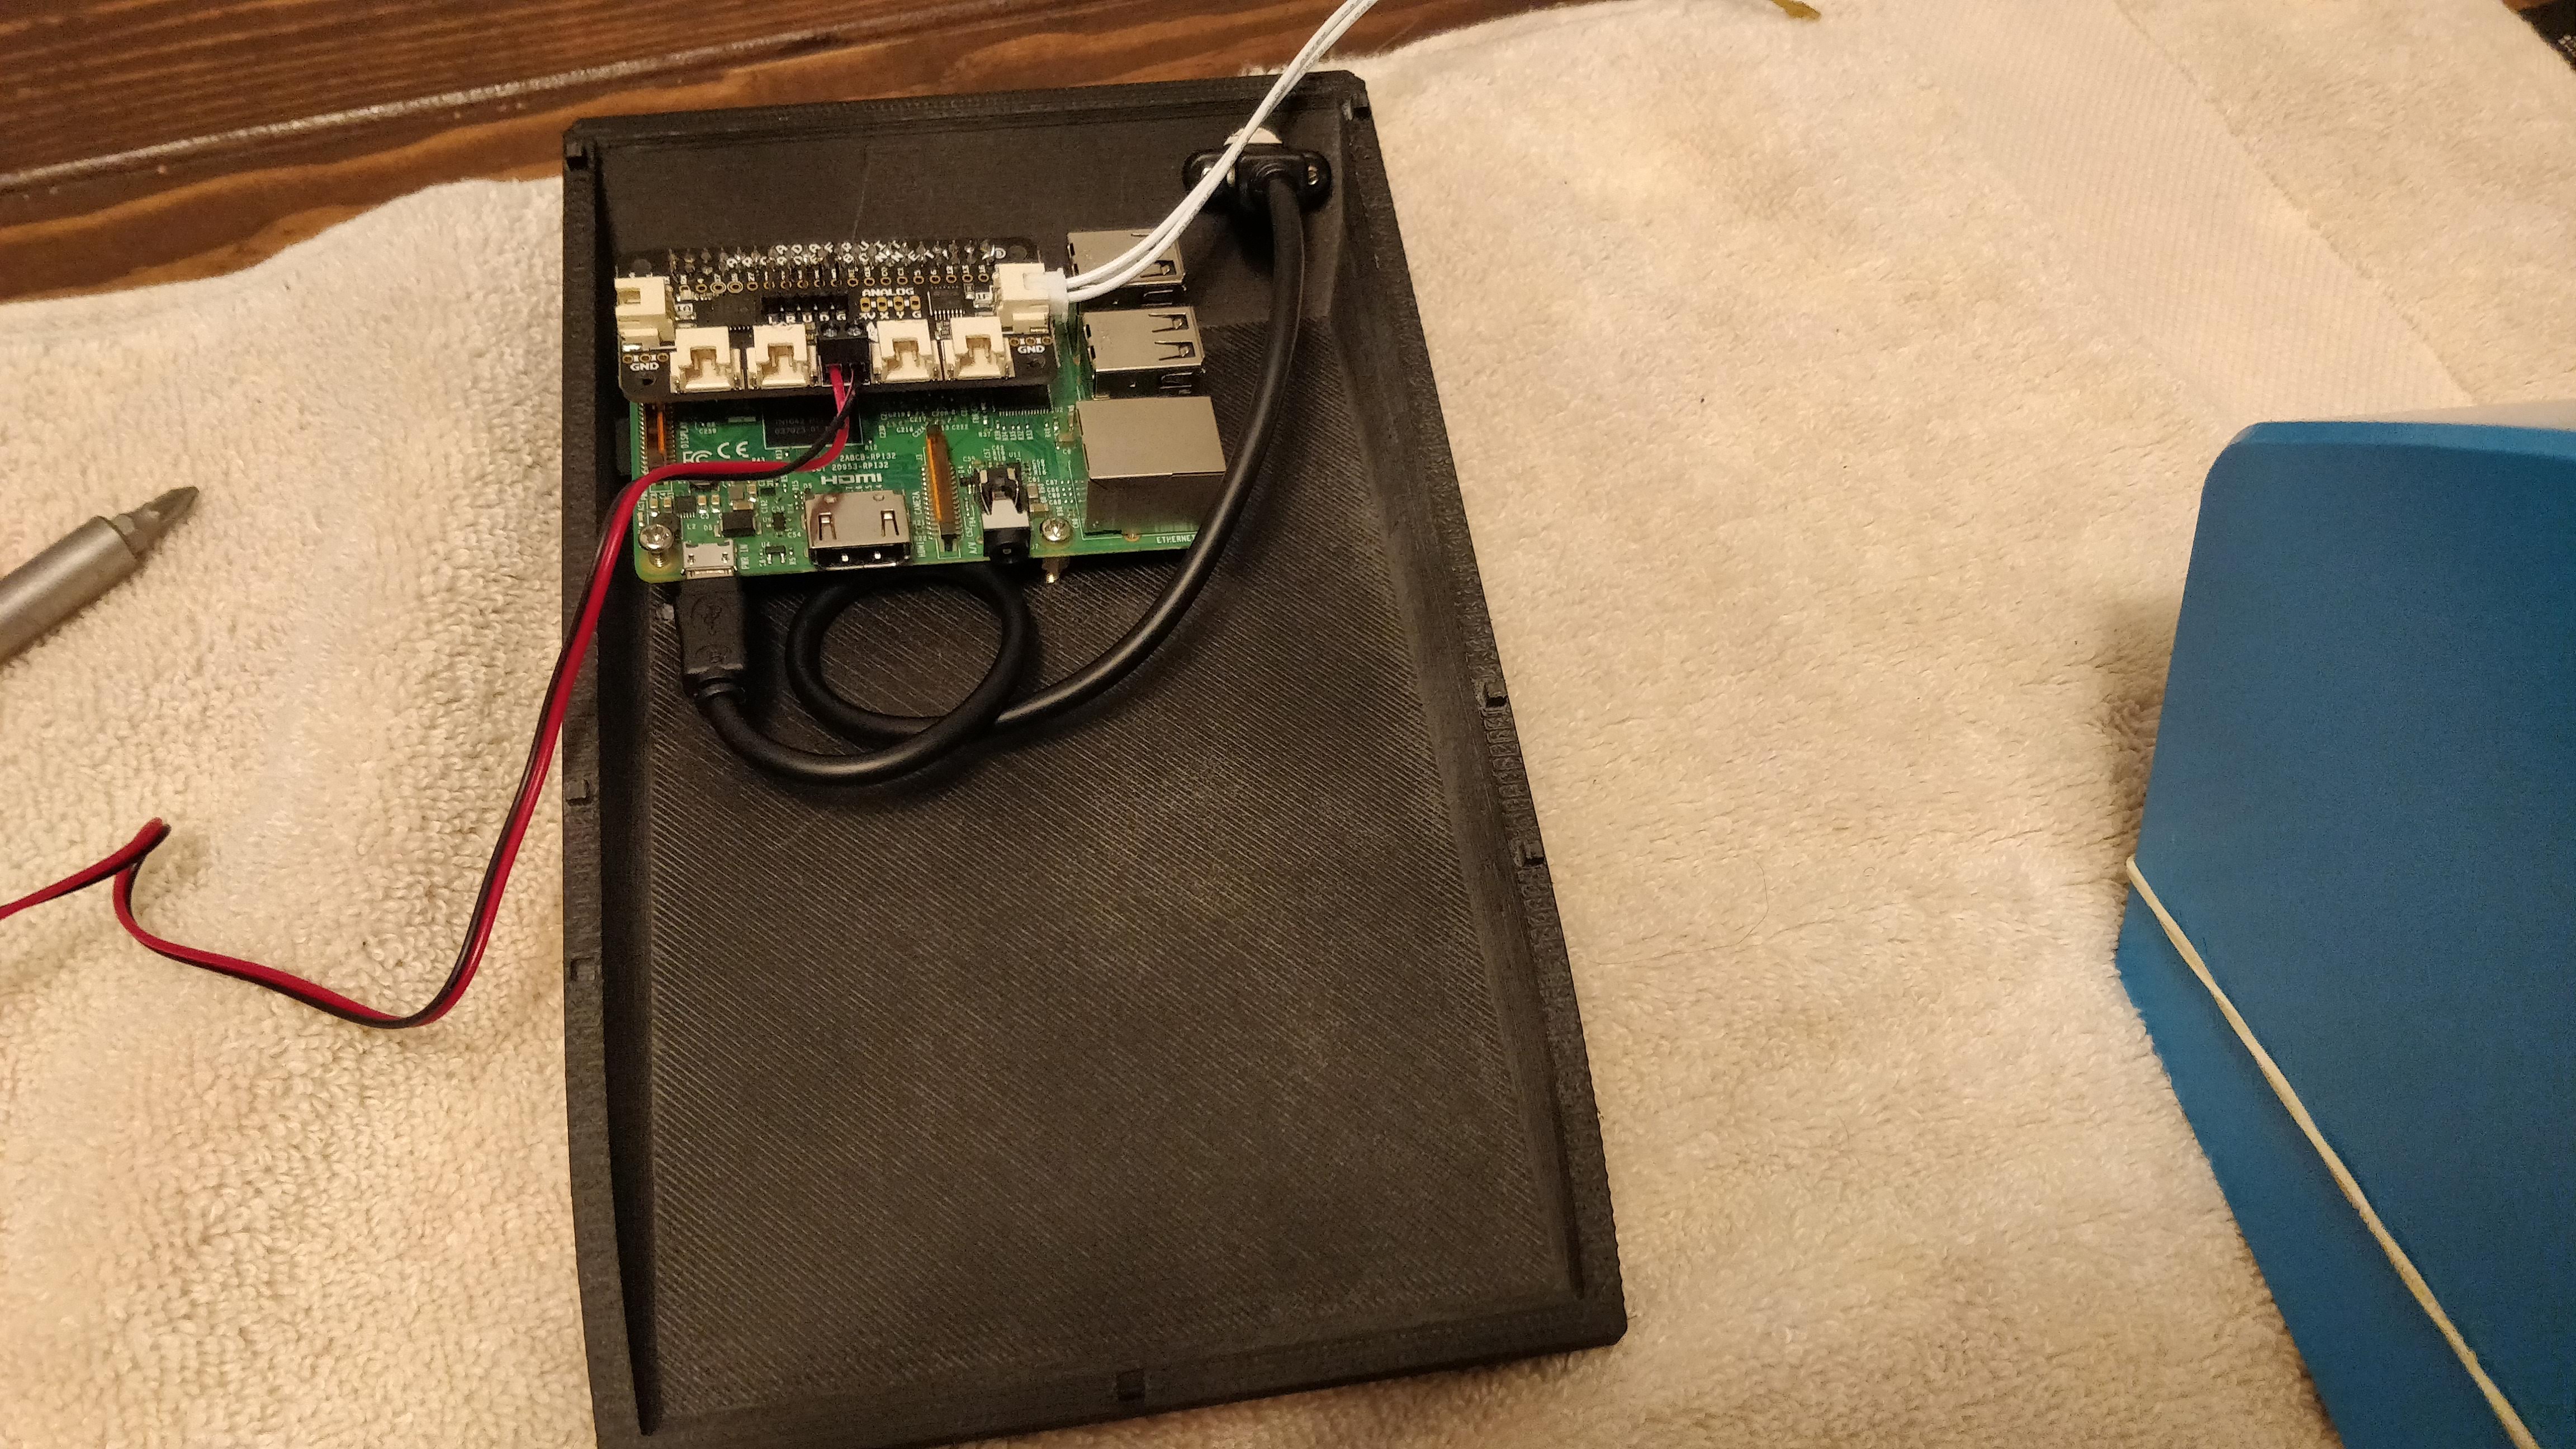
For the guts of this game, I’m using a LattePanda. I recently learned about this single-board computer, and really think it’s ideal for mini arcades. It’s more powerful than a raspberry pi, runs a full version of Windows 10 and has GPIO pins – including a full-on Arduino Leonardo. That means I can program those pins to act as a keyboard and connect my controls directly to it. No keyboard encoder necessary.
The LattePanda Arduino pins can also control simple LEDs, so I designed Felix’s Construction Site to send signals to light up an LED based on gameplay.
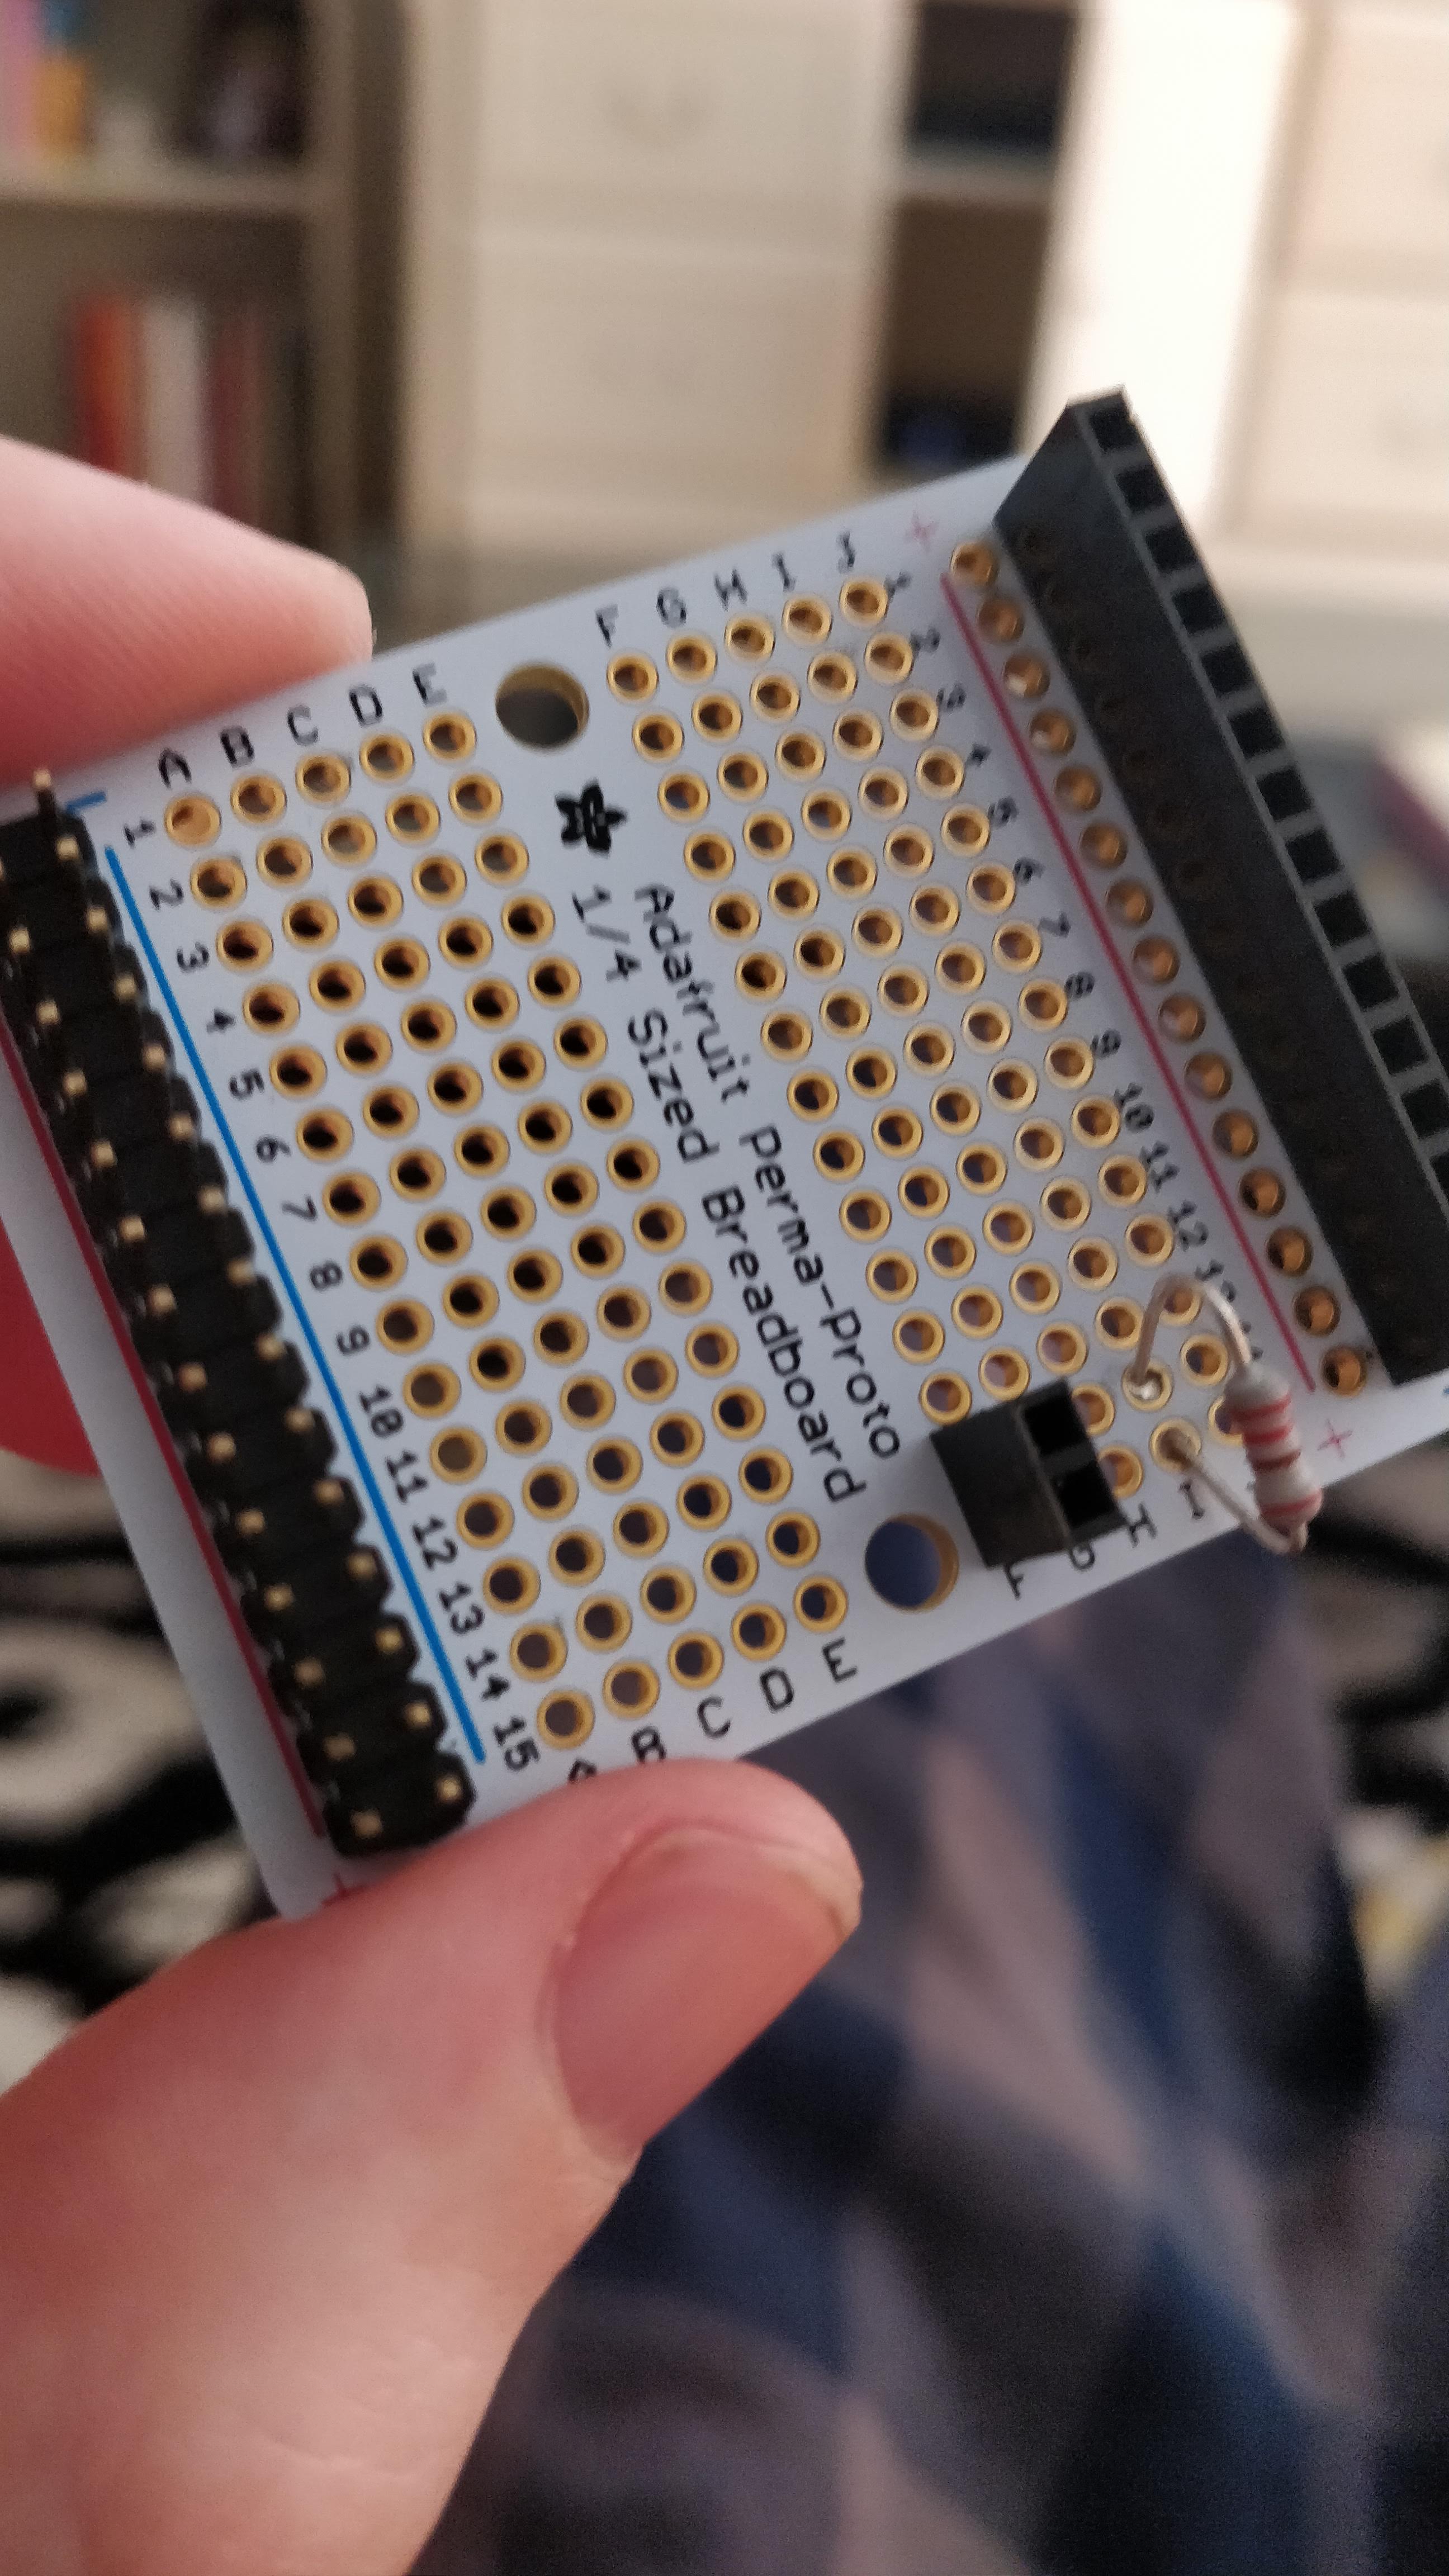
I also made a very simple circuit/PCB to go along with it. It distributes power to the computer and sound amp. It also expands the GND with a ground plane for all the switches (an arduino only contains a single ground pin). Lastly, it has the resistor and pins for the LED. Again, nothing fancy, but it will make wiring easier later.
Simple circuit layout
The final circuit soldered together
Artwork
The Nintendo tabletop games were quite simple in design. Just two solid colors, black and one other with white lettering. So, I did the same. I did flourish JUST a bit though by creating optional side art. It mimics the box art the original games had. You can see below the artwork I created, just print it out and you’re ready to go. Download the full-resolution pdf
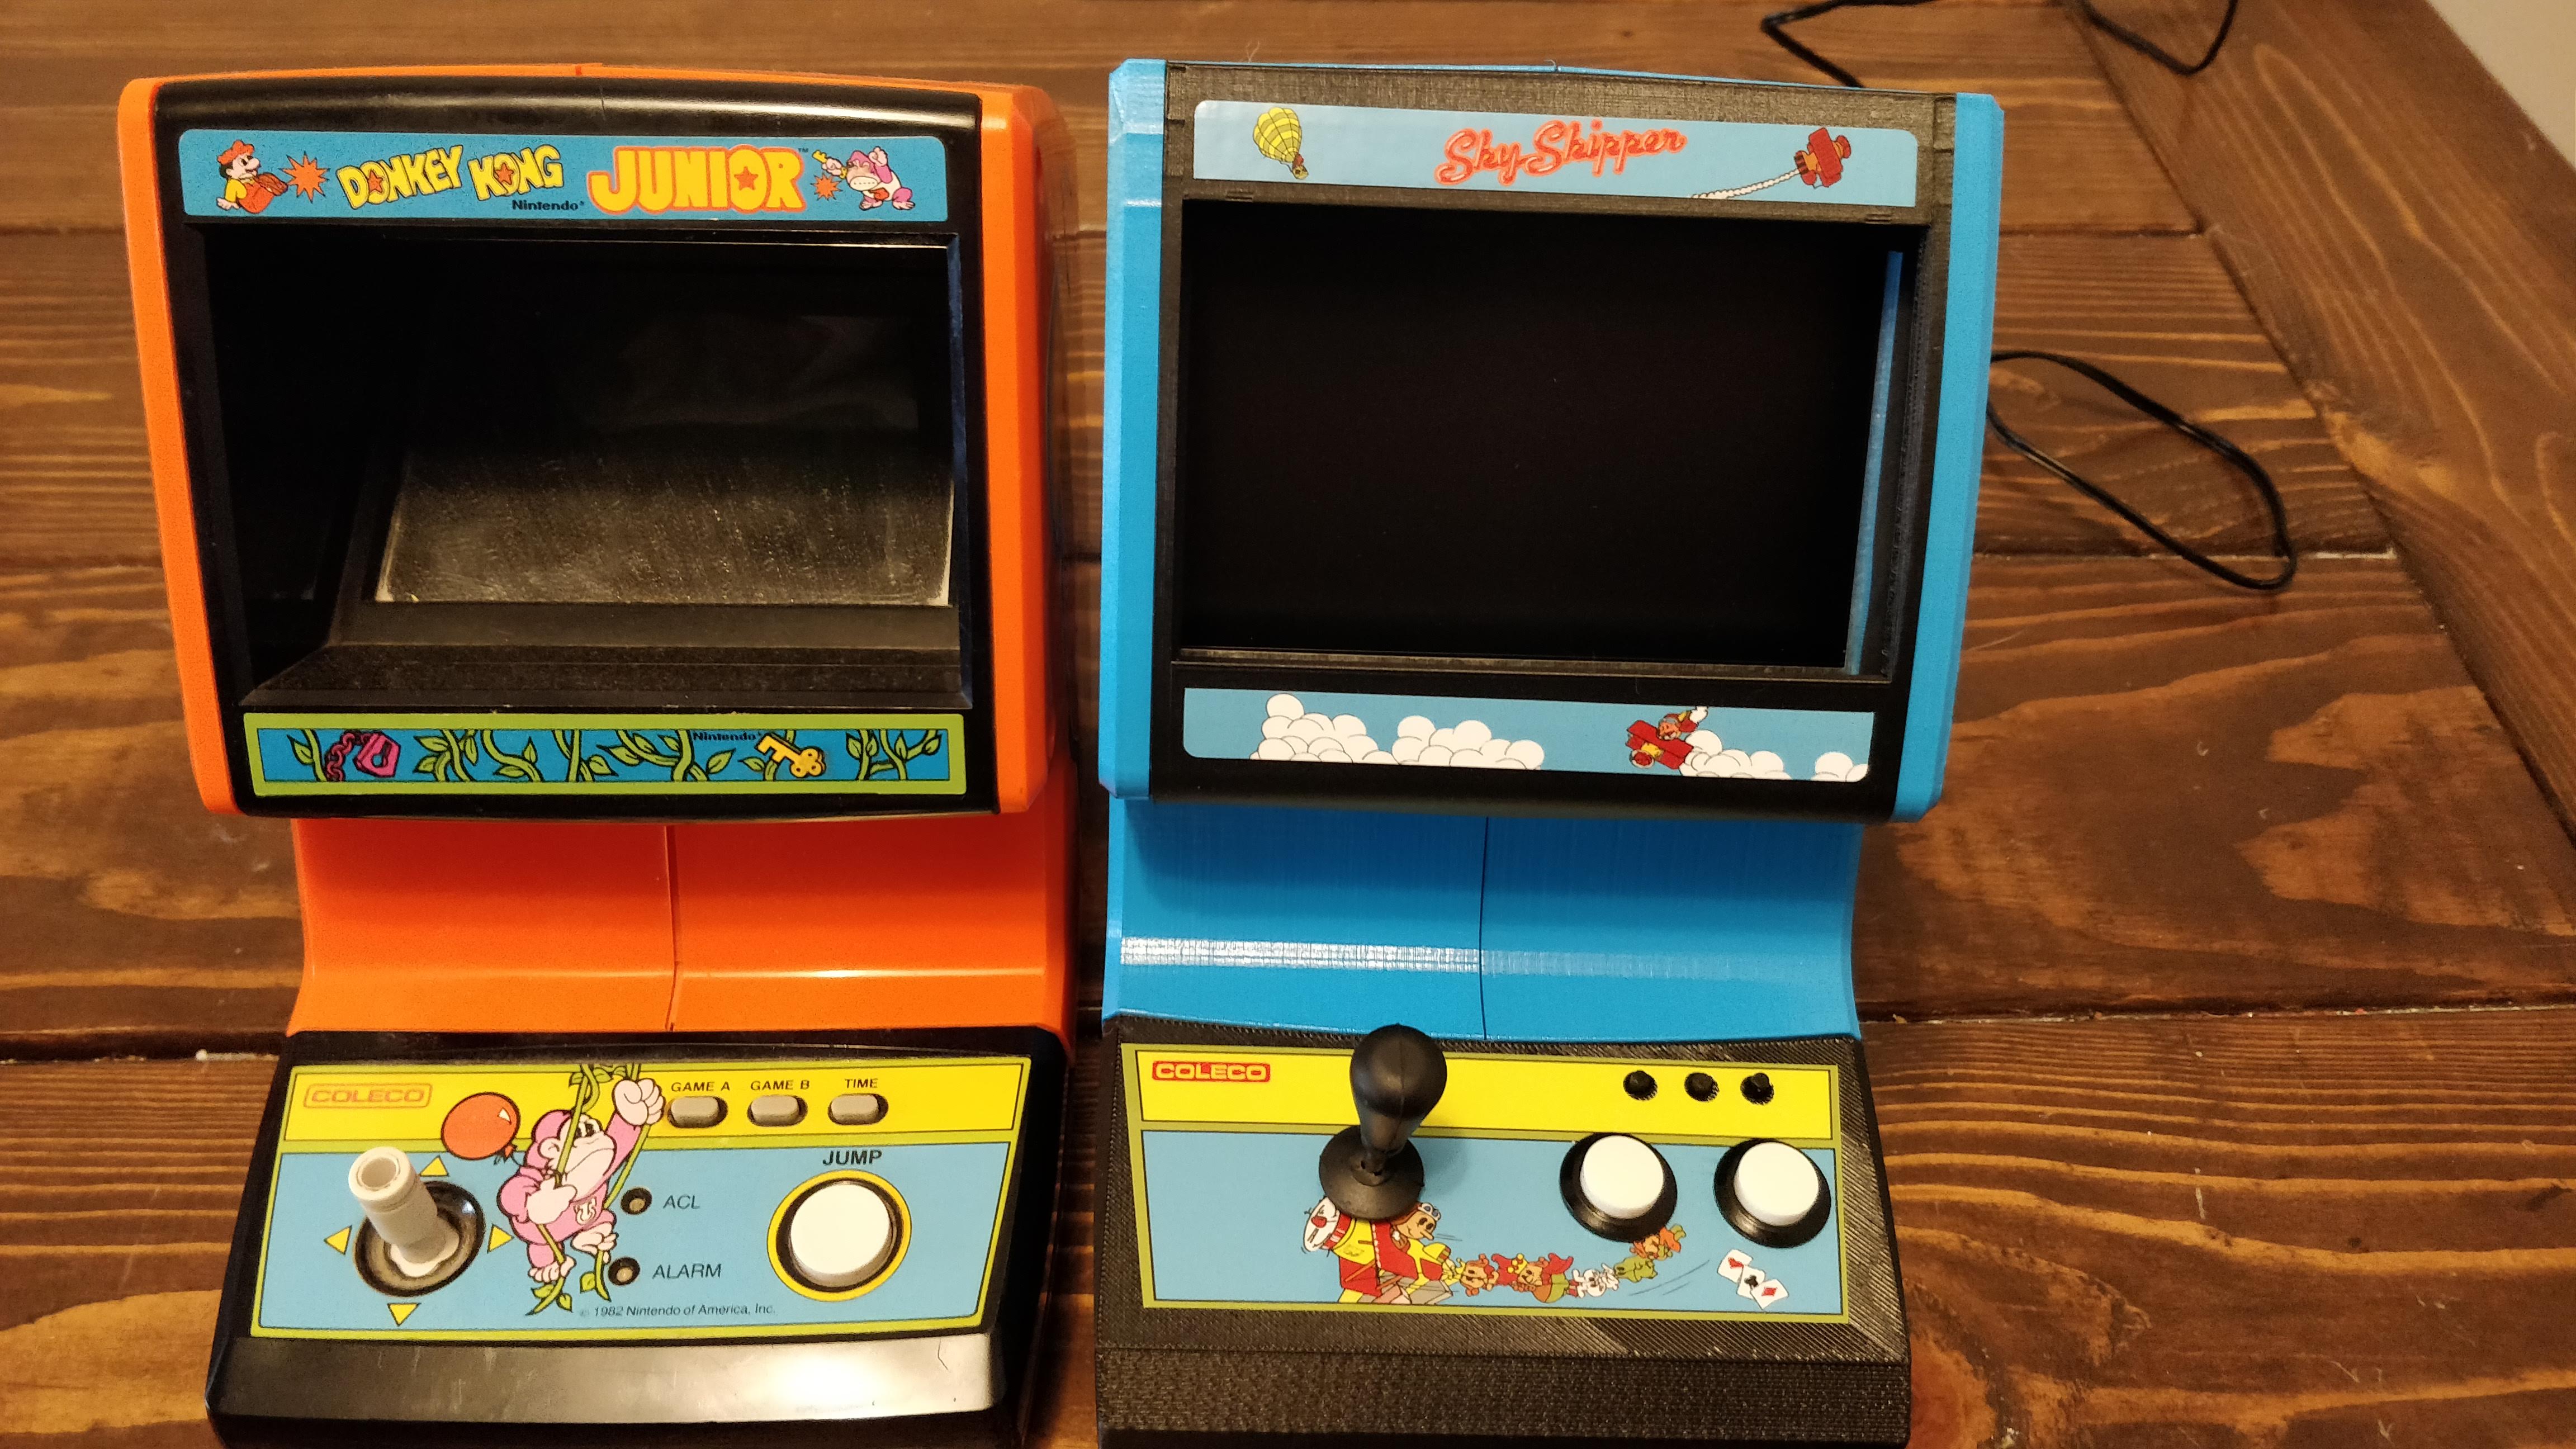
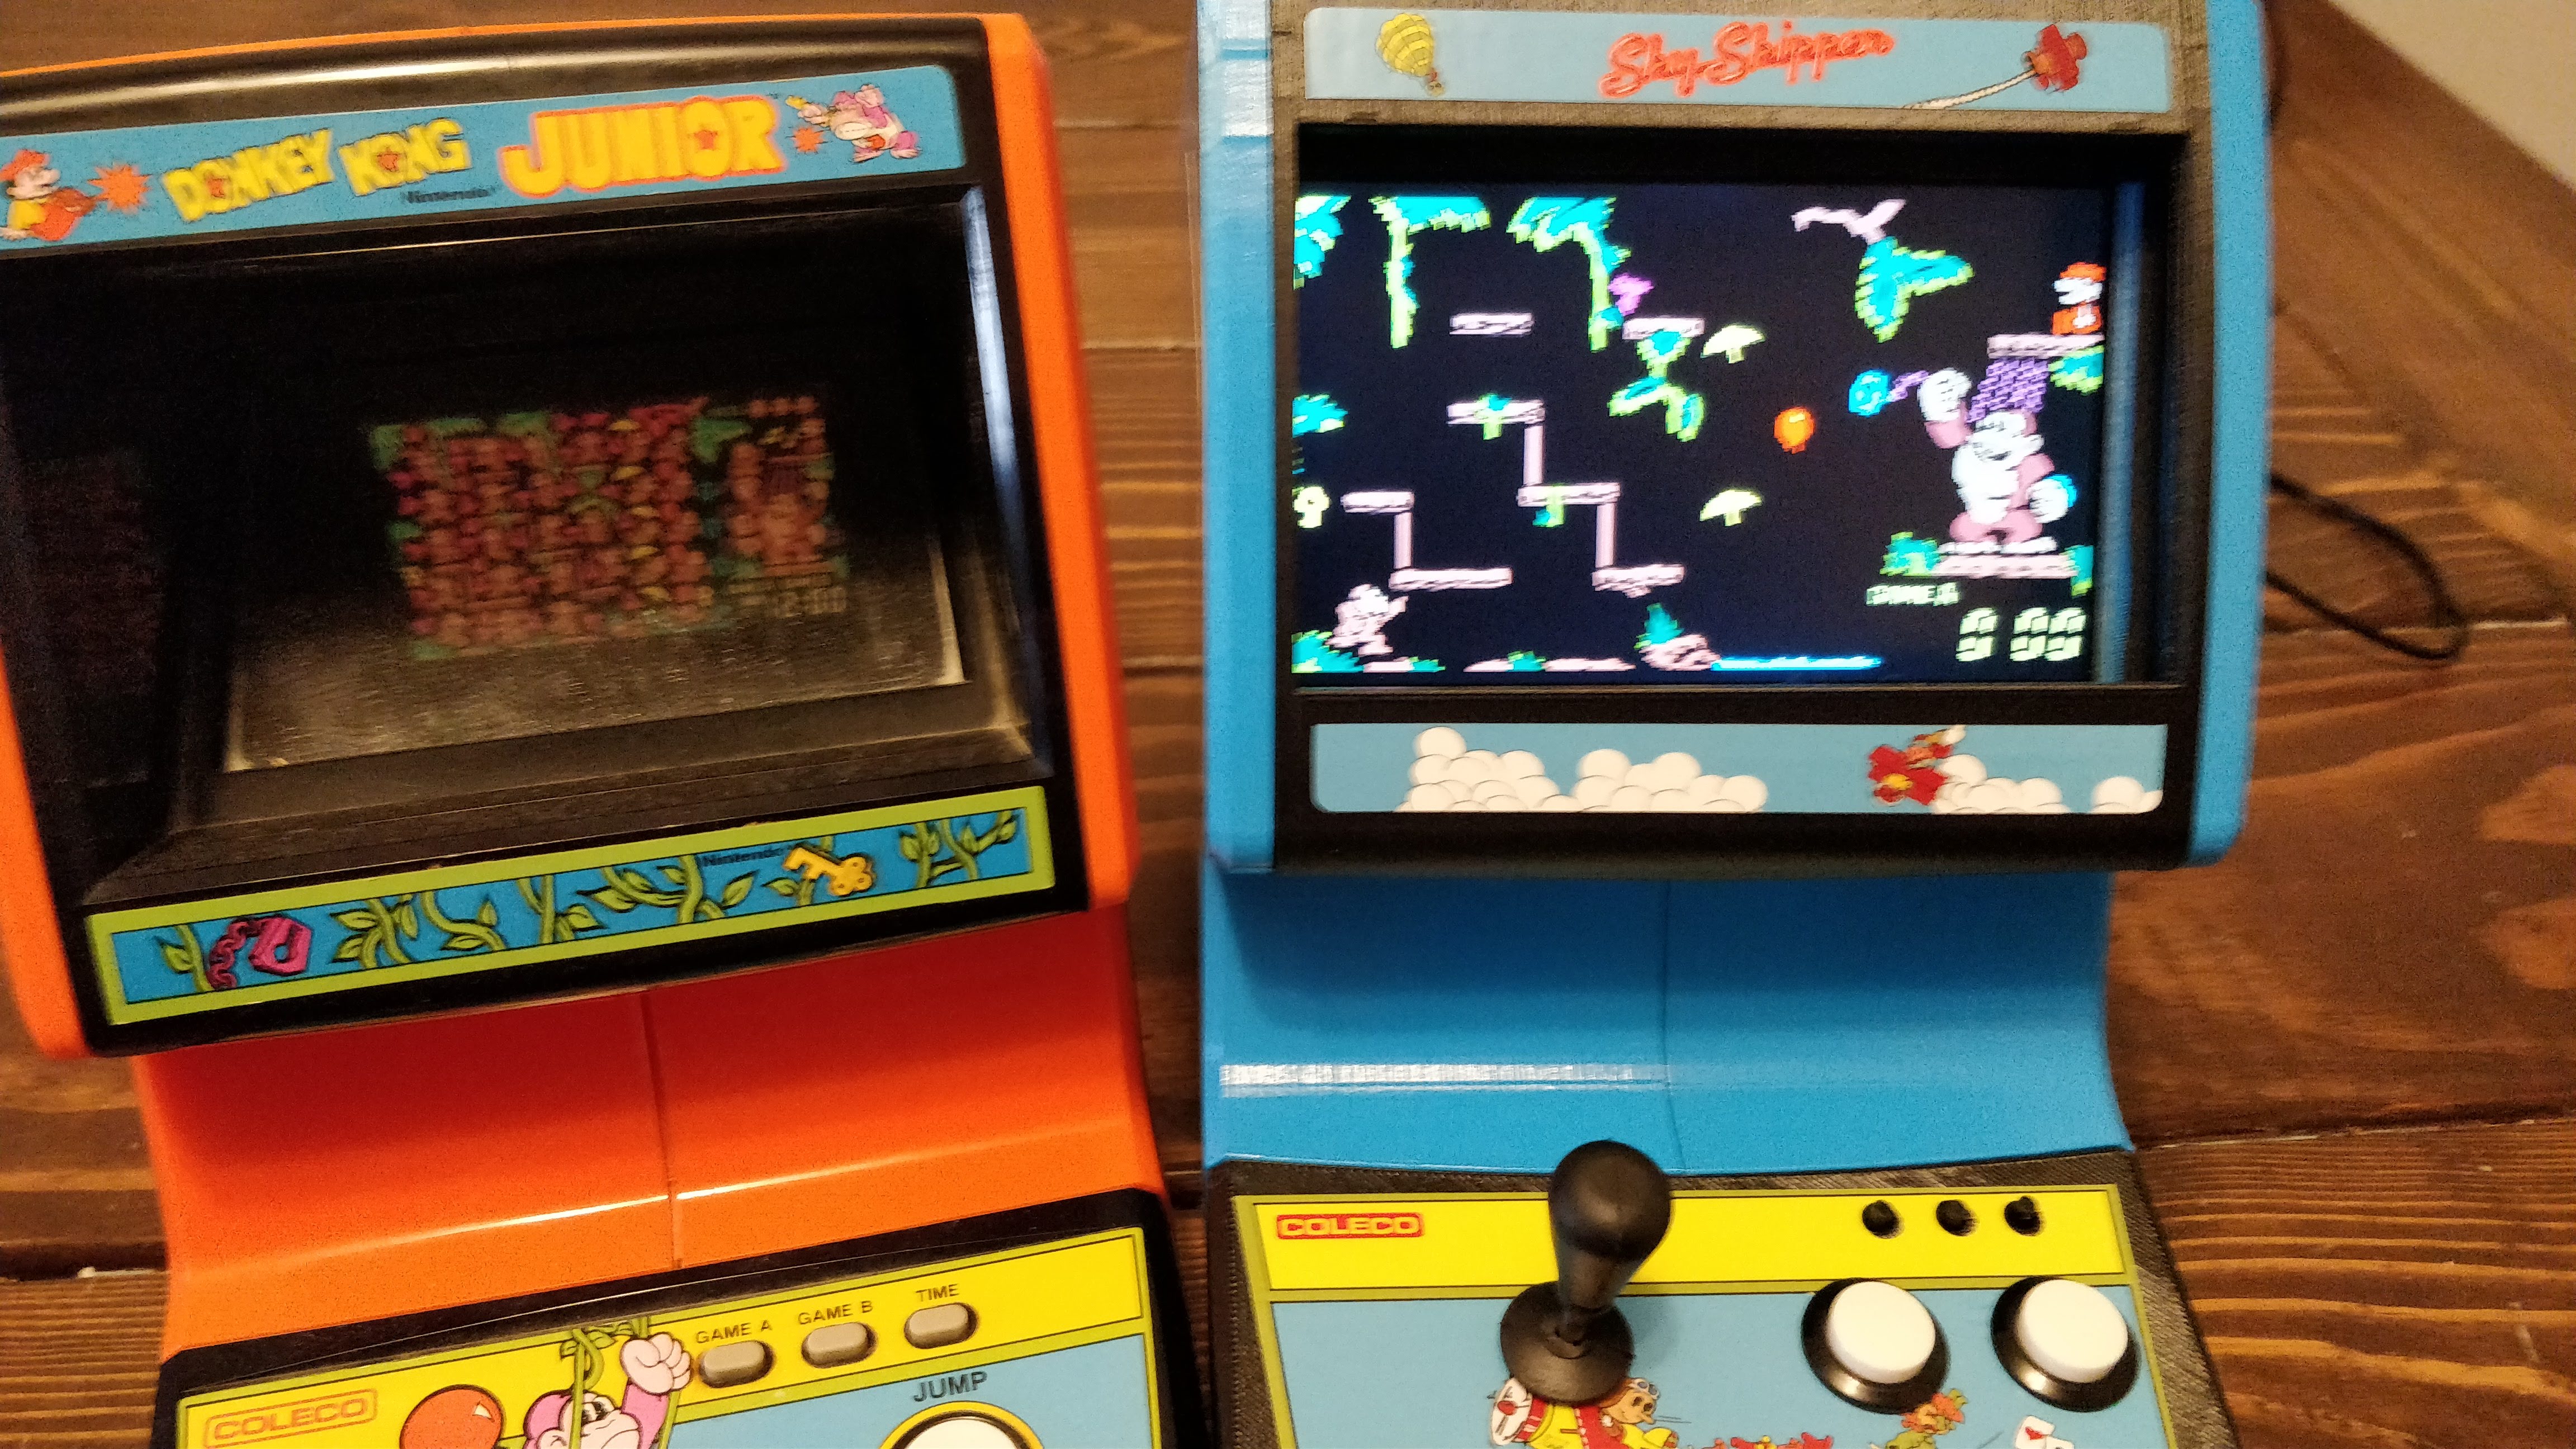
Another project is finished! This one is meant to mimic the Coleco Tabletop Donkey Kong Jr. game (which itself is mimicking the Game and Watch Tabletop games from Nintendo). It’s time to see the Coleco Sky Skipper!
Funny enough, this is actual my first build using a Raspberry Pi. Be sure to read all my other posts for some of the introduction stuff to that.
How and why did I pick sky skipper? Well, this game will most replicate the Donkey Kong Jr game by Coleco, which meant it had to be Nintendo. I didn’t want it to be a Nintendo game that Coleco had already published of course (eliminating DK, DK Jr.). I didn’t want it to be a Nintendo game that their Game and Watch series covered either (eliminating Popeye, Mario Bros, and many more).
I also needed it to be a game that the older versions of MAME on Raspberry Pi could play. I wouldn’t be programming a custom game for this one.
Skyskipper was one of the few choices left! It’s horizontal, by Nintendo, and neither Coleco or Nintendo ever made a handheld version of it. It’s also playable in MAME 0.78
The original Skyskipper cabinets are Donkey Kong blue so I found a spray paint that’s very similar. The rest of the pieces are black.
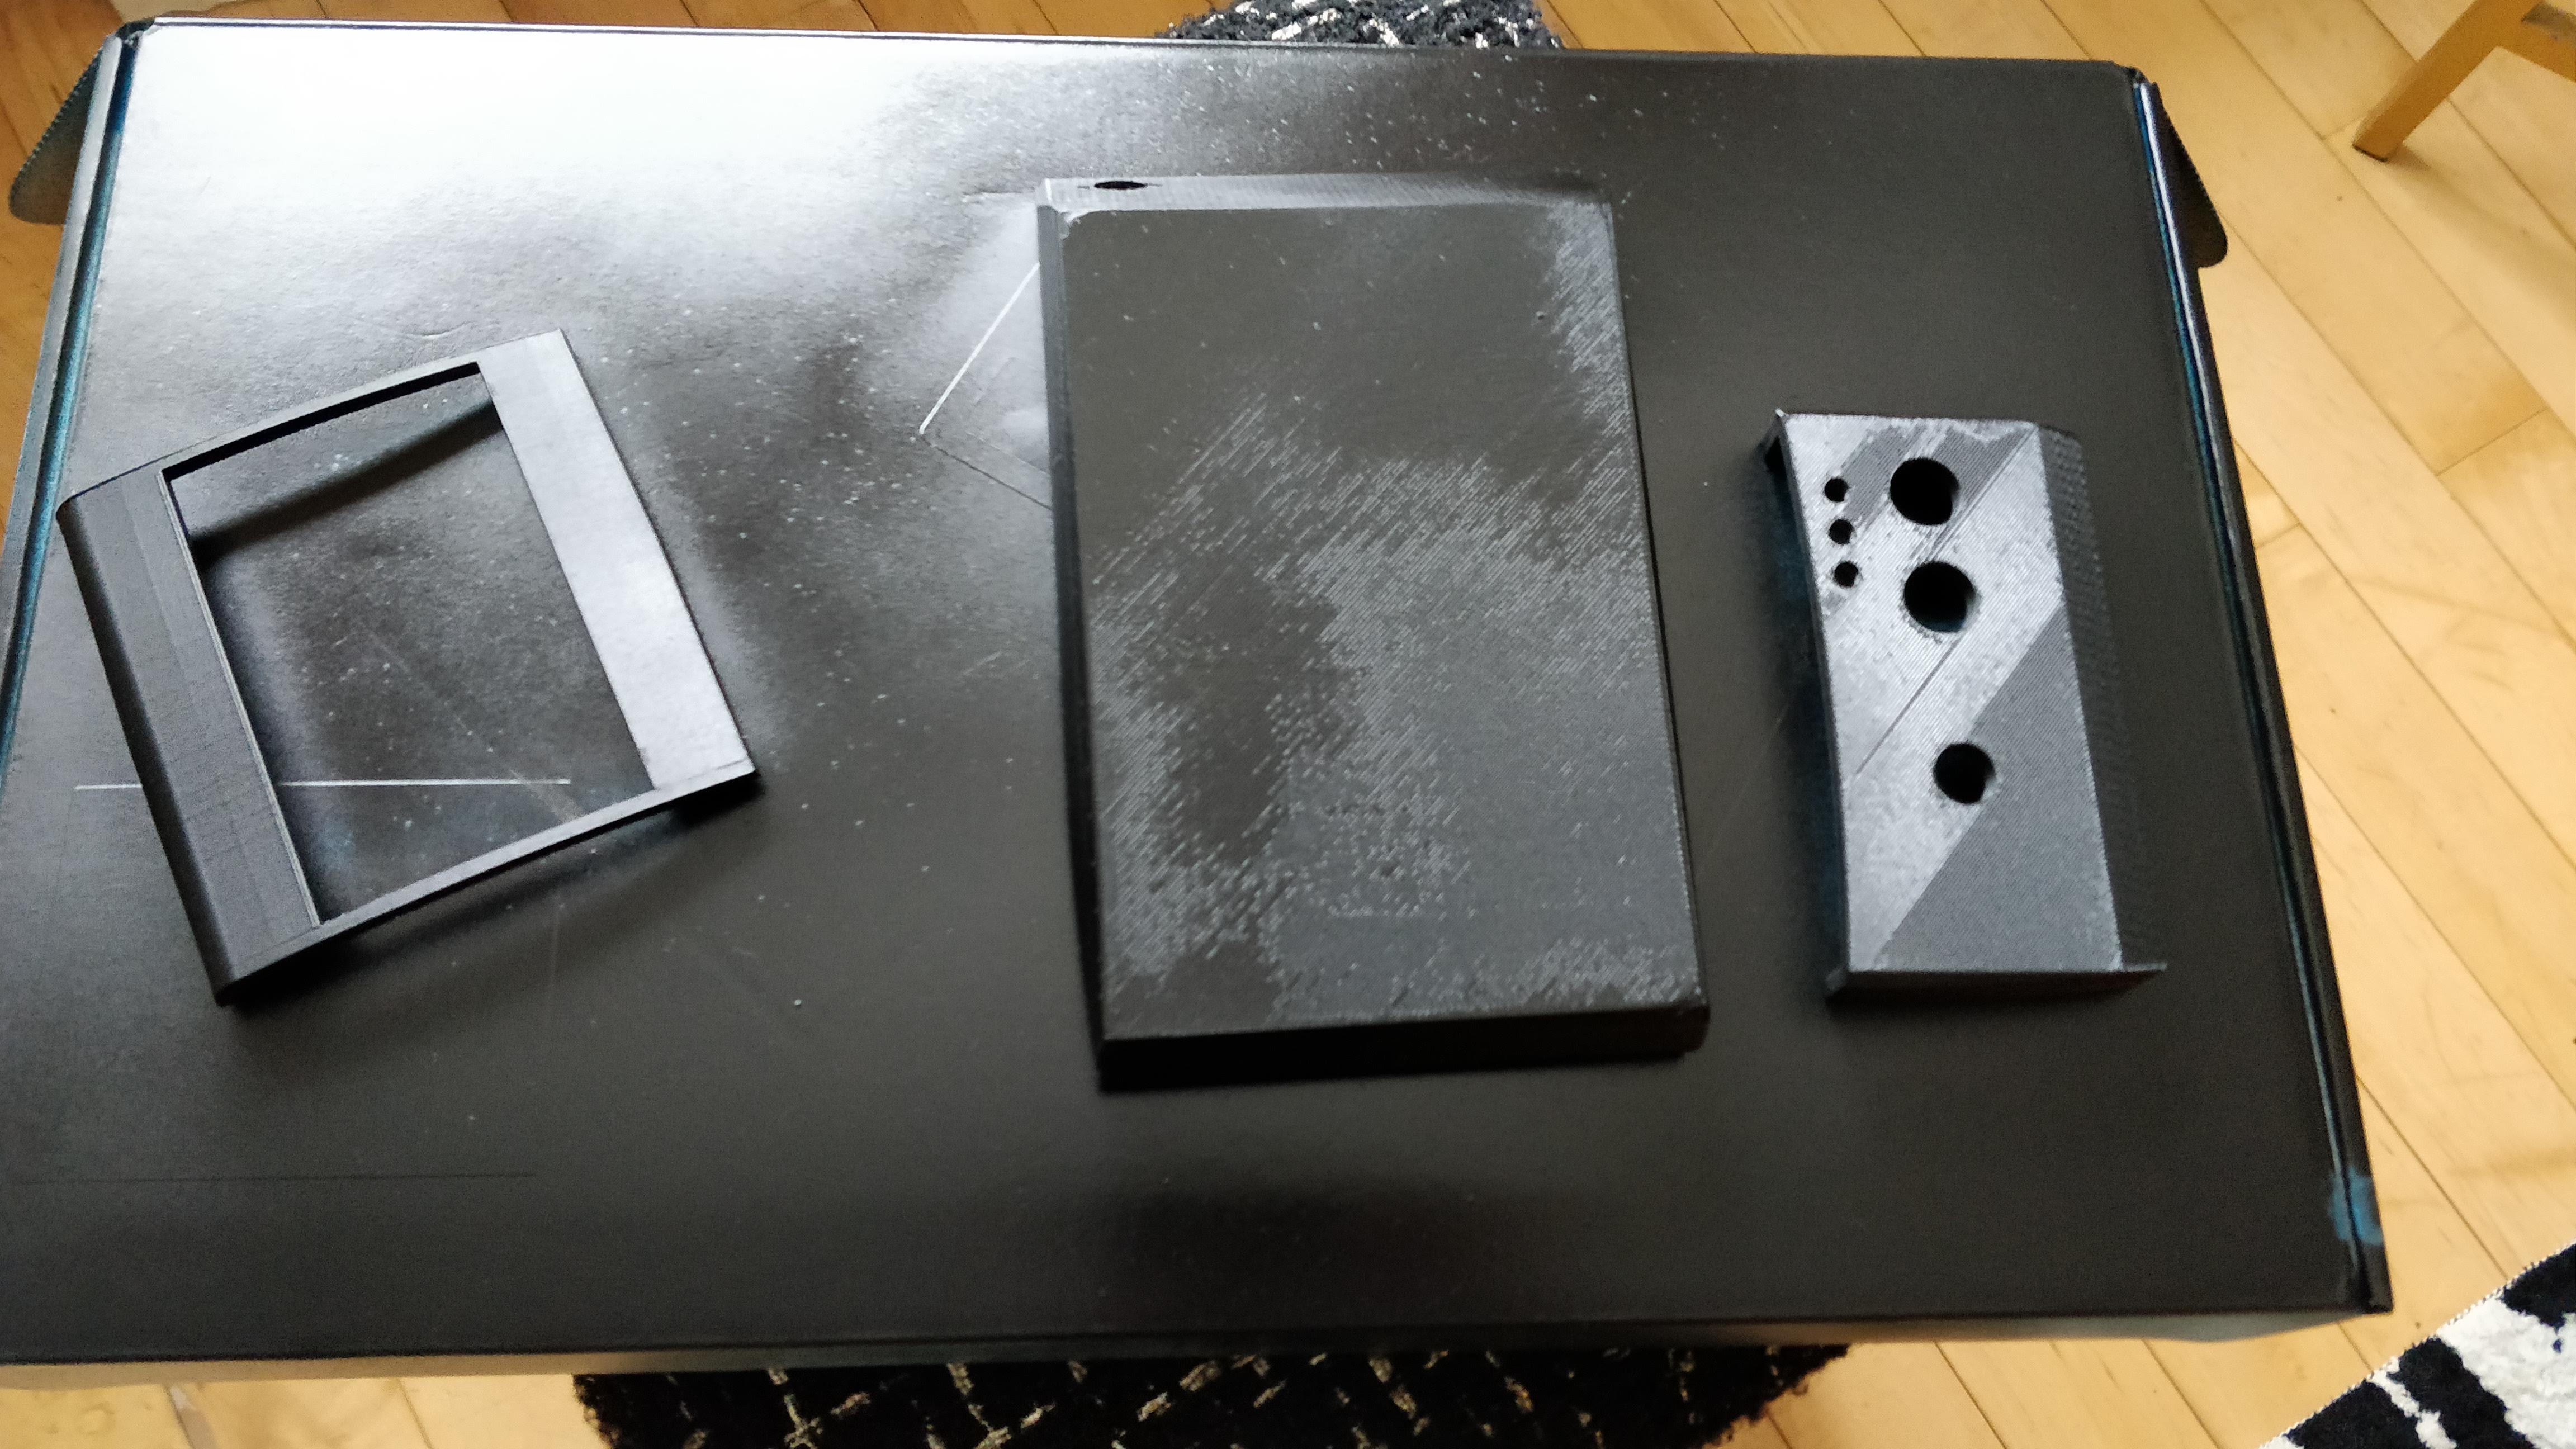
Black Pieces
Painted Shell
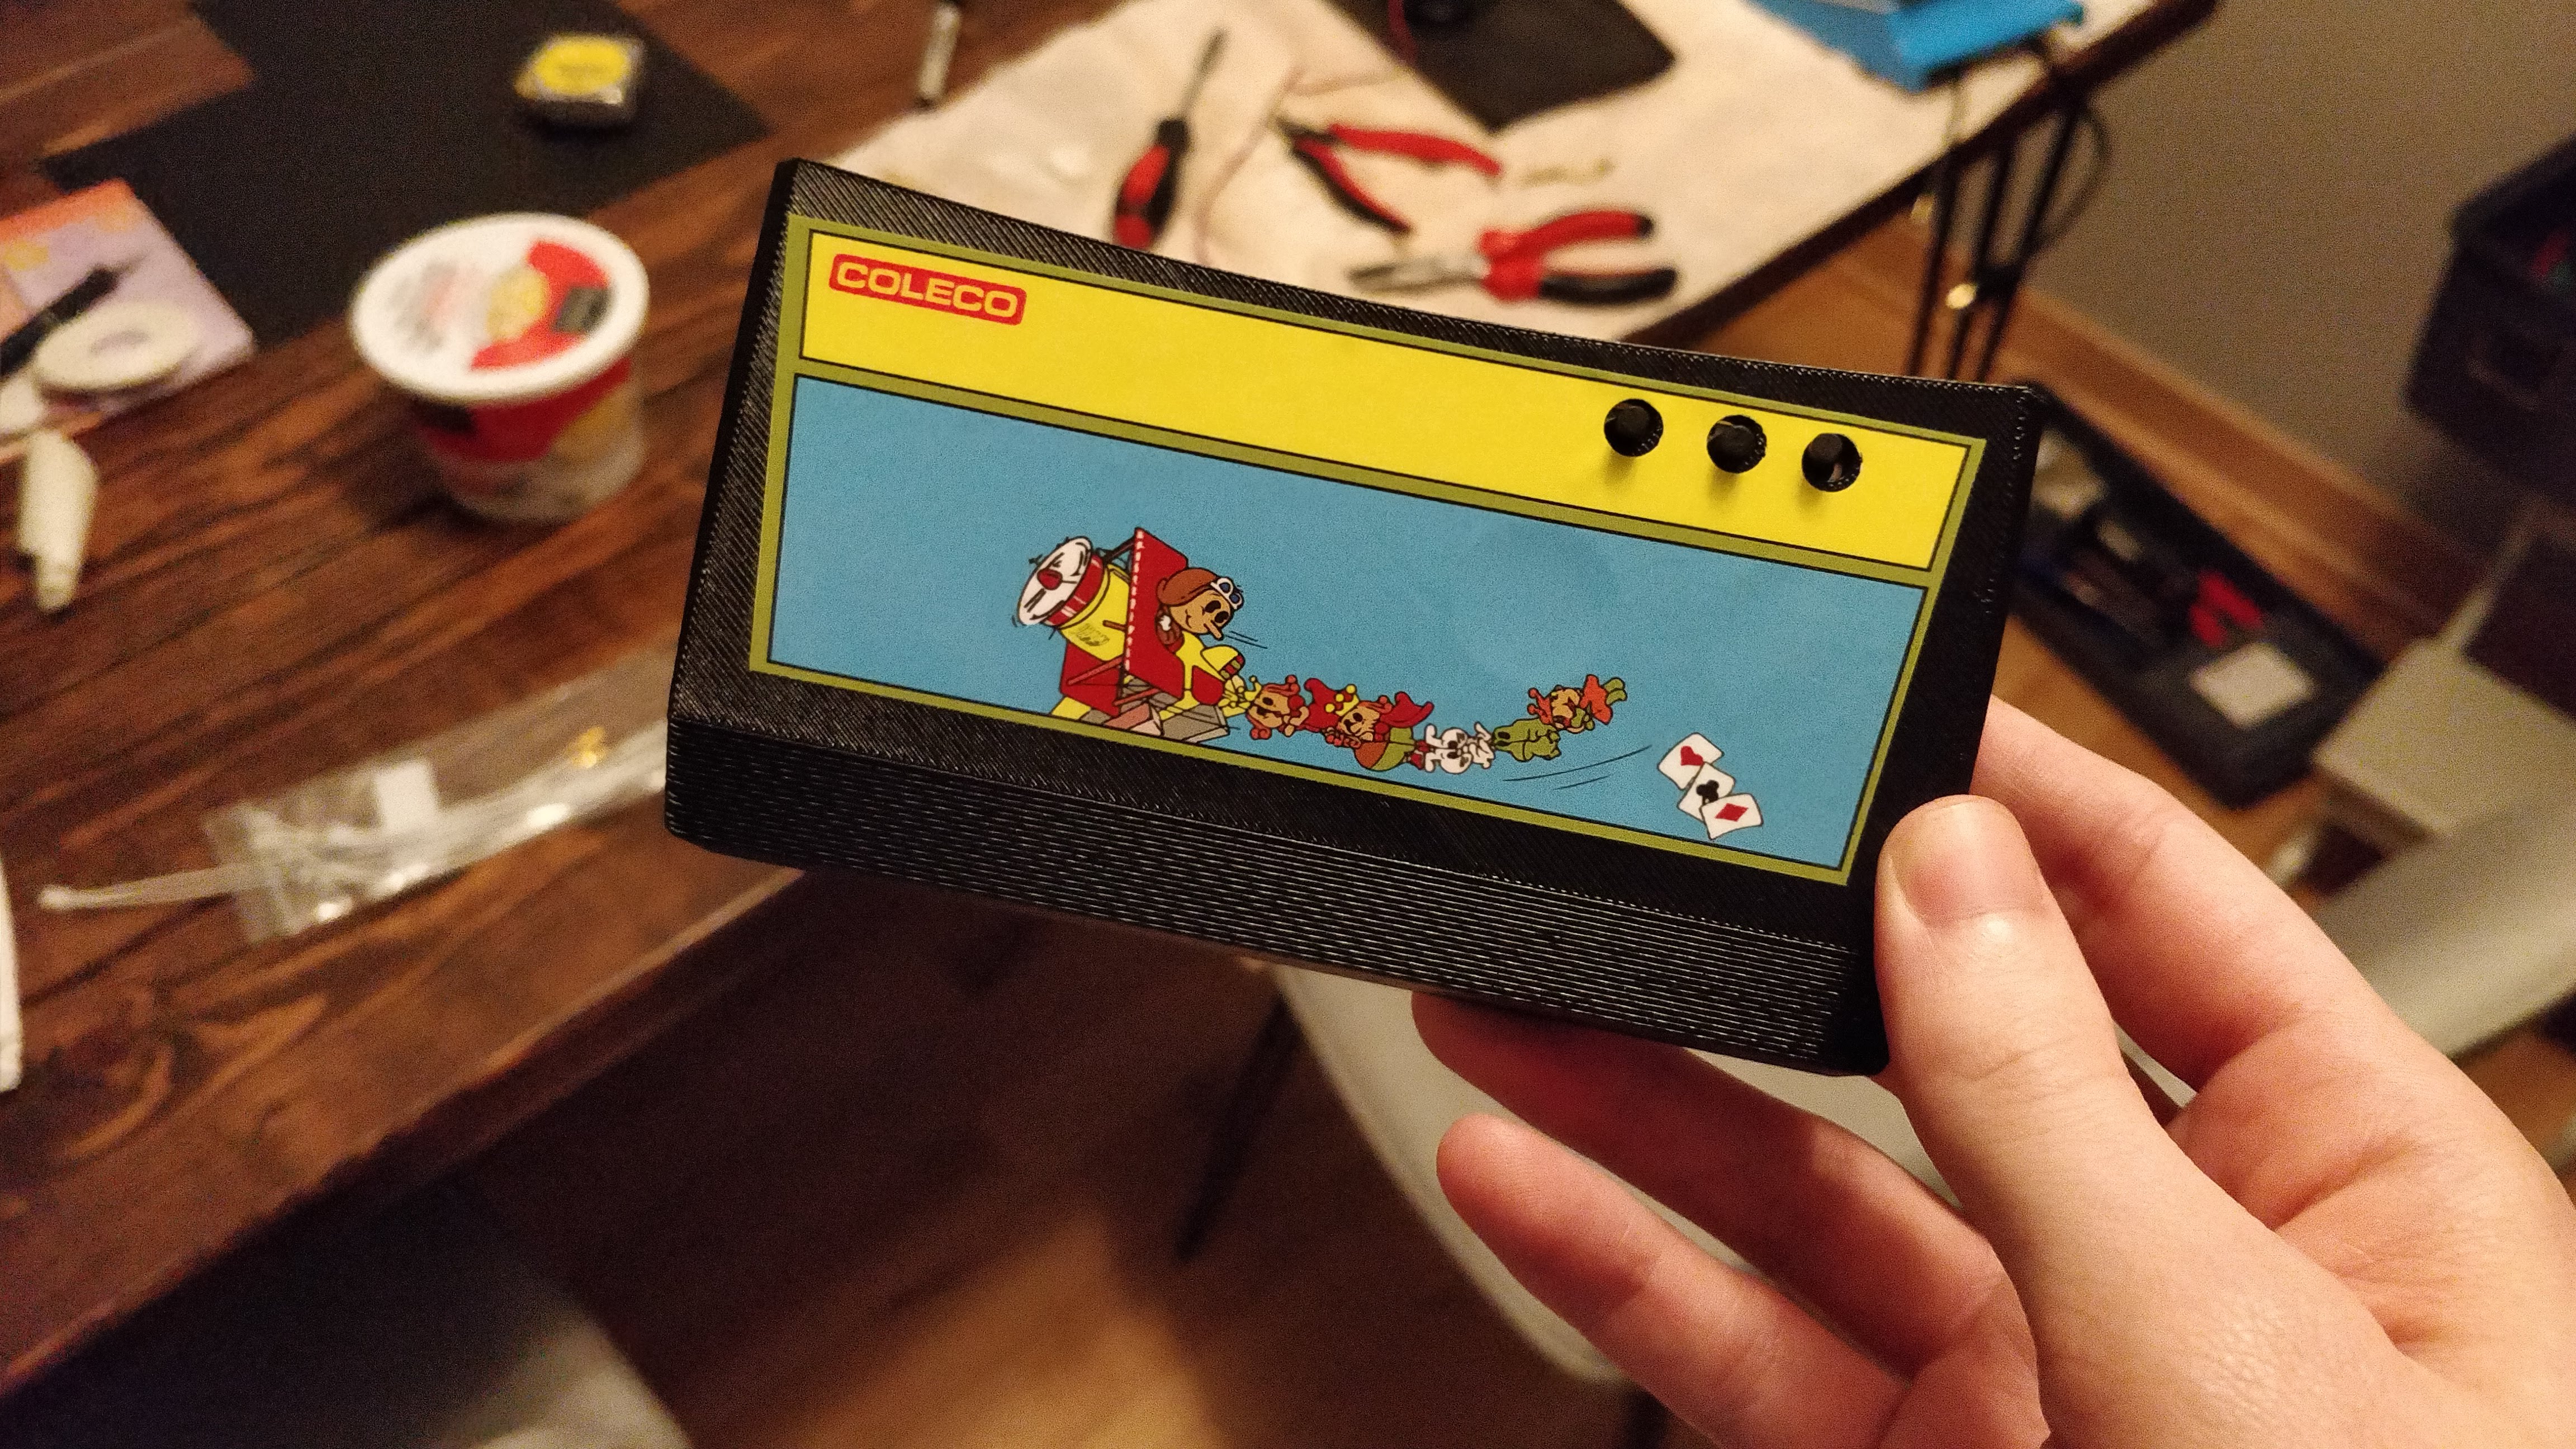
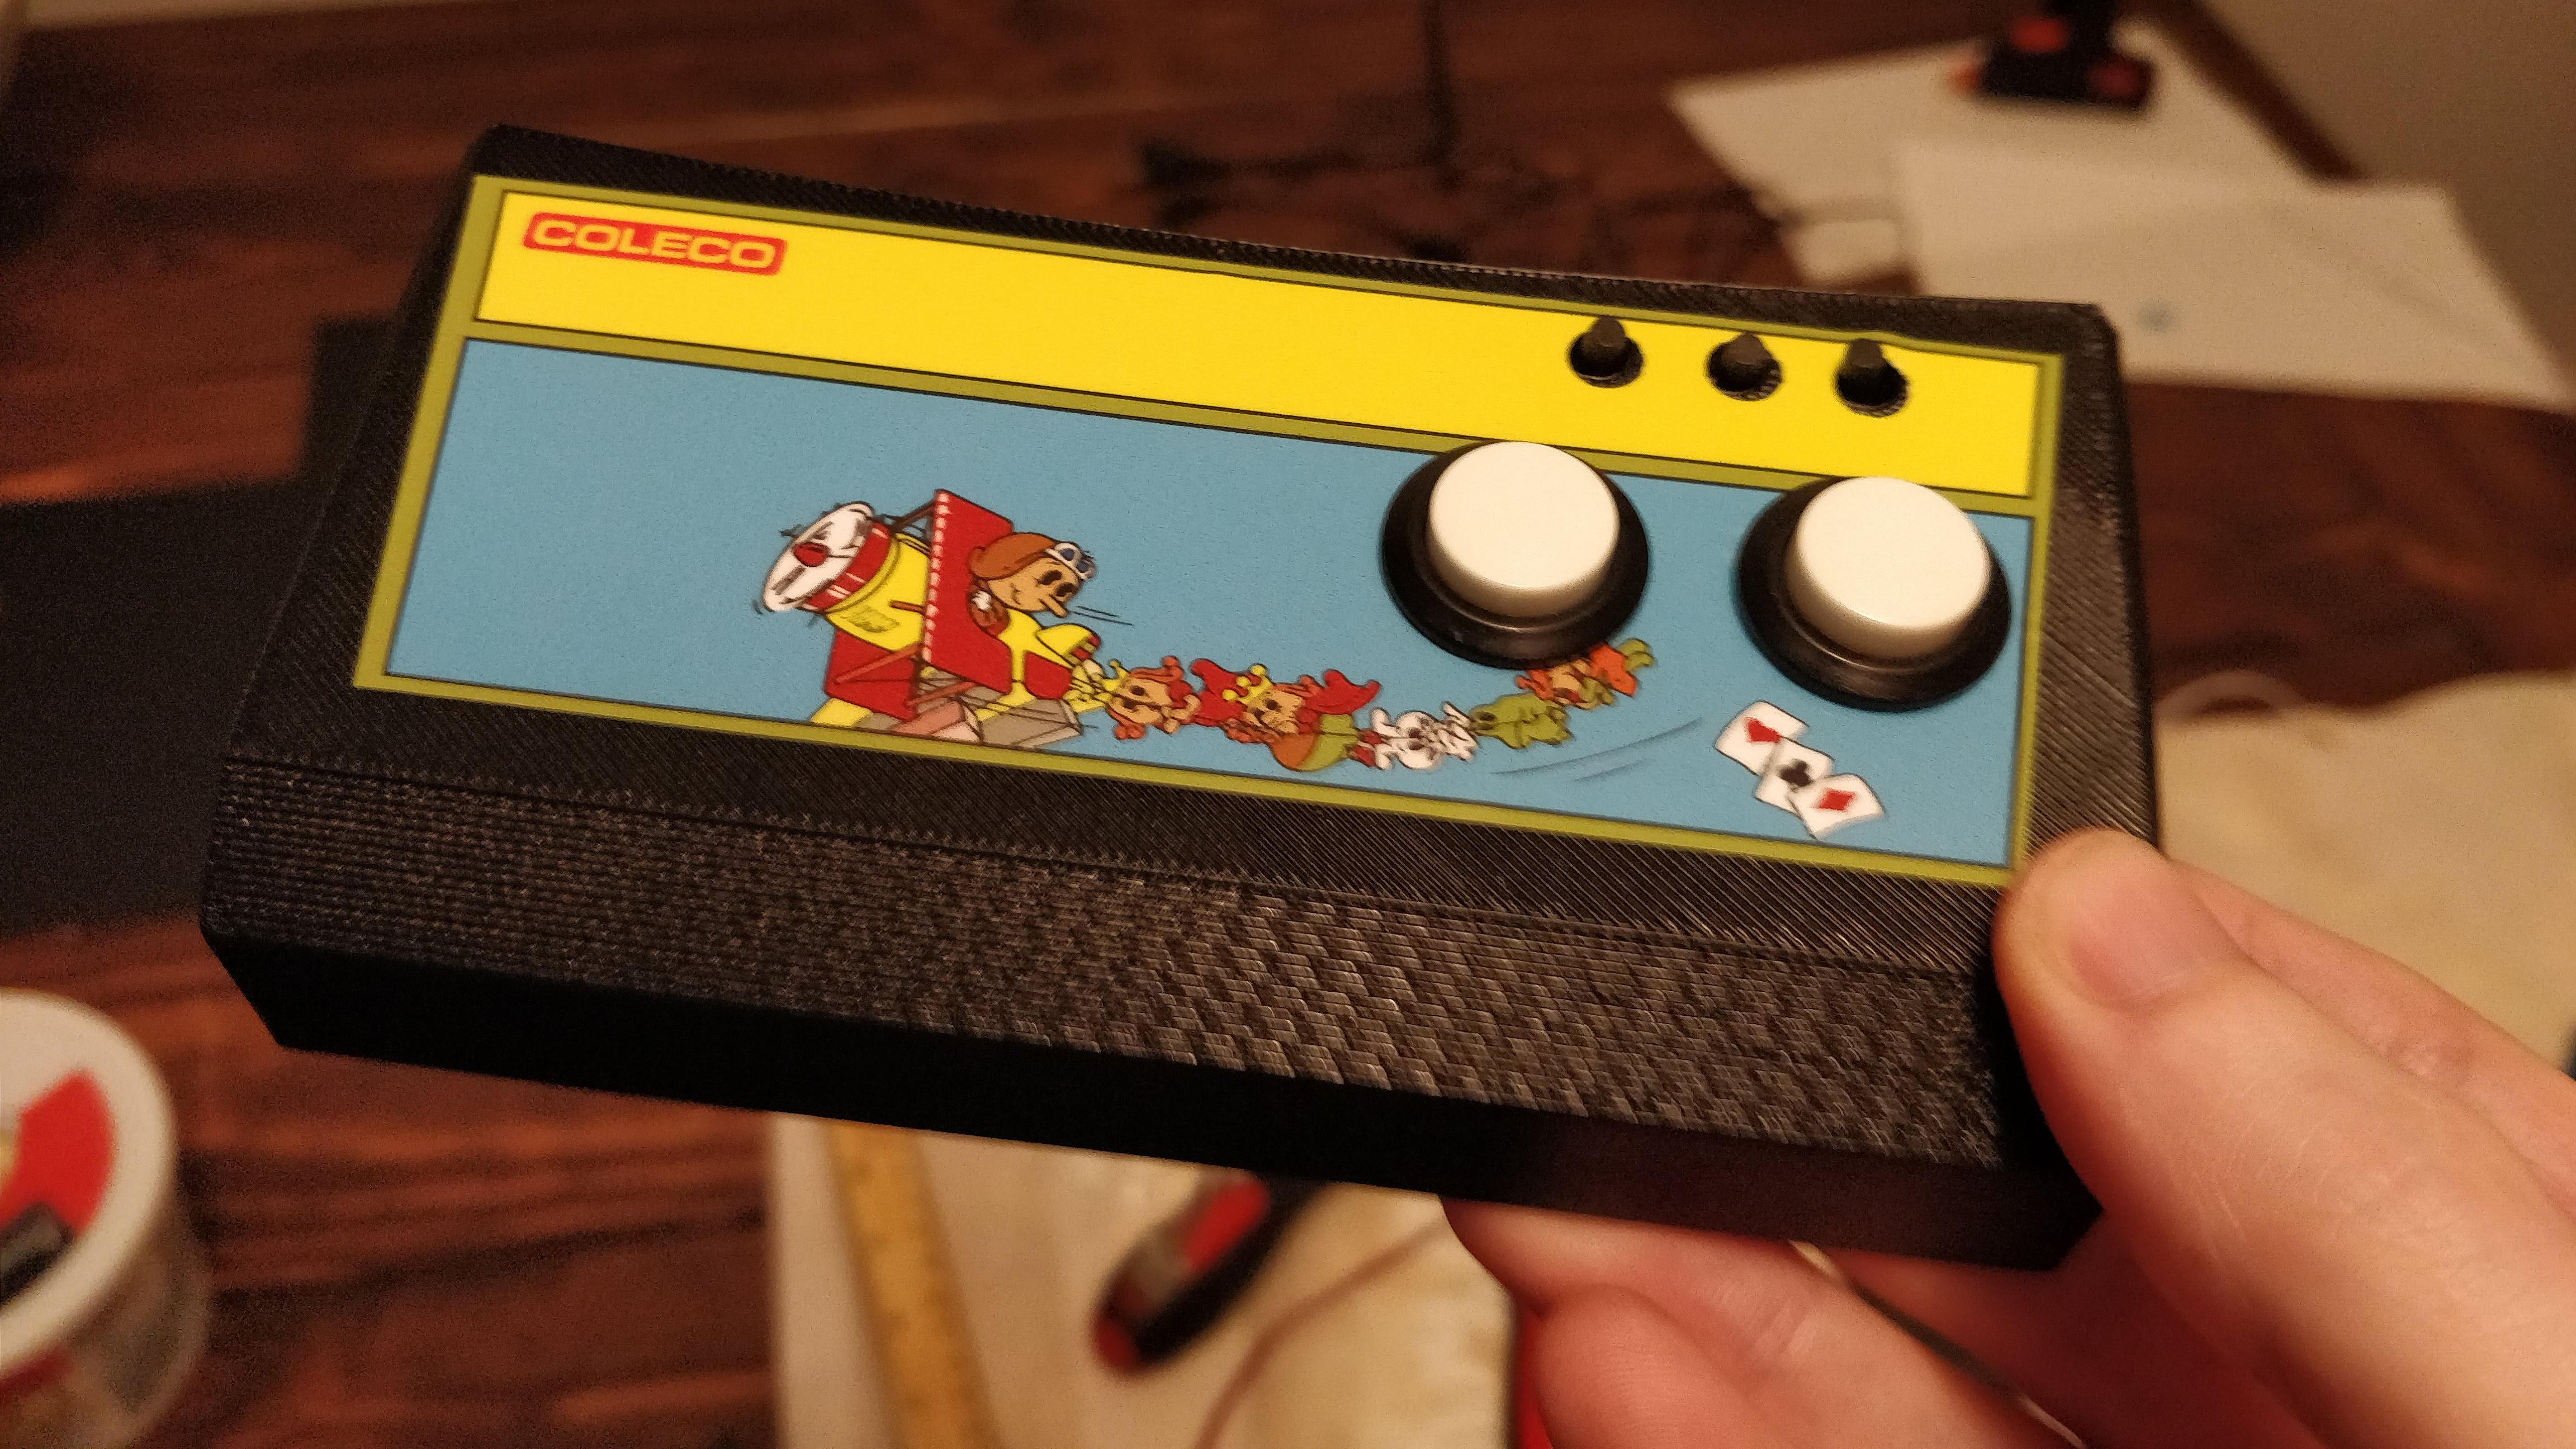
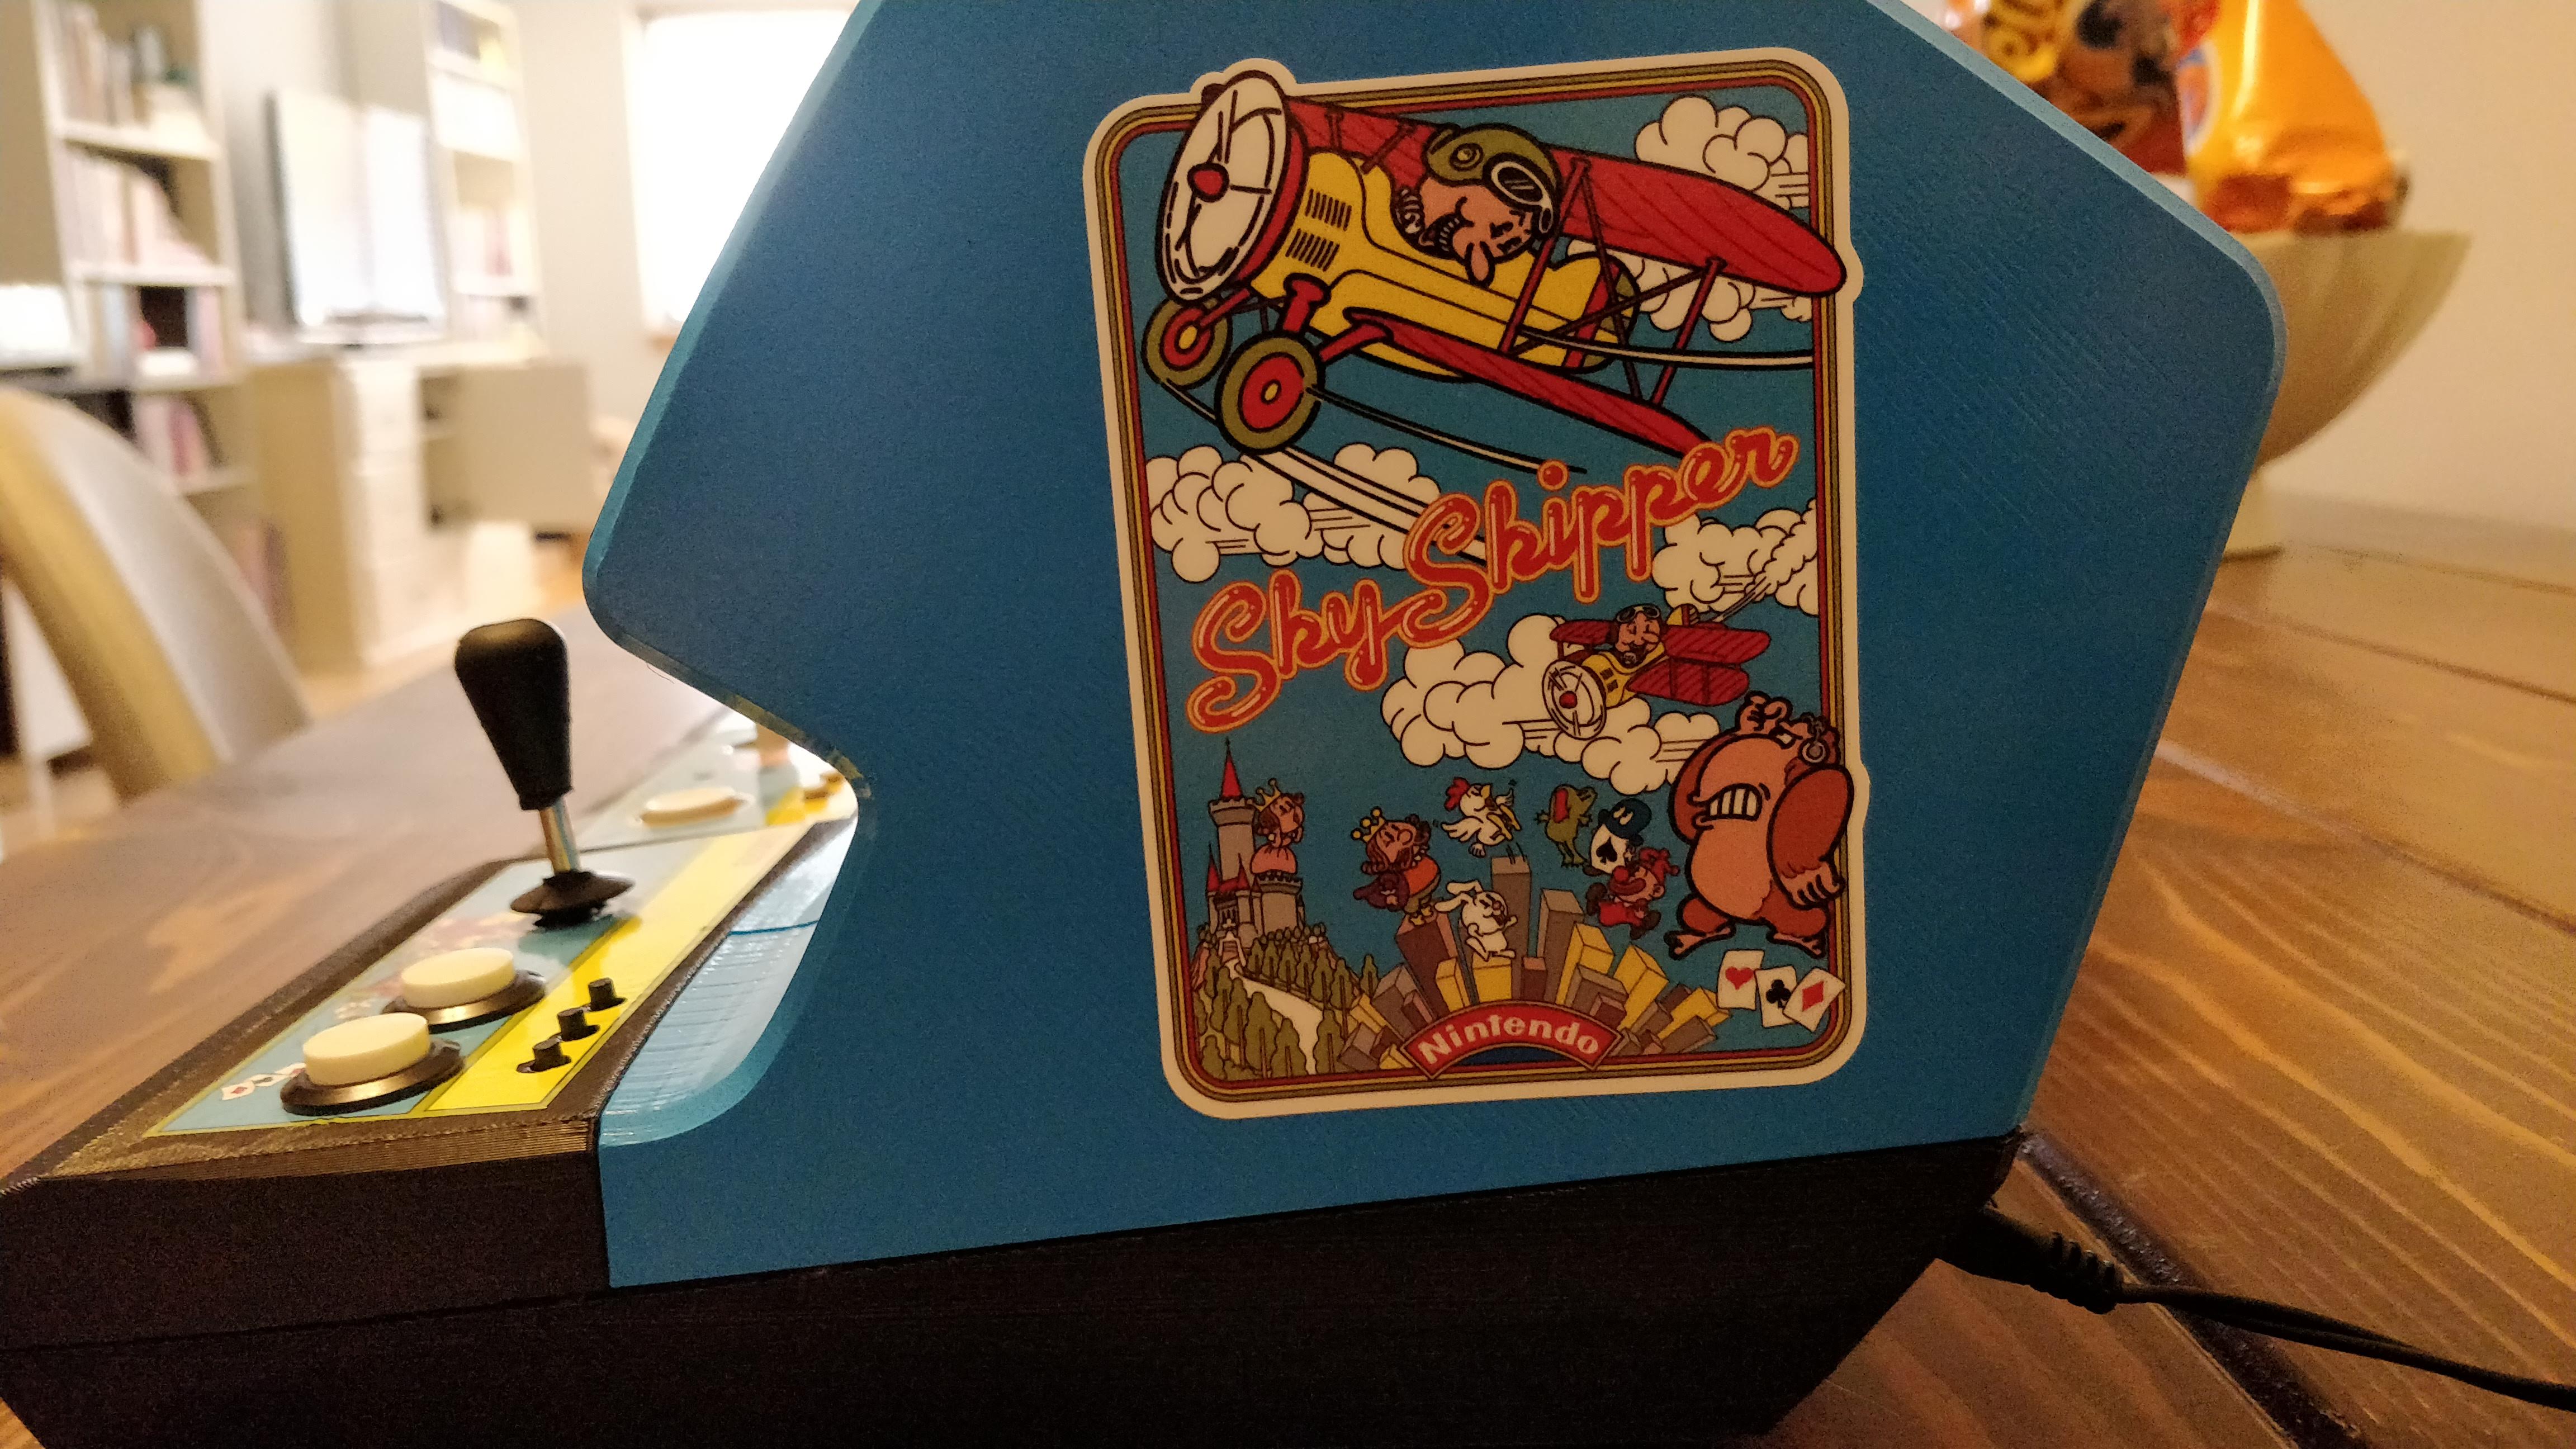
Coleco Sky Skipper Artwork
The Coleco tabletop game actually has a fair amount of artwork on it, so I went the same route. I knew I’d want sideart, top bezel, bottom bezel, and control panel overlay. I used inspiration from the original cabinet as best I could.
This artwork is not widely available, since there is only one original cabinet left (and two rebuilt ones). That meant working from low rez photographs. That’s okay though – it’s small and the artwork on these machines was relatively simple.
I had the artwork printed by BYOAC forum member SlammedNiss. He has done all my miniature build artwork and it always comes out looking great and on high-quality material.
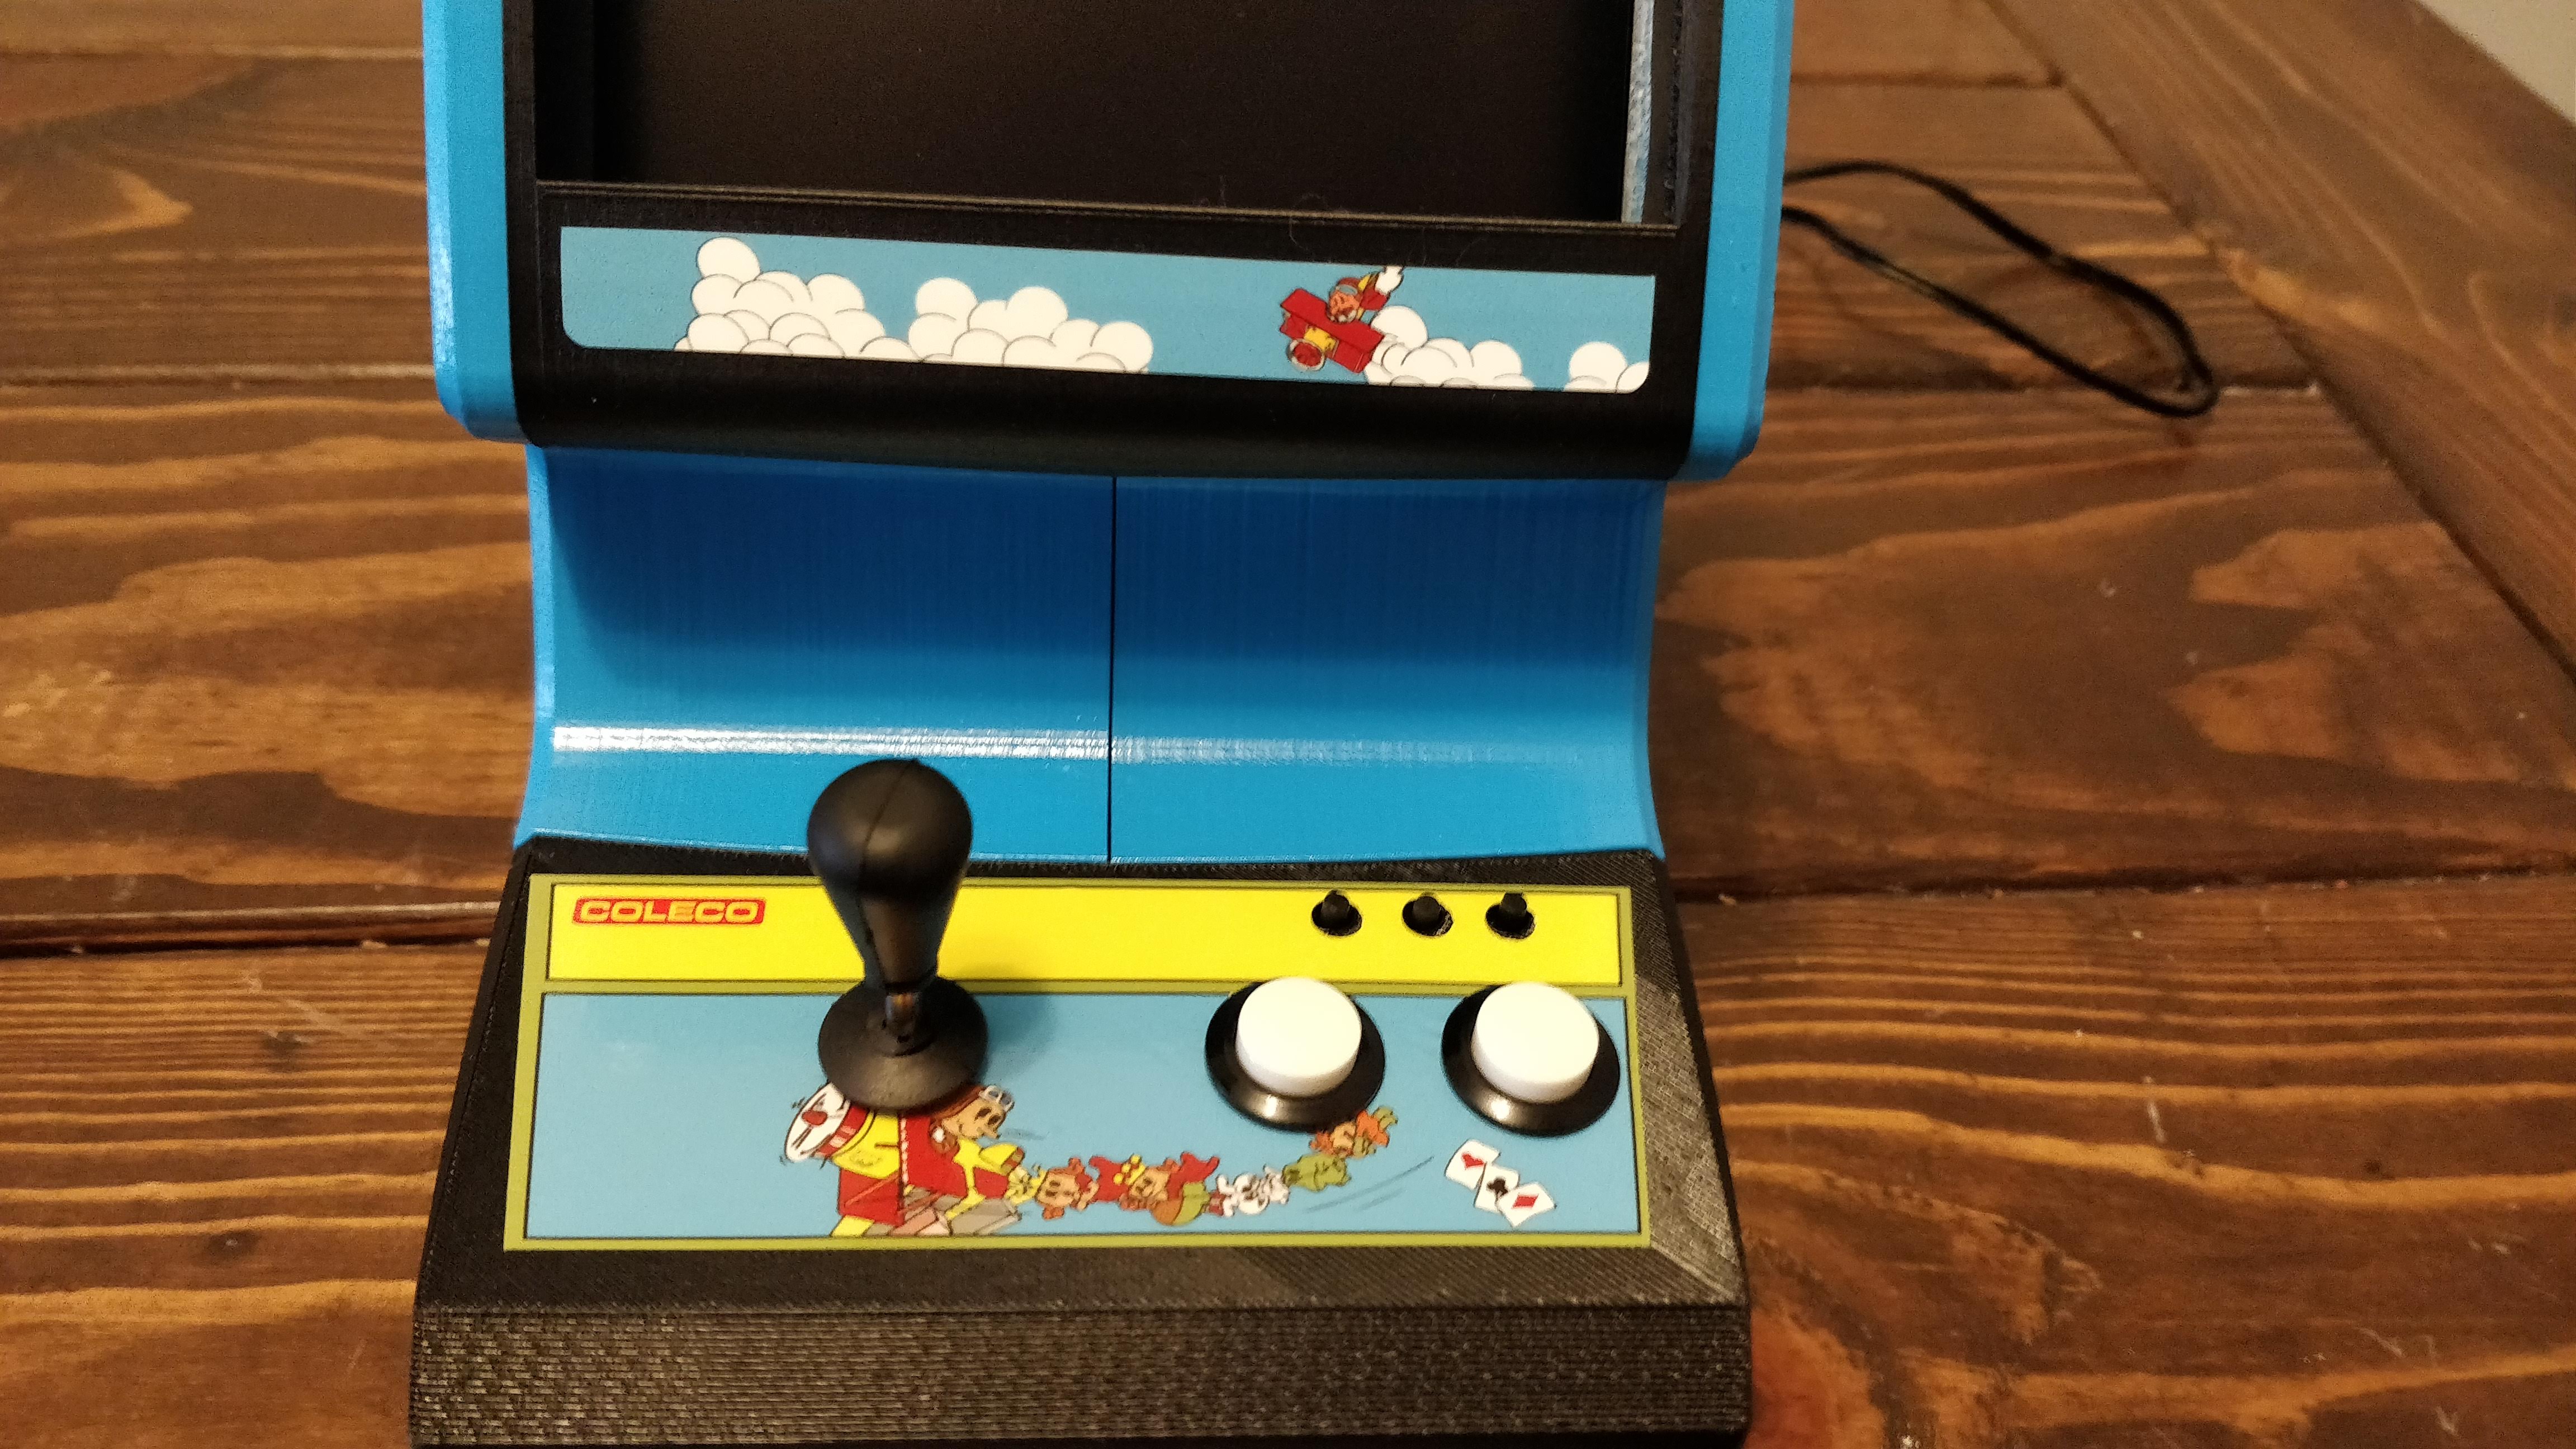
Coleco Sky Skipper Control Panel
Sky Skipper Control Panel
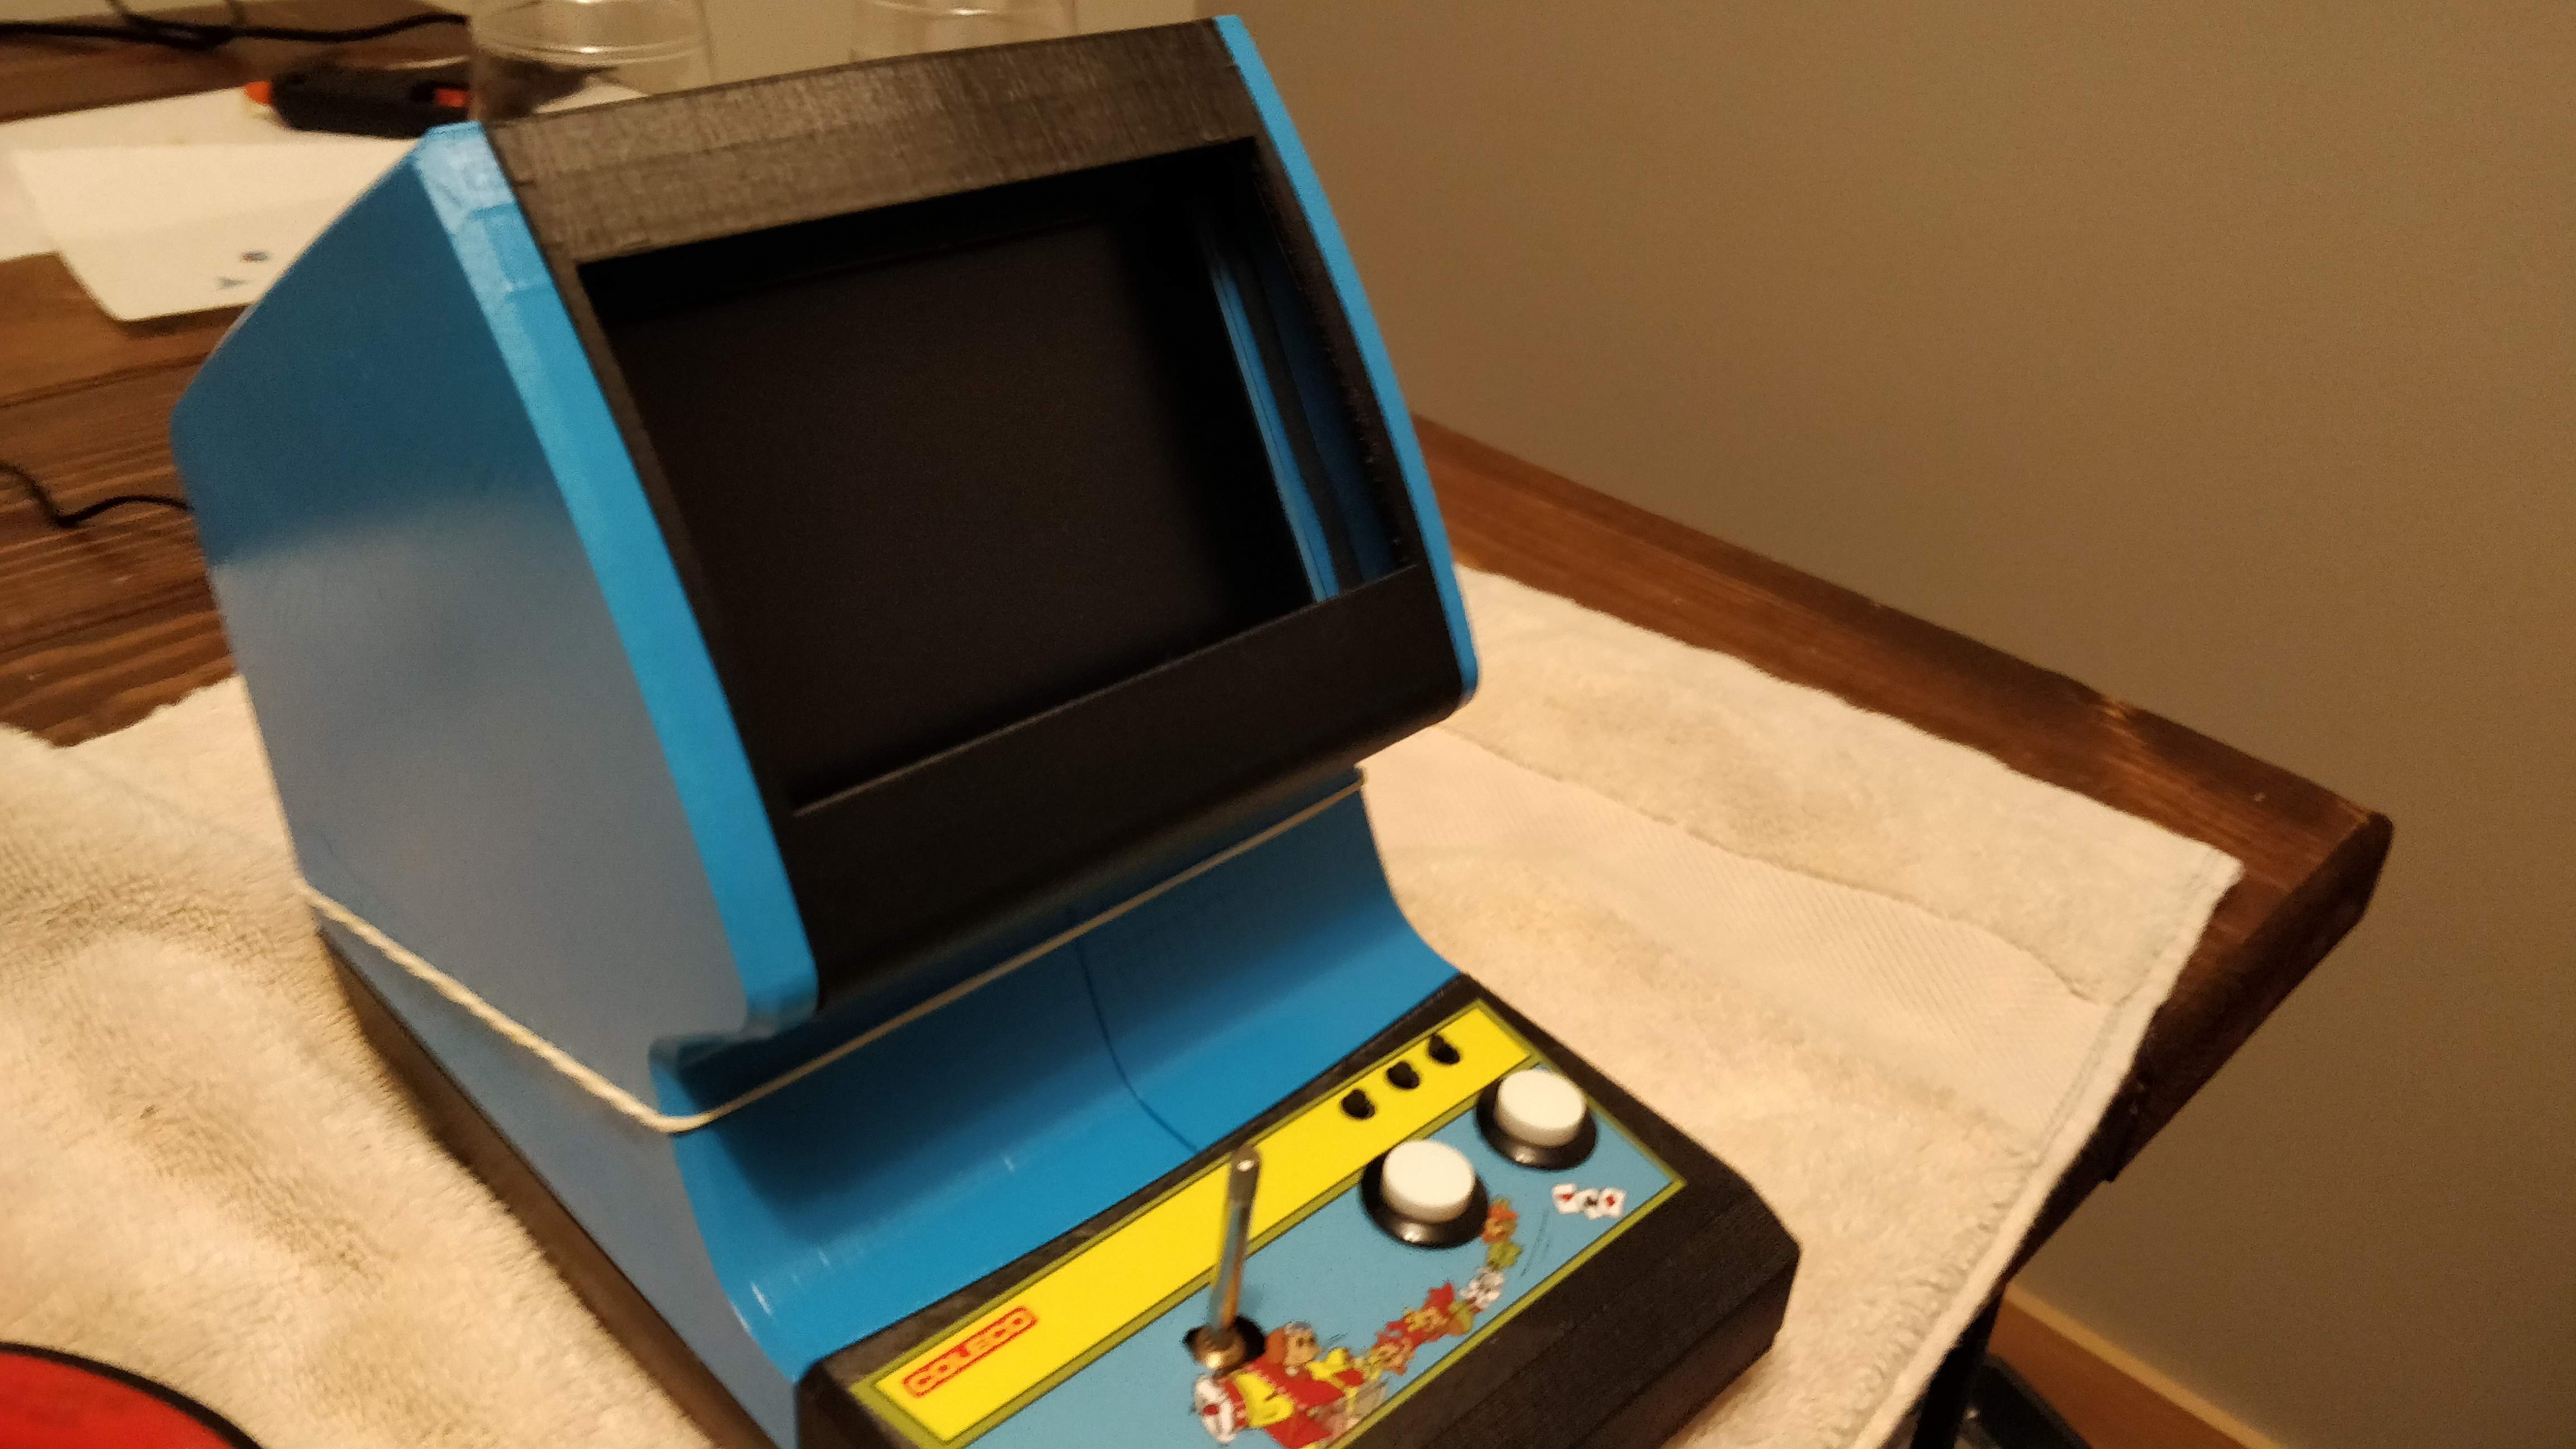
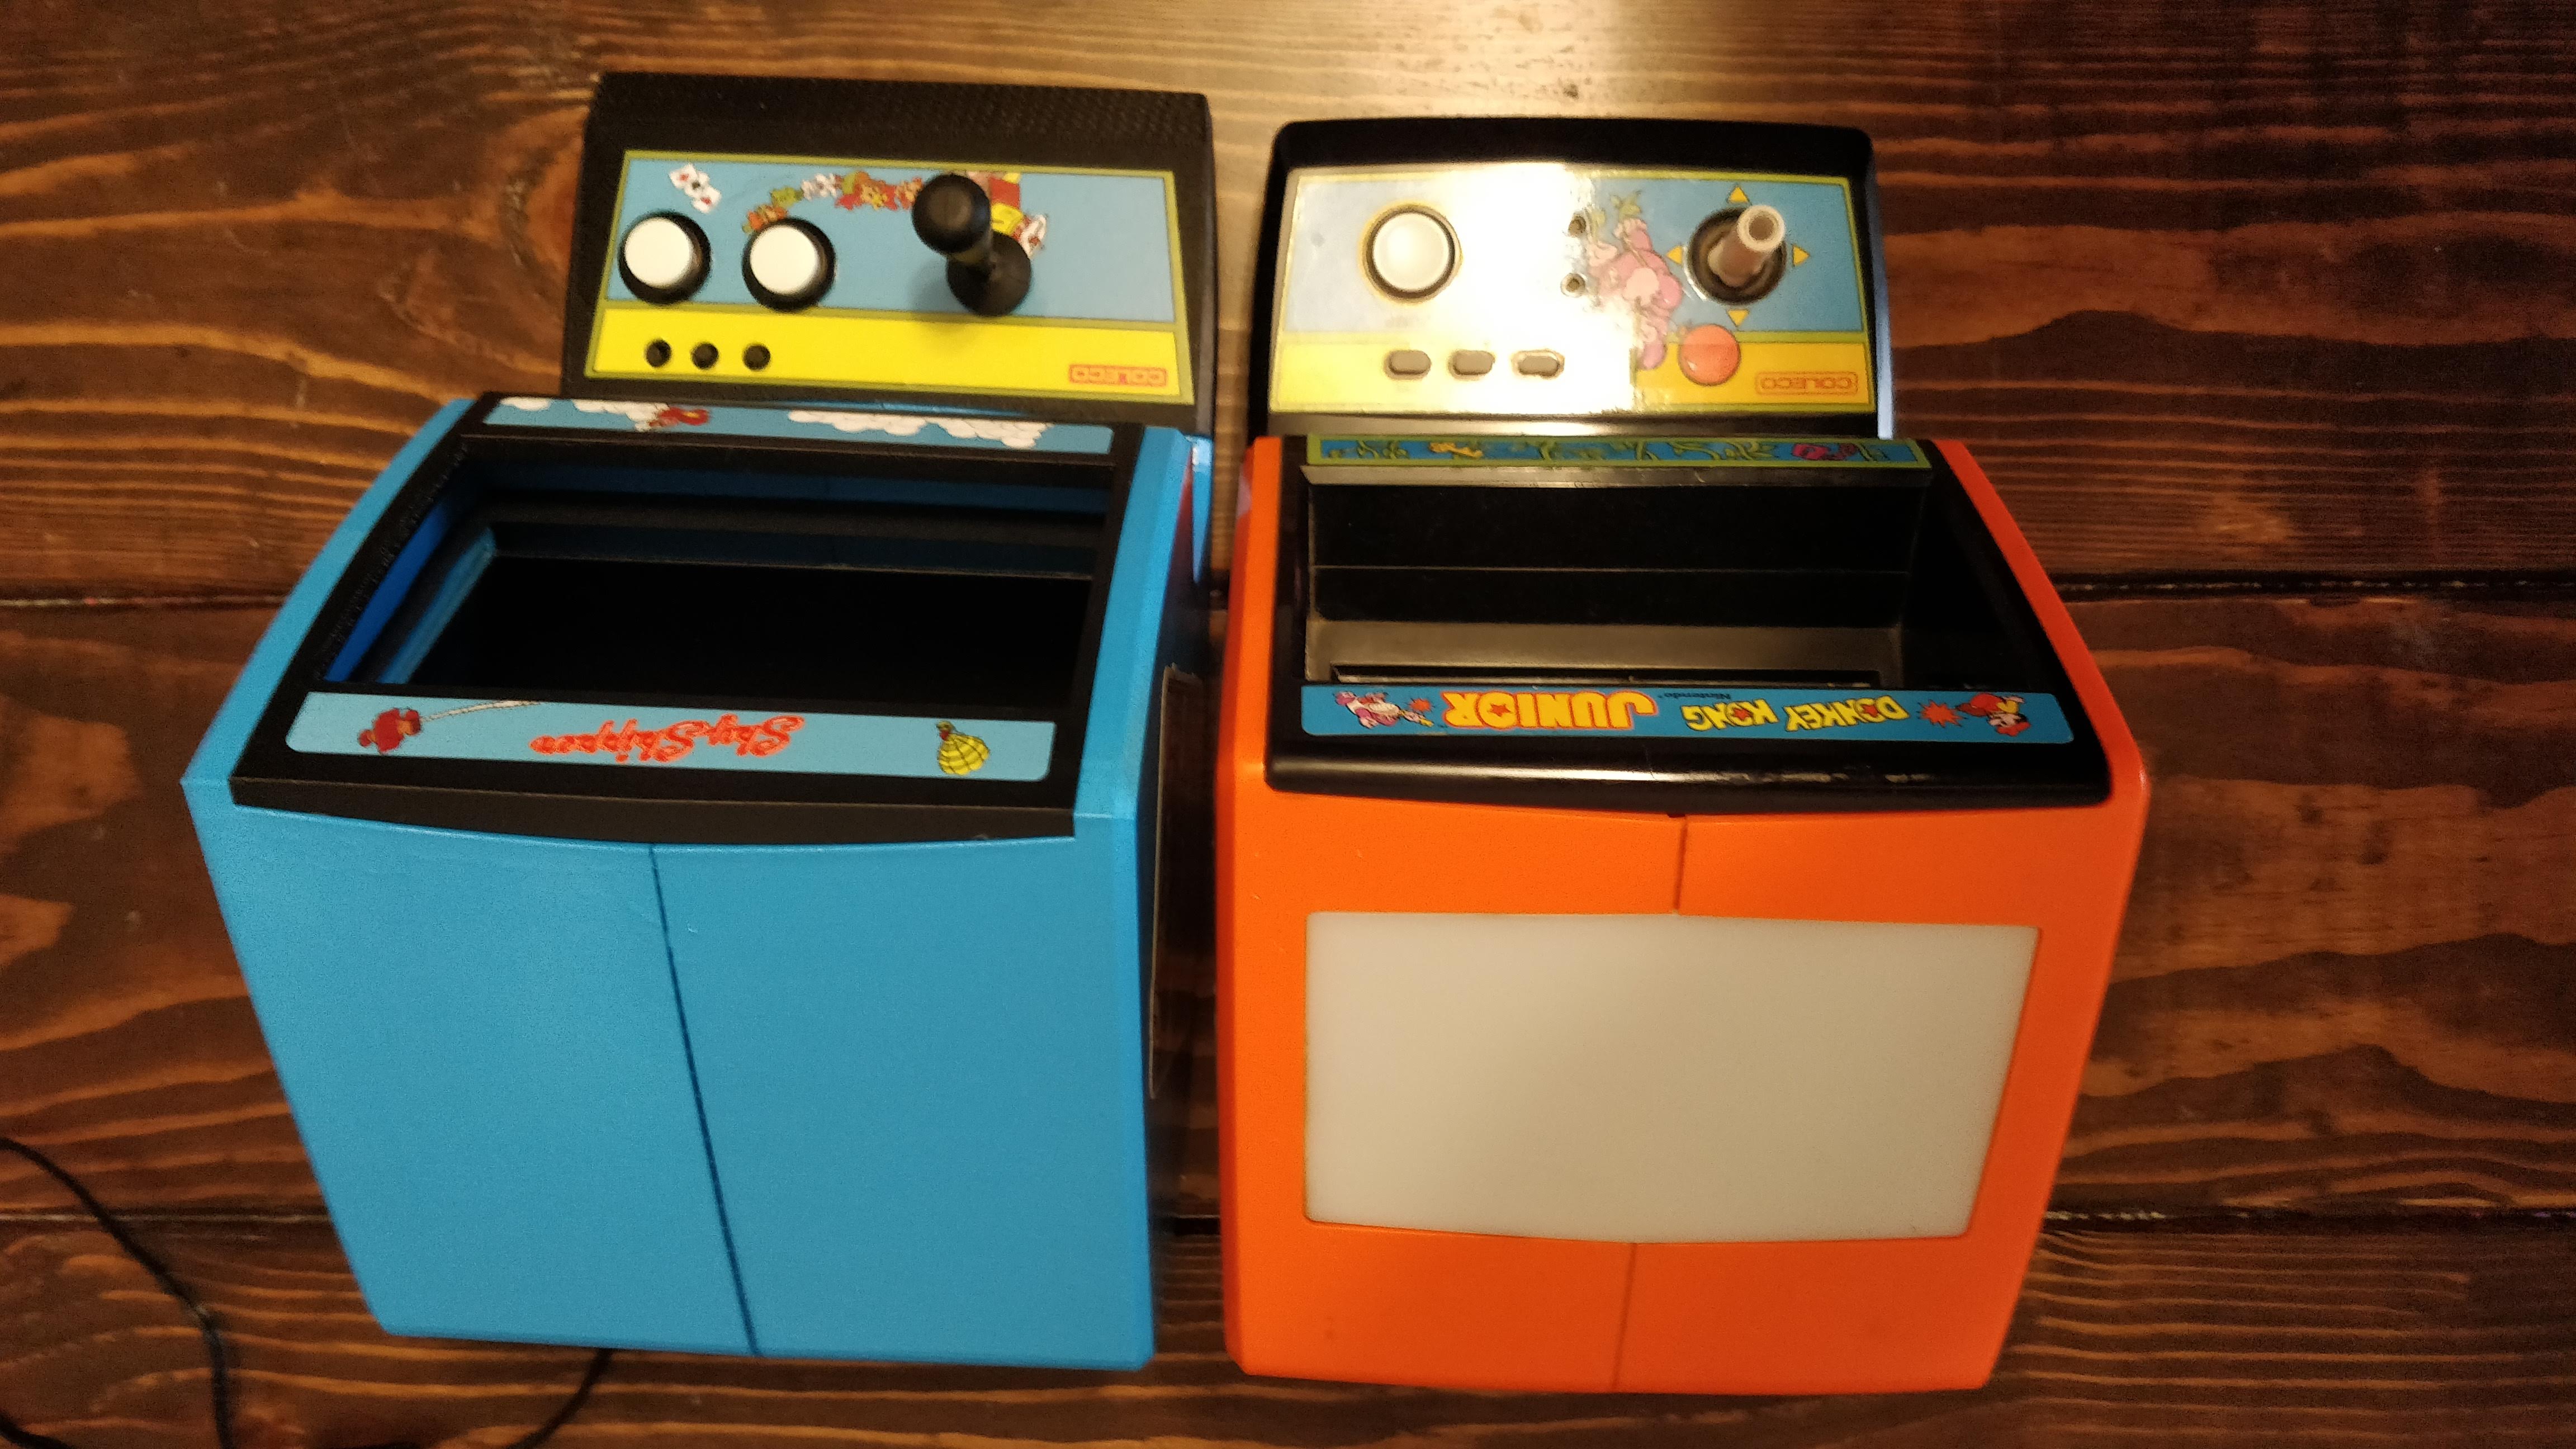
Putting in the Hardware
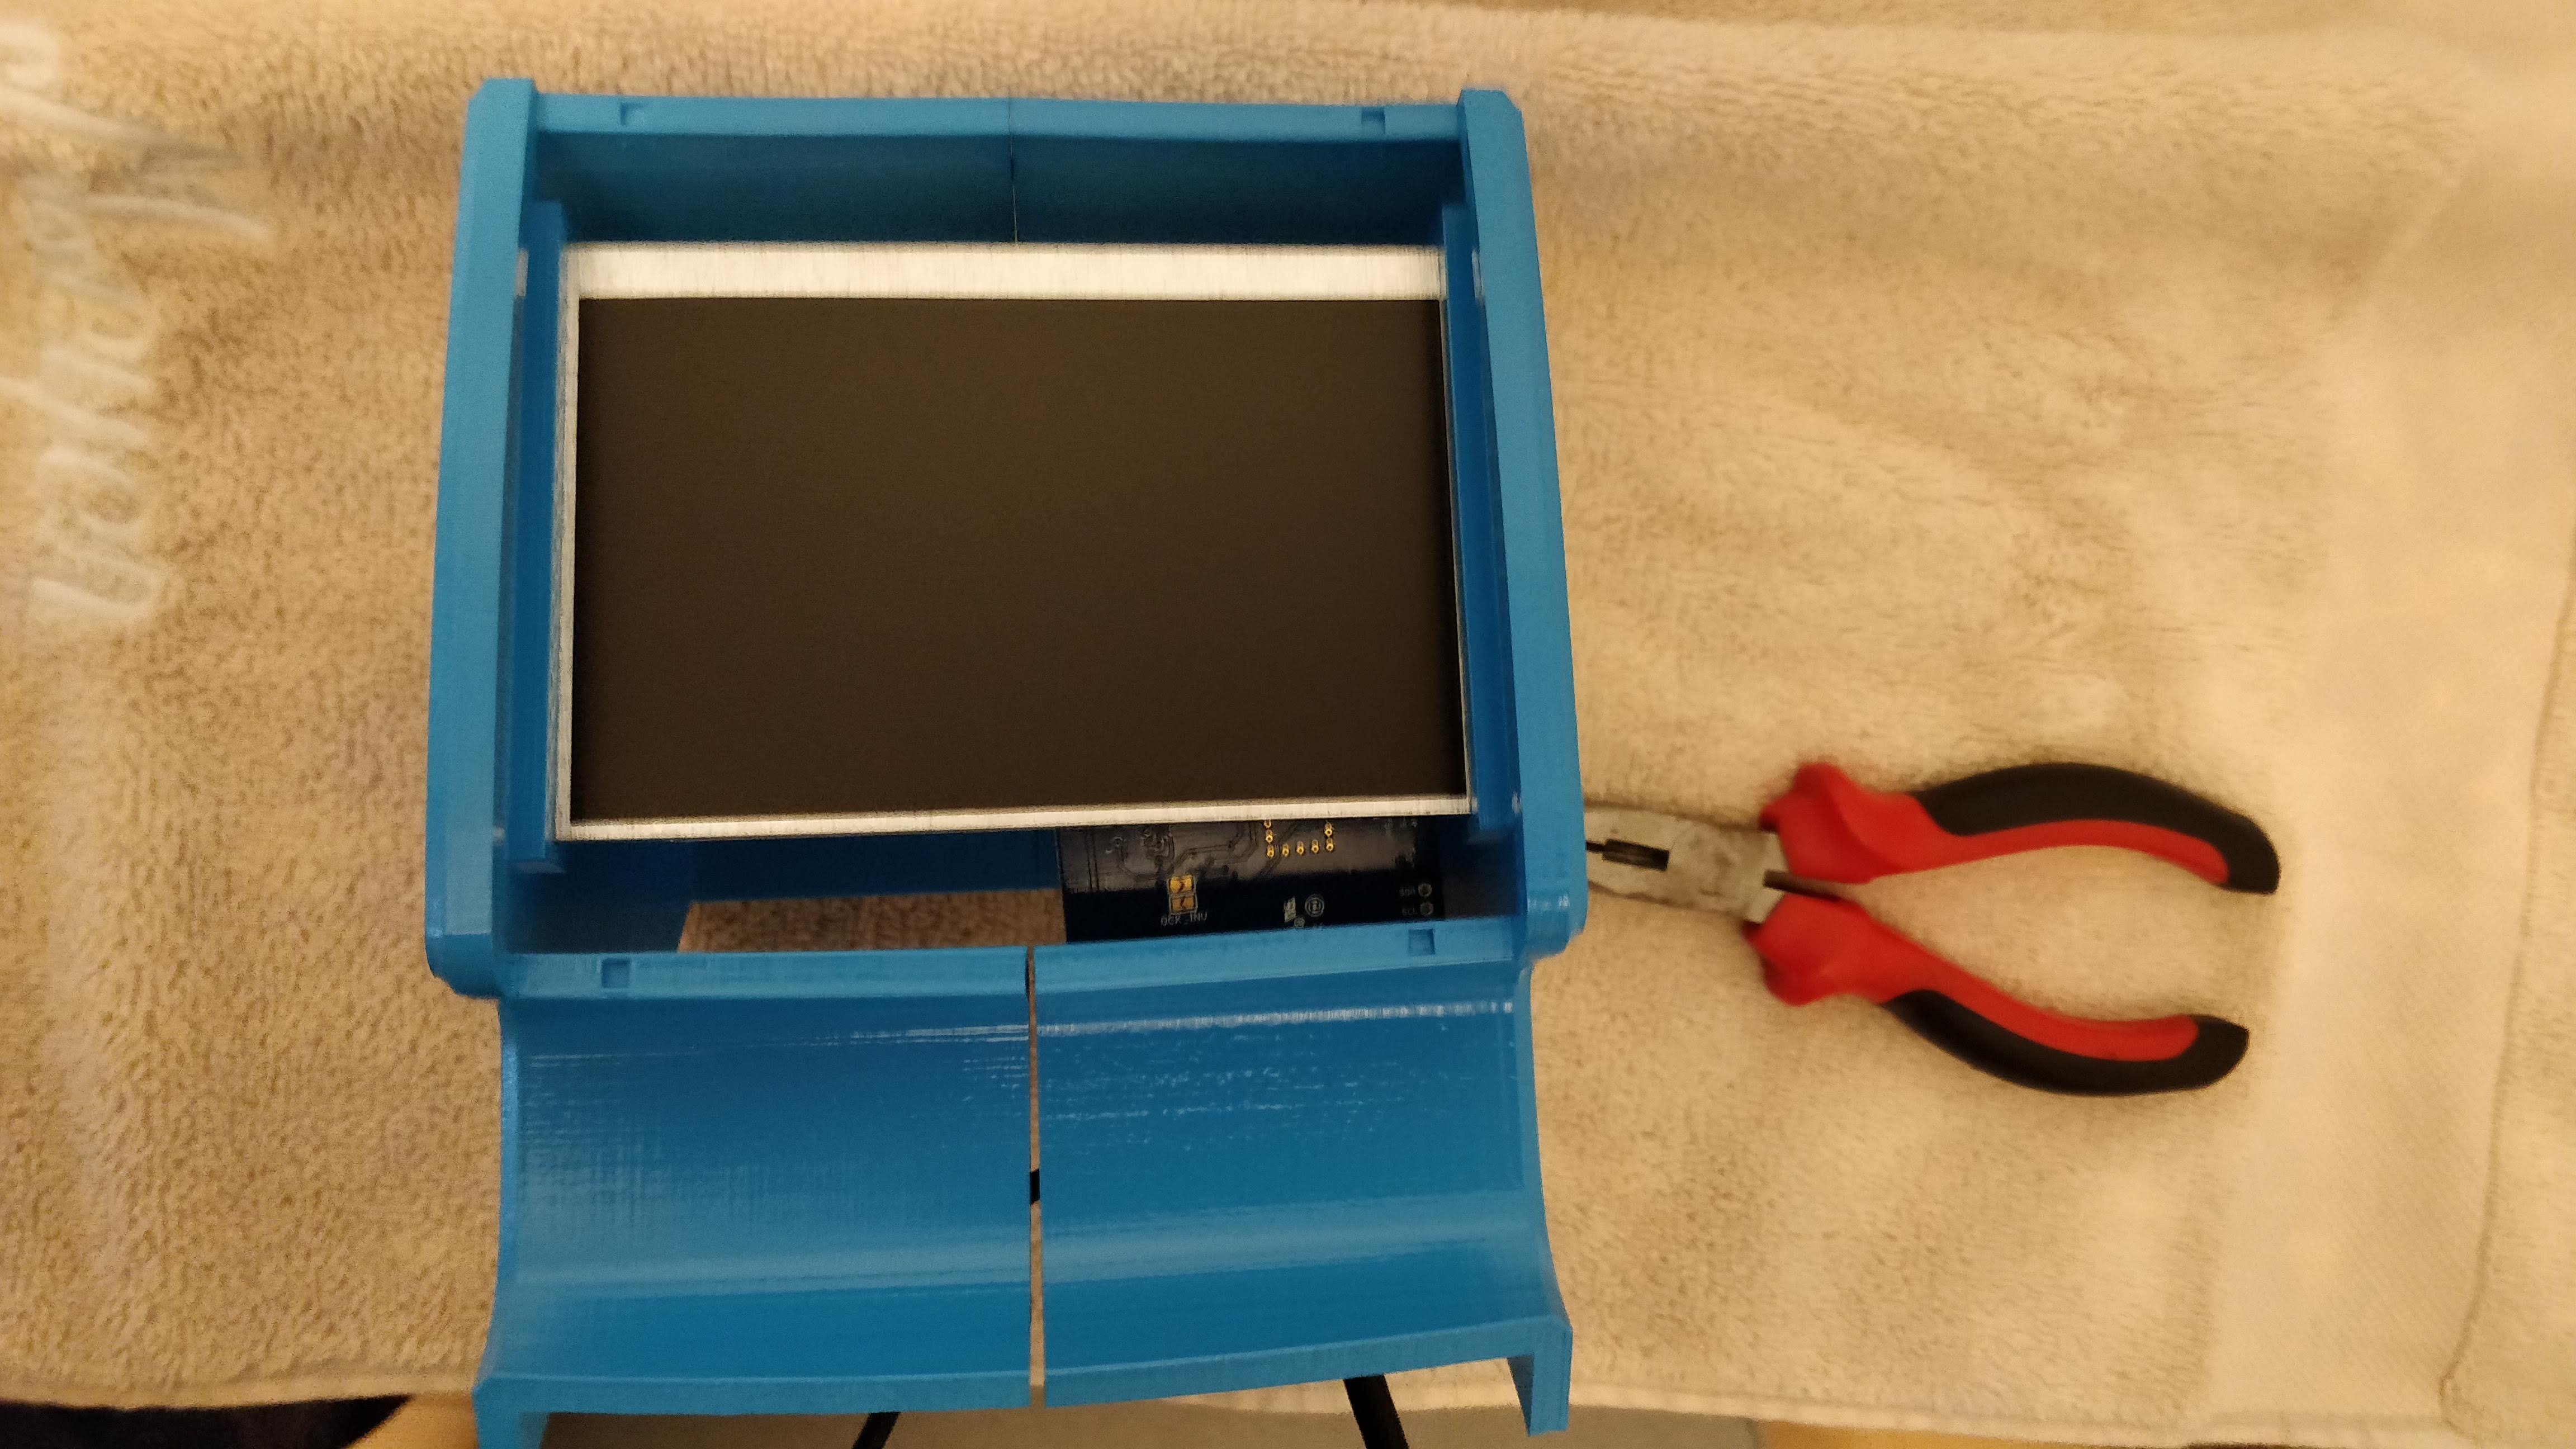
The pi fits nicely in the bottom of the shell on some standoffs. My Adafruit Arcade Bonnet mounts on top of that. There’s only one exterior port (USB for power) which leads to the back. A speaker attaches to the bonnet. The LCD screen is actually mounted upside down (and then rotated in software) so that the ribbon cable bends nicely to the back where it connects to the HDMI decoder. This way I can mount the decoder to the back of the screen with Velcro and all the ports point straight down to connect to the pi.
Mounting the screen
Locking the screen in place
Testing the screen view
Pi in place
Attaching the bezel
View with bezel
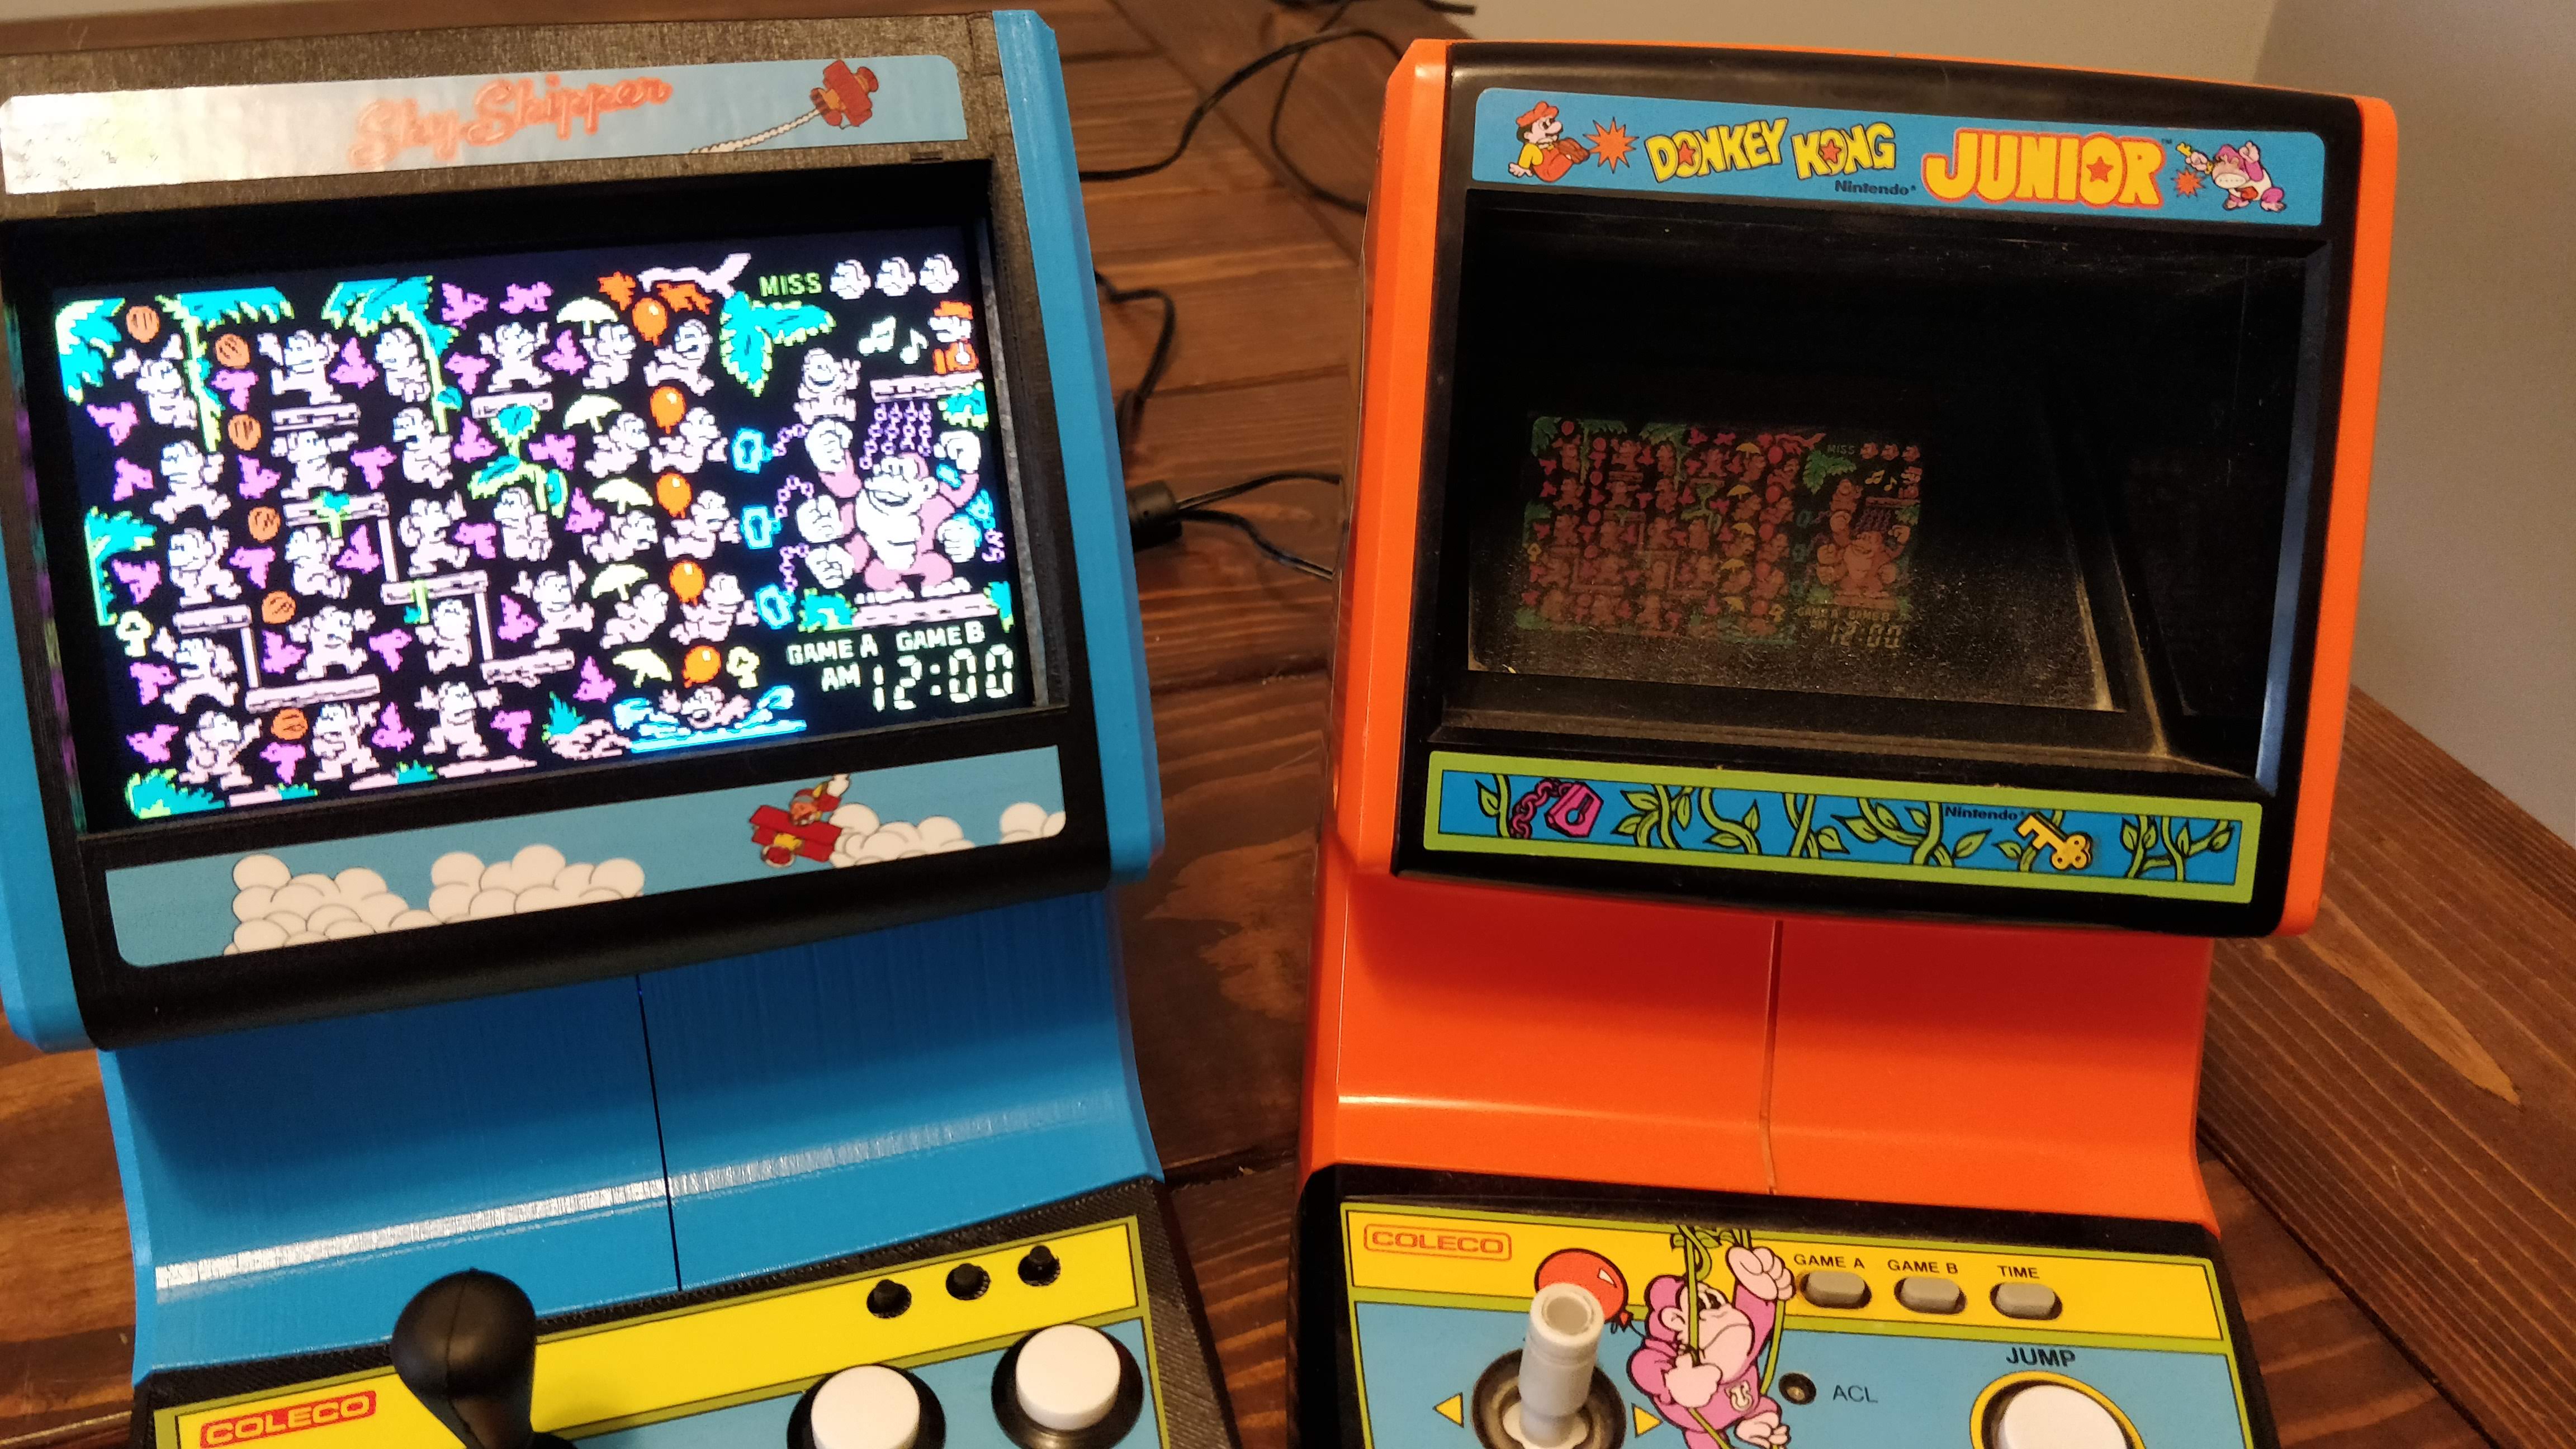
First bootup before assembly
Running Coleco Donkey Kong Jr
Bezel pins
Viewing the bezel
Close to final assembly
Before applying artwork
Software
As I’ve explained a bit in other posts, I’m running Retropie with the Emulation Station frontend. The control panel has two main action buttons and a joystick. I tossed a few other Nintendo Vs. games on there since they have the same number of buttons and such. Also, loaded up the Madrigal Simulators to play the Game and Watch games that were in these shells. The downside to these simulators is they don’t start in fullscreen, so the illusion is slightly ruined, but such is life. I have some thoughts on how to solve this in a future build I’m already working on.
Photos and Tour
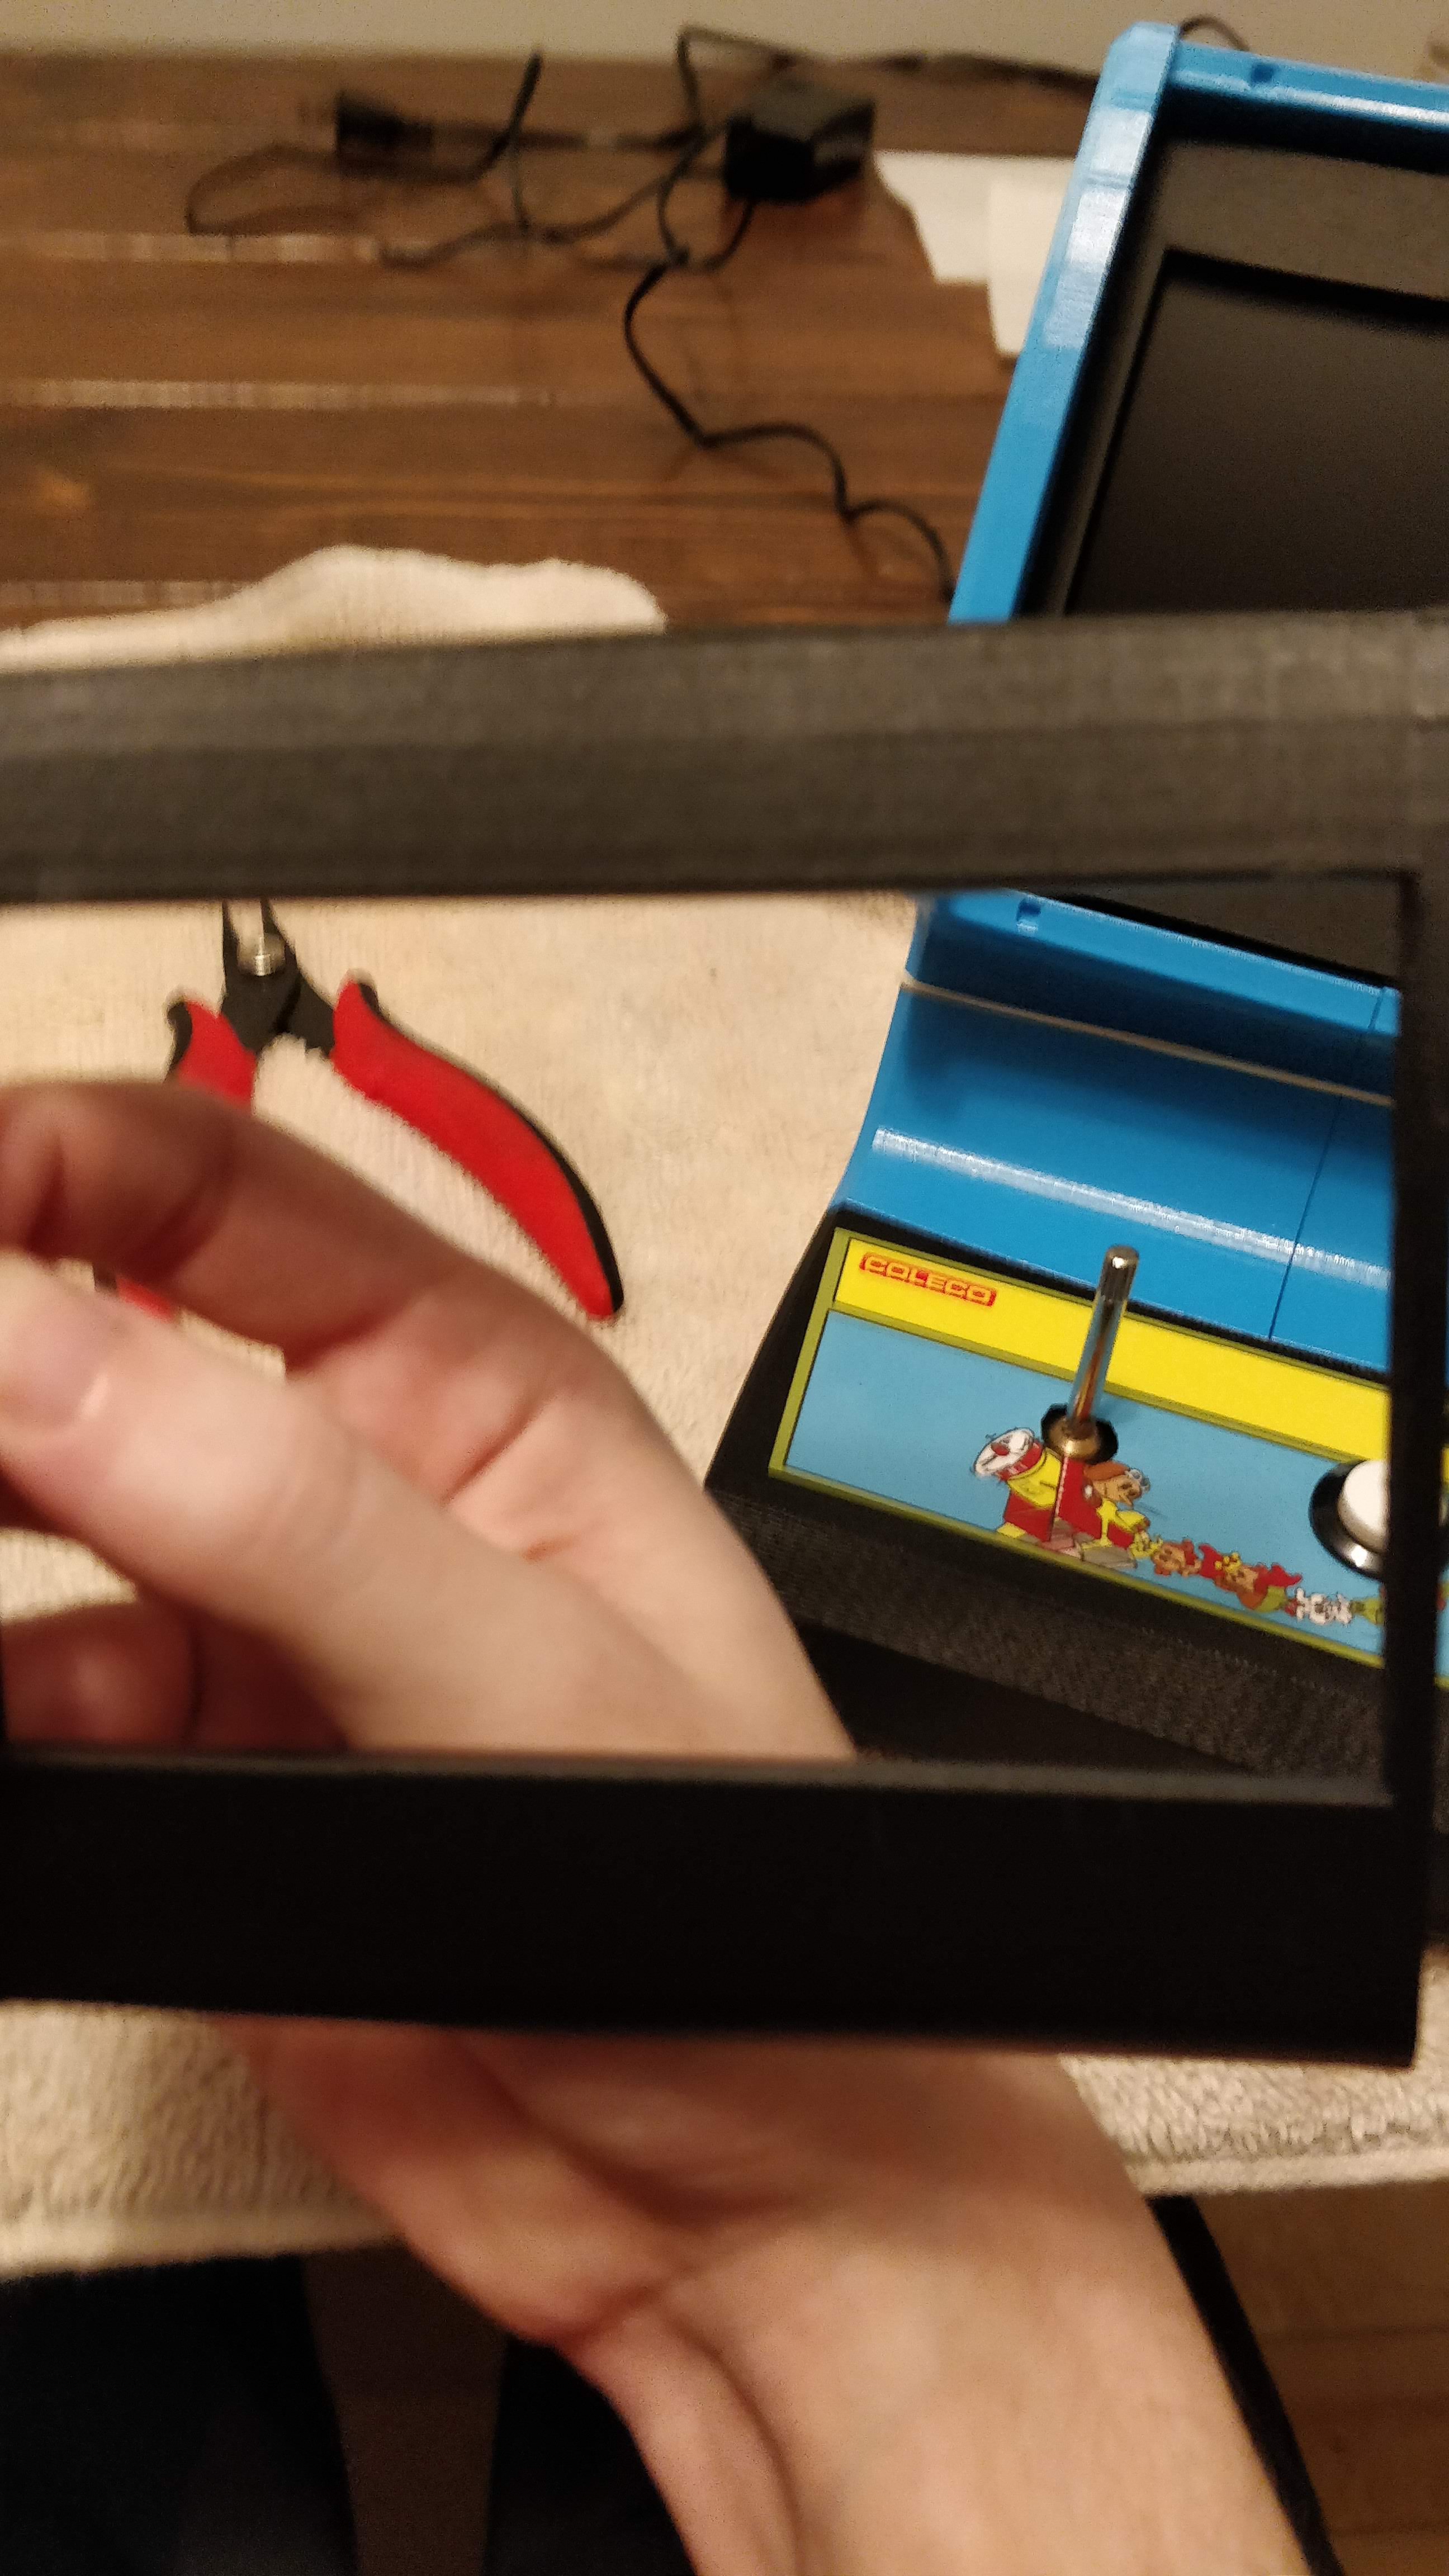
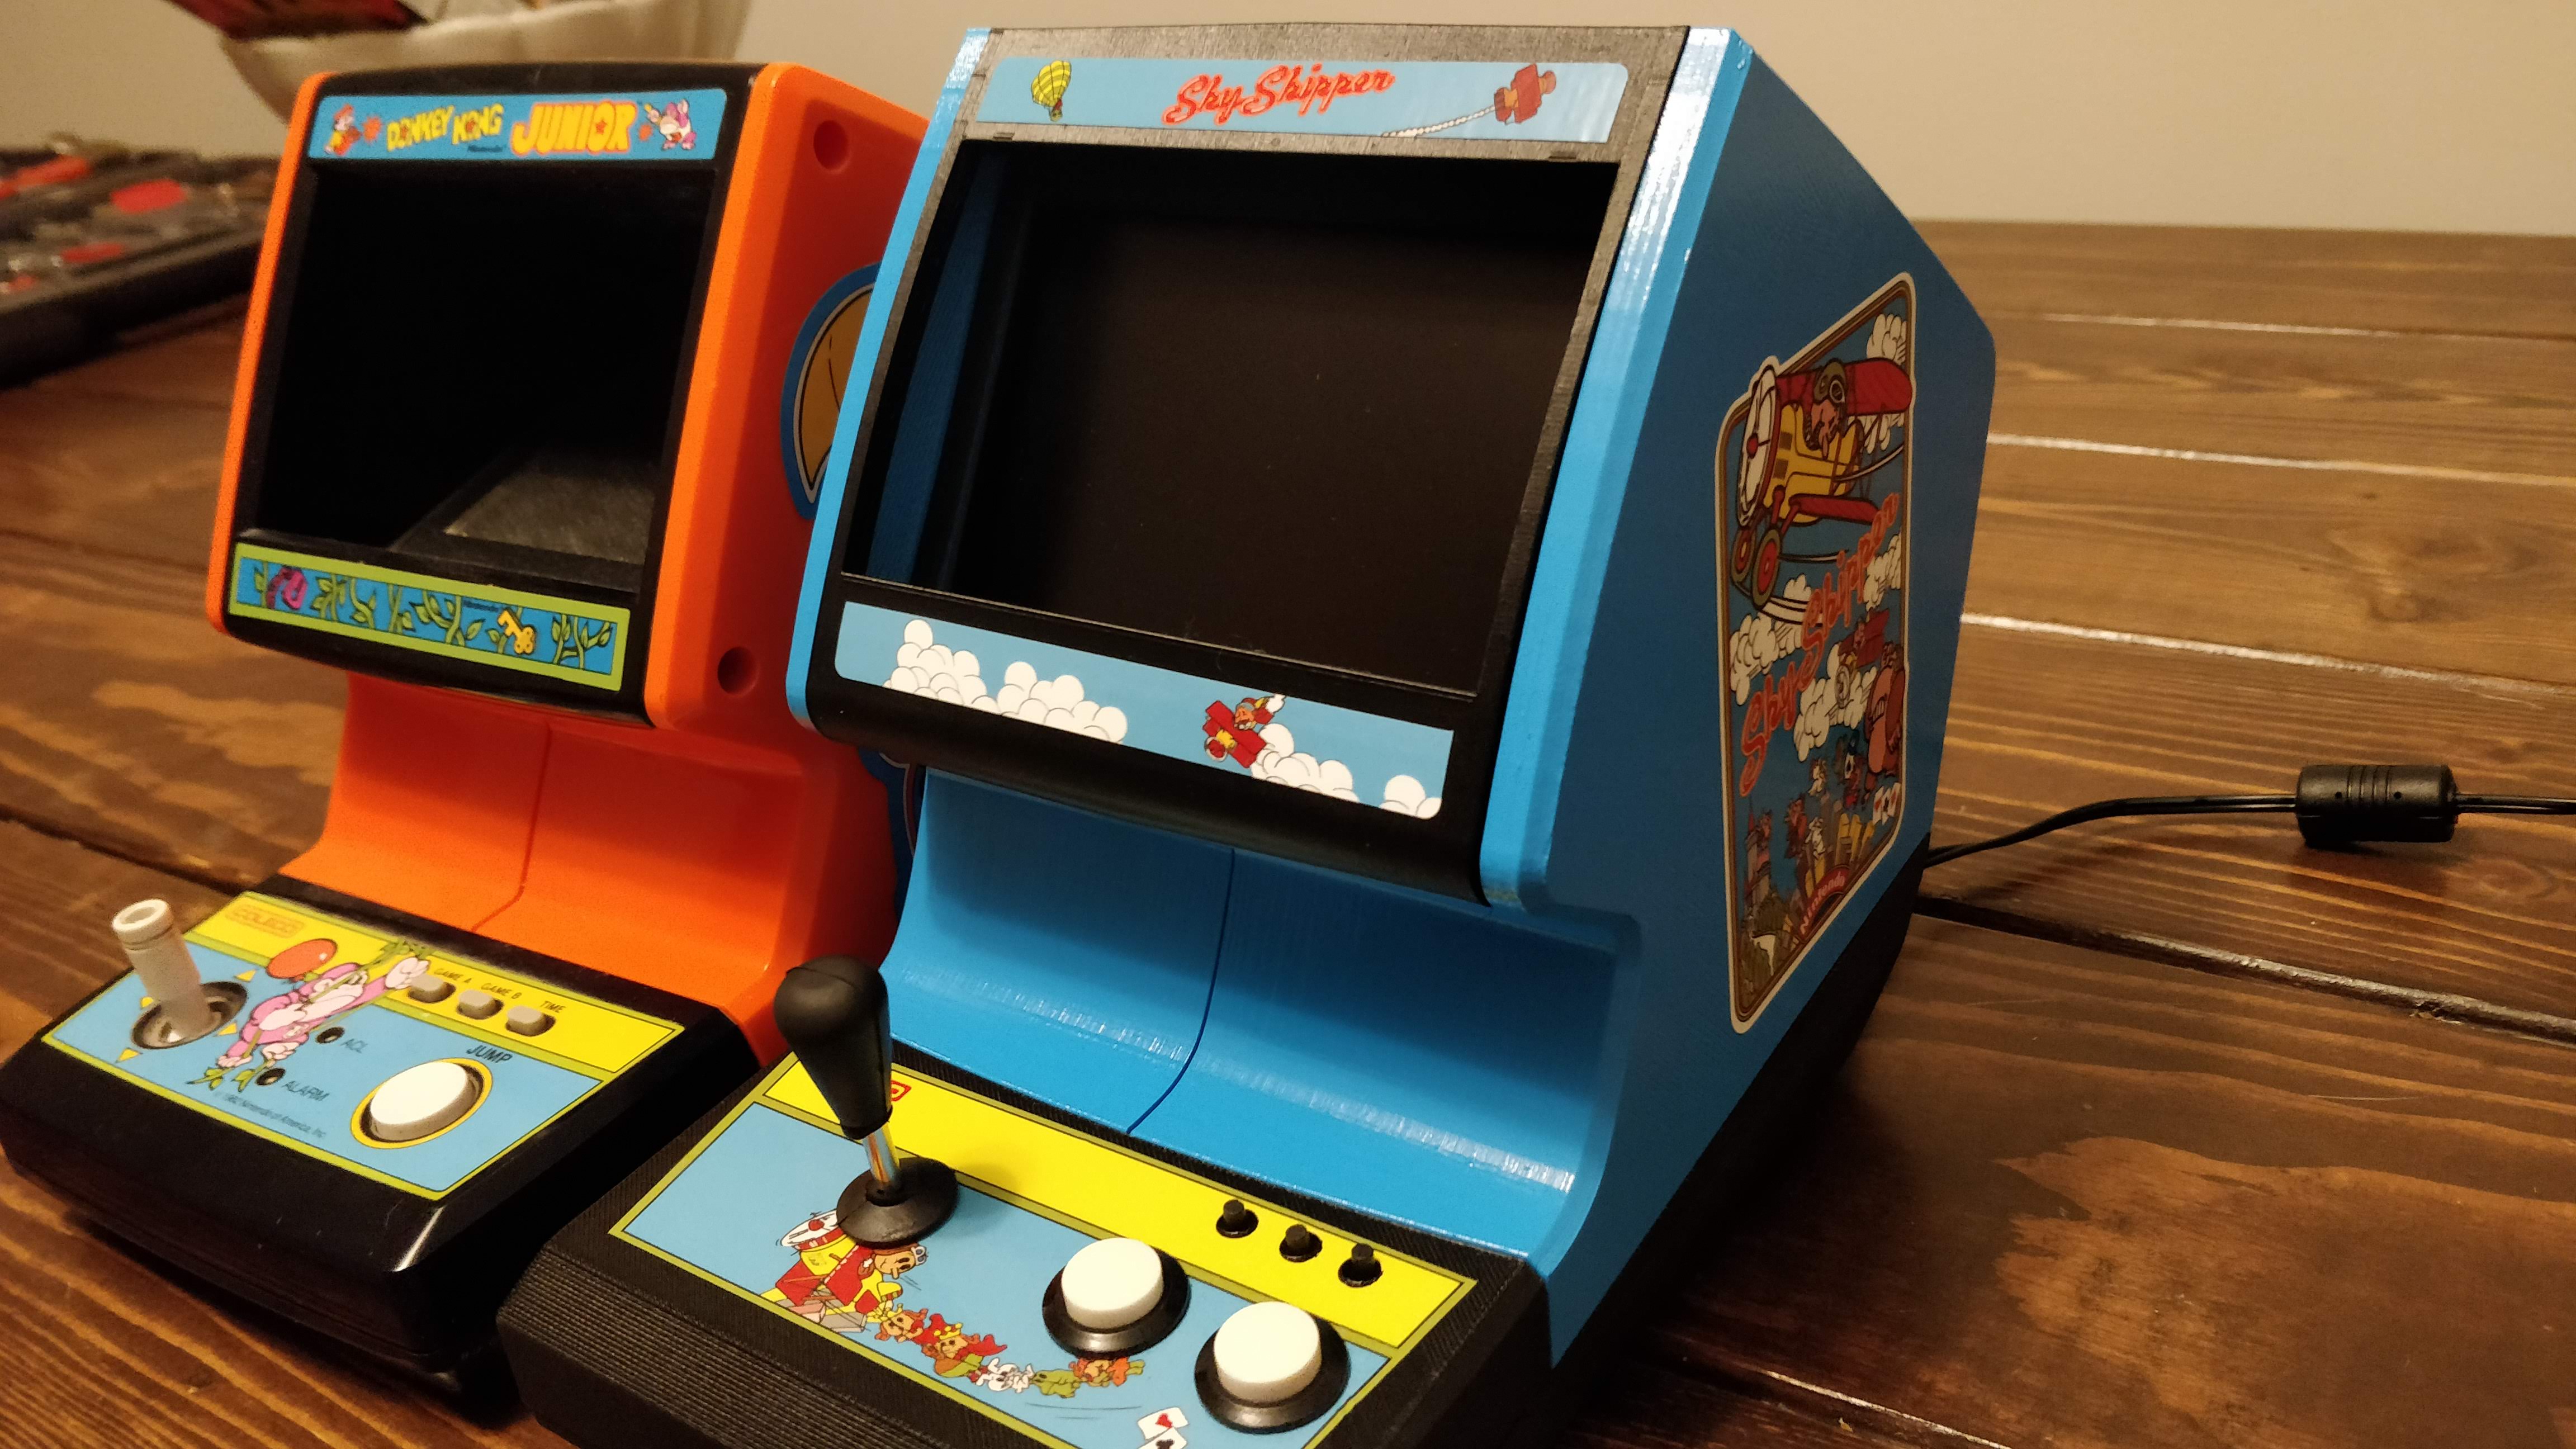
See below for photos and a video tour of the Coleco Sky Skipper Tabletop!
Coleco Sky Skipper Tabletop Next to an original
Two tabletops
Sideart
Top view
Uses Madrigal’s Simulators for these games
Both games running DK Jr
Closeup view
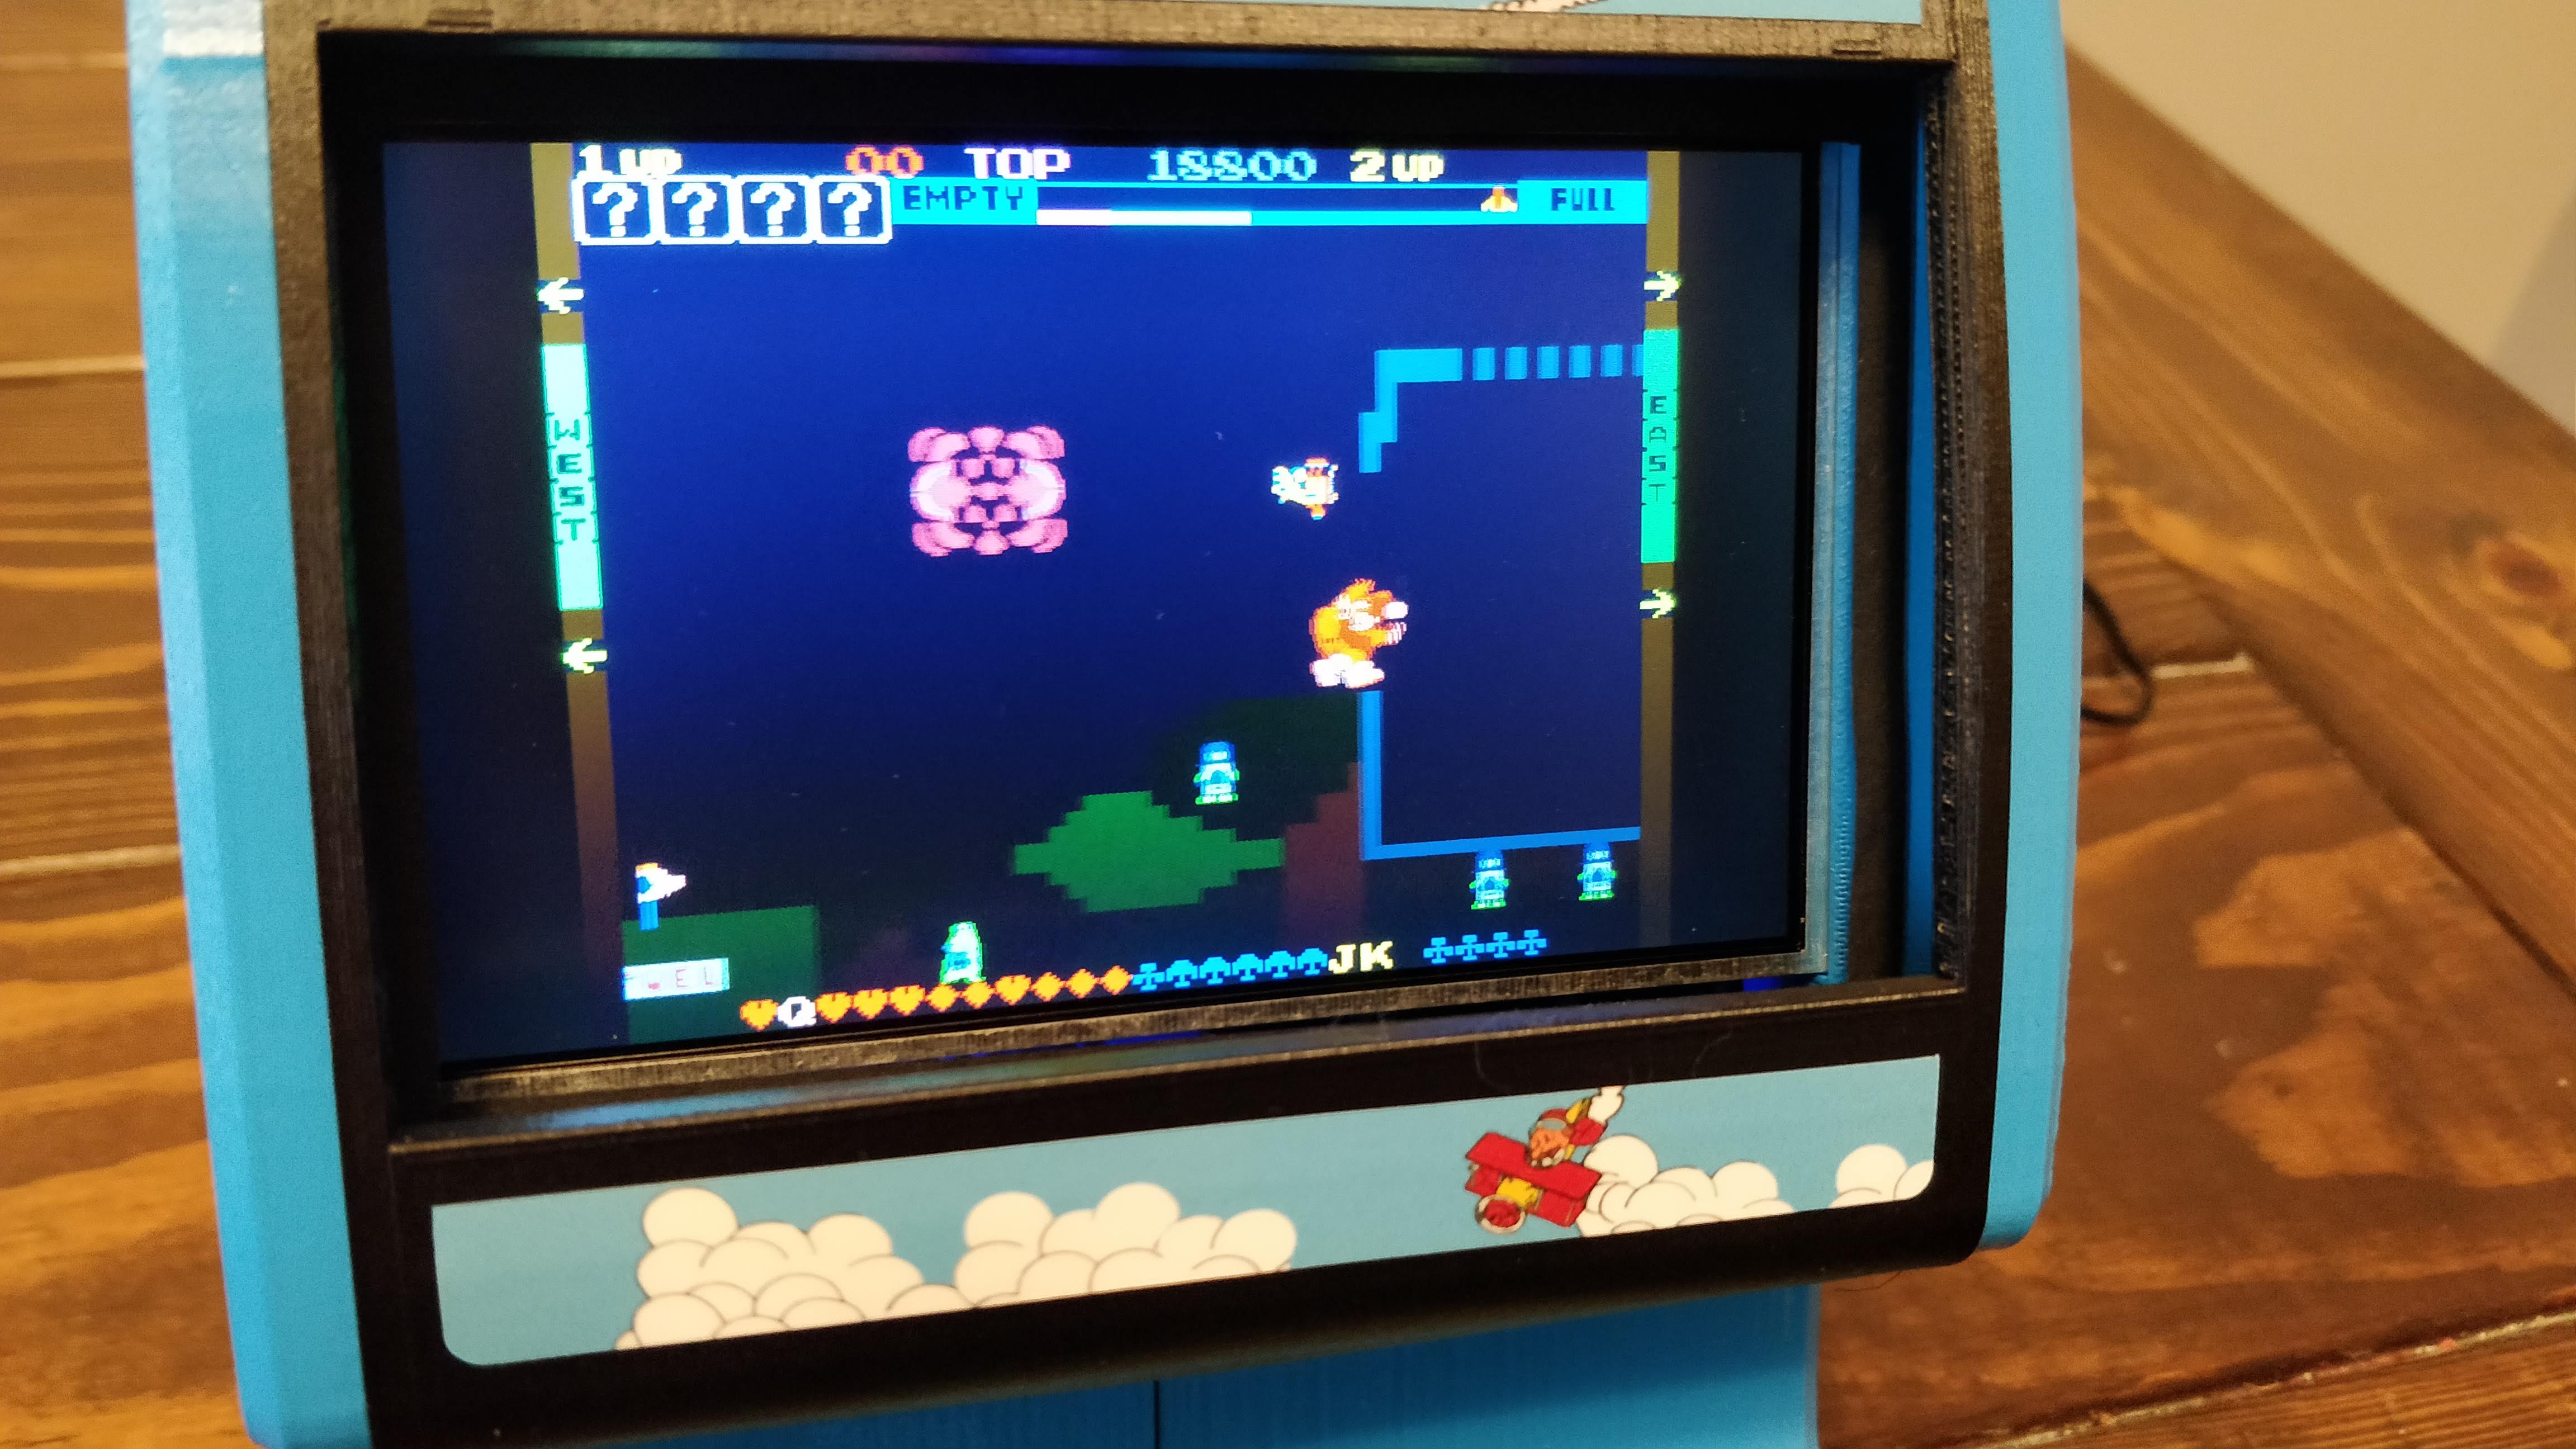
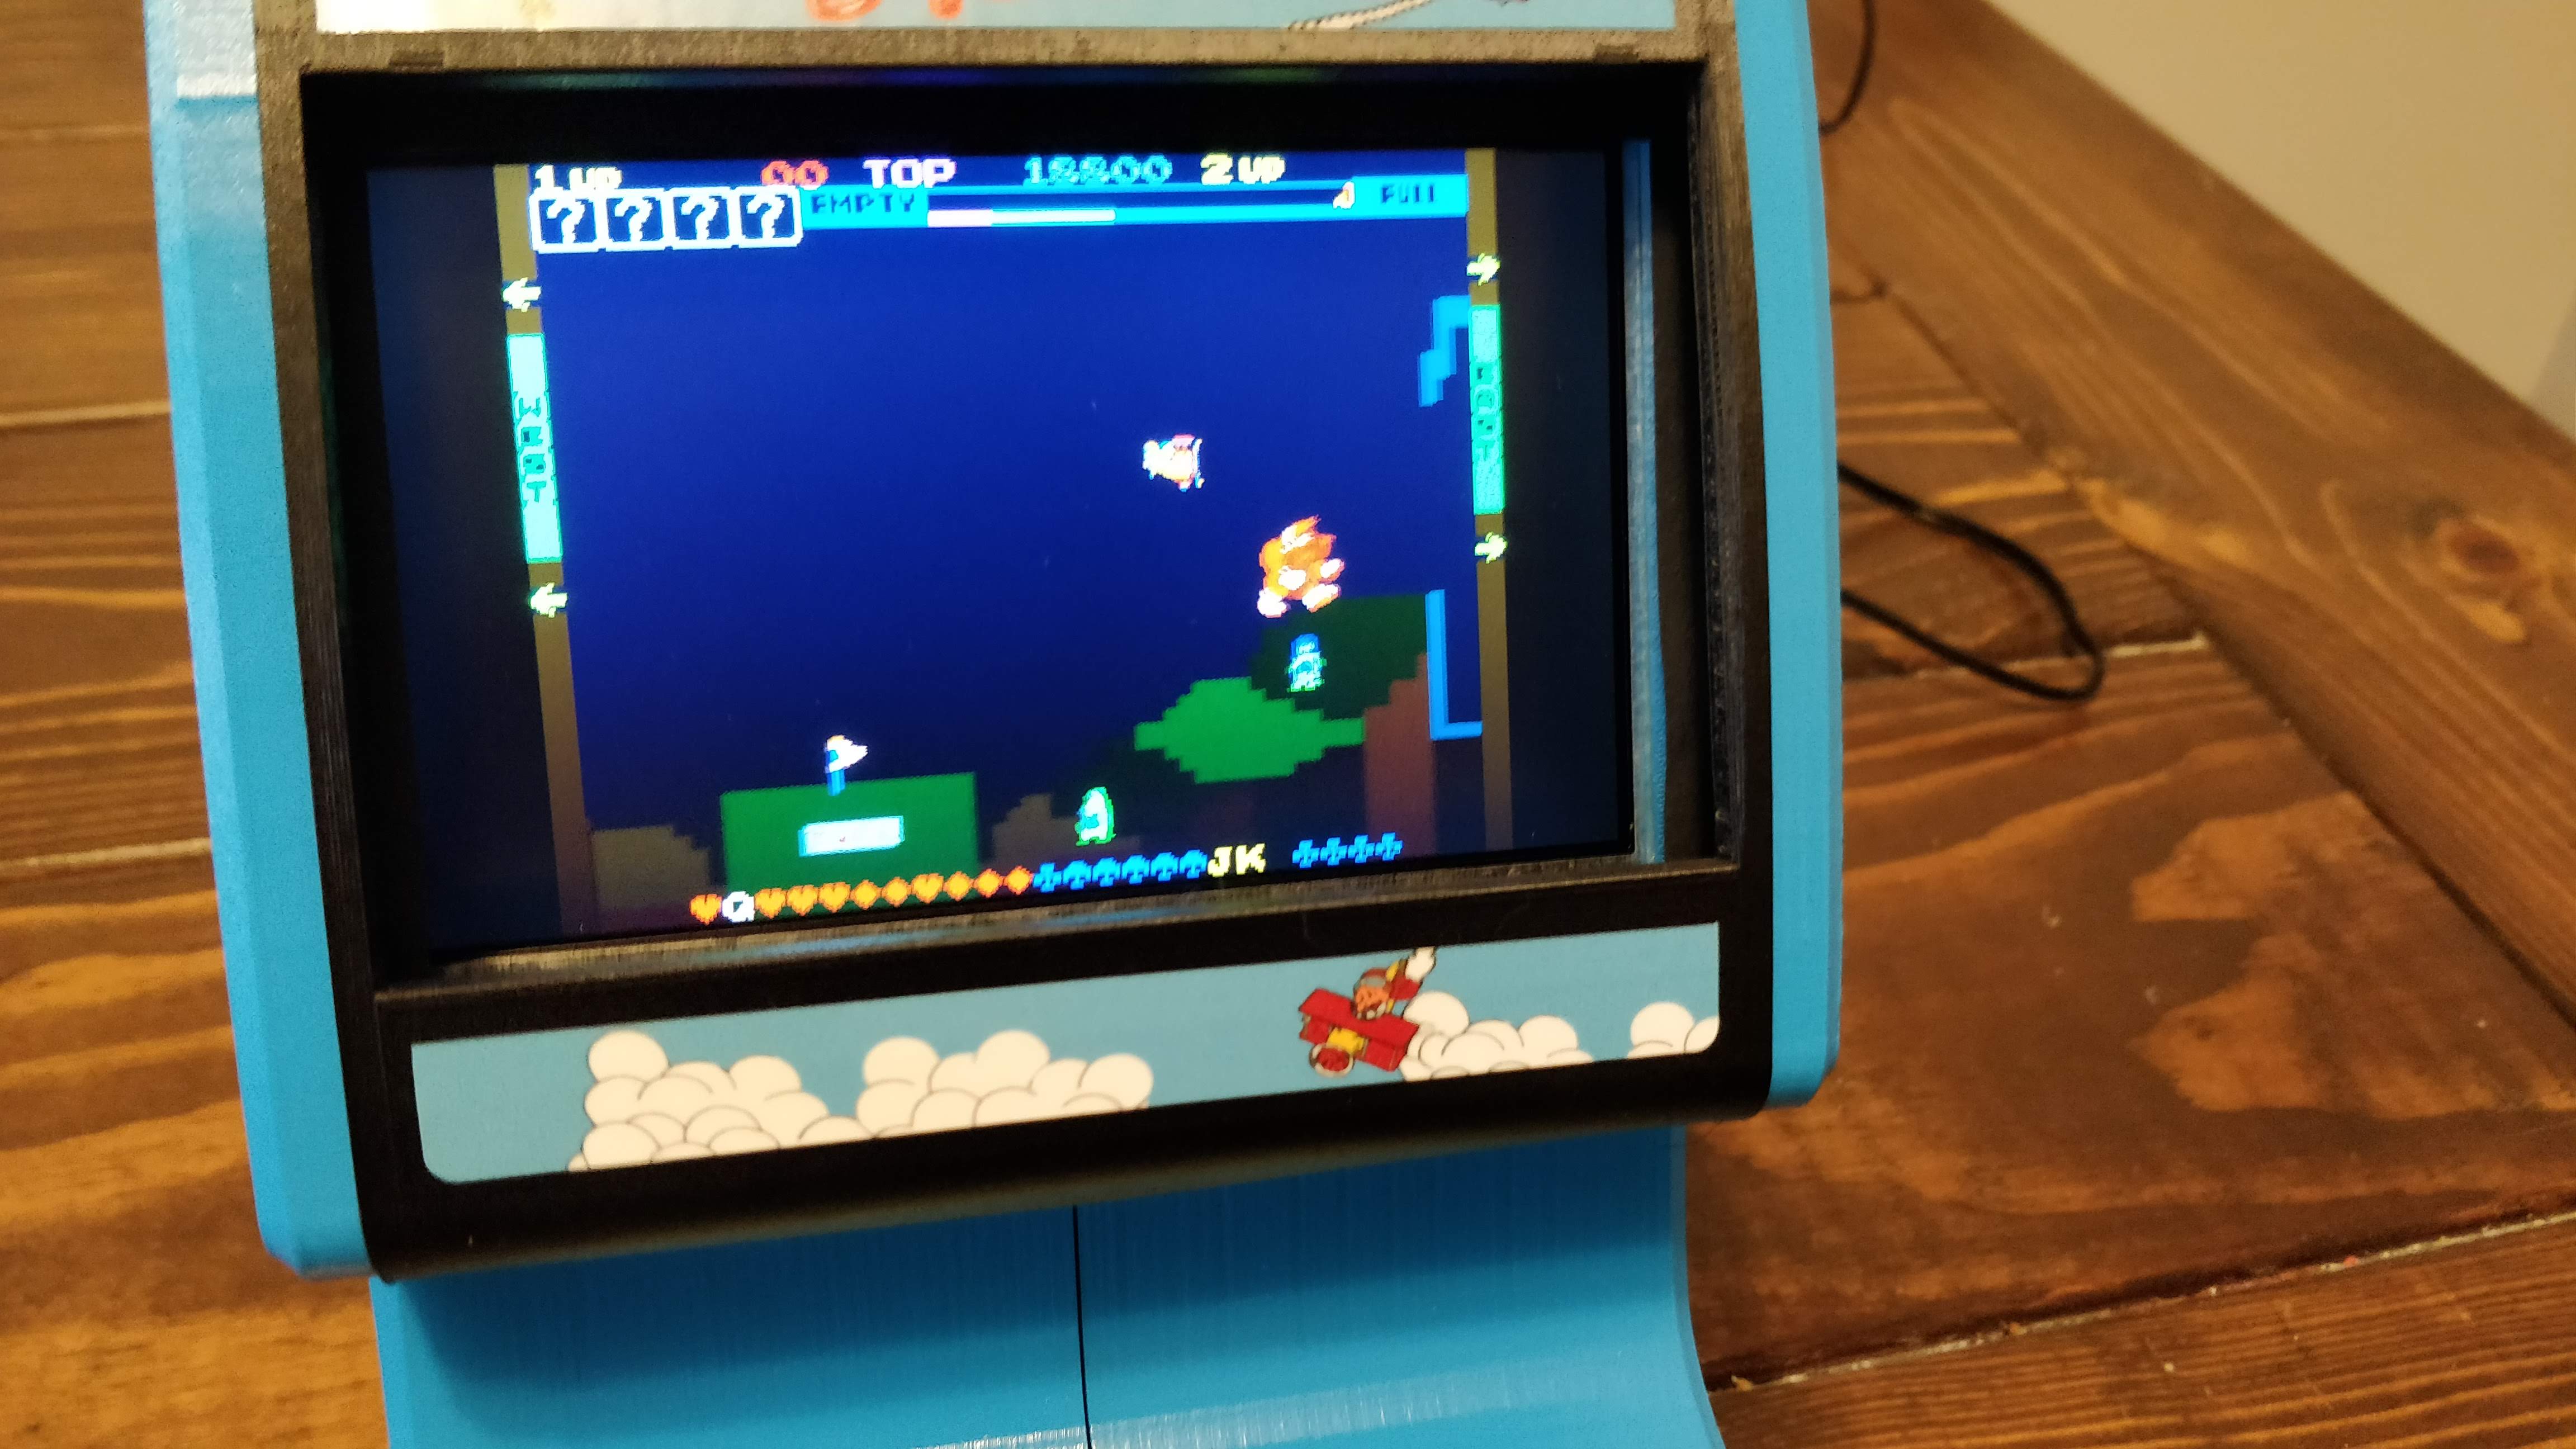
Running sky skipper
Closer view of artwork
Coleco Sky Skipper Tabletop
Two tabletops side by side
3d Print STL Files
By popular demand, I’m sharing my .stl files for this build. I’ll warn you though – they aren’t great! It’s the first thing I’ve ever modeled so some of the tolerances are pretty tight. I don’t have much experience creating holding pins and such so you may have to sand them down a bit, bend them slightly, etc.
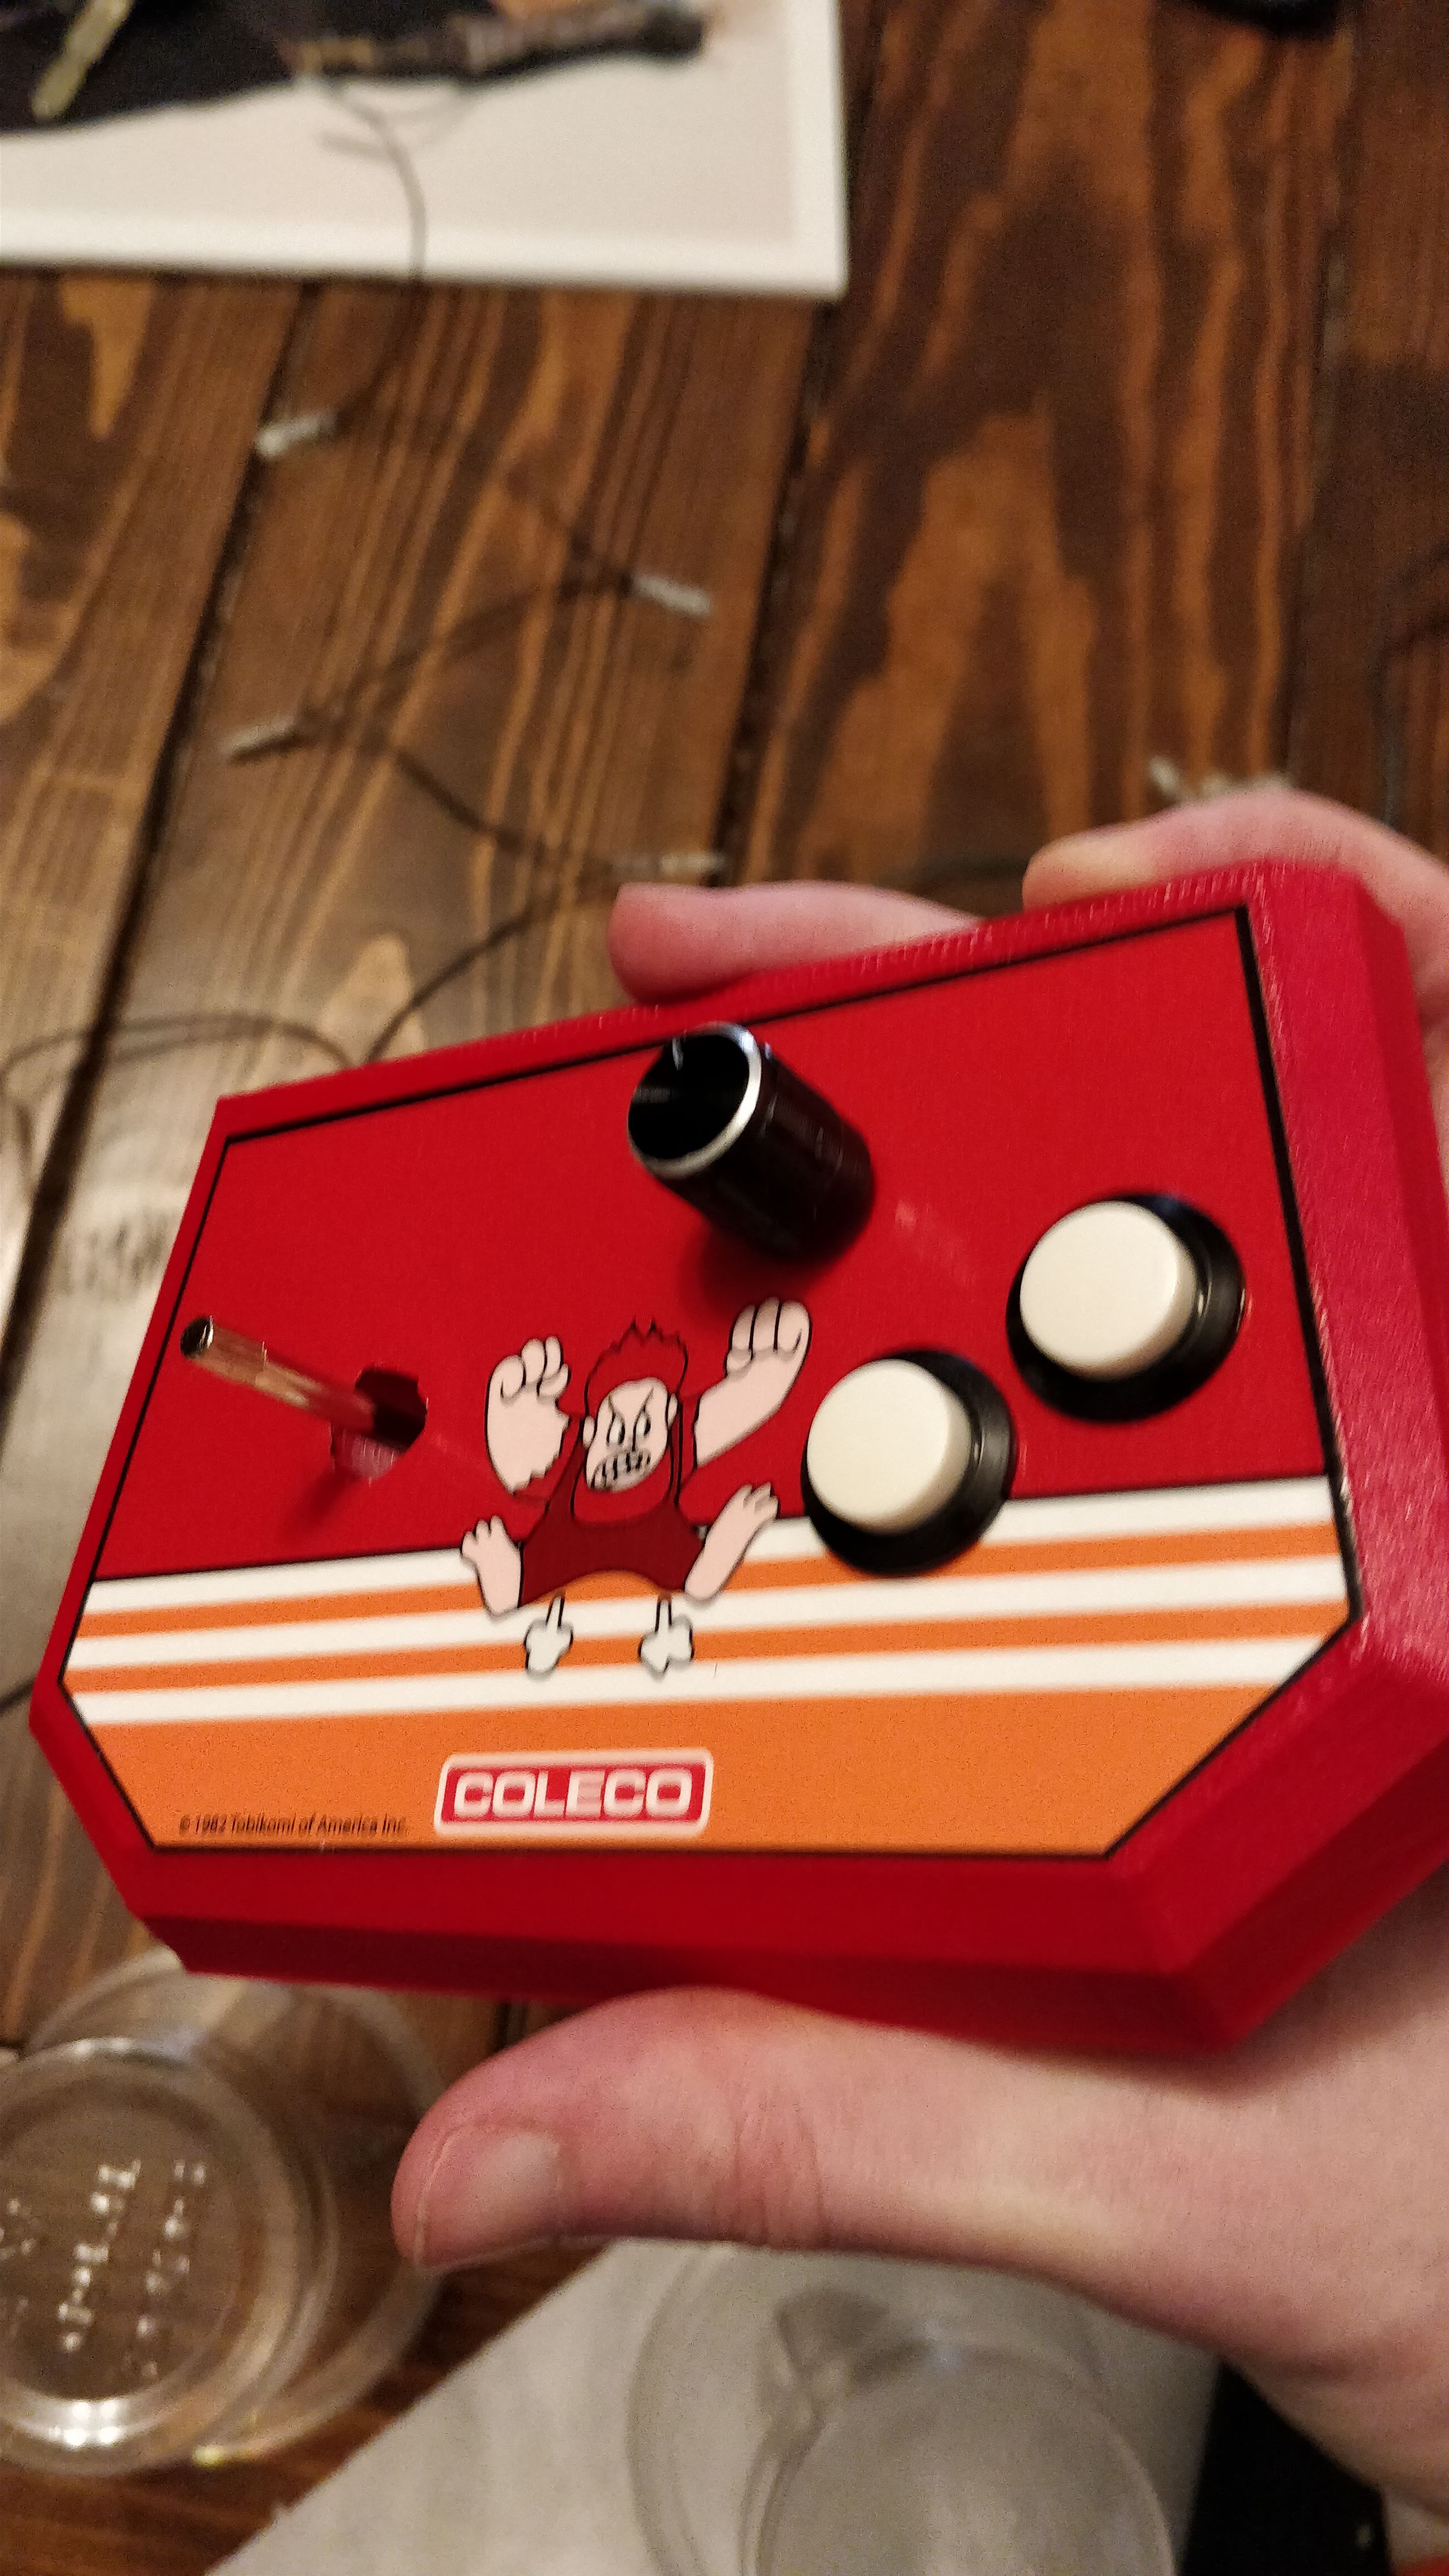
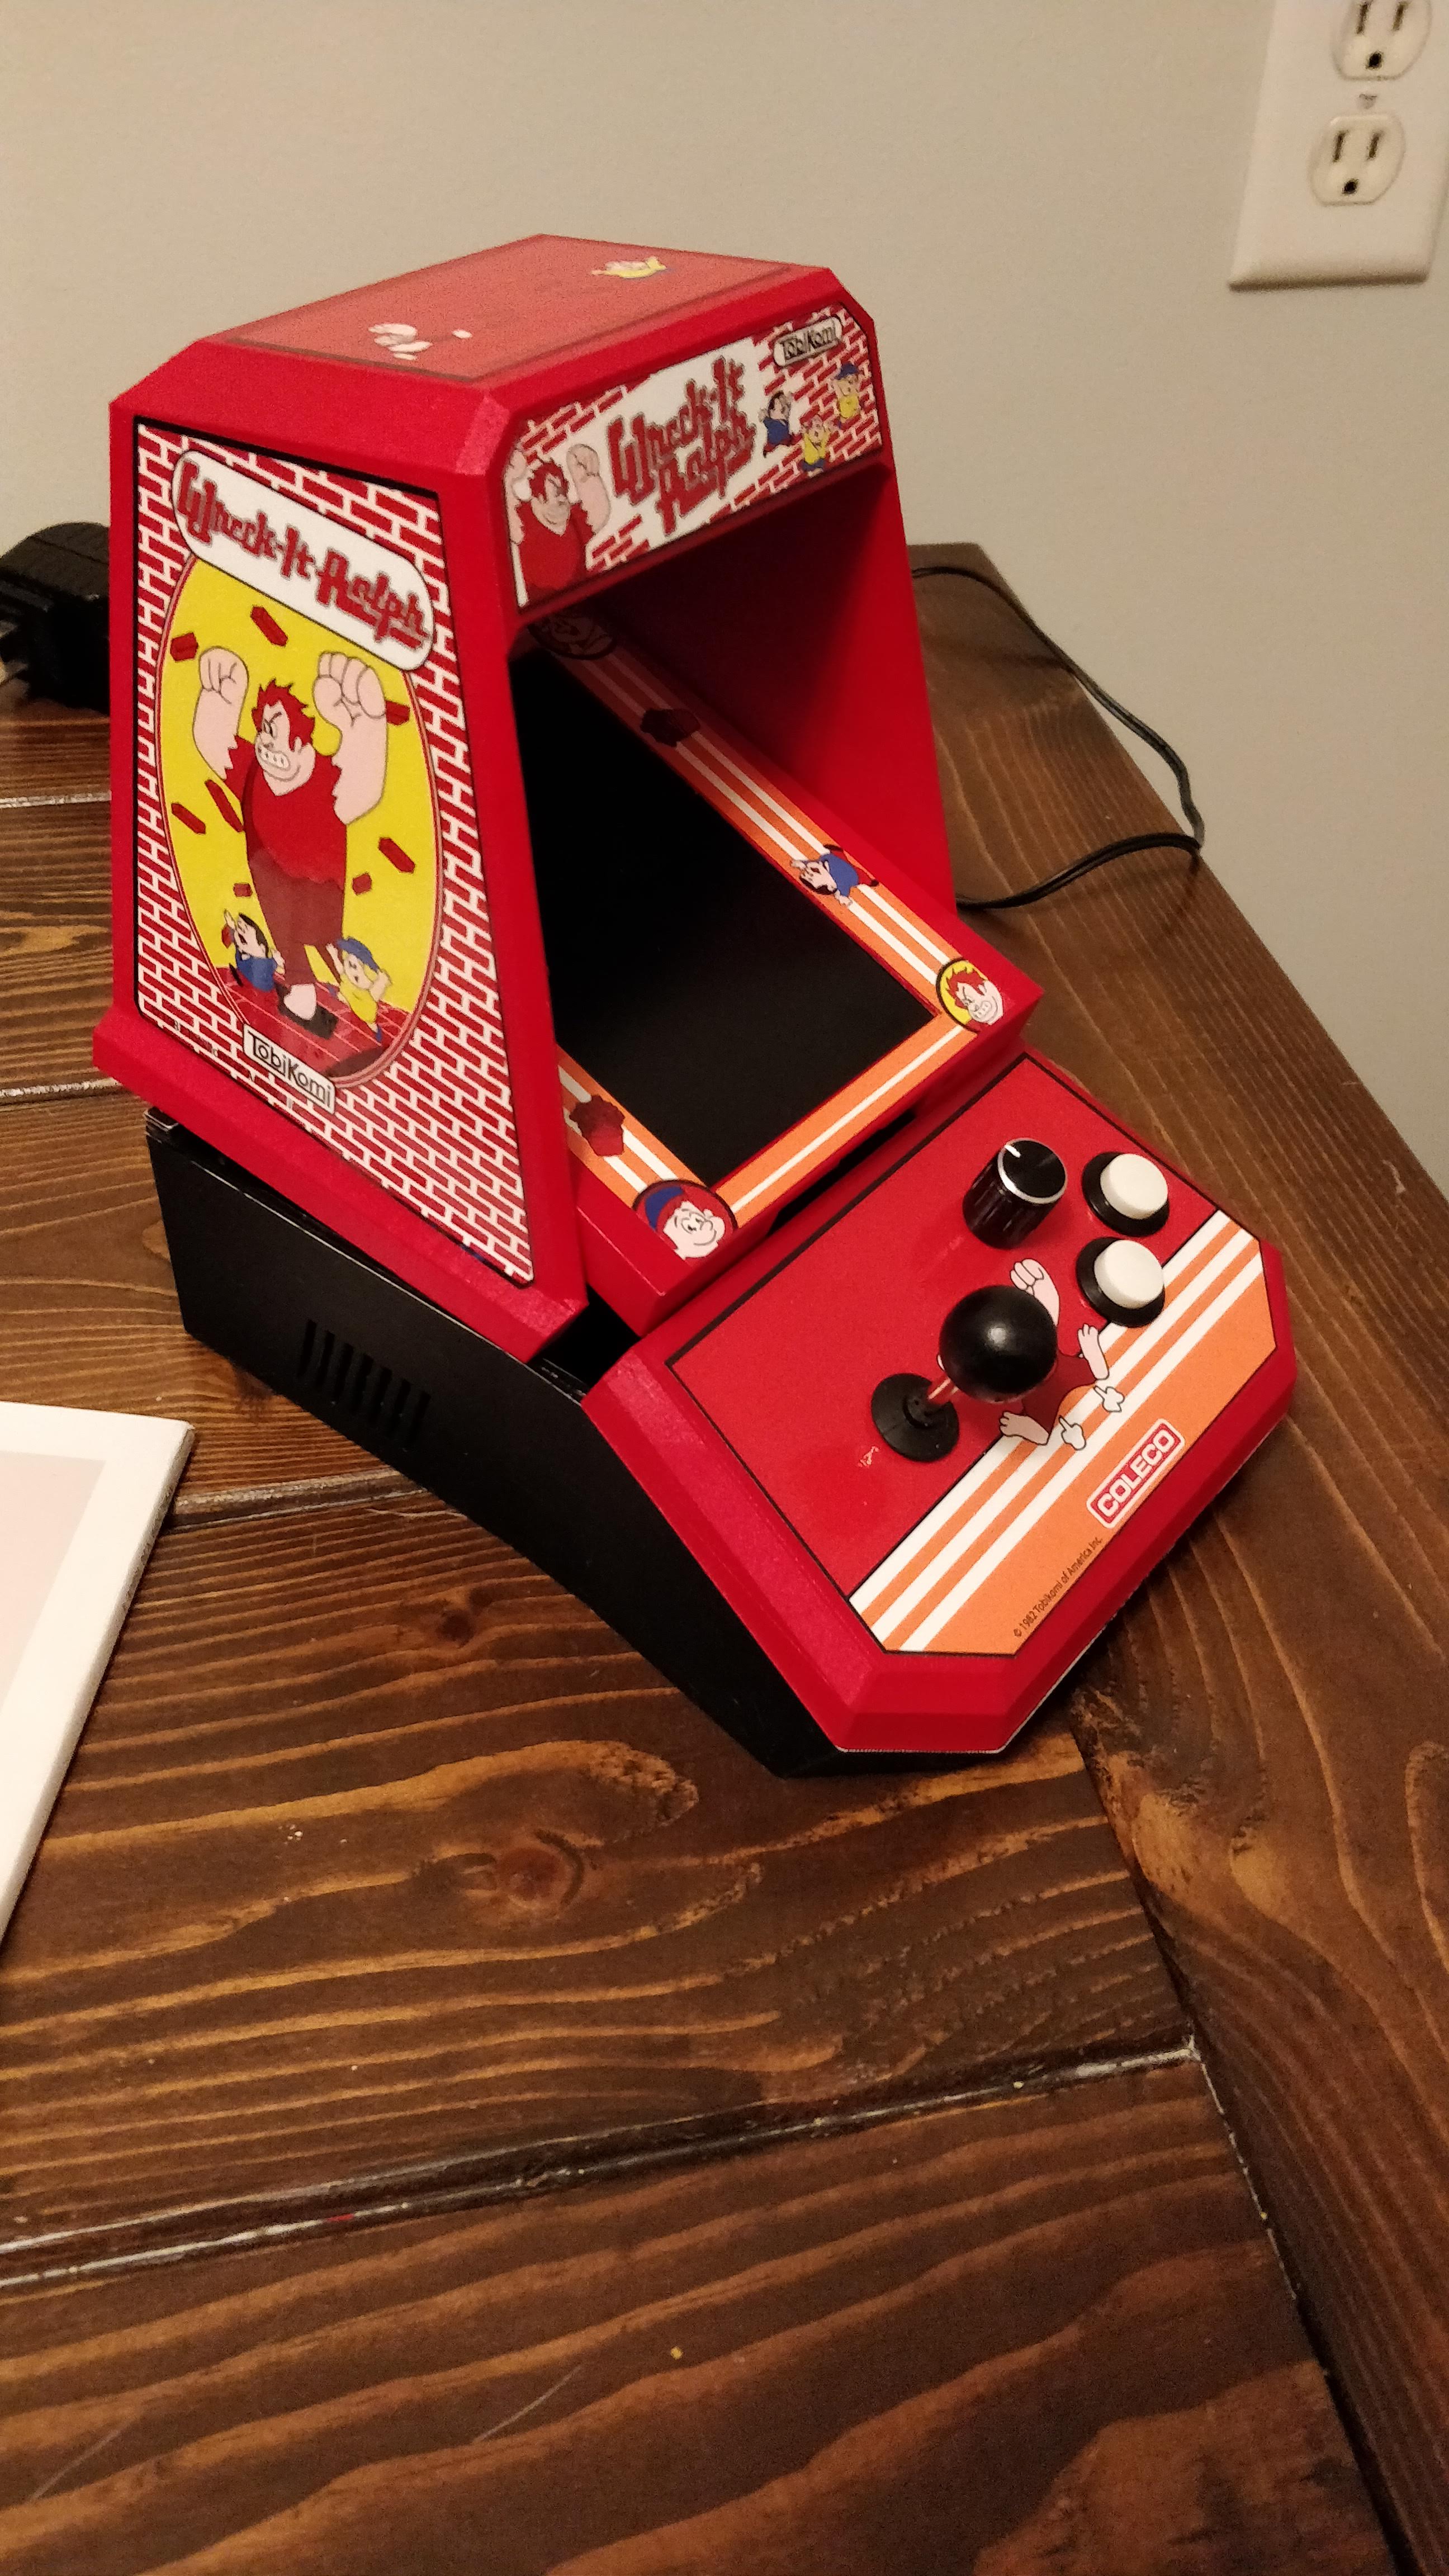
The Coleco Wreck it Ralph is ready to leave the building! (figuratively) The ending was a little sloppy but it came together. Here’s how it went.
Painting
It finally warmed up enough that I could paint my pieces. Easy enough, went with red for the most part and black for the base – just like the real things. 3 coats for each color. I also painted my joystick ball. Previously I went with red, but I felt black fit better this time. The controls will be white with a black spinner. And as this is sort of “emulating” the original red donkey kong cabinets, those had black joystick balls too.
Closeup of painted pieces
All painted pieces
Assembly and Test
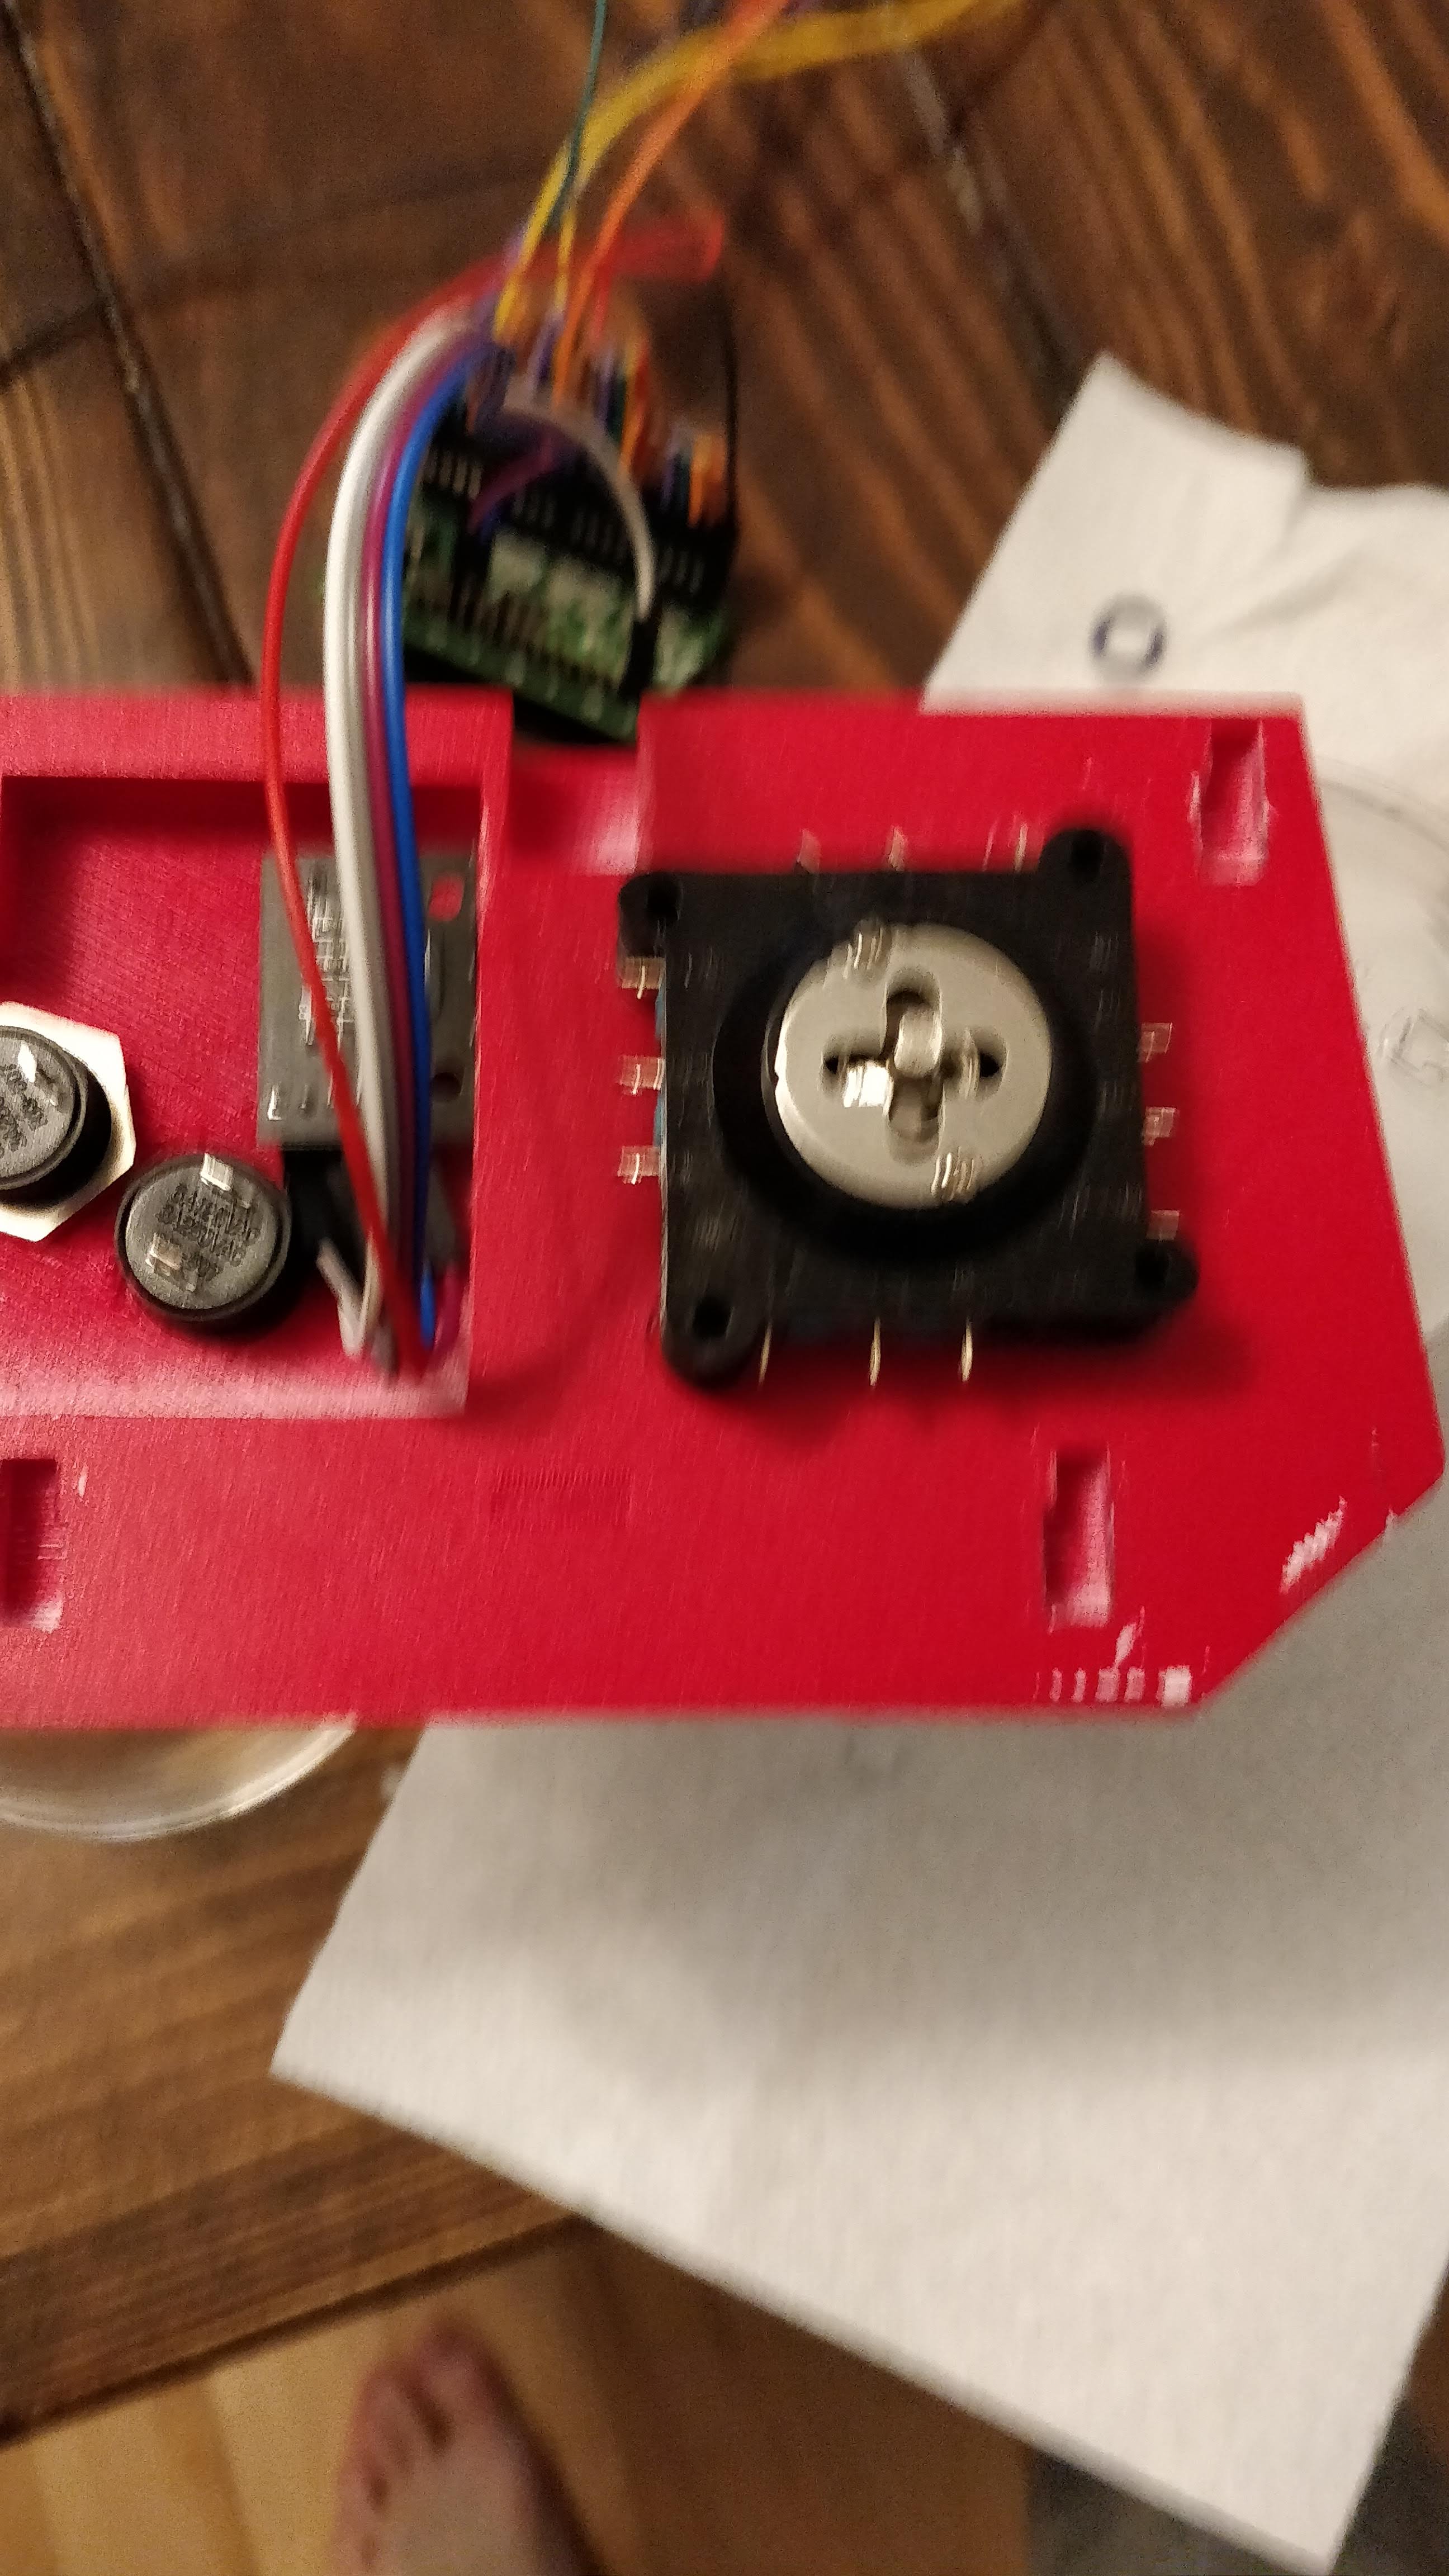
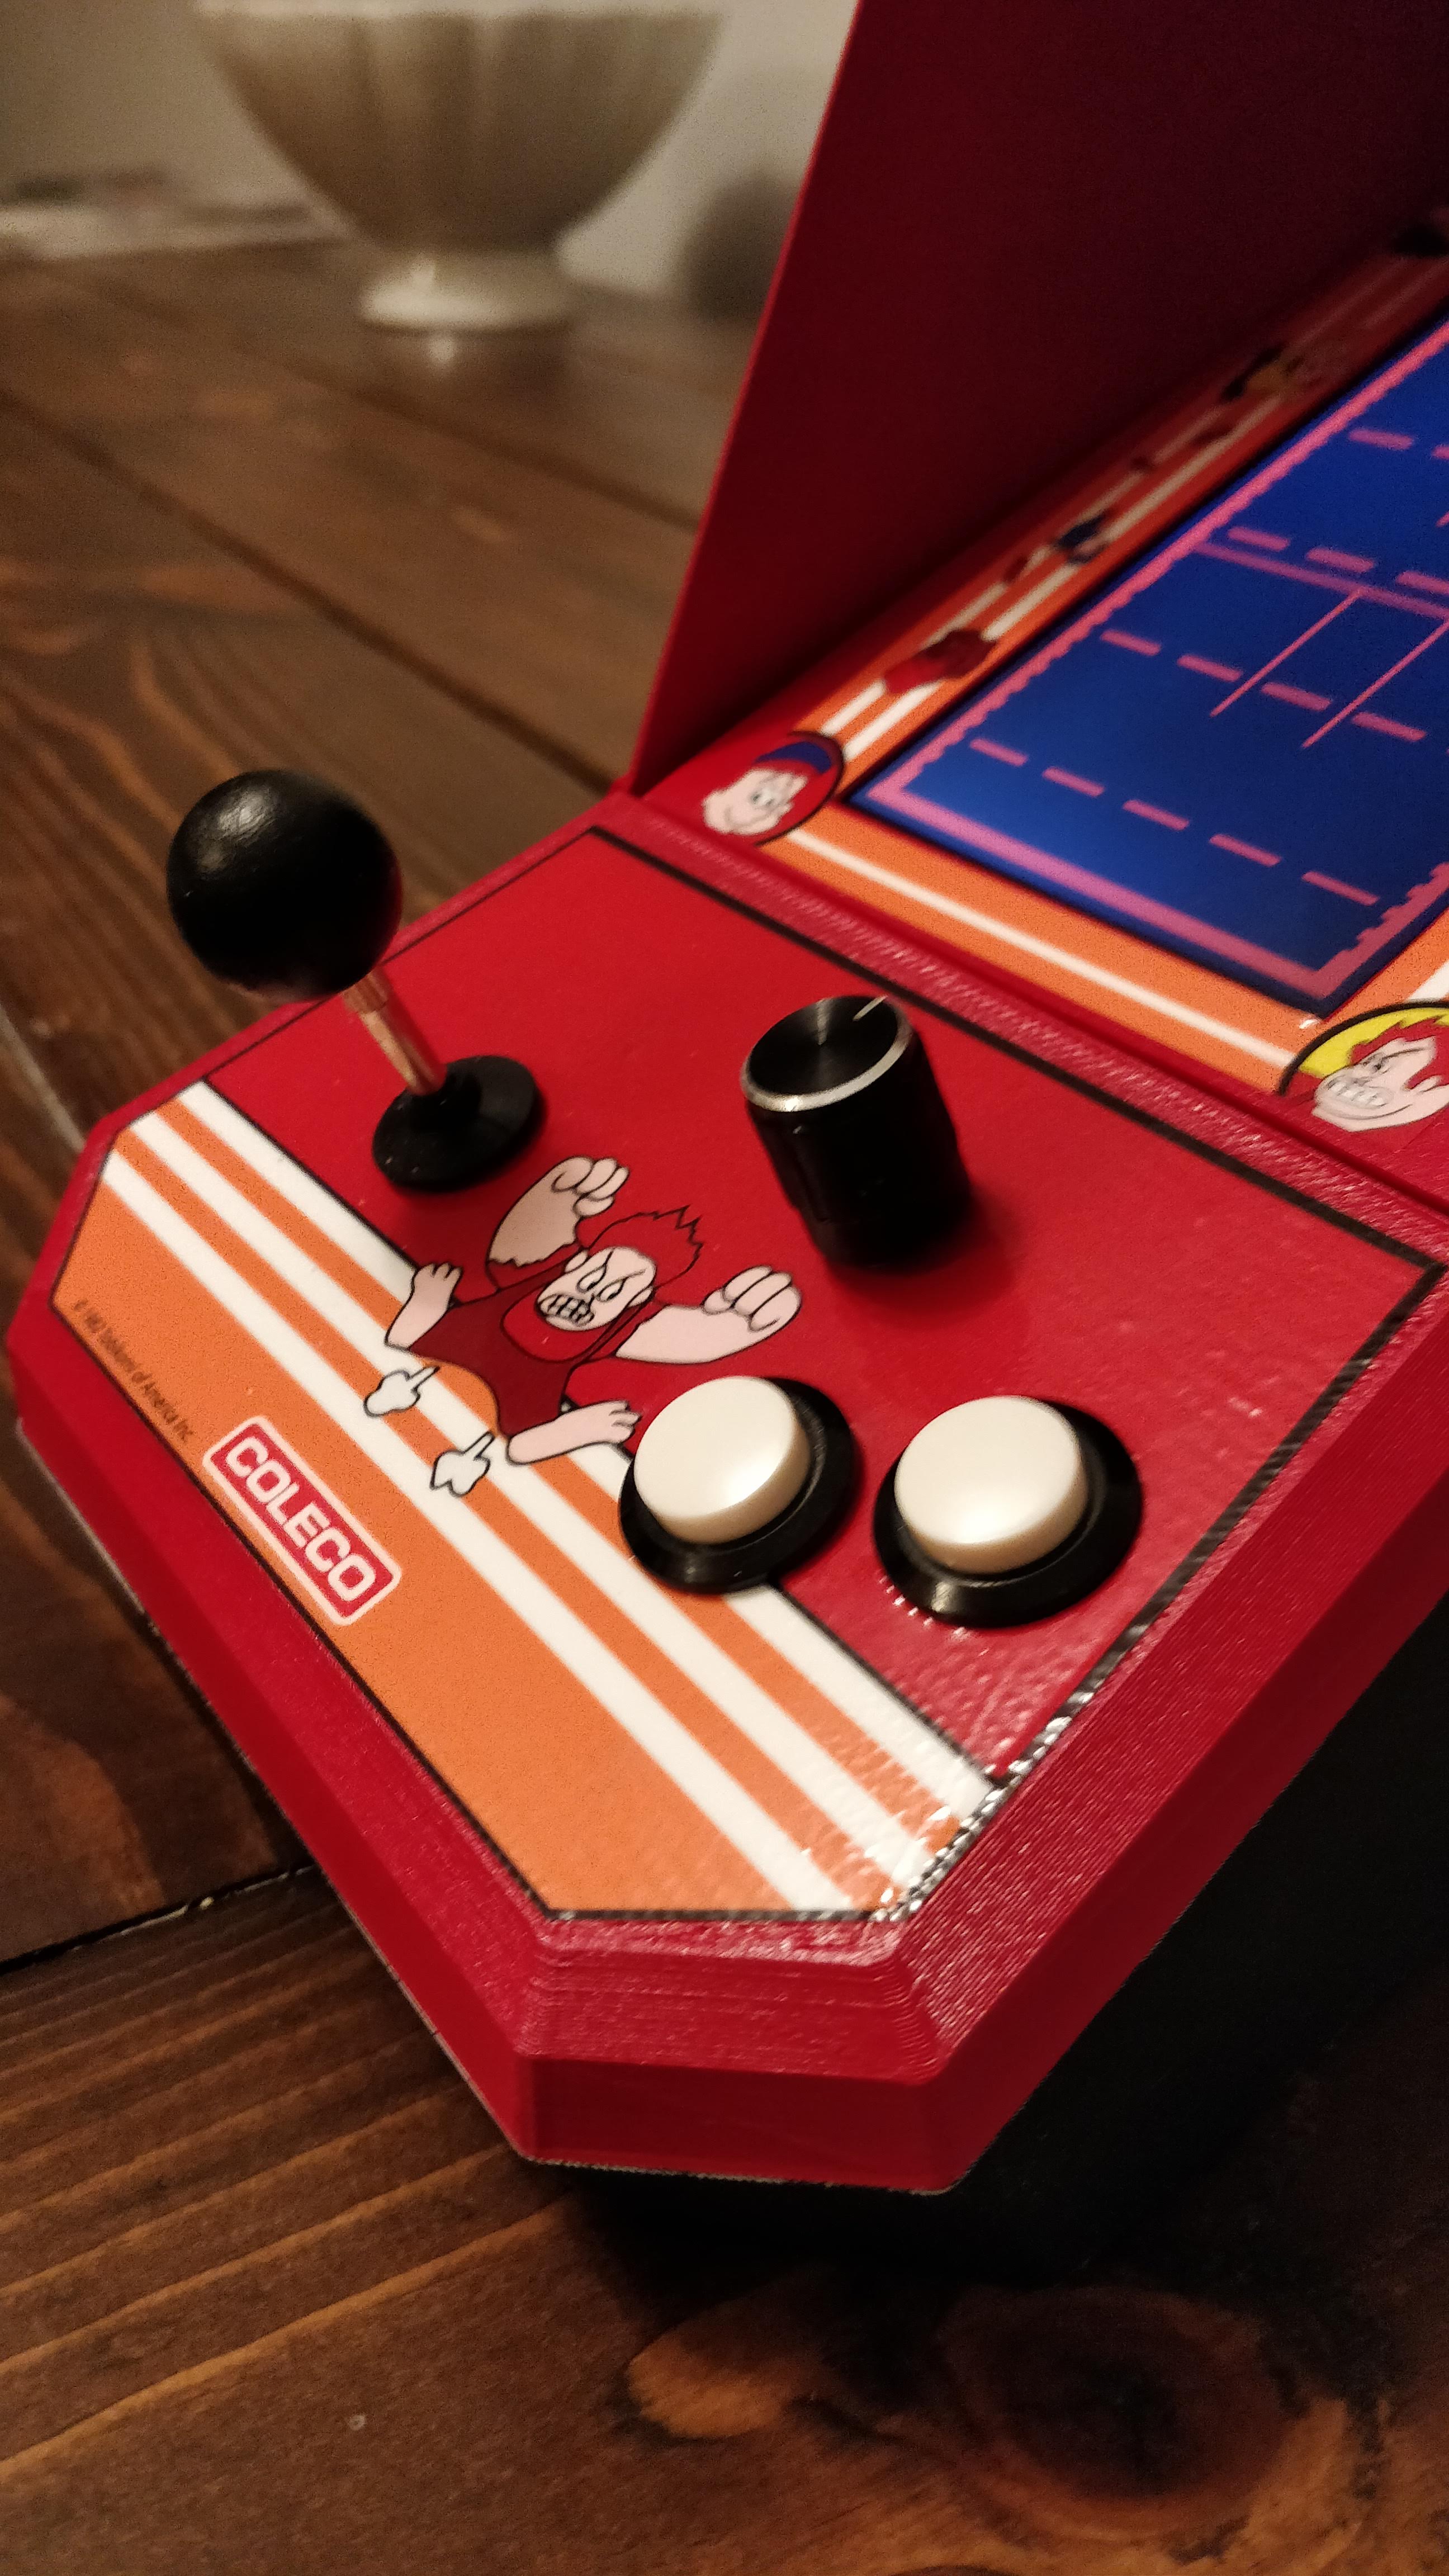
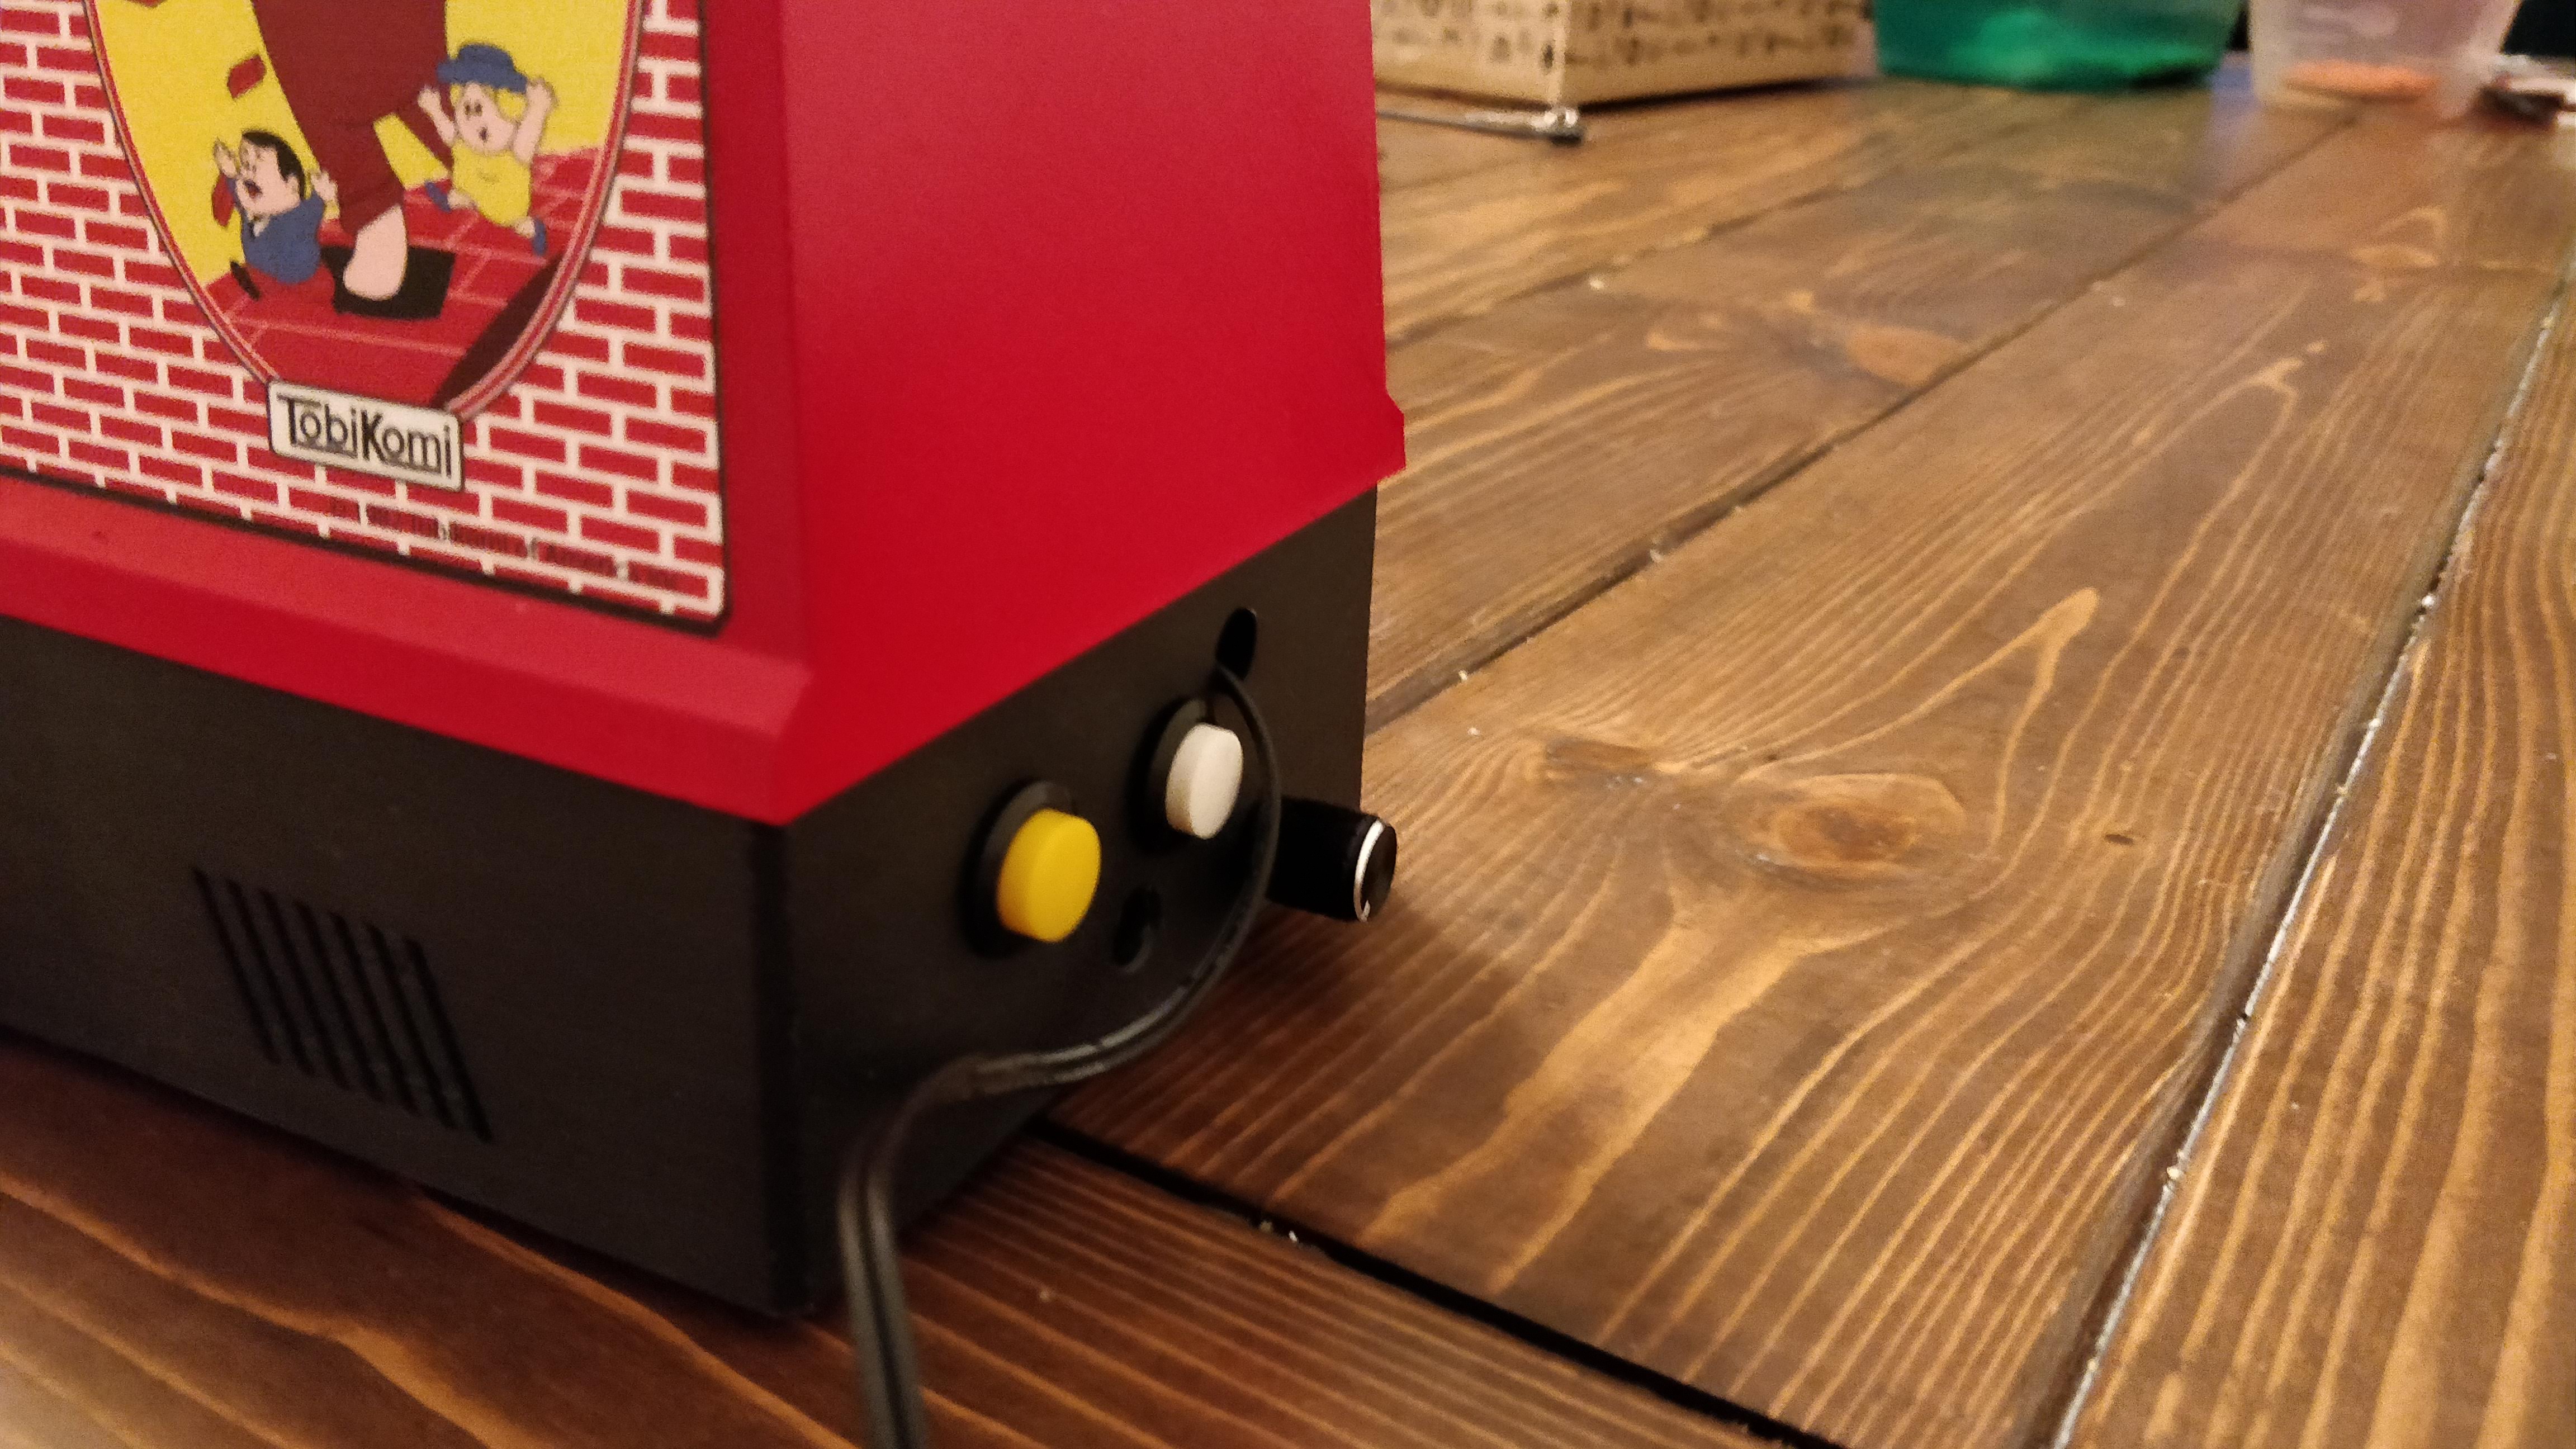
I did a couple of partial assemblies to test things together. Once again, things were very tight. All these wires take up so much room, no matter how short of lengths I use. Anyway, this time I went with two buttons on the back, volume control, power in. On the front, two action buttons, joystick, and spinner. Using a minipac for the controls. Power and sound to the amp. Man, that ends up being a lot of wire.
I also glued the joystick into place and used a small rubber grommet as a dust washer.
Artwork
Next I attached the artwork and cut holes for the controls. I’m really happy with how it looks and definitely feels like something you would have seen 30 years ago. It also looks great next to a Coleco Donkey Kong or my Coleco Fix It Felix. Man, this stuff came out beautiful. Again, I had it printed by SlammedNiss on BYOAC.
It’s a tight fit
Rat’s nest inside
Test fitting the screen
Wreck it ralph Coleco control panel
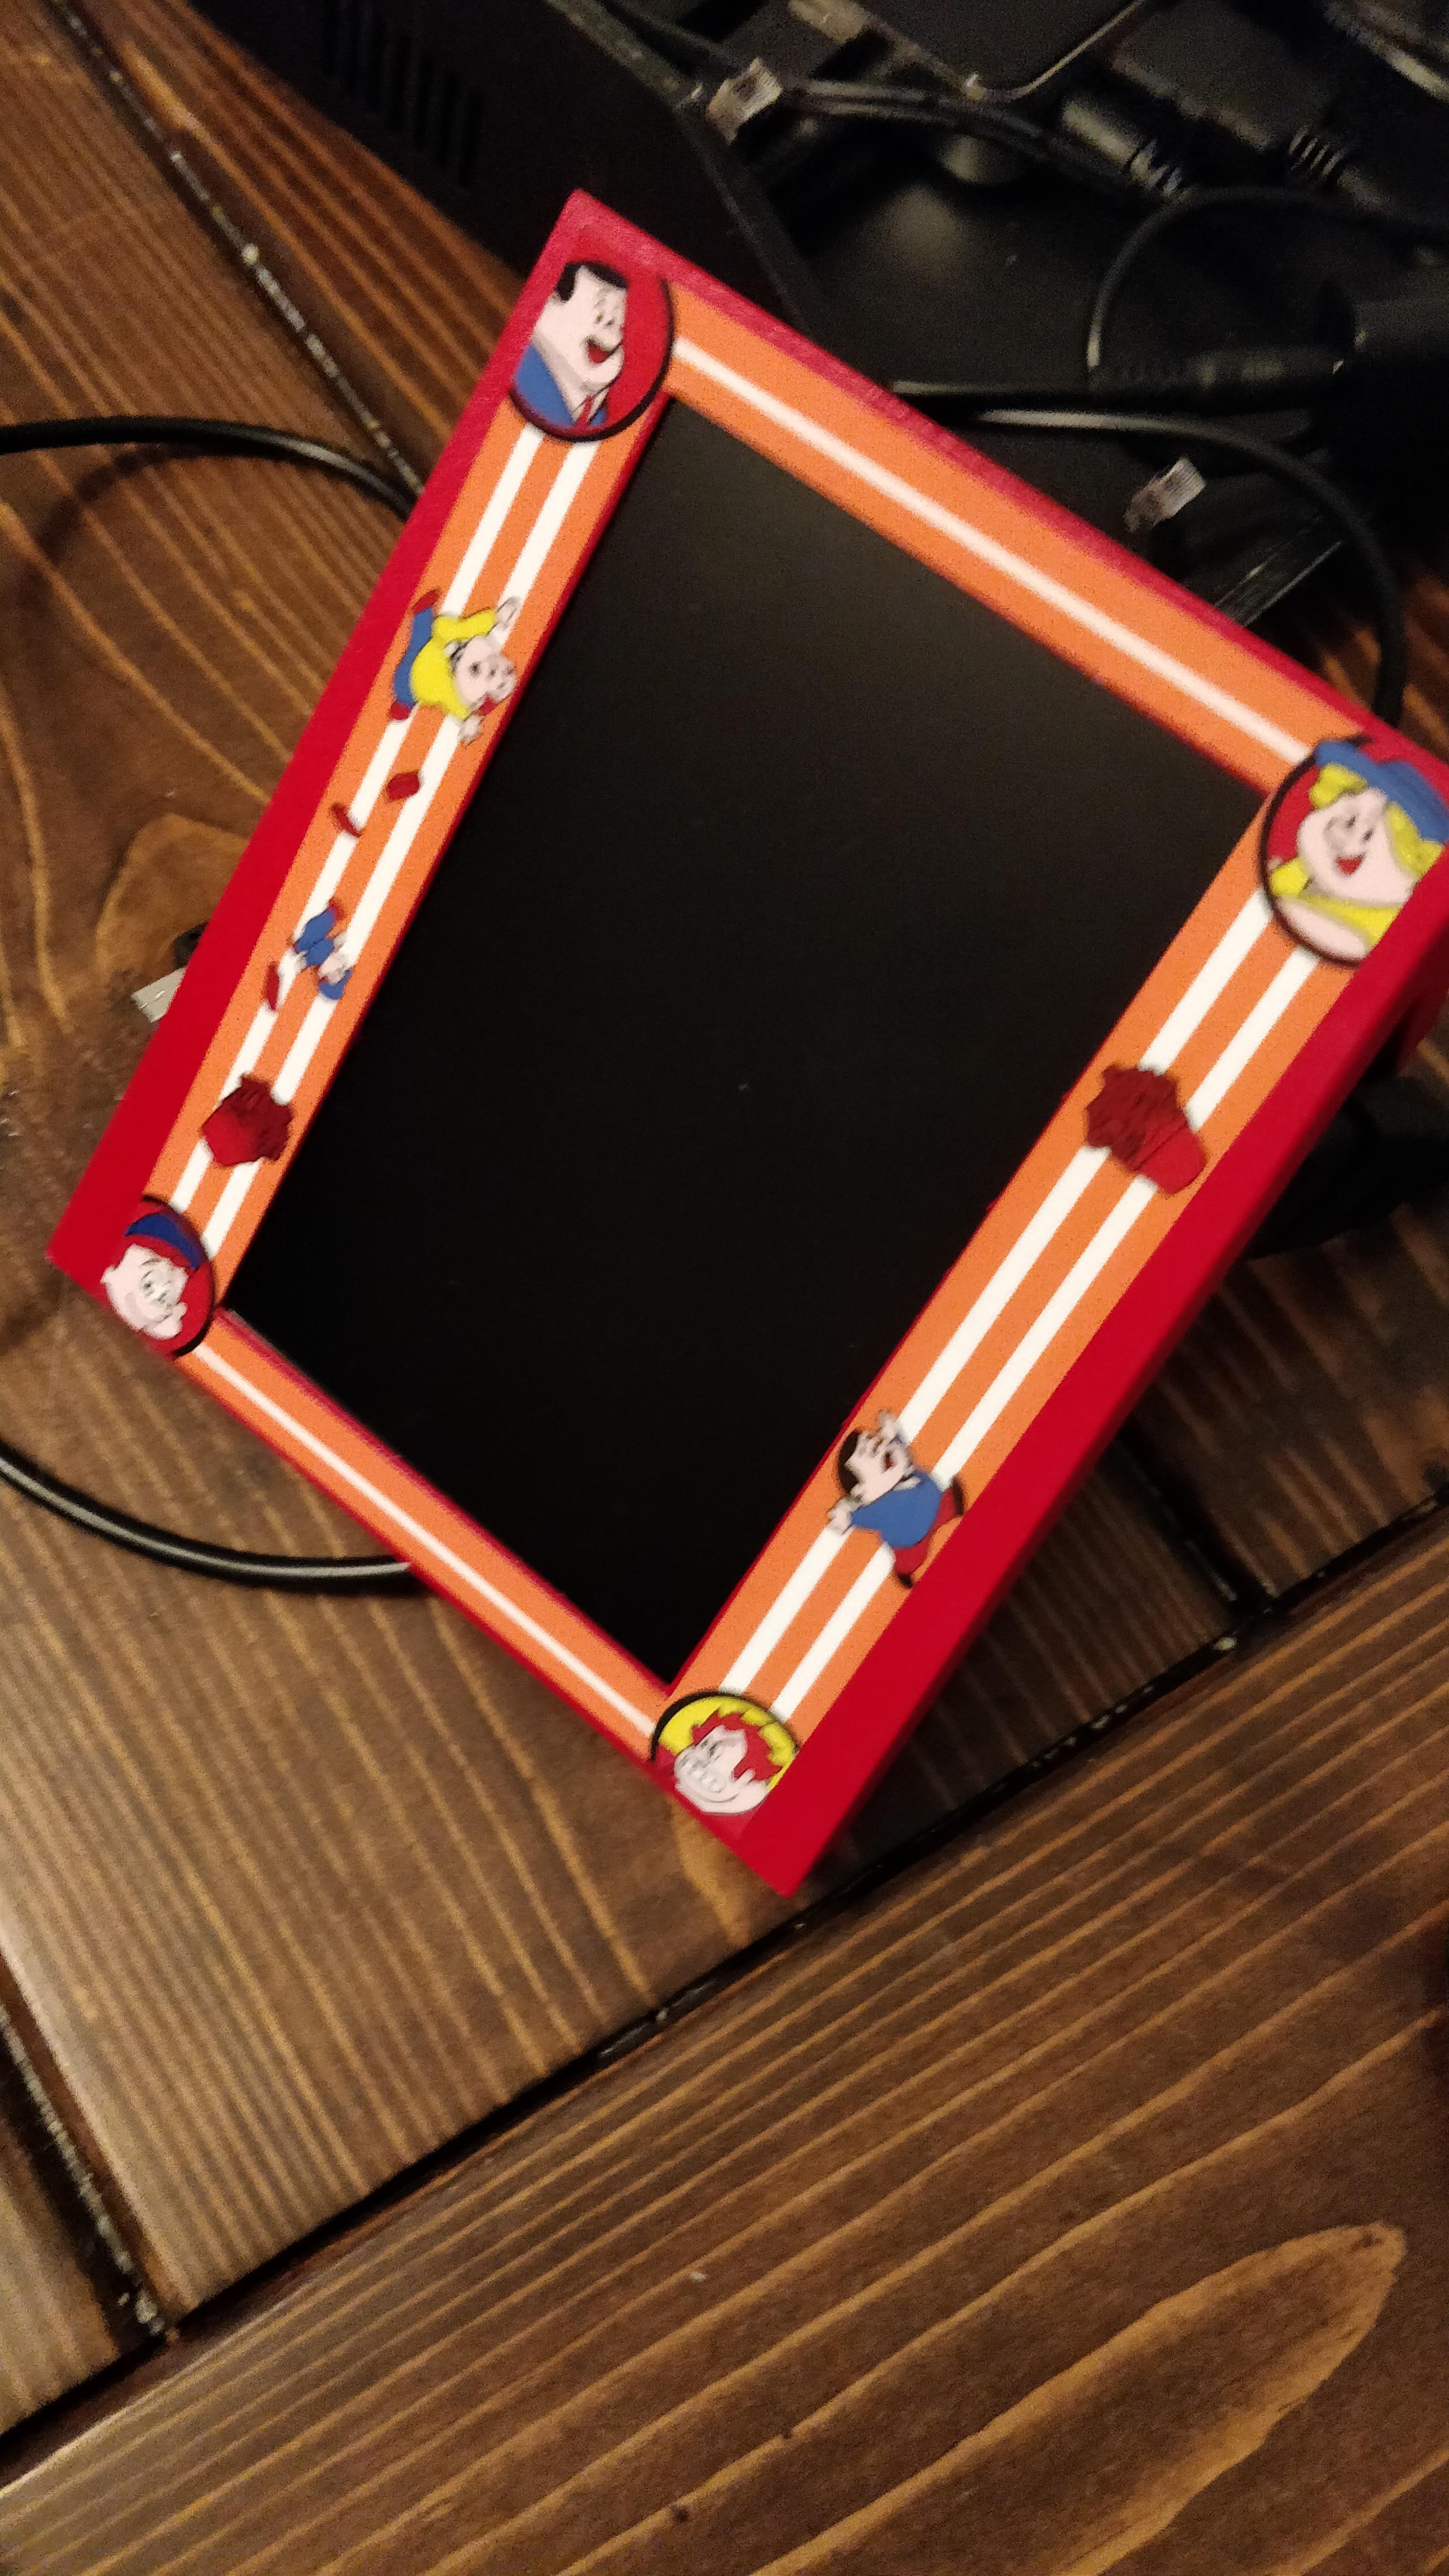
The screen inside bezel
Mounting the joystick and controls
Loose assembly
Getting close to finished
Putting it All Together
Discovered a few small problems during the tests. One button wasn’t working. Turns out I attached the wrong wire on my minipac. This normally wouldn’t be an issue, just change the wire. Problem was, I had already cut all the others off. So, downloaded the minipac software and reprogrammed that one pin. Good thing for that software!
The screen is also very carefully connected. It connects to an HDMI decoder with a thin ribbon cable, which then gets power over USB mini. The ribbon cable isn’t long, so I Velcroed the decoder to the back of the screen. I used right-angle hdmi cables to save a mm or two connecting to the pc.
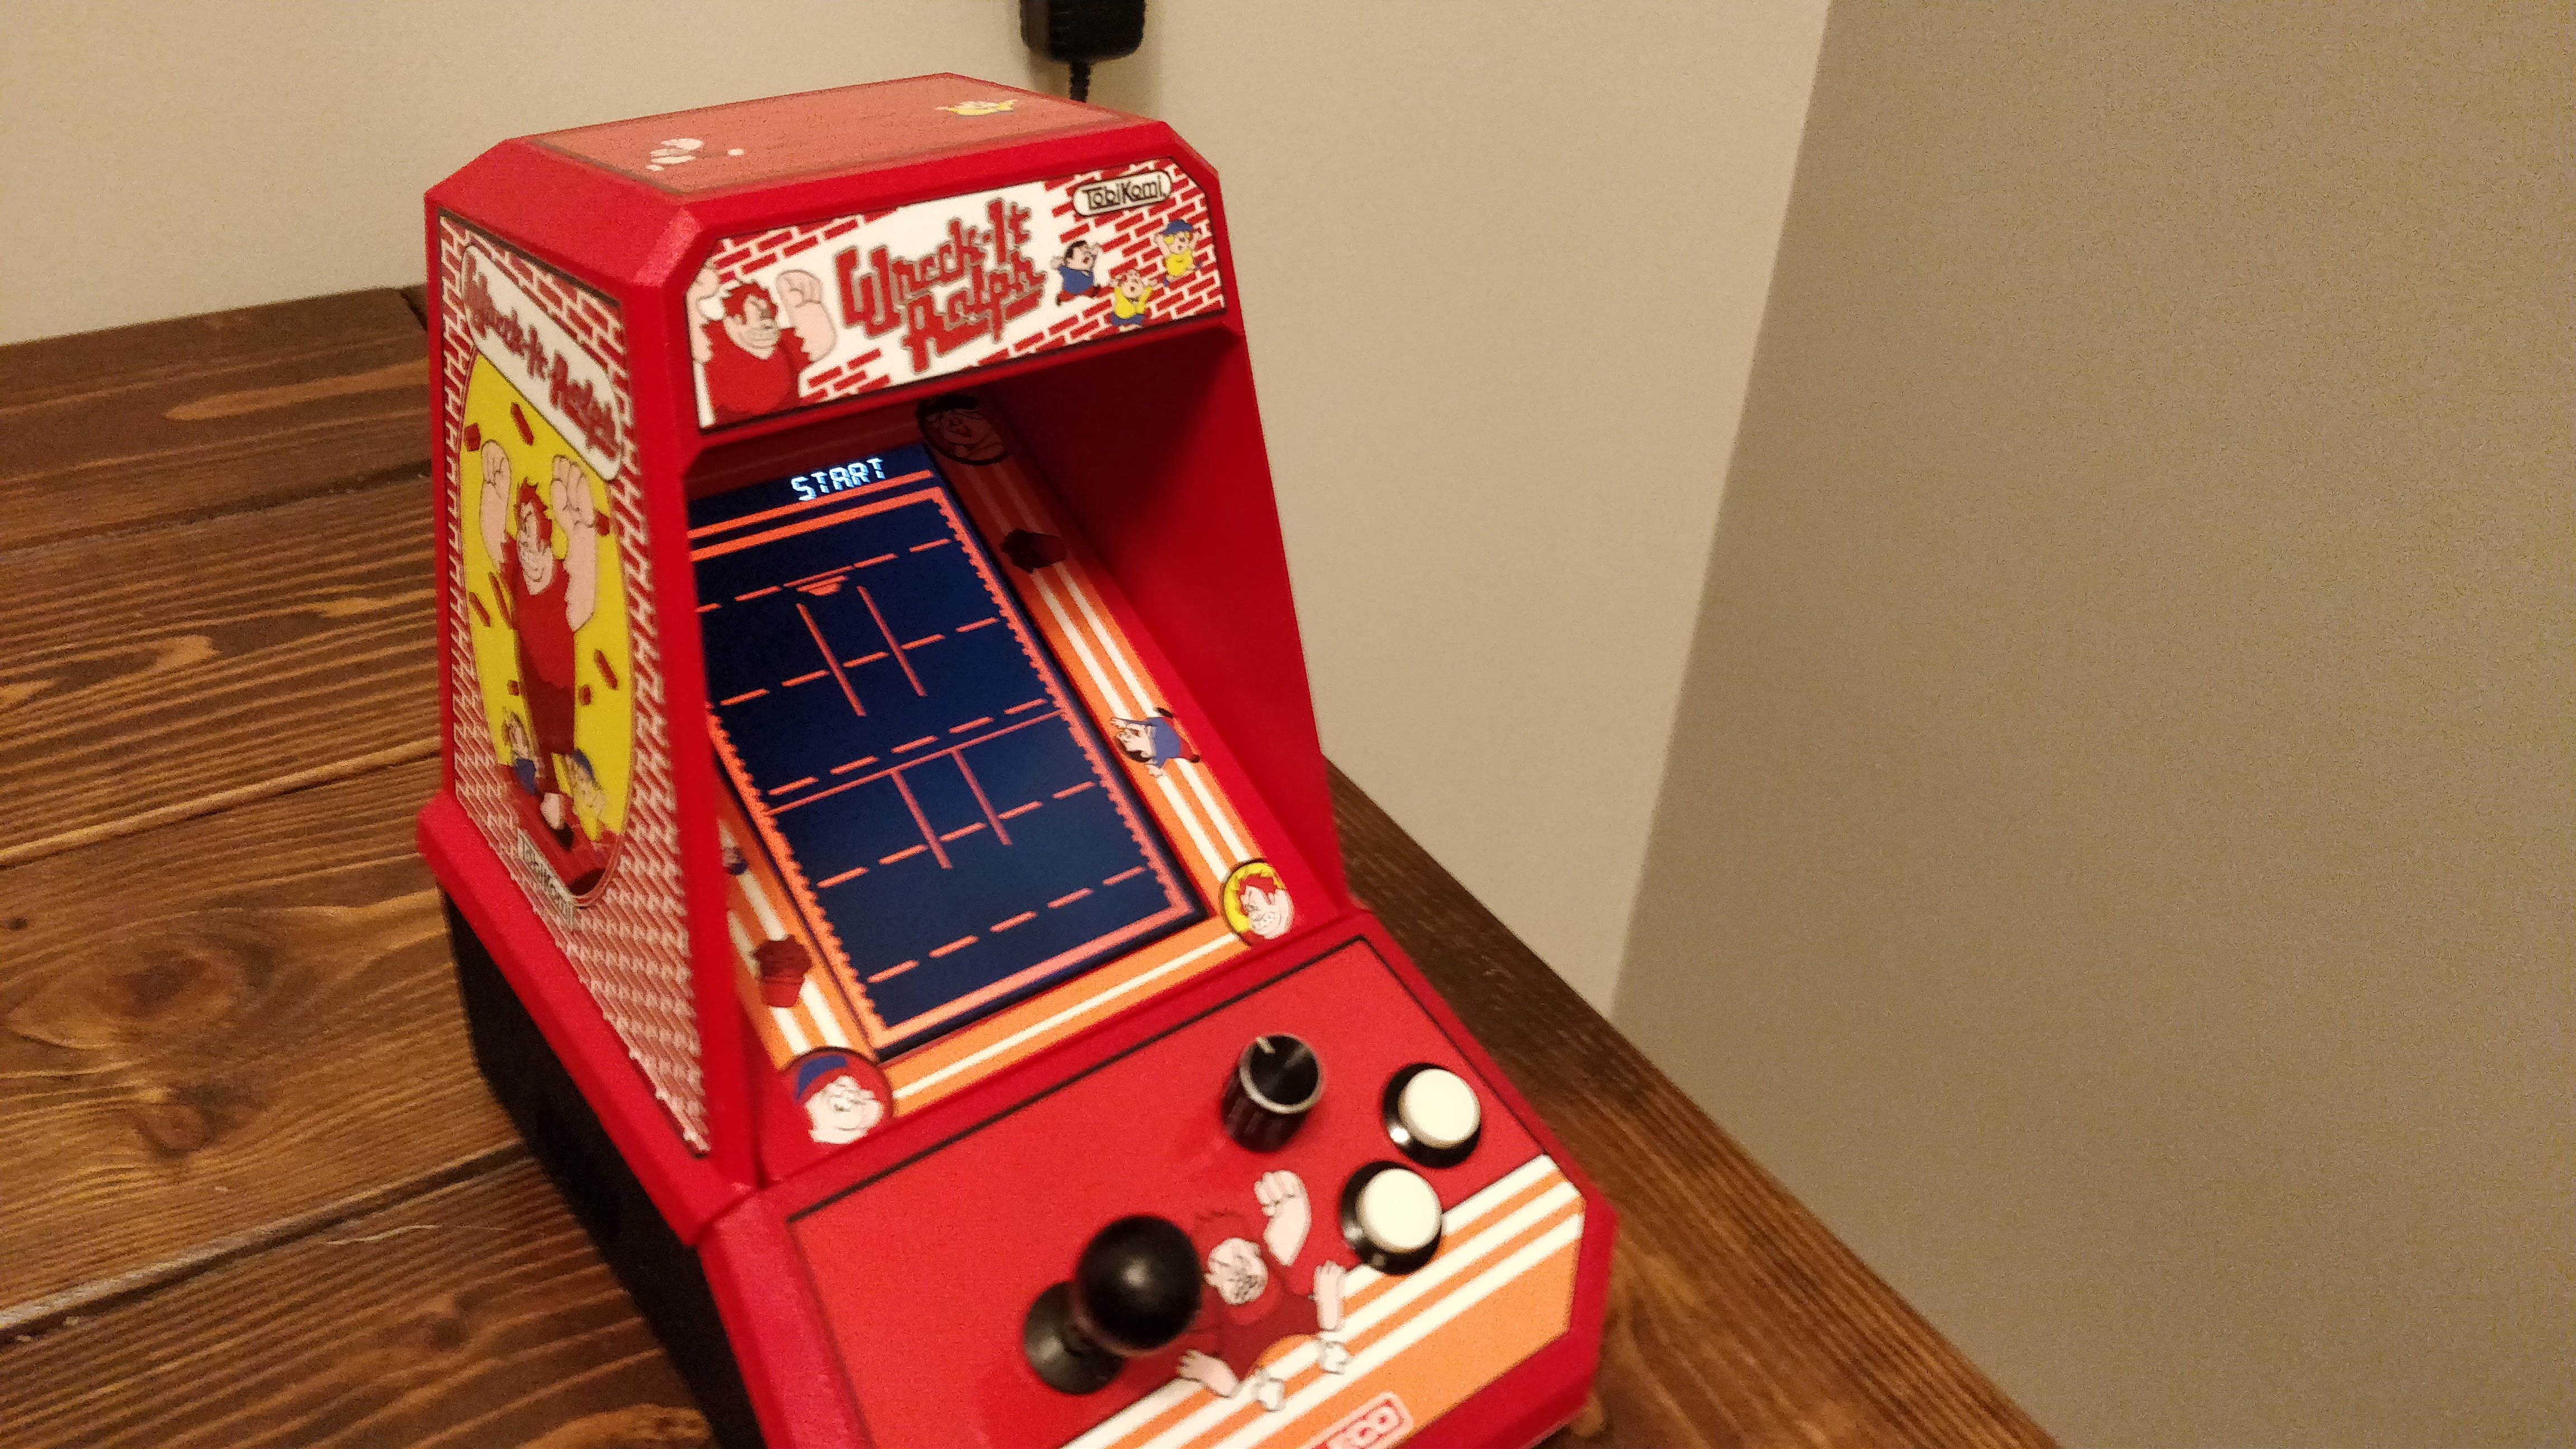
I test booted the game a few times, played the games a few times – including my custom Wreck It Ralph Coleco Style VFD game, and it sure was fun! Even tested Tempest which worked well. Sure, not perfect with my cheaply made spinner but it worked.
The game allows customization of difficulty, lives, and powerups. But, I’m keeping everything to my defaults – which is the most like original Coleco handhelds.
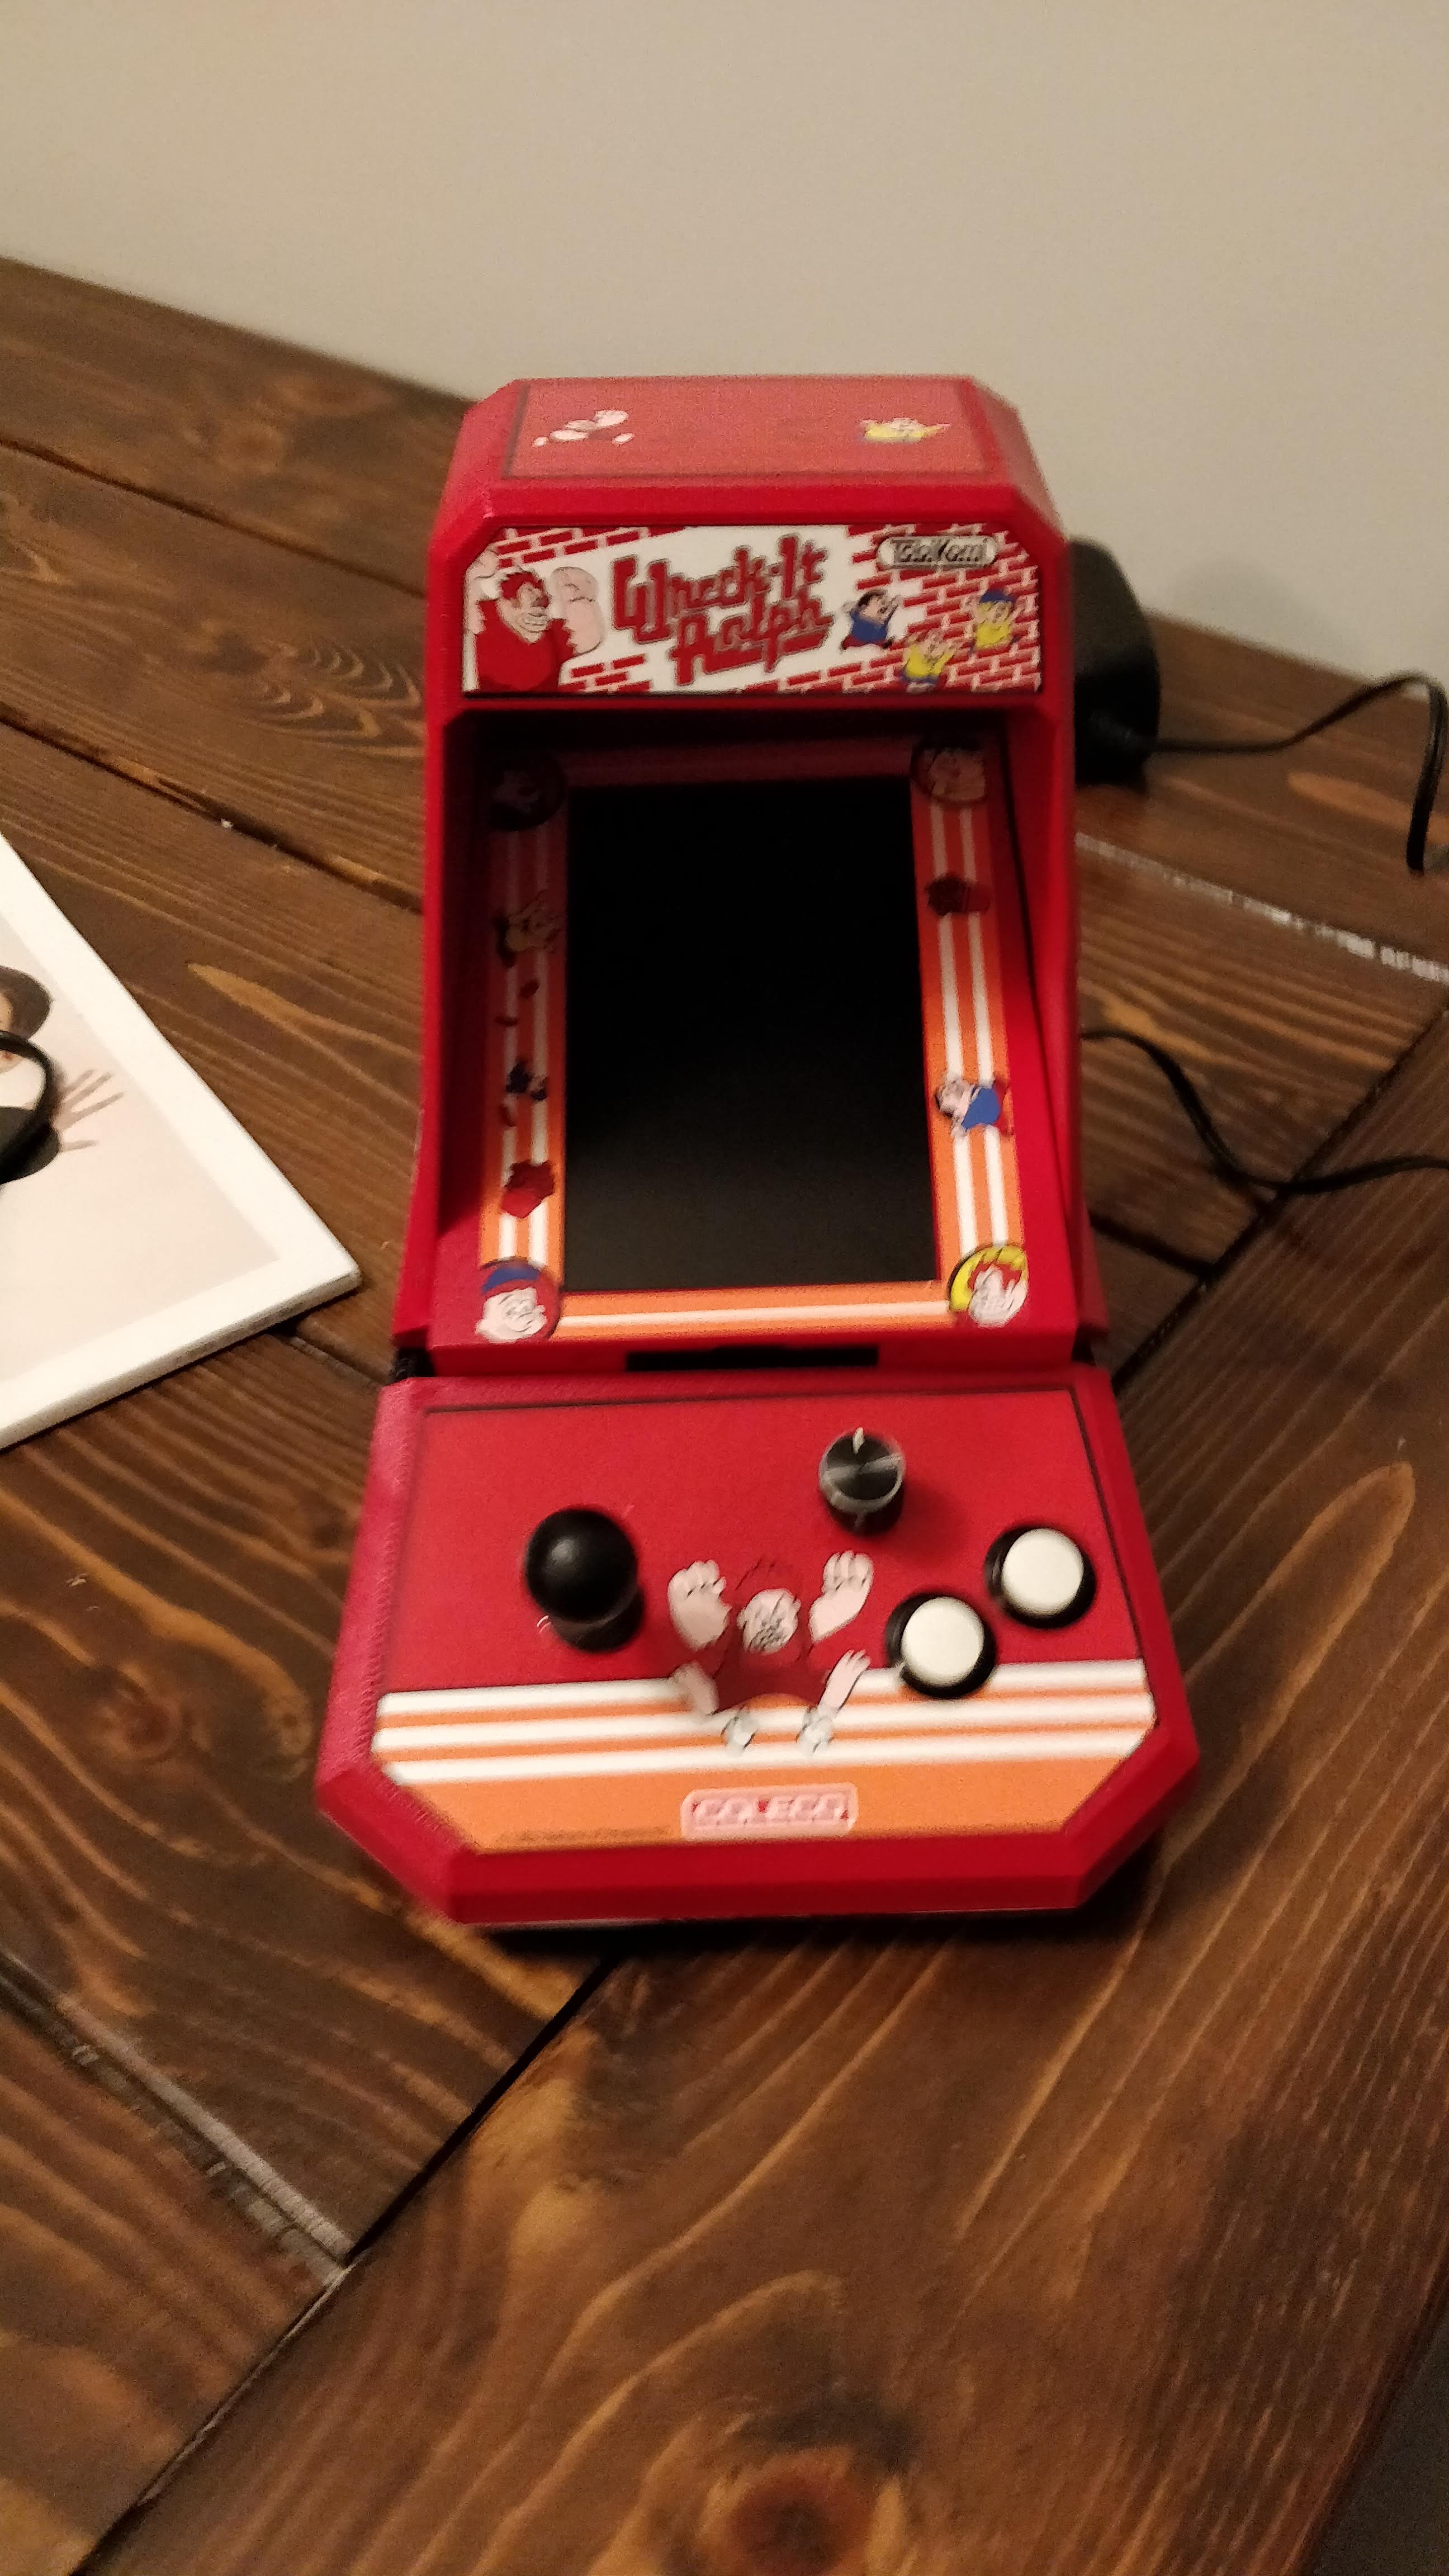
Final Photos of Coleco Wreck It Ralph
Closed everything up, tightened all the connections, and here it is! I also put a few rubber feet on the bottom to make it slip proof. I’m quite happy with how it looks but a little disappointed that, once again, it’s a real mess inside. I don’t think I’ll have any problems with it working consistently; I just hoped I could keep it a little cleaner inside in case I ever wanted to change anything. Oh well. You can also watch a video tour below the gallery.